Breaking Barriers: Advanced Strategies to Enhance Reagent Penetration in 3D Tumor Spheroids
This article provides a comprehensive guide for researchers and drug development professionals on overcoming the critical challenge of reagent penetration in 3D tumor spheroids.
Breaking Barriers: Advanced Strategies to Enhance Reagent Penetration in 3D Tumor Spheroids
Abstract
This article provides a comprehensive guide for researchers and drug development professionals on overcoming the critical challenge of reagent penetration in 3D tumor spheroids. It explores the foundational biological barriers within the spheroid microenvironment, details cutting-edge methodological approaches from nanotechnology to microfluidics, offers practical troubleshooting for optimization, and validates these strategies with advanced analytical techniques. By bridging the gap between traditional 2D cultures and in vivo models, this resource aims to accelerate the development of more effective therapeutics and improve the predictive power of preclinical screening.
Understanding the Spheroid Microenvironment: Key Biological Barriers to Penetration
Frequently Asked Questions (FAQs)
Q1: What causes the formation of distinct cellular zones in spheroids? The formation of proliferating, quiescent, and necrotic zones is primarily driven by diffusion limitations. In spheroids with radii exceeding 200 micrometers, the inward diffusion of oxygen and nutrients, and the outward diffusion of metabolic waste, become restricted. This creates physiochemical gradients, leading to a layered structure:
- A proliferating zone on the outer layer, where cells have ample access to oxygen and nutrients.
- An intermediate quiescent zone of viable, but non-dividing, cells under increasing nutrient and oxygen stress.
- A central necrotic core in spheroids larger than 400-500 µm, where cells die due to severe hypoxia and nutrient deprivation [1] [2].
Q2: How does architectural complexity impact drug delivery and efficacy testing? The 3D architecture and resulting zones present significant barriers that mimic the resistance found in in vivo solid tumors [1] [3]. Key impacts include:
- Limited Drug Penetration: The compact cell-cell interactions and extracellular matrix (ECM) in spheroids act as a physical barrier, hindering the deep penetration of therapeutic agents into the core [1] [4].
- Altered Cellular Response: Quiescent cells in the inner layers are often more resistant to chemotherapeutics that target rapidly dividing cells. Additionally, hypoxic conditions in the core can activate specific survival pathways, further increasing treatment resistance [1] [2].
- Inaccurate Efficacy Data: Results from drug screens using 2D monolayers can be misleading, as spheroids consistently demonstrate higher resistance, providing a more physiologically relevant and predictive model for therapeutic response [1] [3].
Q3: What are the key challenges in analyzing these zones in 3D spheroid models? Researchers face several challenges in characterizing spheroid zones:
- Reproducibility: Generating spheroids of uniform size and shape is difficult, and minor variations can significantly impact zonal structure, making comparisons challenging [2] [5].
- Reagent Penetration: Standard assay reagents and dyes often fail to penetrate the core of larger spheroids, leading to underestimation of viability or incorrect measurement of biomarkers [6].
- Imaging and Analysis: Conventional microscopy techniques like confocal microscopy have limited penetration depth and can struggle to resolve the entire spheroid structure. This creates a need for advanced imaging and AI-driven analysis tools for accurate 3D quantification [3] [5].
Troubleshooting Guides
Issue 1: Inconsistent or Poorly Defined Zonal Architecture
Problem: Spheroids lack a clear, reproducible necrotic core or defined quiescent zone, leading to variable experimental data.
Solutions:
- Control Spheroid Size: The most critical factor. Ensure spheroids reach a sufficient diameter (typically >500 µm) to develop pathophysiological gradients. Use low-attachment U-bottom plates to promote uniform, spherical aggregation [2] [3].
- Optimize Cell Density: Standardize the initial seeding cell number. Refer to the table below for guidance based on common spheroid types.
- Incorporate Stromal Cells: For more physiologically relevant models, use co-culture spheroids including cells like cancer-associated fibroblasts (CAFs). For example, supplementing PANC-1 and stellate cell co-cultures with 2.5% Matrigel was shown to produce dense, well-defined spheroids [3].
- Validate Architecture: Use stains for hypoxia (e.g., pimonidazole) and cell death (e.g., SYTOX Red) to confirm the presence and size of hypoxic and necrotic regions [7] [6].
Issue 2: Inadequate Reagent Penetration for Viability and Biomarker Assays
Problem: Assay reagents fail to lyse all cells or penetrate the core, resulting in inaccurate quantification of markers like ATP (viability) or caspases (apoptosis).
Solutions:
- Use Validated 3D Assays: Employ commercial assay kits specifically reformulated for 3D models. For example, the CellTiter-Glo 3D Assay contains a higher detergent concentration and a stable luciferase to effectively lyse cells and extract ATP from the spheroid core [6].
- Modify Protocols: For assays that cannot withstand harsher detergents, extend the incubation time with the lytic reagent and incorporate vigorous physical disruption using a plate shaker to aid penetration [6].
- Employ Advanced Imaging: Instead of endpoint assays that require full penetration, use non-invasive imaging techniques like Optical Coherence Tomography (OCT) to assess viability and structure based on optical properties, or light-sheet fluorescence microscopy (LSFM) for deep, high-resolution imaging [8] [5].
Issue 3: High Variability in High-Throughput Screening (HTS)
Problem: Significant morphological variability between spheroids compromises the reliability and statistical power of HTS campaigns.
Solutions:
- Automate and Standardize: Utilize automated, AI-driven systems like the SpheroidPicker to pre-select spheroids based on morphology (diameter, circularity) before transferring them to screening plates, ensuring a homogeneous starting population [5].
- Leverage AI-Based Image Analysis: Implement advanced software tools that use AI for single-cell segmentation and analysis within 3D image stacks. This reduces user error and time, enabling robust quantification of complex parameters across large datasets [9] [5].
- Choose the Right Culture Method: For HTS, prefer methods that ensure high uniformity, such as microfabricated microfluidic chambers or low-attachment 96-/384-well plates with forced aggregation by centrifugation, over less consistent methods like the hanging drop [8] [2] [3].
Table 1: Key Size Thresholds and Characteristics of Spheroid Zones
| Spheroid Zone | Typical Location | Key Characteristics | Inducing Condition / Size Threshold |
|---|---|---|---|
| Proliferating | Outer Rim | High cell division, normoxic, high nutrient access | Spheroids > ~200 µm radius [1] |
| Quiescent | Intermediate Layer | Viable but non-dividing, hypoxic, nutrient-stressed | Spheroids > ~200 µm radius [1] |
| Necrotic | Core | Cell death, severe hypoxia, nutrient deprivation | Spheroids > 400-500 µm diameter [1] [2] |
Table 2: Comparison of Spheroid Generation Methods and Outcomes
| Generation Method | Uniformity | Throughput | Ease of Use | Key Considerations |
|---|---|---|---|---|
| Liquid Overlay | Low to Moderate | High | Easy, low-cost | Requires optimization for uniform size [2] |
| Hanging Drop | High | Low | Labor-intensive | Excellent for uniformity, poor for handling [2] [3] |
| Agitation-Based | Low | Moderate | Easy | Mechanical stress may affect biology [2] |
| Microfluidic | High | High | Requires specialized equipment | Precise control, suitable for long-term culture and perfusion [8] [2] |
Experimental Protocol: Establishing a Co-Culture Spheroid Model with Defined Zones
This protocol is adapted from studies on pancreatic ductal adenocarcinoma (PDAC) spheroids and is designed for a 96-well format to produce robust, zonated spheroids for drug penetration studies [3].
Materials:
- Cell Lines: Cancer cell line (e.g., PANC-1 for PDAC) and stromal cell line (e.g., human Pancreatic Stellate Cells - hPSCs).
- Equipment: Low-attachment 96-well U-bottom plates, centrifuge with plate rotors, live-cell imaging system (e.g., Incucyte) or brightfield microscope.
- Reagents: Complete cell culture medium, Matrigel (for certain cell lines like PANC-1) [3].
Step-by-Step Procedure:
- Cell Preparation: Harvest and count both cancer cells and stromal cells. Prepare a co-culture suspension at the desired ratio (e.g., 1:1 PANC-1 to hPSC) in complete medium. For PANC-1-based spheroids, supplement the medium with 2.5% Matrigel to enhance compaction [3].
- Seeding: Pipette a standardized volume (e.g., 100-200 µL) of the cell suspension into each well of a low-attachment U-bottom plate. A common seeding density is 1,000 - 5,000 cells per well, which must be optimized for your model.
- Forced Aggregation: Centrifuge the plate at a low speed (e.g., 500 × g for 2-5 minutes) to pellet the cells to the bottom of the well, promoting immediate and uniform cell contact.
- Culture and Monitoring: Incubate the plate under standard conditions (37°C, 5% CO2). Monitor spheroid formation and growth daily using a live-cell imager or brightfield microscope. Compact, spherical structures should form within 24-72 hours.
- Growth and Maturation: Culture the spheroids for 7-14 days to allow them to grow and develop the characteristic architectural complexity, including a necrotic core. Refresh 50% of the medium every 2-3 days to maintain nutrient levels without disturbing the spheroids.
- Validation: Before experimentation, validate the zonal structure by:
- Size Measurement: Confirm diameter exceeds 500 µm.
- Viability Staining: Use a validated 3D viability/cytotoxicity assay (e.g., Calcein-AM for live cells, SYTOX Red for dead cells) to visually identify the necrotic core [7] [6].
- Hypoxia Staining: Use hypoxia probes to confirm the presence of a hypoxic region preceding the necrotic core.
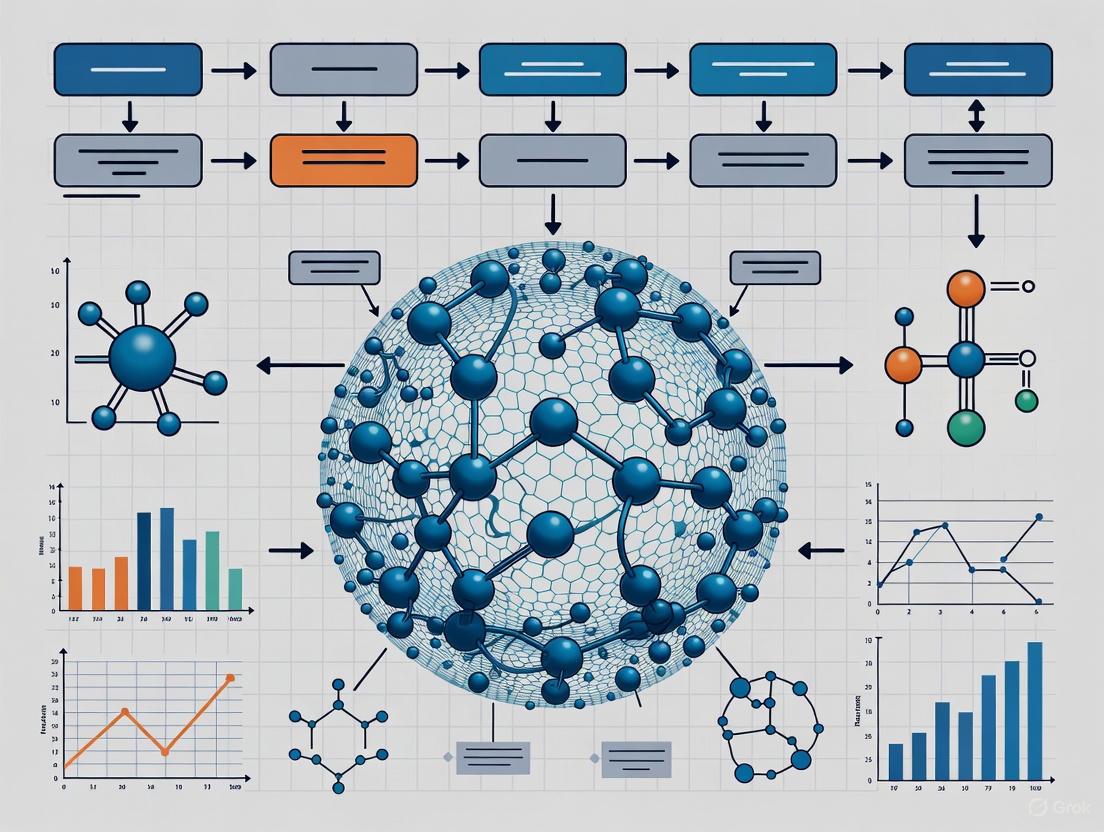
Signaling Pathways and Workflow Visualizations
Spheroid Zone Formation Logic
Reagent Penetration Challenge
The Scientist's Toolkit: Research Reagent Solutions
Table 3: Essential Reagents and Tools for Spheroid Zone Analysis
| Item | Function/Application | Example & Key Features |
|---|---|---|
| Low-Attachment U-bottom Plates | Promotes the formation of a single, uniform spheroid per well through forced aggregation. Essential for high-throughput screening. | BIOFLOAT plates provide a defined, inert surface for consistent spheroid formation [4]. |
| Validated 3D Viability Assay | Quantifies ATP levels as a marker of cell viability. Standard 2D assays fail to lyse the spheroid core, leading to overestimation of viability. | CellTiter-Glo 3D Assay contains a optimized lytic reagent with higher detergent concentration to penetrate and lyse all cells in a spheroid [6]. |
| Extracellular Matrix (ECM) Additives | Enhances spheroid compaction and mimics the in vivo tumor microenvironment, influencing architecture and drug resistance. | Matrigel (at 2.5%) compacts loose PANC-1 spheroids. Collagen I can be used to model invasive behavior [3]. |
| Hypoxia & Necrosis Reporters | Fluorescent probes to visually identify and quantify hypoxic and necrotic regions within the spheroid. | Pimonidazole (hypoxia marker); SYTOX Red or similar dyes (necrosis marker, stains DNA in dead cells) [7] [6]. |
| AI-Driven Analysis Software | Automates the segmentation and quantitative analysis of 3D image data (e.g., from confocal or light-sheet microscopy) at single-cell resolution. | Biology Image Analysis Software (BIAS) and 3D StarDist enable accurate, high-content analysis of complex spheroid structures [9] [5]. |
The Extracellular Matrix (ECM) as a Major Physical Barrier
ECM Barrier Fundamentals: FAQs for Researchers
What is the ECM and why is it a significant barrier in spheroid research? The Extracellular Matrix (ECM) is a non-cellular, three-dimensional network of macromolecules that provides structural and biochemical support to surrounding cells. In solid tumors and 3D spheroid models, the ECM constitutes up to 60% of the tumor mass, forming a dense, stiff, and physiologically active structure that significantly hinders the penetration of therapeutic agents and nanoparticles [10] [11]. This barrier function arises from its complex composition of collagens, proteoglycans, glycoproteins, and other components that create a tortuous, sterically hindered diffusion path.
Which ECM components contribute most significantly to the penetration barrier? The primary ECM components creating penetration barriers include:
- Collagens: The most abundant ECM proteins (especially fibrillar types I, II, III, V, XI) provide structural integrity and tensile strength, creating a dense meshwork that physically impedes diffusion [12] [13].
- Proteoglycans and Glycosaminoglycans (GAGs): Molecules like heparan sulfate, chondroitin sulfate, and hyaluronic acid create highly hydrated gels that resist compression and contribute to steric hindrance [12] [14]. Their negative charges can also interact electrostatically with delivery vehicles.
- Elastin: Provides reversible distensibility and recoil to tissues [13]. The relative contribution of each component varies by tumor type, location, and disease stage [15].
How do the physical properties of the ECM create barriers? The ECM presents multiple physical barriers:
- Stiffness: Tumor ECM can be significantly stiffer than normal tissue (e.g., breast cancer tumors ~4.04 kPa vs. normal breast tissue ~0.167 kPa) [11]. Increased stiffness activates mechanotransduction pathways that promote malignancy and creates a denser physical barrier.
- Architecture and Pore Size: Higher collagen densities create smaller pore sizes that physically restrict the passage of nanoparticles and macromolecules [16].
- Viscoelasticity: The ECM exhibits both solid and fluid properties, providing resistance to deformation over different timescales [11].
Quantitative Data: Nanoparticle Penetration and ECM Properties
Table 1: Nanoparticle Penetration Limitations in Spheroid Models
| Nanoparticle Size | Penetration Capability | Impact of Collagenase Treatment | Experimental Model |
|---|---|---|---|
| <100 nm | Can reach spheroid core | Significantly increased penetration | Multicellular spheroids (SiHa cells) [15] |
| >100 nm | Limited to peripheral regions | Minor improvement in penetration | Multicellular spheroids (SiHa cells) [15] |
| 100 nm with collagenase coating | 4-fold increase in core delivery compared to controls | N/A (inherently modified) | Multicellular spheroids (SiHa cells) [15] |
Table 2: ECM Density Impact on Cell Behavior and Spheroid Formation
| Collagen Density | Cell Migration | Spheroid Size/Organization | Experimental System |
|---|---|---|---|
| Low Density | Enhanced individual cell migration | Smaller, sparser clusters | NSCLC cells in 3D collagen matrices [16] |
| High Density | Restricted migration due to steric hindrance | Larger, more consolidated spheroids | NSCLC cells in 3D collagen matrices [16] |
Experimental Protocols for Overcoming ECM Barriers
Protocol 1: Enzymatic ECM Modulation for Enhanced Nanoparticle Delivery
This protocol is adapted from Goodman et al. (2007) for assessing nanoparticle penetration in multicellular spheroids following collagenase treatment [15].
Research Reagent Solutions Required:
- Carboxylated polystyrene nanoparticles (20-200 nm, fluorescently labeled)
- Collagenase (from Clostridium histolyticum, 0.74 U/mg)
- SiHa human cervical carcinoma cells (or relevant cell line)
- MEM media with 10% FBS and antibiotics
- OptiMEM reduced serum media
- Non-adherent round-bottom spheroid formation plates
Methodology:
- Spheroid Formation:
- Trypsinize monolayer SiHa cells and transfer 10⁷ cells to a 250 mL spinner flask with 200 mL complete MEM media.
- Stir at 150 RPM in a 37°C incubator with 5% CO₂.
- After 3 days, replace 150 mL of media with fresh media, then continue with daily media replacement (150 mL MEM with 5% FBS and antibiotics).
- Harvest spheroids at 400-500 μm diameter (typically 10-14 days).
Collagenase Treatment and Nanoparticle Delivery:
- Transfer ~30 spheroids to a 1.5 mL siliconized tube and exchange media to OptiMEM.
- Add collagenase at optimized concentration (e.g., 0.74 U/mg).
- Add fluorescently labeled polystyrene beads (final concentration 7.58 × 10¹¹ beads/mL for all sizes).
- Rotate spheroids at 5 RPM for 5 hours at 37°C.
Penetration Analysis:
- Wash spheroids with PBS (pH 7.4).
- For quantitative analysis: Separate outer cell layers using sequential trypsinization (0.25% trypsin, 130 RPM rotation for 20 minutes at 37°C).
- Process spheroids for fluorescence measurement or cryosectioning and imaging.
Protocol 2: 3D Bioprinted Spheroid-on-a-Chip for Invasion Studies
This protocol is adapted from Dogan et al. (2024) for creating a controlled microenvironment to study ECM-regulated invasion [17].
Research Reagent Solutions Required:
- Gelatin methacryloyl (GelMA) hydrogel (5-15% concentration)
- Photoinitiator (Lithium phenyl-2,4,6-trimethylbenzoylphosphinate, LAP)
- Human fibrosarcoma cell line (HT1080) or relevant cell line
- Dulbecco's Modified Eagle Medium with 10% FBS and 1% Pen/Strep
- Microfluidic chip fabrication materials
- UV crosslinking system (wavelength 365 nm, intensity 5-10 mW/cm²)
Methodology:
- Spheroid Formation:
- Prepare cell suspension at 1 × 10⁴ cells/well in 200 μL.
- Seed in non-adherent round-bottom plates.
- Centrifuge at 300 × g for 3 minutes to enhance cell contact.
- Culture for 3-4 days until compact spheroids form.
Bioink Preparation and 3D Bioprinting:
- Prepare GelMA solutions at varying concentrations (5%, 10%, 15%) to modulate matrix density.
- Mix GelMA with 0.5% LAP photoinitiator.
- Encapsulate spheroids in GelMA bioink.
- Bioprint into microfluidic device using appropriate nozzle size (22-27G).
- Photocrosslink with UV light (365 nm, 5-10 mW/cm² for 10-60 seconds).
Perfusion Culture and Analysis:
- Connect bioprinted construct to perfusion system with continuous media flow.
- Maintain at 37°C, 5% CO₂ for duration of experiment.
- Monitor invasion daily via microscopy.
- Analyze invasion metrics: area quantification, circularity measurements, and gene expression analysis of invasion markers (MMP2, MMP9, CD44, HIF-1α).
Research Reagent Solutions for ECM Modulation Studies
Table 3: Essential Reagents for ECM Barrier Research
| Reagent Category | Specific Examples | Research Application | Key Considerations |
|---|---|---|---|
| ECM Degrading Enzymes | Collagenase, Hyaluronidase, Matrix Metalloproteinases (MMPs) | Enzymatic disruption of specific ECM components to enhance diffusion [15] | Enzyme concentration, exposure time, and specificity must be optimized for each model system |
| Engineered Nanoparticles | Carboxylated polystyrene beads (20-200 nm), PEGylated liposomes, Metal nanoparticles | Penetration efficiency studies and therapeutic delivery vehicle development [15] [10] | Size, surface charge, and functionalization significantly impact penetration capability |
| Hydrogel Systems | Collagen matrices, GelMA, Matrigel, Hyaluronic acid-based hydrogels | 3D cell culture and controlled microenvironment studies [16] [17] | Matrix stiffness, ligand density, and porosity can be tuned to mimic specific tissue environments |
| Small Molecule Inhibitors | Caffeic acid derivatives, MMP inhibitors, LOX inhibitors [18] | Modulating ECM production and remodeling in fibrotic and cancerous conditions | Specificity, potency, and potential off-target effects must be characterized |
| Decellularized ECM Scaffolds | Porcine SIS, Urinary Bladder Matrix, Fetal bovine dermis [19] | Physiologically relevant substrates for studying cell-ECM interactions | Source tissue, decellularization efficiency, and mechanical properties impact experimental outcomes |
ECM Barrier Mechanism and Experimental Workflow
ECM Barrier Mechanisms and Research Approaches
Troubleshooting Guide: Common Experimental Challenges
Problem: Inconsistent Nanoparticle Penetration Across Spheroid Replicates
- Potential Cause: Heterogeneous ECM deposition within and between spheroids.
- Solution: Standardize spheroid formation protocol (consistent cell seeding density, culture duration, and media composition). Pre-screen spheroids for size uniformity and ECM markers (collagen, fibronectin) before experiments [15] [16].
Problem: Enzyme Toxicity in ECM Modulation Experiments
- Potential Cause: Excessive enzyme concentration or prolonged exposure damaging cells.
- Solution: Titrate enzyme concentration and treatment duration. Use viability assays (e.g., Live/Dead staining, ATP quantification) to establish optimal conditions that balance ECM disruption with cell viability [15].
Problem: Poor Reproducibility in 3D Bioprinted Models
- Potential Cause: Batch-to-batch variation in hydrogel properties or inconsistent crosslinking.
- Solution: Characterize mechanical properties (rheology) of each bioink batch. Standardize crosslinking parameters (light intensity, duration) and validate with control samples [17].
Problem: Limited Translation Between 2D and 3D Drug Screening Results
- Potential Cause: Absence of ECM barrier in traditional 2D cultures.
- Solution: Incorporate 3D spheroid models with physiological ECM density early in screening pipelines. Use ECM-modifying agents (e.g., collagenase) as positive controls for penetration enhancement studies [10] [17].
Future Directions in ECM Barrier Research
The field is rapidly advancing toward more sophisticated ECM modulation strategies. Promising approaches include:
- Enzyme-Conjugated Nanoparticles: Collagenase immobilized on nanoparticle surfaces for site-specific ECM degradation [15].
- Smart Biomaterials: Hydrogels with tunable mechanical properties that can be dynamically modulated during experiments [17].
- Stromal Cell Targeting: Approaches focused on cancer-associated fibroblasts (CAFs) to prevent aberrant ECM deposition rather than degrading existing matrix [11].
- Multi-Scale Computational Models: Integrating ECM properties at molecular, cellular, and tissue levels to predict nanoparticle transport [16].
Understanding and overcoming the ECM barrier remains crucial for improving therapeutic efficacy in solid tumors and developing more physiologically relevant 3D models for drug screening.
Frequently Asked Questions (FAQs)
Q1: Why does my fluorescent probe only stain the periphery of my spheroid?
This is a classic problem caused by the probe's molecular properties. A theoretical membrane partition model explains that lipophilic probes with high membrane affinity become trapped in the peripheral cell membranes, while very hydrophilic probes may diffuse through intercellular spaces without entering cells. For even distribution throughout the spheroid, probes require intermediate membrane affinity to undergo sequential diffusion in and out of cells [20].
Solution: Optimize probe structure for smaller size and increased hydrophilicity. The second-generation probe with these properties demonstrated roughly even distribution throughout tumor spheroids in validation studies [20].
Q2: How does oxygen concentration in my incubator actually relate to what cells experience?
The oxygen concentration set in your incubator (typically 18.6% O₂ at sea level in normoxic conditions) does not represent what adherent cells experience at the bottom of culture dishes due to diffusion limitation [21]. Oxygen reaches cells through diffusion, which becomes limited at approximately 100-200 μm in tissues. In a standard petri dish with ~10 mL medium, the diffusion distance creates a significant oxygen gradient, meaning cells at the bottom experience substantially lower oxygen levels than the gas phase concentration [21].
Solution: Consider medium height reduction, specialized cultureware, or use of oxygen-controlled incubators for more precise oxygenation control.
Q3: What causes the formation of hypoxic gradients in spheroids?
Hypoxic gradients form due to metabolic consumption and diffusion limitations. As spheroids grow beyond 400 μm, oxygen consumption by peripheral cells combined with limited diffusion distance (100-200 μm) creates an oxygen-deficient core. This leads to the characteristic zonal organization with proliferating cells at the periphery, quiescent cells in the intermediate layer, and necrotic cells at the core [22] [23].
Q4: How do serum concentrations affect spheroid development?
Serum concentration significantly influences spheroid architecture and viability [24]:
- Higher serum (10-20%): Promotes dense spheroid formation with distinct necrotic, quiescent, and proliferative zones
- Serum-free conditions: Causes spheroid shrinkage, reduced density, and increased cell detachment
- Low serum (0.5-5%): Reduces ATP content by over 60% and increases cell death signals
Experimental Variables and Their Effects on Spheroids
Oxygen Concentration Effects
| Oxygen Level | Spheroid Size | Necrosis | Cell Viability | ATP Content |
|---|---|---|---|---|
| 3% O₂ | Reduced dimensions | Significantly increased | Decreased | Decreased |
| 18.6% O₂ (Normoxia) | Standard progression | Normal progression | Higher | Higher |
Data derived from systematic analysis of spheroid attributes [24]
Serum Concentration Effects
| Serum Concentration | Spheroid Characteristics | Structural Integrity | Viability Markers |
|---|---|---|---|
| 0% FBS | ~200 μm, shrunk over time, reduced density | Poor, cell detachment | Low ATP content |
| 0.5-1% FBS | Intermediate size | Moderate | High cell death signals |
| 10-20% FBS | Largest, densest spheroids | Distinct zones: necrotic, quiescent, proliferative | Highest viability, stable ATP |
Data from MCF-7 spheroid studies [24]
Initial Seeding Density Effects
| Initial Cell Number | Spheroid Size | Structural Stability | Morphology |
|---|---|---|---|
| 2000 cells | Smaller spheroids | Stable | Regular |
| 6000 cells | Largest spheroids | Instability, rupture in some cases | Lowest compactness, solidity, sphericity |
| 7000 cells | Smaller than 6000-cell spheroids | Variable | More regular than 6000-cell |
Note: Effects vary by cell line; HCT 116 and MCF-7 show different patterns [24]
Detailed Experimental Protocols
Spheroid Immunofluorescence Protocol
Materials Required:
- Non-adherent tissue culture plates (96-well round bottom recommended)
- Wide-bore ice-cold tips (prevents spheroid damage)
- PBS with 1% Bovine Serum Albumin (BSA)
- 4% paraformaldehyde or 100% methanol (-20°C)
- Permeabilization buffer: PBS with 0.5-10% Triton X-100
- Blocking buffer: PBS with 0.1% Tween, 1% BSA, 22.52 mg/mL glycine, 10% goat serum
- Primary and secondary antibodies
- Nuclear stain (DAPI or Hoechst)
- Mounting media or storage buffer (PBS with 0.1% sodium azide)
Procedure:
Spheroid Formation: Seed cells in non-adherent plates (e.g., 2000 HCT116 cells, 96 hours). Verify good spheroid formation visually [25].
Harvesting: Recover spheroids using wide-bore ice-cold tips. Use pre-coated tubes (sterile 1% BSA/PBS overnight) to reduce adhesion. Centrifuge at 20 × g for 20 seconds at 4°C [25].
Fixation:
- Remove medium by careful aspiration
- Fix with either:
- 4% paraformaldehyde in PBS pH 7.4 for 10 minutes at room temperature
- 100% methanol (-20°C) at 4°C for 5 minutes
- Wash three times with PBS [25]
Antigen Retrieval (if needed): For formaldehyde-fixed spheroids, heat-induced retrieval may be necessary. Use antigen retrieval buffer (Tris/EDTA pH 9.0 or sodium citrate pH 6.0) and incubate for 20 minutes at 96-98°C [25].
Permeabilization: Add permeabilization buffer (PBS with 0.5% Triton X-100) for one hour at room temperature with gentle shaking [25].
Blocking: Incubate overnight at room temperature with blocking buffer on a flat shaker [25].
Antibody Staining:
- Wash with PBS containing 0.1% Tween
- Add primary antibodies at optimized concentration, incubate per manufacturer protocol
- Wash four times with wash buffer (1 hour each wash)
- Add secondary antibodies and/or nuclear stain, incubate overnight
- Wash four times with wash buffer (1 hour each wash) [25]
Storage and Imaging: Store in mounting media or PBS with 0.1% sodium azide at 4°C in dark. Image using appropriate excitation/emission filter sets [25].
Microfluidic Tumor Slice Model Protocol
Device Fabrication:
- Create SU-8 template using lithography
- Pour PDMS and polymerize at 80°C for 4 hours
- Assemble top and bottom PDMS layers with reversible bonding
- Insert 340 μm-diameter PDMS rod to form lumen
- Plasma bond to glass-bottom Petri dish
- Sterilize with UV exposure for 15 minutes
- Treat with poly(ethyleneimine) and glutaraldehyde for enhanced hydrogel attachment [22]
Cell Culture in Microdevice:
- Trypsinize and resuspend HCT-116 cells at desired density
- Prepare 4.0 mg/ml collagen hydrogel with 5-15 million cells/ml
- Inject collagen-cell mixture into device chamber
- Polymerize at room temperature for 20 minutes
- Remove PDMS rod to create perfusion lumen
- Add 5 ml culture media to Petri dish
- Culture at 37°C with 5% CO₂ [22]
Cell Viability Assessment:
- Dilute calcein AM (1:1000) and propidium iodide (1:500) in PBS
- Remove upper microdevice half to expose collagen hydrogel
- Add staining solution for 15 minutes
- Image using fluorescent/confocal microscopy [22]
The Scientist's Toolkit: Research Reagent Solutions
| Reagent/Category | Function | Application Notes |
|---|---|---|
| Triton X-100 | Membrane permeabilization for intracellular antibody access | Concentration optimization required (0.5-10%); efficiency varies by protein localization [25] |
| NBDG (2-(N-(7-Nitrobenz-2-oxa-1,3-diazol-4-yl)Amino)-2-Deoxyglucose) | Fluorescent glucose analog for tracking nutrient diffusion | Used at 200 μM to monitor glucose diffusion kinetics in microfluidic devices [22] |
| Deep-red NTR probes | Detection of nitroreductase activity as hypoxia biomarker | Second-generation probes with intermediate hydrophilicity provide better spheroid penetration [20] |
| FUCCI Cell Cycle Sensor | Cell cycle phase monitoring in live cells | Baculovirus-based system with TagRFP (G1) and EmGFP (S/G2/M) reporters [22] |
| Collagen Type I Hydrogel | 3D scaffold for cell encapsulation in microfluidic devices | Used at 4 mg/ml concentration; provides physiological matrix environment [22] |
| Oxygen-controlled incubators | Precise regulation of oxygen tension | Essential for replicating physiological hypoxia; normoxic condition is 18.6% O₂ at sea level [21] |
Signaling Pathways and Experimental Workflows
Cellular Hypoxia Response Pathway
Spheroid Analysis and Optimization Workflow
Probe Distribution Mechanisms in Spheroids
Cell-Cell Adhesion and Stromal Interactions in Penetration Resistance
Frequently Asked Questions (FAQs)
Q1: What are the primary physical barriers that limit reagent penetration in 3D spheroids?
Spheroids present formidable physical barriers that are absent in traditional 2D cultures. The dense extracellular matrix (ECM) shows dramatic upregulation, with fibronectin levels elevated up to 33-fold compared to 2D cultures [26]. This is compounded by extreme cell packing density, reaching 6 × 10⁷ cells/cm³ in mature spheroids compared to 1.8–3.6 × 10⁶ cells/cm³ in confluent monolayers [26]. These structural barriers create tortuous diffusion pathways that significantly retard reagent penetration, particularly toward the spheroid core where interstitial space becomes minimal [26].
Q2: How does cell adhesion directly contribute to drug resistance in spheroid models?
Cell adhesion mediates drug resistance (CAM-DR) through integrin-mediated survival signaling. In human myeloma models, drug-sensitive cells pre-adhered to fibronectin via VLA-4 (α4β1) and VLA-5 (α5β1) integrins become relatively resistant to doxorubicin and melphalan-induced apoptosis compared to suspension cells [27]. This CAM-DR is not due to reduced drug accumulation but rather to adhesion-activated anti-apoptotic signaling pathways [27]. Additionally, drug-resistant cell lines selected with doxorubicin or melphalan overexpress VLA-4, demonstrating significantly increased α4-mediated adhesion [27].
Q3: What signaling pathways are activated by stromal interactions that promote survival?
Stromal interactions activate multiple pro-survival pathways through both direct cell contact and soluble factors:
- Integrin-mediated signaling: Engagement of β1 integrins with ECM components activates PI3K/AKT, ERK/MAPK, and NF-κB pathways critical for cell survival [28].
- Cytokine networks: Stromal-secreted IL-6, IGF-1, and SDF-1α activate MEK/p42/p44/MAPK signaling cascades in multiple myeloma cells [28].
- Calcium and eNOS activation: Ultrasound-mediated hyperpermeability in brain spheroid models depends on calcium influx via mechanosensitive channels and subsequent endothelial nitric oxide synthase (eNOS) activation [7].
Q4: What experimental variables most significantly impact spheroid barrier properties?
Systematic analysis of spheroid attributes reveals that several experimental variables critically influence barrier function [24]:
Table: Key Experimental Variables Affecting Spheroid Barrier Properties
| Variable | Impact on Spheroid Barriers | Optimization Guidance |
|---|---|---|
| Oxygen Levels | 3% O₂ reduces spheroid dimensions but increases necrosis [24] | Physiological oxygen (3-5%) better mimics in vivo conditions |
| Serum Concentration | >10% serum promotes dense spheroid formation with distinct zones [24] | 10% FBS optimal for balanced growth and structure |
| Media Composition | RPMI 1640 significantly elevates cell death signals [24] | Match media to cell type and experimental objectives |
| Initial Seeding Density | 2000-6000 cells determines final spheroid size and structure [24] | Optimize for desired size; high densities may cause structural instability |
Troubleshooting Guides
Problem: Inconsistent Drug Penetration Across Spheroid Batches
Potential Causes and Solutions:
- Variable ECM deposition: Monitor fibronectin and collagen levels through immunostaining. Consider standardizing spheroid maturation time [26].
- Inconsistent spheroid size: Implement automated image analysis (e.g., AnaSP) to monitor spheroid metrics in real-time. Control initial seeding density precisely [24].
- Serum batch variation: Source FBS from consistent suppliers and validate lot numbers. Consider serum-free alternatives for critical applications [24].
- Oxygen tension fluctuations: Maintain physiological oxygen levels (3-5%) using controlled incubators to ensure consistent hypoxic gradient formation [24].
Problem: Overcoming Stromal-Mediated Drug Resistance
Experimental Approaches:
- Target integrin signaling: Use functional blocking antibodies against VLA-4 or small molecule inhibitors of focal adhesion kinase (FAK) to disrupt adhesion-mediated survival signals [27] [28].
- Modulate calcium signaling: Employ calcium chelators or mechanosensitive channel inhibitors to disrupt UTMC-induced hyperpermeability pathways [7].
- Combine stromal-disrupting agents: Co-administer hyaluronidase to degrade ECM components and improve drug access to core regions [26].
Research Reagent Solutions
Table: Essential Reagents for Studying Penetration Resistance
| Reagent/Category | Specific Examples | Research Application | Key Considerations |
|---|---|---|---|
| Integrin Inhibitors | VLA-4 blocking antibodies, FAK inhibitors | Disrupt CAM-DR signaling [27] | Confirm target specificity; monitor compensatory pathways |
| ECM Modulators | Hyaluronidase, collagenase | Reduce physical penetration barriers [26] | Optimize concentration to avoid spheroid disintegration |
| Calcium Modulators | BAPTA-AM (chelator), Gadolinium (channel blocker) | Study UTMC-induced hyperpermeability [7] | Assess effects on overall cell viability and signaling |
| Metabolic Probes | TRITC-conjugated dextrans, 10 kDa Texas Red dextran | Quantify penetration depth and barrier function [7] | Use size-matched analogs for drug penetration studies |
| Viability Assays | Calcein-AM/SYTOX Red, ATP content assays | Distinguish live/dead cells in spheroid zones [7] [24] | Account for differential penetration of viability dyes |
Experimental Protocols
Protocol 1: Assessing Integrin-Mediated Drug Resistance in Spheroids
Based on: Damiano et al., Blood (1999) [27]
- FN Coating: Coat 96-well immunosorp plates with 50 μL of 40 μg/mL fibronectin (FN) overnight at 4°C.
- Blocking: Block nonspecific binding sites with 1% BSA for 1 hour at room temperature.
- Cell Seeding: Wash 8226/S myeloma cells and resuspend in serum-free RPMI 1640. Add 4 × 10⁴ cells/well to FN-coated plates or 8 × 10³ cells/well to BSA-coated control plates.
- Adhesion: Incubate plates for 1 hour at 37°C in 5% CO₂ to allow cell adhesion.
- Drug Treatment: After washing, treat with chemotherapeutic agents (e.g., doxorubicin, melphalan) for 1 hour in serum-containing media.
- Viability Assessment: Following 96-hour incubation in drug-free media, add MTT dye for 4 hours, solubilize with DMSO, and read absorbance at 540 nm.
Protocol 2: Evaluating Ultrasound-Enhanced Penetration in BBB Spheroids
Based on: Pandit et al., Scientific Reports (2024) [7]
- Spheroid Preparation: Generate multicellular brain spheroids containing endothelial cells, pericytes, neurons, astrocytes, and microglia.
- Microbubble Incubation: Incubate spheroids with microbubbles and 10 kDa Texas Red dextran (TRD) as a model drug in multiwell plates with shallow media.
- Ultrasound Treatment: Place plate in custom water tank with submersible 1 MHz single-element ultrasound transducer.
- UTMC Parameters: Apply UTMC at 250 kPa peak negative pressure, 10 µs pulse length, 10 ms pulse interval, for 10-second treatment duration.
- Penetration Quantification: Image spheroids using confocal microscopy with z-stacks from surface to 200 µm depth. Quantify TRD fluorescence intensity.
- Viability Assessment: Confirm maintained cell viability using Calcein-AM/SYTOX Red staining.
Signaling Pathway Diagrams
Cell Adhesion Mediated Drug Resistance Signaling
UTMC-Induced Spheroid Hyperpermeability
Practical Strategies and Novel Technologies to Boost Penetration
Technical Support Center: Troubleshooting Guides and FAQs
This technical support center is designed for researchers aiming to enhance reagent penetration in 3D tumor spheroid models. The following guides address common experimental challenges related to nanocarrier design.
Frequently Asked Questions (FAQs)
FAQ 1: Why do my nanocarriers accumulate around the spheroid periphery but fail to penetrate the core?
- Potential Cause: This is often due to a size limitation. While the Enhanced Permeability and Retention (EPR) effect allows accumulation at the tumor site, the dense extracellular matrix (ECM) within the spheroid acts as a physical barrier to deeper penetration [29] [30].
- Solution:
- Optimize Size: Design size-transformable nanocarriers that are initially large (~100 nm) for prolonged circulation but break down into smaller particles (<50 nm) upon encountering stimuli in the tumor microenvironment (TME) to enhance diffusion [29].
- Modify Surface Charge: Use charge-reversal strategies. Employ neutrally or negatively charged surfaces for circulation, which switch to a positive charge in the acidic TME to interact with negatively charged cell membranes and improve internalization [29].
FAQ 2: My nanocarriers show good efficacy in 2D culture but fail in 3D spheroid models. What is wrong?
- Potential Cause: 2D monolayers lack the physiological barriers present in real tumors and 3D models, such as compact cell packing, hypoxic cores, and abundant ECM, leading to an overestimation of therapeutic efficacy [31] [3].
- Solution:
- Use Physiologically Relevant Models: Transition to 3D spheroid or organoid models for preclinical testing. These models better replicate the diffusion barriers, cell-cell interactions, and drug resistance mechanisms of solid tumors [31] [32].
- Characterize Penetration Directly: Use advanced imaging techniques like light sheet microscopy (see Protocol 1 below) to visually confirm and quantify nanocarrier distribution within the spheroid, rather than relying solely on bulk efficacy metrics [3].
FAQ 3: How can I improve the stability and targeting specificity of my lipid-based nanocarriers?
- Potential Cause: Conventional liposomes can suffer from low stability, drug leakage, and rapid clearance by the immune system [29] [33].
- Solution:
- Develop Hybrid Nanocarriers: Combine an inorganic solid core (e.g., silica) with a lipid layer. The core enhances drug loading and stability, while the lipid coating improves biocompatibility and tumor penetration [34].
- Apply Surface PEGylation: Coat the nanocarrier surface with polyethylene glycol (PEG) to create a "stealth" effect, reducing protein adsorption and clearance by the reticuloendothelial system (RES), thereby prolonging circulation time [29] [30].
- Incorporate Active Targeting: Functionalize the nanocarrier surface with targeting ligands (e.g., antibodies, peptides) that bind specifically to receptors overexpressed on cancer cells [30] [35].
Quantitative Data on Nanocarrier Design Parameters
The following tables summarize how key physicochemical parameters influence nanocarrier behavior and penetration. Use these to guide your design strategy.
Table 1: Impact of Nanocarrier Physicochemical Properties on Performance [29] [30] [35]
| Parameter | Optimal Range for Penetration | Primary Effect | Associated Trade-off |
|---|---|---|---|
| Size | 50-100 nm (circulation); <50 nm (deep penetration) | Small size enhances diffusion through dense ECM; larger size benefits from EPR effect. | Very small particles (<5 nm) are rapidly cleared by the kidneys [30]. |
| Shape | Rod-like, discoidal, or worm-like | High aspect ratio shapes minimize phagocytosis, prolong circulation, and enhance vessel wall adhesion [30]. | Complex shapes can be more challenging to fabricate reproducibly. |
| Surface Charge | Neutral/Negative (circulation); Positive (penetration) | Neutral charge prevents opsonization; positive charge enhances cellular uptake via electrostatic interaction [29]. | Positively charged surfaces can cause higher cytotoxicity and rapid clearance from blood [29]. |
Table 2: Nanocarrier Types for Enhanced Spheroid Penetration
| Nanocarrier Type | Key Materials | Advantages for Penetration | Limitations |
|---|---|---|---|
| Charge-Reversal NPs | Polymers with pH-labile bonds (e.g., β-carboxylic acid) [29] | Dynamic charge switching enhances both tumor accumulation and cellular uptake. | Requires precise tuning of the trigger sensitivity (e.g., to TME pH) [29]. |
| Lecithin-Modified Silica NPs | Silica core, Lecithin lipid layer [34] | Lipid coating enhances biocompatibility and tumor distribution compared to non-modified silica [34]. | Complex synthesis involving sol-gel and lipid deposition steps [34]. |
| Pluronic-Polydopamine NPs | Pluronic F127, Polydopamine [3] | Good penetration demonstrated in dense PDAC spheroid models; suitable for drug delivery (e.g., SN-38) [3]. | Penetration efficiency is highly dependent on spheroid density and composition [3]. |
Detailed Experimental Protocols
Protocol 1: Assessing Nanocarrier Penetration in 3D Spheroids via Light Sheet Microscopy
This protocol is adapted from research using a pancreatic ductal adenocarcinoma (PDAC) spheroid model [3].
Spheroid Generation:
- Seed a co-culture of cancer cells and relevant stromal cells (e.g., pancreatic stellate cells) in a low-attachment 96-well plate.
- Centrifuge the plate to promote cell-cell contact.
- For loosely-packed spheroids (e.g., PANC-1 cells), supplement the culture medium with 2.5% Matrigel to increase density and compaction. Dense spheroids (e.g., BxPC-3) may not require this.
- Incubate under standard conditions until spheroids reach the desired size (~300-500 µm), typically 2-5 days.
Nanocarrier Treatment and Staining:
- Add fluorescently labelled nanocarriers to the spheroid culture medium.
- Incubate for a predetermined time (e.g., 24 hours) to allow for penetration.
- Wash spheroids with PBS to remove non-internalized nanocarriers.
- Fix spheroids with paraformaldehyde.
- Optionally, stain the spheroid with a cell membrane dye (e.g., CellMask) and a nuclear counterstain (e.g., DAPI) for structural context.
Imaging and Analysis:
- Critical Note: Confocal microscopy is often unsuitable for thick spheroids due to limited light penetration and significant signal scattering. Use light sheet fluorescence microscopy (LSFM) for accurate 3D visualization [3].
- Mount the fixed and stained spheroid in agarose and image using LSFM.
- Use image analysis software (e.g., Fiji/ImageJ) to generate 3D reconstructions and fluorescence intensity profiles from the spheroid periphery to the core to quantify penetration depth.
Protocol 2: Evaluating the Therapeutic Efficacy of Drug-Loaded Nanocarriers in 3D Spheroids
- Spheroid Preparation: Generate uniform spheroids as described in Protocol 1.
- Treatment: Apply treatments to the spheroids: free drug, drug-loaded nanocarriers, and empty nanocarriers as a control.
- Viability Assessment: After a suitable incubation period, assess cell viability using assays compatible with 3D cultures, such as:
- CellTiter-Glo 3D: Measures ATP levels, indicating metabolically active cells.
- Live/Dead Staining: Uses calcein-AM (live, green) and propidium iodide (dead, red) to visualize viability throughout the spheroid.
- Analysis: Image stained spheroids using LSFM or confocal microscopy (if small enough) and quantify the live/dead signal. Compare the half-maximal inhibitory concentration (IC50) values between free drug and nanocarrier formulations to determine efficacy enhancement [3].
Visualizing the Design and Evaluation Workflow
The following diagram illustrates the logical workflow for designing and evaluating nanocarriers for deep spheroid penetration.
The Scientist's Toolkit: Key Research Reagent Solutions
Table 3: Essential Materials for Nanocarrier Penetration Studies in Spheroids
| Reagent / Material | Function / Application | Example Use Case |
|---|---|---|
| Low-Attachment Plates | Prevents cell adhesion, forcing cells to aggregate and form spheroids [3]. | Standardized high-throughput spheroid formation. |
| Matrigel / Collagen I | Extracellular matrix (ECM) components to increase spheroid density and mimic the in vivo TME [3]. | Modeling dense, fibrotic tumors (e.g., pancreatic cancer). |
| Pluronic F127 | A triblock copolymer used to form stable, penetrating polymeric nanocarriers [3]. | Core material for creating polydopamine-coated nanocarriers. |
| Lecithin (Phospholipid) | A natural lipid used to create biocompatible coatings on nanocarriers [34]. | Modifying silica nanoparticles to enhance tumor distribution. |
| Polyethylene Glycol (PEG) | A polymer used for "PEGylation" to create stealth surfaces, reducing immune clearance [29] [30]. | Extending the circulation half-life of various nanocarriers. |
| CellTiter-Glo 3D Assay | A luminescent assay optimized for measuring viability in 3D cell cultures. | Quantifying the therapeutic efficacy of drug-loaded nanocarriers in spheroids [3]. |
This technical support guide addresses the critical experimental challenges in developing advanced three-dimensional (3D) tumor models. Moving beyond traditional two-dimensional (2D) cultures is essential for cancer research, as 3D models like spheroids and organoids better recapitulate the structural architecture and cell-cell interactions of real tumors [36]. A significant limitation of basic tumor organoids is their lack of diverse cellular composition and extracellular matrix (ECM), which hinders their ability to fully replicate the complexity of the tumor microenvironment (TME) [37]. This guide provides targeted troubleshooting for integrating stromal cells and modulating the ECM to create more physiologically relevant models, directly supporting a thesis focused on improving reagent penetration in spheroids research.
? Frequently Asked Questions (FAQs) and Troubleshooting
1. FAQ: Our tumor spheroids show poor infiltration of co-cultured T cells. What strategies can improve immune cell recruitment?
- Problem: The model lacks robust T cell infiltration, limiting its usefulness for immunotherapy studies.
- Solution:
- Utilize Patient-Derived Materials: Develop 3D tumor spheroids from patient-derived xenograft (PDX) materials. Histologic and transcriptomic analysis confirms these spheroids closely recapitulate source tumor characteristics, providing a more native environment for immune cell interaction [38].
- Employ Assisted Integration: Use established technologies, such as magnetic nanoparticle-based methods, to achieve consistent and robust T cell infiltration into pre-formed spheroids. This method has been shown to preserve T cell function and tumor-killing activity [38].
2. FAQ: How does the presence of stromal cells like Cancer-Associated Fibroblasts (CAFs) influence cancer spheroid behavior and ECM remodeling?
- Problem: The isolated cancer spheroids do not mimic the invasive and ECM-remodeling properties observed in vivo.
- Solution:
- Incorporate Stromal Cells: Integrate stromal cells (e.g., endothelial cells, normal fibroblasts, CAFs) into your spheroid contractility assays. Research shows that the presence of stromal cells significantly increases cancer cell invasiveness and alters the spheroid's ability to deform and realign the surrounding collagen matrix [39].
- Monitor Secreted Factors: This enhanced invasiveness is linked to the upregulation of pro-inflammatory cytokines secreted by the stromal cells in the co-culture system. Characterizing these biochemical interactions is key to understanding the modulatory effect [39].
3. FAQ: Our model lacks physiological ECM stiffness, which we suspect is a barrier to drug penetration. How can we modulate and control ECM stiffness?
- Problem: The ECM in the model is not stiff enough to replicate the physical barrier found in many solid tumors.
- Solution:
- Target Key Enzymes: Increased ECM stiffness in tumors is primarily driven by the accumulation and cross-linking of collagen. Focus on enzymes that regulate this process, specifically members of the lysyl oxidase (LOX) family and the procollagen-lysine,2-oxoglutarate 5-dioxygenase (PLOD) family [40].
- Activate CAFs: The activation of CAFs is a key regulator of ECM remodeling. Factors like TGF-β secreted by cancer cells can trigger fibroblast transformation into CAFs, which subsequently produce and remodel the ECM, increasing its stiffness [40].
4. FAQ: We observe high variability in spheroid formation when using passive methods. Is there a more controlled approach?
- Problem: Traditional methods like hanging drop or low-adhesion plates yield spheroids with inconsistent size and shape.
- Solution:
- Use Active Assembly Methods: Employ techniques that use external forces for higher controllability. For instance, dielectrophoresis (DEP) within a digital microfluidic (DMF) system can directionally control cells to aggregate into tumor spheroids with well-defined morphology and high cell viability. This method offers better process control and integration with external systems compared to passive approaches [41].
The following table summarizes key quantitative findings on the impact of stromal cells on cancer spheroid mechanics and invasion, providing a reference for expected experimental outcomes.
Table 1: Impact of Stromal Cell Co-culture on Tumor Spheroid Behavior [39]
| Cell Line / Spheroid Type | Experimental Condition | Key Observed Effect |
|---|---|---|
| Metastatic lung cancer (SK-MES-1) | Co-culture with stromal cells (ECs, NFs, CAFs) | Significant increase in cancer cell invasiveness; Altered ability to deform and realign collagen gel. |
| Non-metastatic lung cancer (A549) | Co-culture with stromal cells (ECs, NFs, CAFs) | Significant increase in cancer cell invasiveness; Altered ability to deform and realign collagen gel. |
| A549 & SK-MES-1 | Presence of stromal cells | Upregulation of pro-inflammatory cytokines (e.g., IL-6, IL-8, TNF) linked to the observed phenotypic changes. |
Key Experimental Protocols
This protocol details the creation of a multilayer assay to study how stromal cells impact tumor spheroid contractility and invasion.
Spheroid Formation:
- Dissociate tumor cells (e.g., A549, SK-MES-1) and resuspend in growth medium supplemented with 20% Methocel solution.
- Seed approximately 1000 cells/well into a 96-well U-bottom plate.
- Centrifuge the plate at 350 rcf for 10 minutes to aggregate cells.
- Incubate for 24 hours in a humidified incubator (37°C, 5% CO₂) to form compact spheroids.
Preparation of Hydrogel Layers:
- Collagen Gel (for ECM): Prepare an unpolymerized collagen I solution (2 mg/mL final concentration) on ice. Keep the solution sterile and maintain a neutral pH (7.4).
- Fibrin Gel (for Stromal Cell Embedding): Prepare a fibrin hydrogel by mixing equal volumes of thrombin working solution (4 U/mL in EGM-2MV media) and fibrinogen working solution (6 mg/mL in PBS).
Assay Setup:
- Layer 1 (Base): Dispense ~200 µL of unpolymerized collagen hydrogel into a well. Incubate at 37°C for 30 minutes to form a base layer that prevents spheroid adhesion to the dish.
- Layer 2 (Spheroid in Collagen): Mix up to 3 pre-formed spheroids with 200 µL of unpolymerized collagen solution. Pour this mixture over Layer 1, manually positioning spheroids near the well's center. Incubate for 1 hour to polymerize.
- Layer 3 (Stromal Cells in Fibrin): Dissociate and count stromal cells (e.g., ECs, NFs, CAFs). Resuspend in the thrombin working solution and mix with an equal volume of fibrinogen solution to a final concentration of 0.25 x 10⁶ cells/mL. Add ~300 µL of this stromal cell-fibrinogen mixture over Layer 2 and incubate to form the final gel layer.
This advanced protocol uses bioprinting to create a personalized ECM structure around pre-formed tumor spheroids.
Spheroid Formation via Dielectrophoresis (DEP):
- Transport cell-laden hydrogel droplets to designated positions on a digital microfluidic (DMF) chip using a uniform electric field.
- Apply a non-uniform electric field to generate dielectrophoretic forces, which drive the cells to aggregate and form tight, viable tumor spheroids.
Digital Light Processing (DLP) Bioprinting of ECM:
- Use a Digital Micromirror Device (DMD) to dynamically control UV light patterns for photopolymerization.
- Precisely encapsulate the pre-formed tumor spheroids within customized hydrogel geometries that mimic the native TME's architecture.
Signaling Pathways and Experimental Workflows
Diagram: ECM Stiffness and Stromal Signaling in the TME
Diagram: Workflow for Integrated Spheroid-Stromal Co-culture
The Scientist's Toolkit: Essential Research Reagents
Table 2: Key Reagents for Engineering Advanced Tumor Models
| Reagent / Material | Function in the Experiment | Example Context |
|---|---|---|
| Matrigel | Serves as a biomimetic extracellular matrix (ECM) scaffold; provides structural support and essential growth signals for organoid culture [37]. | Used as a culture substrate for establishing tumor organoids from patient samples [37]. |
| Collagen I | A major natural component of the ECM; used to create 3D hydrogel environments for quantifying spheroid contractility, invasion, and ECM remodeling [39]. | Used in multilayer spheroid contractility assays to study stromal cell effects on collagen deformation [39]. |
| Growth Factors (Wnt3A, R-spondin-1, EGF, Noggin) | Added to culture media to support the growth and maintenance of specific tumor organoid types by mimicking niche signals [37]. | Commonly used in growth factor-reduced media to cultivate patient-derived tumor organoids while minimizing clone selection [37]. |
| TGF-β (Transforming Growth Factor Beta) | A critical cytokine that induces the transformation of normal fibroblasts into activated Cancer-Associated Fibroblasts (CAFs), a key driver of ECM remodeling [40]. | Secreted by cancer cells to activate CAFs in the tumor microenvironment [40]. |
| LOX Family Inhibitors | Pharmacological agents that target lysyl oxidase (LOX) activity; used to study and reduce collagen cross-linking, thereby decreasing ECM stiffness [40]. | Investigated as a potential strategy to reduce ECM stiffness and improve drug penetration in solid tumors [40]. |
| Fibrin Hydrogel | A natural polymer hydrogel used as a 3D matrix for encapsulating and culturing stromal cells (e.g., endothelial cells, fibroblasts) in co-culture assays [39]. | Serves as the matrix for stromal cell embedding in the third layer of the spheroid contractility assay [39]. |
Integrating perfusion through microfluidic platforms represents a paradigm shift in three-dimensional (3D) cell culture. Unlike traditional static cultures where spheroids are bathed in a stagnant medium, perfusion systems provide a continuous, controlled flow of nutrients and gases while simultaneously removing waste products. This dynamic environment is crucial for improving reagent penetration, enhancing the viability and growth of larger, more physiologically relevant spheroids, and ultimately generating more predictive in vitro models for biomedical research and drug development [8] [42]. This technical support center is designed to help you leverage these advanced systems effectively within the context of improving reagent penetration in spheroid research.
Troubleshooting FAQs & Guides
1. Question: Our spheroids show poor growth and central necrosis despite using a perfusion system. What could be the cause?
This is often related to inadequate nutrient penetration into the spheroid core.
- Solution A: Optimize Flow Rate. Excessively high flow rates can shear off important autocrine factors, while overly low rates fail to replenish nutrients effectively. You must find a balance. Refer to the Quantitative Perfusion Benefits Table below for flow rate impact data.
- Solution B: Verify Channel Configuration. Ensure your device's channel configuration matches your experimental goals. For instance, a serial connection might be appropriate for studying secreted factors, while a parallel configuration can improve uniformity across cultures [8]. Check that channels are not blocked.
- Solution C: Monitor Spheroid Size. Spheroids larger than 500 µm are highly prone to developing necrotic cores due to diffusion limitations [43]. Consider controlling the spheroid size in your experiment.
2. Question: We are experiencing low cell viability after loading cells into the microfluidic device. How can this be improved?
This can stem from several loading and environmental stress factors.
- Solution A: Gentle Loading Protocols. Use low-pressure pumping methods or exploit gravitational flow to load cell suspensions. Avoid high shear stress that can damage cells during the initial seeding process.
- Solution B: Confirm Biocompatibility. The material of your microfluidic device (e.g., PDMS) can sometimes absorb critical nutrients or release cytotoxic compounds. Ensure the device is properly cured and, if necessary, pre-conditioned with culture medium before cell loading [44].
- Solution C: Maintain Sterility. Implement a strict sterilization protocol for the entire microfluidic system, such as disinfecting components with 80% ethanol and using autoclaved or sterile-filtered tubing and connectors [45].
3. Question: How can we non-invasively monitor spheroid viability and metabolic activity during a long-term perfusion culture?
End-point assays are destructive. For longitudinal monitoring, use label-free, non-invasive techniques.
- Solution A: Optical Coherence Tomography (OCT). OCT can be used for in-situ, 3D visualization of spheroid morphology and to identify necrotic regions based on optical attenuation coefficients, without the need for disruptive staining [8].
- Solution B: Microfluidic NMR Spectroscopy. Nuclear Magnetic Resonance (NMR) spectroscopy can be integrated with microfluidic devices to quantitatively monitor metabolic changes, such as glucose consumption and lactic acid production, from a single spheroid in real-time [43].
- Solution C: In-Situ Microscopy. Use the transparent properties of common device materials (like PDMS) for continuous observation of spheroid growth and morphology under an inverted microscope [8].
4. Question: Retrieving spheroids from the microfluidic device for downstream analysis is difficult and often leads to loss of samples. Are there better designs?
Yes, this is a common challenge with closed-channel systems.
- Solution: Use Modular, Reconfigurable Devices. Opt for devices with a reversibly sealable adhesive layer. This design allows you to open the device after culture for direct, facile access to the wells and simple retrieval of spheroids using a pipette for downstream analysis like genomics, proteomics, or additional imaging [8].
Data Presentation: Quantitative Perfusion Benefits
Table 1: Impact of Dynamic Perfusion vs. Static Culture on Spheroid Properties
| Cell Type / Model | Key Measured Parameter | Static Culture Performance | Dynamic Perfusion Performance | Notes & Citation |
|---|---|---|---|---|
| Mouse Embryonic Fibroblasts (MEFs) | Spheroid Growth (over 14 days) | 100% (Control baseline) | Up to 139.9% over control | Demonstrates significant growth enhancement [8] |
| Human Induced Pluripotent Stem Cells (hiPSCs) | Spheroid Growth (over 14 days) | 100% (Control baseline) | Up to 139.9% over control | Improved growth, though some budding observed [8] |
| Hepatic Spheroids (HepG2 tri-culture) | Proliferation & Metabolic Capacity | Baseline | Significantly Enhanced | Direct comparison showed clear advantage of dynamic flow [42] |
| MCF7 Breast Cancer Spheroids | Metabolic Activity (l-Lactic Acid production) | Higher production rate | ~2.5 times slower production rate | Highlights metabolic differences between spheroid and monolayer cultures [43] |
| General Spheroid Culture | Nutrient & Waste Handling | Nutrient-deficient periphery, waste accumulation | Continuous replenishment and waste removal | Fundamental advantage of perfusion systems [42] |
Table 2: Essential Research Reagent Solutions for Perfusion Spheroid Culture
| Item | Function in Experiment | Example Application |
|---|---|---|
| Pluronic F-127 Coating | Creates a non-adhesive surface on device channels and wells, enabling cells to aggregate and form spheroids instead of adhering to surfaces [43]. | Used to coat the interior of microfluidic chambers for scaffold-free spheroid formation of MCF7 cells [43]. |
| Silicone Elastomer | A biocompatible material used to fabricate perfusion channels and seals within microfluidic devices [42]. | Printing of perfusable microchannels on the back of culture plates [42]. |
| Resazurin (CellTiter-Blue) | A cell-permeant dye used in viability assays. Viable cells reduce non-fluorescent resazurin to highly fluorescent resorufin, allowing for metabolic activity quantification [45]. | Adapted for droplet-based microfluidic platforms to determine high-resolution IC50 values for drug efficacy testing on HEK-293 spheroids [45]. |
| Fibronectin Coating | Promotes cell adhesion to surfaces. Used when creating adherent monolayers for comparative studies with spheroids [43]. | Coating microfluidic devices to create adherent monolayers of MCF7 cells for metabolic comparison with spheroids [43]. |
| Ultra-Low Attachment (ULA) Coatings | Prevents cell attachment to the substrate, driving spheroid development. Includes poly-HEMA and agarose [42]. | Used in 96-well plates or integrated into microfluidic device wells to facilitate 3D spheroid formation. |
Detailed Experimental Protocols
Protocol 1: Establishing a Perfused Spheroid Culture in a Modular Microfluidic Device
This protocol is adapted from studies using customizable, reconfigurable devices [8].
1. Device Assembly and Sterilization:
- Select the desired adhesive layer channel configuration (e.g., serial, parallel) based on your experimental needs [8].
- Assemble the three-layer device: (a) bottom well layer, (b) middle adhesive layer with laser-cut channels, (c) top cover layer with inlet/outlet ports.
- Sterilize the assembled device using UV light or by flushing channels with 70% ethanol, followed by rinsing with sterile phosphate-buffered saline (PBS).
2. Device Coating and Cell Loading:
- To promote spheroid formation, introduce a solution of Pluronic F-127 (1%) into the wells and incubate for a suitable period (e.g., 30 minutes), then aspirate [43].
- Detach and resuspend your cells in the appropriate culture medium.
- Open the reversible seal of the device and pipette the cell suspension directly into the wells of the bottom layer. This open-access method simplifies loading and reduces shear stress [8].
- Allow cells to settle for a few hours in an incubator to initiate aggregation.
3. Initiating Perfusion:
- After cell settling, securely attach the top PDMS cover layer to seal the device.
- Connect the device's inlet and outlet to a syringe pump system containing fresh culture medium.
- Begin continuous perfusion at a low flow rate (e.g., 0.1-10 µL/min). The optimal rate must be determined empirically to balance nutrient delivery and autocrine factor retention [8].
4. Culture Maintenance and Monitoring:
- Place the entire setup in a cell culture incubator (37°C, 5% CO₂).
- Use in-situ OCT or microscopy to monitor spheroid growth and morphology non-invasively over time [8].
- To retrieve spheroids for endpoint analysis, simply detach the cover layer and pipette spheroids directly from the open wells.
Protocol 2: Performing a Viability Assay in a Droplet-Based Perfusion System
This protocol outlines the adaptation of a resazurin-based assay in a pipe-based bioreactor (pbb) system [45].
1. Platform Sterilization and Setup:
- Disinfect microfluidic modules (e.g., Mixing Module) in an 80% ethanol bath for 20 minutes and dry in a sterile hood [45].
- Plasma-functionalize microfluidic modules and assemble the platform with sterile tubing under aseptic conditions.
2. Droplet Generation with Continuous Gradient:
- Use the gradient module (GM) to generate a sequence of droplets.
- One inlet stream contains a homogeneous cell suspension (e.g., HEK-293 cells). The other inlet streams contain culture media and the drug/dye, which are continuously mixed to create a linear concentration gradient [45].
- Droplets are generated at a high throughput, each acting as a nanoliter-scale bioreactor.
3. Spheroid Formation and Drug Exposure:
- The droplets are stored in a storage module (SM) and incubated for spheroid formation (e.g., 20 hours) [45].
- During this time, the dynamic flow within the droplet, induced by the platform's motion, acts as a form of perfusion.
4. Viability Assay and Analysis:
- After incubation, use a conditioning module (CM) to inject the resazurin-based CellTiter-Blue reagent into the droplets [45].
- Incubate for a further period (e.g., 4 hours) to allow viable cells to reduce resazurin to fluorescent resorufin.
- Finally, the analysis module (AM) measures the fluorescence intensity in each droplet, which correlates with the number of viable cells and allows for high-resolution IC50 profiling [45].
Visualization of Workflows
Diagram: Microfluidic Spheroid Culture & Analysis Workflow
Workflow for a modular microfluidic spheroid culture, highlighting key steps from preparation to analysis.
Diagram: Spheroid Perfusion & Nutrient Transport Logic
Logical relationship showing how continuous perfusion addresses the diffusion limitations of static culture to improve spheroid health.
Fundamental Concepts and Benefits
Droplet-based microfluidics involves generating and manipulating monodisperse droplets typically ranging from picoliters to nanoliters in volume within an immiscible carrier phase [46]. This technology provides isolated microenvironments where spheroids can be cultured and analyzed. The small volume of these droplets significantly enhances reagent concentration, improving penetration into the dense spheroid core [47] [46]. This system functions at kHz frequencies, enabling the high-throughput screening of millions of individual spheroids, which is a substantial advantage over traditional well-plate methods [47].
The technology's compartmentalization nature ensures that secreted molecules from single spheroids remain trapped, quickly reaching detectable concentrations due to the minimal volume. This allows for rapid detection of cellular responses within the spheroids [47]. Furthermore, the controlled environment enables precise manipulation of individual droplets—including merging, splitting, and sorting—based on fluorescent readouts, facilitating complex multi-step assays [48].
Frequently Asked Questions (FAQs)
Q1: How does droplet-based microfluidics improve reagent penetration in spheroids compared to conventional methods? The ultrasmall volume (picoliter to nanoliter scale) of droplets creates a highly concentrated reagent environment. This concentration gradient drives more efficient reagent diffusion into the spheroid core. Furthermore, the ability to perform picoinjection allows you to add permeabilization agents or fresh reagents at defined time points, further enhancing penetration without manual intervention [48] [46].
Q2: My reagents are not penetrating the core of my spheroids. What parameters can I adjust? You can optimize several parameters to improve penetration:
- Droplet Incubation Time: Utilize on-chip delay lines for extended incubation, allowing more time for diffusion [48].
- Reagent Concentration: Leveraging the small droplet volumes, you can significantly increase the effective concentration of staining reagents or permeabilization agents without excessive cost [47] [49].
- Surfactant Choice: The surfactant stabilizing your droplets can affect membrane permeability. Screening different biocompatible surfactants can improve reagent entry into cells [50] [47].
- Physical Stimulation: Application of mild electric fields via electrodes (a technique also used in picoinjection) can temporarily disrupt membranes and improve permeability [48].
Q3: What are the most effective methods for analyzing reagent penetration in spheroids on-chip? Confocal fluorescence microscopy is the gold standard for visualizing penetration depth and distribution within a spheroid. For high-throughput screening, implement laser-induced fluorescence (LIF) detection in your microfluidic setup. This provides a quantitative readout of fluorescence intensity, which can be correlated with penetration efficiency. For multi-parameter analysis, protocols using live/dead stains (e.g., Calcein AM/EthD-1) and nuclear markers (e.g., Hoechst) have been successfully adapted from microtiter plates to the droplet format [48] [49].
Q4: How can I maintain spheroid viability during long-term on-chip incubation? Spheroid viability in droplets is supported by using fluorinated carrier oils, which have high oxygen solubility (approximately 20 times greater than water), ensuring adequate gas exchange. Incorporating biocompatible surfactants (e.g., PEG-based fluorosurfactants) is critical to prevent droplet coalescence without introducing cytotoxicity. For incubations exceeding one hour, off-chip reservoirs can be used to store droplets under controlled conditions before reinjecting them into the analysis chip [47] [48].
Q5: I am encountering issues with spheroid clogging in my microfluidic device. How can I prevent this? To prevent clogging, incorporate passive filters upstream of the droplet generation nozzle. The smallest dimension of these filters should be equal to or smaller than the nozzle width to capture large aggregates before they reach the critical junction. Furthermore, standardizing your spheroid size by using low-cell-attachment U-bottom plates to generate highly uniform spheroids will drastically reduce the risk of clogging [47] [51].
Troubleshooting Guides
Poor Reagent Penetration in Spheroids
| Problem | Possible Cause | Solution |
|---|---|---|
| Incomplete staining in spheroid core | Incubation time too short; Reagent concentration too low; Spheroids too large or dense | Increase incubation time in delay lines; Increase reagent concentration via picoinjection [48]; Standardize spheroid size using low-attachment plates [51] |
| High background signal | Inadequate washing; Non-specific binding of dyes | Implement a droplet splitting and washing protocol; Optimize dye concentration and include blocking agents like BSA in the reagent mix [49] |
| Variable penetration between spheroids | Inconsistent spheroid size; Non-uniform droplet volume | Use low-attachment U-bottom plates for uniform spheroid formation [51]; Ensure stable flow rates for highly monodisperse droplet generation [50] |
Droplet Generation and Stability Issues
| Problem | Possible Cause | Solution |
|---|---|---|
| Unstable droplet formation, coalescence | Incorrect flow rate ratio; Insufficient or unsuitable surfactant | Optimize aqueous-to-oil flow rate ratio; Use biocompatible surfactants (e.g., PFPE-PEG block copolymers) and ensure adequate concentration [50] [47] |
| Low cell viability in droplets | Cytotoxic carrier oil/surfactant; Lack of oxygen | Switch to fluorinated oils with high oxygen permeability and use certified biocompatible surfactants; Ensure proper oil saturation with air [47] [46] |
| Droplets clogging at reinjection | Too much continuous phase during reinjection; Droplet aggregation | Minimize the continuous phase before reinjection to create a compact droplet train; Verify surfactant stability over the incubation period [48] |
Detection and Sorting Problems
| Problem | Possible Cause | Solution |
|---|---|---|
| Weak fluorescence signal | Signal penetration insufficient; Detector sensitivity too low | Use tissue-clearing reagents (e.g., CytoVista) to enhance signal penetration [51]; Optimize detector gain and use high-sensitivity fluorescence detection [48] |
| Low sorting efficiency and purity | Misalignment between detection and actuation; High droplet speed | Calibrate the delay time between detection and actuator trigger; Use synchronization algorithms and consider slightly reducing flow rates for sorting steps [47] [48] |
Experimental Protocols
Protocol 1: On-Chip Viability and Permeability Assay
This protocol details a multiparametric live-cell assay to assess spheroid health and reagent penetration, adapted for droplet-based microfluidics [49].
Workflow Overview:
Materials:
- Spheroids: Pre-formed in Corning ultralow-attachment U-bottom 96-well or 384-well plates [49].
- Staining Cocktail: 2 μM Calcein AM (viability), 3 μM Ethidium Homodimer-1 (EthD-1, cytotoxicity), 33 μM Hoechst 33342 (nuclear stain) [49].
- Carrier Oil: Fluorinated oil with 2% (w/w) biocompatible PEG-PFPE surfactant [47].
- Microfluidic Device: PDMS chip with flow-focusing droplet generator, picoinjector, and delay line.
Step-by-Step Procedure:
- Spheroid Formation: Seed HCT116 cells at 1,500 cells/well in a U-bottom low-attachment plate. Centrifuge at 150 × g for 5 minutes to aggregate cells and culture for 3-7 days, changing half the media every 2-3 days [51] [49].
- Droplet Encapsulation: Introduce the spheroid suspension and carrier oil into the microfluidic device. Using a flow-focusing geometry, generate monodisperse droplets containing single spheroids. Typical flow rates are 1000 μL/h for the oil phase and 300 μL/h for the aqueous phase [47] [46].
- Initial Incubation: Incubate droplets on-chip for the desired period (e.g., 24-48 hours) using a long delay line or by collecting them in an off-chip reservoir.
- Picoinjection of Stains: At the assay endpoint, use picoinjection to merge the droplets with the staining cocktail cocktail. An electric field (e.g., 1-2 kV/cm) applied via electrodes at the picoinjection junction facilitates the injection [48].
- Secondary Incubation: Allow the stained droplets to incubate for 3 hours in a delay line or off-chip to ensure sufficient dye penetration and development [49].
- Imaging and Analysis: Reinject droplets into a confocal imaging chip. Acquire Z-stack images (e.g., 7-11 slices with 10-35 μm spacing) using a 20x objective. Analyze the maximum projection images using custom software modules to quantify spheroid area, live/dead cell counts, and fluorescence intensity profiles [49].
Protocol 2: Enhancing Penetration with Tissue Clearing
This protocol integrates a tissue-clearing step to improve optical clarity and reagent penetration for deeper imaging [51].
Workflow Overview:
Materials:
- Clearing Reagent: Commercial kit such as Invitrogen CytoVista 3D Cell Culture Clearing/Staining Kit [51].
- Antibody Solution: Primary and secondary antibodies diluted in PBS with 5% DMSO (to reduce background) [51].
- Microfluidic Device: Chip with two picoinjection modules.
Step-by-Step Procedure:
- Fixation and Permeabilization: After on-chip culture, picoinject a fixative (e.g., 4% PFA) followed by a permeabilization agent (e.g., 0.5% Triton X-100) into the droplets containing spheroids.
- Clearing Agent Injection: Use a second picoinjector to merge the clearing reagent with the droplets.
- Clearing Incubation: Incubate the droplets for 24-48 hours. If possible, implement gentle agitation to enhance clearing efficiency.
- Antibody Staining: Picoinject the antibody solution into the cleared droplets.
- Antibody Incubation: Incubate for over 12 hours. The combination of clearing and extended incubation is crucial for antibody penetration to the spheroid core.
- Image Acquisition: Perform high-resolution 3D fluorescent imaging. The clearing process enables sharp imaging at depths of up to 1000 μm [51].
Research Reagent Solutions
Table: Essential Reagents for Droplet-Based Spheroid Penetration Assays
| Item | Function | Application Note |
|---|---|---|
| Fluorinated Oil (e.g., HFE-7500) | Carrier phase; High oxygen solubility supports spheroid viability [47]. | Ensure saturation with air/CO₂ for long-term cultures. |
| PEG-PFPE Surfactant | Stabilizes droplets against coalescence; critical for picoinjection and sorting [50] [47]. | Biocompatible formulations are essential for maintaining cell viability. |
| Nunclon Sphera / Corning U-bottom Plates | Generate single, uniform spheroids for consistent encapsulation [51] [49]. | Centrifugation after seeding improves spheroid formation consistency. |
| Calcein AM | Live-cell stain; fluorescent upon hydrolysis by intracellular esterases [49]. | Penetration is slower in 3D; requires longer incubation times (≥30 min). |
| Ethidium Homodimer-1 (EthD-1) | Dead-cell stain; binds nucleic acids upon loss of membrane integrity [49]. | Impermeant to live cells; signal indicates cytotoxic effects. |
| Hoechst 33342 | Cell-permeant nuclear counterstain [49]. | Useful for segmenting individual cells within the spheroid in image analysis. |
| CellEvent Caspase-3/7 | Apoptosis detection; activated upon cleavage by caspases [49]. | Can be combined with viability stains for multiplexed phenotyping. |
| CytoVista Clearing Reagent | Reduces light scattering, improves depth of imaging and antibody penetration [51]. | Requires protocol adaptation for on-chip use; incubation times are long. |
| Finntip Wide Orifice Pipette Tips | Manual handling of formed spheroids without structural damage [51]. | Critical for off-chip protocols and for loading spheroids into syringe pumps. |
Decision Pathway for Penetration Issues
The following diagram provides a systematic approach to diagnosing and resolving the common problem of poor reagent penetration in spheroids.
Optimizing Experimental Protocols and Overcoming Reproducibility Challenges
Controlling Spheroid Size and Compactness for Consistent Diffusion
Key Experimental Variables and Their Effects on Spheroid Properties
The following table synthesizes quantitative data from systematic analyses of over 32,000 spheroid images, detailing how critical experimental parameters influence spheroid size, viability, and structure. These factors directly impact nutrient and reagent diffusion by determining spheroid architecture and density [24].
| Variable | Optimal Range for Consistency | Impact on Spheroid Size & Compactness | Effect on Diffusion & Viability |
|---|---|---|---|
| Oxygen Level | Physiologically relevant (e.g., 3% O₂) | Reduces equivalent diameter and volume [24]. | Increases necrotic core formation and reduces overall cell viability, mimicking in vivo hypoxia gradients [24]. |
| Serum Concentration | 10-20% Fetal Bovine Serum (FBS) | Promotes dense, compact spheroid formation with distinct necrotic and proliferative zones [52] [24]. | Serum-free conditions cause ~3x spheroid shrinkage and cell detachment; 10-20% FBS balances growth and physiological structure [24]. |
| Seeding Density | Cell line-specific (e.g., 2,000-6,000 cells for MCF-7) | Directly controls initial size; high density (6,000-7,000 cells) can cause structural instability and rupture [24]. | Lower densities yield stable but smaller spheroids; optimal density ensures integrity without a disproportionately large necrotic core [52] [24]. |
| Media Composition | Avoid high-glucose variants like RPMI 1640 | Varying glucose and calcium levels significantly affect size, shape, and compactness [24]. | RPMI 1640 increases cell death signals; media composition alters parameter correlations (e.g., diameter vs. solidity) [24]. |
| Fabrication Method | SpheroidSync or low-attachment plates | Methods like SpheroidSync produce highly uniform, spherical spheroids with better structural integrity [53] [54]. | Superior long-term viability and sustained esterase activity, preventing core deterioration and ensuring consistent diffusion profiles [53]. |
Troubleshooting FAQs
1. How does serum concentration specifically affect drug diffusion in my spheroids? Serum concentration is a primary determinant of spheroid compactness. Low or serum-free conditions lead to loose, irregular aggregates with low density, which can cause overestimation of drug penetration [24]. Conversely, concentrations of 10-20% FBS promote the formation of dense, compact spheroids that develop distinct zones—a proliferating outer layer, a quiescent middle layer, and a necrotic core [52] [24]. This architecture creates physiological barriers to diffusion that better mimic in vivo tumors, providing a more accurate assessment of drug penetration and efficacy.
2. My spheroids are too large and develop a large necrotic core. How can I control this? A large necrotic core indicates that your spheroids have exceeded the diffusion limit of oxygen and nutrients. To control this:
- Optimize Seeding Density: Systematically test a range of seeding densities (e.g., 2,000 to 6,000 cells) for your specific cell line. Spheroids formed from very high cell numbers (e.g., 6,000-7,000) are prone to rupture and release necrotic debris [24].
- Control the Culture Time: Monitor spheroid growth over time. Prolonged culture leads to a natural increase in size and a decrease in internal ATP content and viability. Establish an endpoint for your experiments before significant structural degradation occurs [24].
- Consider the Method: Use a reproducible method like the SpheroidSync technique, which enhances uniformity and can help maintain viability over longer cultures, thereby offering a more stable window for experimentation [53].
3. Why are my spheroids irregular and not spherical, and how does this impact my data? Irregular shapes often stem from suboptimal culture conditions or methods.
- Cause: Inconsistent serum levels, inappropriate extracellular matrix (ECM) components for your cell line, or the use of traditional methods like the hanging drop technique which can be labor-intensive and prone to variation [3] [53].
- Impact on Data: Non-spherical spheroids create highly variable diffusion path lengths for reagents, compromising the reproducibility and reliability of penetration studies [53].
- Solution: Ensure serum concentrations are in the 10-20% range and consider adopting more robust methods like low-attachment plates or the SpheroidSync method, which are designed to produce highly uniform and spherical spheroids [53] [24].
Detailed Experimental Protocols
Protocol 1: Generating Uniform Spheroids Using Low-Attachment Plates
This protocol is adapted from studies on pancreatic (PDAC) and breast cancer spheroids, designed for simplicity and reproducibility [3] [55].
- Cell Preparation: Harvest cells from 2D culture and create a single-cell suspension. Determine cell viability using trypan blue exclusion.
- Seeding: Calculate the volume needed to seed the desired cell number (e.g., 2,000-6,000 cells) in a volume of 100-200 µL per well of a 96-well round-bottom ultra-low attachment (ULA) plate.
- Centrifugation: Centrifuge the sealed plate at a low speed (e.g., 300-500 x g for 3-5 minutes) to pellet the cells at the bottom of the well and promote initial cell-cell contact [3].
- Incubation: Culture the plate under standard conditions (37°C, 5% CO₂) for the desired period (typically 3-7 days). For some cell lines like PANC-1, supplementing the medium with 2.5% Matrigel is necessary to promote compactness, whereas for others like BxPC-3, it can induce irregularity [3].
- Monitoring: Use live-cell imaging systems (e.g., Incucyte) or daily microscopy to monitor spheroid formation and growth without disturbing the culture.
Protocol 2: SpheroidSync Method for Enhanced Uniformity and Viability
This innovative protocol combines the hanging drop method with a unique transfer strategy to create highly uniform MCF-7 spheroids without the need for expensive supplements [53] [54].
Hanging Drop Formation:
- Culture MCF-7 cells to 70-80% confluence.
- Create a cell suspension and deposit 58 µL droplets on the lid of a 10 cm Petri dish, with each drop containing 1,500 to 15,000 cells.
- Invert the lid and place it over a PBS-filled bottom dish to prevent evaporation. Incubate for the initial aggregation phase.
SpheroidSync Transfer:
- After spheroid formation in the hanging drops, use a sampler tip with a cut end to gently aspirate the cell sheet (early spheroid) from the droplet, preserving its integrity.
- Transfer the cell sheet into a pre-prepared agarose-coated culture medium. This step circumvents the need for viscosity-increasing agents and mitigates nutrient diffusion issues common in hanging drops [53].
Long-term Culture:
- Culture the transferred spheroids in the agarose medium. This environment supports long-term viability and maintains shape uniformity, as evidenced by sustained intracellular esterase activity and enrichment of cancer stem cell markers like CD44 and ALDH1 [53].
Factors Influencing Spheroid Diffusion Properties
The diagram below illustrates the relationship between key experimental variables and their direct impact on spheroid properties that govern diffusion.
Research Reagent Solutions
The following table lists key materials and their functions for establishing robust spheroid cultures.
| Reagent/Material | Function in Spheroid Culture |
|---|---|
| Round-Bottom ULA Plates | Provides a scaffold-free environment that forces cell-cell contact, promoting spontaneous spheroid formation in a high-throughput format [55] [56]. |
| Matrigel | ECM extract used to increase spheroid compactness and density for certain cell lines (e.g., PANC-1), mimicking the tumor microenvironment [3]. |
| Fetal Bovine Serum (FBS) | Critical supplement that provides growth factors and nutrients to support spheroid health; concentrations of 10-20% promote dense, architecturally defined spheroids [52] [24]. |
| Agarose | Used to coat plates for the liquid overlay method or in the SpheroidSync protocol, creating a non-adhesive surface that prevents cell attachment and facilitates spheroid formation [53]. |
| Collagen I | An alternative ECM component to Matrigel; can induce spheroid compaction and, at higher concentrations, invasive behavior in certain models [3]. |
| CellTiter-Glo 3D Assay | Luminescent assay optimized for 3D models that quantifies ATP content, providing a reliable metric for cell viability within dense spheroids [52] [24]. |
Within the context of a broader thesis on improving reagent penetration in spheroids, understanding and controlling culture conditions is not merely a matter of cell maintenance—it is a fundamental determinant of experimental success. Three-dimensional (3D) spheroids more accurately recapitulate the complex physiology of in vivo tissues, including critical barriers to mass transport such as nutrient gradients, cell-cell interactions, and extracellular matrix (ECM) deposition [1]. These very features that enhance physiological relevance also present significant challenges for the consistent penetration of therapeutic reagents and experimental dyes. The culture environment—specifically oxygen tension, serum concentration, and media composition—directly governs the development of these internal spheroid structures and gradients. By systematically controlling these conditions, researchers can directly influence spheroid architecture, viability, and the diffusion properties that are essential for reliable assessment of drug delivery systems and therapeutic efficacy [1] [24].
Frequently Asked Questions (FAQs) & Troubleshooting Guides
Q1: How do oxygen levels influence reagent penetration in my spheroids?
Answer: Oxygen tension is a pivotal factor that directly shapes the internal spheroid microenvironment, thereby creating physical and metabolic barriers to reagent penetration.
- Low Oxygen (3% O₂): Culturing spheroids under 3% oxygen tension leads to the formation of a more compact structure with reduced overall dimensions. However, this condition also correlates with a significant decrease in cell viability and ATP content, and a heightened necrotic signal in the core [24]. This necrotic core, often enriched with cellular debris, can act as a diffusion barrier, trapping reagents and preventing their uniform distribution throughout the spheroid [57].
- Normoxia (~20% O₂): While spheroids grown under standard oxygen conditions often become larger, they can develop extensive hypoxic and necrotic regions if they exceed a critical size (typically radii beyond 200 μm) due to diffusion limitations [58] [1]. The resulting zonation—with proliferating cells on the outside, quiescent cells in the middle, and a necrotic core—creates a heterogeneous environment where reagents may penetrate and interact differently with each cell population [1].
Q2: My spheroids are not forming compact structures. How does serum concentration affect this?
Answer: Serum concentration is a primary regulator of spheroid compactness and density, which in turn dictates the diffusion path for reagents.
- Low Serum (0-5% FBS): Serum-free or low-serum conditions (≤1%) often result in loose, shrunken aggregates (~200 μm) with low cellular density and poor structural integrity. These spheroids exhibit increased cell detachment and high levels of cell death, which can create irregular pores and pathways that allow non-specific, passive reagent entry but may not accurately model solid tissue barriers [24].
- High Serum (10-20% FBS): Concentrations of 10% and 20% FBS promote the formation of large, dense, and highly compact spheroids. These structures consistently develop distinct concentric zones of proliferation, quiescence, and necrosis [24]. The dense packing of viable cells in the outer rim presents a significant barrier to reagent penetration, making these spheroids excellent for testing the delivery efficiency of nanocarriers and other penetration-enhancing technologies [1] [3].
Q3: I'm getting highly variable spheroid sizes and necrosis. What is the role of media composition?
Answer: The choice of basal media and its components directly impacts spheroid growth kinetics, health, and internal architecture.
- Media Formulation: Different basal media (e.g., RPMI 1640, DMEM, DMEM/F12) support significantly different spheroid growth profiles. For instance, spheroids cultured in RPMI 1640 can exhibit significantly elevated cell death signals compared to other media, while those in DMEM/F12 may show the lowest overall viability [24]. These differences in health and turnover affect the density and composition of the spheroid, altering the diffusion landscape.
- Component Gradients: Media compositions often vary considerably in key components like glucose (typically 2–5 times higher than human plasma) and calcium (often half or lower than plasma levels) [24]. These imbalances can alter cellular metabolism and ECM production, indirectly influencing the tortuosity and charge of the interstitial space through which reagents must travel.
Q4: What is the simplest way to control the size of my spheroids for reproducible penetration studies?
Answer: The most straightforward method is to use low-cell-attachment round-bottom microplates (e.g., 96-well U-bottom plates) and precisely control the initial cell seeding number.
- Method: Utilizing plates with a superior low-binding surface ensures the reliable formation of a single, uniform spheroid per well, minimizing satellite colonies [51].
- Seeding Density: The initial seeded cell number has a profound and direct linear relationship with the final spheroid size. For example, increasing the seeding density from 2,000 to 6,000 cells can lead to a predictable and significant increase in spheroid diameter [24]. This allows researchers to standardize the physical diffusion distance that a reagent must travel, a critical variable for penetration studies. For toxicological assessment, smaller spheroids (~118 μm) with minimal pre-existing hypoxia are recommended for more accurate measurement of treatment response without the confounding variable of a large necrotic core [58].
Data Presentation: Quantitative Effects of Culture Conditions
Impact of Serum Concentration on Spheroid Properties
Table 1: The effect of Fetal Bovine Serum (FBS) concentration on MCF-7 spheroid attributes. Data adapted from a large-scale analysis of spheroid images [24].
| FBS Concentration | Spheroid Size | Compactness/Density | Viability (ATP Content) | Necrotic Zones |
|---|---|---|---|---|
| 0% (Serum-Free) | Small (~200 μm) | Very Low | Very Low (>60% drop vs. high serum) | Absent or poorly defined |
| 0.5% - 1% | Small to Medium | Low | Low | Present, but irregular |
| 5% | Medium | Moderate | Moderate | Beginning to form |
| 10% - 20% | Large | High (Densest) | High (Stable) | Clearly distinct |
Influence of Oxygen Tension on Spheroid Landscape
Table 2: A comparison of spheroid characteristics cultured under normoxic and hypoxic conditions. Data synthesized from experimental studies [24].
| Parameter | Normoxia (~20% O₂) | Hypoxia (3% O₂) |
|---|---|---|
| Spheroid Dimensions | Larger | Reduced |
| Cell Viability | Higher | Significantly Decreased |
| ATP Content | Higher | Significantly Decreased |
| Necrotic Core Signal | Lower | Heightened |
| Utility in Penetration Studies | Models oxygen gradients in larger spheroids | Models chronic hypoxia; compact structure increases diffusion barrier. |
Experimental Protocols for Optimizing Culture Conditions
Protocol: Direct Measurement of Oxygen Gradients using EPR Oximetry
This non-invasive method allows for the quantitative evaluation of oxygen gradients within spheroids, a key parameter for understanding reagent penetration [58].
Key Research Reagent Solutions:
- Paramagnetic Probe: Lithium phthalocyanine (LiPc). Functions as an oxygen sensor; its EPR spectrum linewidth broadens in the presence of oxygen.
- Non-adherent Surface: Poly(2-hydroxyethyl methacrylate) (pHEMA) coated plates or commercial low-cell-attachment plates. Prevents cell attachment, forcing aggregation into spheroids.
- Basal Medium: MEM or other appropriate basal medium, supplemented with serum and other factors as required.
Methodology:
- Probe Preparation: Sonicate LiPc in DPBS for 5 hours at 4°C to yield sufficiently small probe particulates (approx. 11.2 μm) [58].
- Spheroid Formation with Probe:
- Trypsinize confluent monolayer cultures (e.g., RTG-2 cells) and count cells.
- Seed cells into non-tissue culture treated, pHEMA-coated, U-shaped 96-well plates at a defined density (e.g., ~2,500 cells/spheroid for minimal pre-existing hypoxia).
- Add 20 μL of the sonicated LiPc stock solution (0.10 mg/mL) to each well during spheroid formation.
- Centrifuge the plate at a low speed (e.g., 150 x g for 5 minutes) to pellet cells and probe together, promoting aggregation.
- Incubate under standard culture conditions (e.g., 5% CO₂, 19°C for RTG-2) on an orbital shaker [58].
- Oxygen Measurement: After spheroid formation, transfer individual spheroids to a capillary tube for analysis using an EPR spectrometer. The measured linewidth of the LiPc spectrum is directly proportional to the local oxygen concentration [58].
Protocol: Standardized Generation of Dense Spheroids for Nanocarrier Penetration Studies
This protocol is designed to produce dense, reproducible spheroids suitable for evaluating the tissue penetration of nanocarriers (NCs), such as polymeric Pluronic F127-polydopamine NCs [3].
Methodology:
- Cell Preparation: Harvest and count the desired cell lines (e.g., PANC-1 pancreatic cancer cells and human pancreatic stellate cells (hPSCs) for a co-culture model).
- Seeding and Aggregation:
- Mix cells at the desired ratio and seed them into a low-attachment 96-well plate.
- Centrifuge the plate to force cells into close proximity at the bottom of the well, initiating cell-cell contact.
- Promoting Compaction (Cell Line Dependent):
- For loosely-packed cell lines like PANC-1, supplement the culture medium with 2.5% Matrigel to increase spheroid density and uniformity. (Alternative: collagen I can be used but may induce invasiveness [3]).
- For cell lines that naturally form dense spheroids (e.g., BxPC-3), use Matrigel-free medium to maintain regularity.
- Culture and Monitoring: Incubate under standard conditions. Monitor spheroid formation and growth over time using a live-cell analysis system (e.g., Incucyte).
- Penetration Assay:
- Incubate mature spheroids with the fluorescently-labelled NCs or reagents.
- For imaging penetration depth, use light sheet microscopy. Avoid confocal microscopy for this purpose, as it is not suitable for accurate 3D penetration studies in large spheroids due to limited light penetration and scattering [3].
Signaling Pathways and Experimental Workflows
The following diagram illustrates the logical relationship between key culture parameters, their impact on spheroid physiology, and the subsequent effect on the critical outcome for reagent penetration studies.
Three-dimensional (3D) spheroid models have emerged as indispensable tools in cancer research, bridging the gap between traditional two-dimensional (2D) cultures and in vivo tumors. These models better replicate critical tumor characteristics, including structural complexity, cell-cell interactions, and nutrient gradients [59]. The choice of extracellular matrix (ECM) is paramount, as it directly influences spheroid architecture, density, and ultimately, the reliability of downstream applications like drug penetration studies [3]. This guide provides a detailed comparison of two widely used matrices—Matrigel and Collagen—to help researchers optimize spheroid density for improved experimental outcomes.
FAQ: Matrix Selection and Spheroid Density
1. How does matrix composition fundamentally influence spheroid density? The extracellular matrix provides the physical and biochemical microenvironment that guides cell behavior. Matrigel and Collagen I, despite both being common choices, have distinct compositions and mechanical properties that direct spheroid formation down different pathways [3] [60]. Matrigel, a basement membrane extract, is rich in laminin and collagen IV, promoting compact, well-defined spheroid structures. In contrast, Collagen I, a major interstitial matrix component, often results in looser aggregates and can promote invasive phenotypes, directly impacting the final density and compactness of the spheroid [3].
2. Why is my spheroid density inconsistent even when using the same matrix? Spheroid density is highly sensitive to specific experimental conditions. Key variables include:
- Matrix Concentration: For instance, one study found that a minimum of 2.5% Matrigel was required to achieve compact PANC-1 spheroids, while lower concentrations yielded loose aggregates [3].
- Cell Line Characteristics: The inherent biological properties of your cell line are a major factor. Research shows that while PANC-1 cells required Matrigel for compaction, BxPC-3 cells formed dense spheroids without any matrix and produced irregular structures when Matrigel was added [3].
- Serum Concentration: Higher serum concentrations (e.g., 10-20%) generally promote the formation of denser spheroids with distinct proliferative and necrotic zones [24].
3. I am studying drug penetration. Which matrix is more suitable? For drug penetration studies, generating spheroids with high density and compactness is crucial to mimic the diffusion barriers found in solid tumors. Evidence suggests that Matrigel is often the preferred choice for creating these dense, compaction-relevant models. Its composition promotes strong cell-cell adhesion and the formation of tight spheroids that better replicate the physical barrier to drug penetration [3]. Spheroids grown in Collagen may exhibit a more invasive, looser structure, which could underestimate diffusion challenges.
4. Can I combine Matrigel and Collagen in a single experiment? Yes, combining matrices is a sophisticated approach to engineer a more physiologically relevant TME. For example, a study on pancreatic cancer used Matrigel to ensure spheroid compactness while separately using Collagen I to study invasion potential [3]. This strategy allows researchers to independently control structural integrity and migratory behavior within the same model system.
Troubleshooting Guide: Matrix-Related Spheroid Issues
| Problem | Potential Causes | Recommended Solutions |
|---|---|---|
| Low Spheroid Density / Loose Aggregates | • Suboptimal matrix concentration• Cell line incapable of self-aggregation in current matrix• Low serum concentration [24] | • Titrate matrix concentration (e.g., test 1.5%, 2.5%, 4% Matrigel) [3]• Switch from Collagen to Matrigel or a mixed matrix• Increase FBS concentration to 10% |
| Irregular Spheroid Morphology | • Incompatibility between matrix and cell line• Poor homogenization of matrix-cell suspension• Inconsistent polymerization temperature | • Test the alternative matrix; some lines form spheroids in Matrigel but not Collagen, and vice versa [60]• Ensure complete mixing on ice prior to plating• Use a pre-warmed, level incubator for consistent gelation |
| High Central Necrosis | • Spheroids too large for nutrient diffusion• Overly dense matrix impedes medium perfusion• Extended culture time [24] | • Reduce seeding cell number [24]• Consider a slightly lower matrix density or use a scaffold-free method• Shorten the experiment timeline or optimize feeding schedule |
| Poor Drug Penetration in Assays | • Inadequate spheroid compaction failing to create a barrier• Drug properties (size, charge) not suitable for the model [61] | • Use Matrigel to increase spheroid density and compactness [3]• Validate your model with nanoparticles known to have good penetration (e.g., small, negatively charged) [61] |
Quantitative Comparison: Matrigel vs. Collagen I
The table below summarizes key differential characteristics based on current research. These are general trends and should be validated for your specific cell line.
| Parameter | Matrigel | Collagen I |
|---|---|---|
| Major Components | ~60% Laminin, ~30% Collagen IV, growth factors [62] [3] | >95% Collagen I [60] |
| Typical Spheroid Outcome | Compact, dense spheroids [3] | Loose aggregates or invasive structures [3] |
| Effect on Cell Invasion | Generally suppresses single-cell invasion | Promotes invasive, stellate morphologies [3] |
| Matrix Stiffness | Soft, basement membrane-like | Stiffer, tunable via concentration [63] |
| Batch Variability | High (complex, natural composition) [62] | Lower (defined composition) |
| Drug Resistance Modeling | Excellent for modeling physical diffusion barriers | May underestimate penetration resistance |
| Optimal For | Basic compact spheroid formation, drug penetration studies [3] | Studying invasion, metastasis, and matrix remodeling |
Detailed Experimental Protocols
Protocol 1: Generating Dense Spheroids using Matrigel
This protocol is adapted from a study on pancreatic ductal adenocarcinoma (PDAC) spheroids [3].
Workflow Overview
Materials
- Growth Factor-Reduced Matrigel (Corning, Cat #354230): Provides a defined matrix for consistent spheroid formation.
- Low-attachment multi-well plates (e.g., ULA plates): Prevents cell adhesion to the plastic surface, forcing 3D growth.
- Refrigerated centrifuge: For handling Matrigel and cell suspensions.
Step-by-Step Method
- Preparation: Thaw Matrigel overnight at 4°C. Pre-chill all tubes, tips, and a 24-well plate on ice.
- Cell Harvest: Prepare a single-cell suspension of your cancer cell line (e.g., PANC-1) using standard trypsinization. Count cells and resuspend in cold serum-free medium.
- Mixing: On ice, gently mix the cell suspension with cold Matrigel to achieve a final concentration of 2.5% Matrigel and your desired cell density (e.g., 500-5000 cells/50 µL droplet). Avoid introducing bubbles.
- Plating: Quickly pipette 50 µL of the cell-Matrigel mixture into the center of each well of the pre-chilled plate.
- Polymerization: Transfer the plate to a 37°C, 5% CO2 incubator for 15-20 minutes to allow the Matrigel to solidify into a dome.
- Feeding: After polymerization, carefully add 500 µL of pre-warmed complete culture medium along the side of the well to avoid disrupting the dome.
- Culture: Maintain the spheroids at 37°C, changing the medium every 2-3 days. Compact spheroids should form within 3-7 days [3].
Protocol 2: Assessing Spheroid Formation in Collagen I
This protocol is adapted from methods used in liposarcoma and pancreatic cancer research [3] [60].
Workflow Overview
Materials
- Rat Tail Collagen I, High Concentration (Corning, Cat #354236): The primary structural component for the 3D scaffold.
- 10X PBS and 1N NaOH: For neutralizing the acidic collagen solution to a physiological pH.
- Ice bucket and cold tubes: Essential to prevent premature polymerization.
Step-by-Step Method
- Neutralize Collagen: On ice, prepare a collagen working solution by mixing the following components in order:
- Collagen I (to final 3 mg/mL)
- 10X PBS (to final 1X)
- Sterile dH2O
- 1N NaOH (volume determined empirically to achieve a pH of ~7.4). The final solution should be kept ice-cold.
- Cell Harvest: Prepare a single-cell suspension as in Protocol 1.
- Mixing: On ice, quickly mix the cell suspension with the neutralized collagen solution at a 1:1 ratio.
- Plating: For a "collagen layer" method, pipette 1 mL of the mixture into a 12-well plate. For a "droplet" method, use 50 µL per well in a 24-well plate [60].
- Polymerization: Transfer the plate to a 37°C incubator for 30 minutes to allow the collagen to form a gel.
- Feeding: After polymerization, gently add 1 mL (12-well) or 500 µL (24-well) of complete culture medium on top of the gel.
- Culture and Analysis: Culture for up to 14 days, changing medium every 2-3 days. Monitor spheroids for compactness or the emergence of invasive protrusions using microscopy [3].
The Scientist's Toolkit: Essential Research Reagents
| Item | Function in Spheroid Research | Example Application |
|---|---|---|
| Ultra-Low Attachment (ULA) Plates | Provides a scaffold-free environment that promotes cell aggregation by minimizing adhesion to the plate surface. [59] [64] | Generating spheroids from cell lines that naturally form tight aggregates (e.g., BxPC-3) [3]. |
| Poly-HEMA | A cost-effective synthetic polymer used to coat standard tissue culture plates, creating a non-adhesive surface similar to ULA plates. [64] | An accessible alternative to commercial ULA plates for high-throughput screening. |
| Pluronic F127-Polydopamine Nanocarriers | Used to study drug penetration dynamics within dense spheroid models, a key application for these systems. [3] | Testing the efficacy and distribution of nanocarrier-based therapeutics in dense PANC-1 spheroids [3]. |
| hPSC (Human Pancreatic Stellate Cells) | A source of Cancer-Associated Fibroblasts (CAFs) for creating complex, co-culture spheroid models that include stromal components. [3] | Modeling the fibrotic tumor microenvironment of pancreatic cancer in co-culture with PANC-1 cells [3]. |
Frequently Asked Questions (FAQs)
Q1: How do the inherent aggregation properties of a cell line affect reagent penetration in spheroid models?
The inherent aggregation properties of a cell line directly determine the final architecture and density of the spheroid. Cell lines that form dense, compact aggregates create significant physical barriers that can limit the penetration of therapeutic reagents and nanocarriers. For instance, in pancreatic ductal adenocarcinoma (PDAC) models, PANC-1 cells form large, loosely packed aggregates, while BxPC-3 cells naturally form denser, more compact spheroids even without external matrix support [3]. This structural difference profoundly impacts how deeply molecules can diffuse into the spheroid core.
Q2: What are the key differences between 2D culture and 3D spheroids in penetration studies?
Unlike 2D monolayers, 3D spheroids replicate key features of solid tumors that significantly impact penetration, including:
- Chemical gradients leading to spatially heterogeneous oxygenation and pH [3]
- Extracellular matrix (ECM) components that create physical barriers to diffusion [3]
- Cell-cell interactions that mimic the dense architecture of real tumors [3] [65] These factors explain why cells in spheroids demonstrate significantly higher resistance to chemotherapy compared to 2D cultures, more accurately mirroring in vivo drug responses [3].
Q3: How can researchers modulate aggregation properties to improve penetration?
Aggregation can be controlled through:
- Substrate adhesivity: Non-adhesive substrates promote formation of larger, fewer aggregates, while adhesive substrates yield smaller, more numerous aggregates [65]
- Matrix supplementation: Adding Matrigel (2.5% minimum) or collagen I to culture medium increases spheroid uniformity and compaction for some cell lines [3]
- Co-culture systems: Incorporating stromal cells like pancreatic stellate cells better models the tumor microenvironment and affects aggregate properties [3]
Q4: What are the limitations of spheroid models for penetration studies?
Key limitations include:
- Reproducibility challenges across different generation techniques [3]
- Difficulty in imaging and analysis, with confocal microscopy being unsuitable for studying nanocarrier penetration in some models [3]
- Cell line-specific variability in spheroid formation and growth dynamics [3]
Troubleshooting Guides
Problem: Inconsistent Spheroid Formation Across Cell Lines
Issue: Different cell lines from the same experiment form spheroids with dramatically different sizes and compactness.
Solution:
- For loosely-packed aggregates (e.g., PANC-1:hPSC): Supplement culture medium with 2.5% Matrigel to promote compaction [3]
- For overly-dense spheroids: Consider collagen I supplementation (15-60 µg/mL) which can induce invasiveness while maintaining structure [3]
- Optimize cell seeding density using a range from 5×10³ to 50×10³ cells per well in 96-well plates to identify ideal spheroid size [66]
Problem: Poor Reagent Penetration in Dense Spheroids
Issue: Therapeutic agents or nanocarriers fail to penetrate beyond the outer layers of spheroids.
Solution:
- Characterize spheroid density early using live/dead staining to identify necrotic cores indicative of penetration barriers [66]
- Select appropriate cell lines based on aggregation properties - looser aggregates (like PANC-1 with Matrigel) may enable better penetration than inherently dense lines (like BxPC-3) [3]
- Consider nanocarrier properties: Size, surface characteristics, and composition significantly impact penetration capability [67]
Problem: Difficulty Imaging and Quantifying Penetration
Issue: Unable to accurately visualize or measure penetration depth of reagents within spheroids.
Solution:
- Use light sheet microscopy instead of confocal microscopy for better visualization of nanocarrier penetration [3]
- Employ live/dead staining with fluorescein diacetate (FDA) and propidium iodide (PI) to assess viability gradients through spheroid cross-sections [66]
- Utilize multiple analytical techniques including mass spectrometry, flow cytometry, X-ray fluorescence microscopy, and transmission electron microscopy to overcome limitations of any single method [67]
Quantitative Data on Cell Line Aggregation Properties
Table 1: Experimentally Determined Aggregation Properties of Common Research Cell Lines
| Cell Line | Origin | Aggregation Properties | Spheroid Size Range | Key Formation Requirements |
|---|---|---|---|---|
| PANC-1:hPSC | Pancreatic | Large, loosely packed | ~500 µm to ~1 mm diameter [3] | Requires 2.5% Matrigel for compaction [3] |
| BxPC-3:hPSC | Pancreatic | Dense, compact | ~300 µm diameter [3] | Forms dense spheroids without Matrigel [3] |
| F98 | Glioma | Substrate-dependent | Varies with adhesivity [65] | Larger, fewer aggregates on non-adhesive substrates [65] |
| U87-MG | Glioma | Substrate-dependent | Varies with adhesivity [65] | Smaller, more aggregates on adhesive substrates [65] |
| MDA-MB-231 | Breast | Uniform spheroid formation | Size depends on seeding density [66] | Liquid overlay method with agarose coating [66] |
Table 2: Drug Response Comparison Between 2D and 3D Culture Models
| Cell Line | Treatment | 2D IC50 | 3D Spheroid IC50 | Resistance Factor |
|---|---|---|---|---|
| MDA-MB-231 | Cisplatin | Reference | ~4-5 fold higher [66] | 4-5× [66] |
| HeLa | Cisplatin | Reference | ~4-5 fold higher [66] | 4-5× [66] |
| CaSki | Cisplatin | Reference | ~4-5 fold higher [66] | 4-5× [66] |
Experimental Protocols
Protocol 1: Generating Uniform Spheroids Using Liquid Overlay Method
This protocol is adapted from the collagen-embedded 3D spheroid model described for breast and cervical cancer cell lines [66].
Materials Needed:
- 96-well tissue culture plates
- 1% w/v agarose in distilled water
- Complete cell culture medium
- Collagen type I (optional, for embedding)
- 0.1N NaOH, 10X phosphate-buffered saline (PBS)
Procedure:
- Create non-adhesive surface: Coat each well of 96-well plates with 50 µL of 1% w/v agarose and allow to solidify at room temperature [66].
- Seed cells: Trypsinize, count, and prepare cell suspension at appropriate density (5×10³ to 50×10³ cells per well in 100 µL medium) [66].
- Promote aggregation: Centrifuge plates at low speed (180×g) to force cell-cell contact and incubate under standard conditions (37°C, 5% CO₂) [3].
- Monitor formation: Check spheroid formation after 24 hours using microscopic examination.
- Optional embedding: For collagen embedding, mix spheroids with collagen type I pre-gelation mixture and incubate at 37°C for 45 minutes to induce hydrogel formation [66].
- Maintain cultures: Add growth media over formed spheroids and replace every alternate day until ready for experimentation [66].
Protocol 2: Assessing Penetration Efficiency in Spheroids
Materials Needed:
- Fluorescein diacetate (FDA, 5 mg/mL)
- Propidium iodide (PI, 2 mg/mL)
- Serum-free media
- Inverted fluorescence microscope
Procedure:
- Prepare staining solution: Combine 8 µL FDA and 50 µL PI in 5 mL serum-free media [66].
- Stain spheroids: Incubate spheroids with staining solution at room temperature for 10 minutes [66].
- Remove stain: Carefully remove staining solution and wash twice with PBS.
- Image immediately: Visualize using appropriate fluorescence filters (FDA: 488/545 nm; PI: 594/660 nm) [66].
- Analyze penetration: Assess viability gradients - live cells (green fluorescence) versus dead cells (red fluorescence) - to infer penetration barriers.
Signaling Pathways and Experimental Workflows
Diagram 1: Relationship between cell line properties and penetration outcomes.
Diagram 2: Experimental workflow for spheroid generation and penetration studies.
Research Reagent Solutions
Table 3: Essential Materials for Spheroid Penetration Studies
| Reagent/Material | Function | Application Notes |
|---|---|---|
| Agarose (1% w/v) | Creates non-adhesive surface for spheroid formation | Prevents cell attachment to promote cell-cell interactions [66] |
| Matrigel | Basement membrane matrix for spheroid compaction | Use at 2.5% minimum for PANC-1 cells; not needed for BxPC-3 [3] |
| Collagen Type I | Extracellular matrix component for embedding | Induces invasiveness in concentration-dependent manner [3] |
| Fluorescein Diacetate (FDA) | Live cell staining | Penetrates intact membranes, fluoresces green upon enzymatic cleavage [66] |
| Propidium Iodide (PI) | Dead cell staining | Only enters cells with damaged membranes, fluoresces red [66] |
| Pluronic F127-polydopamine NCs | Nanocarrier for drug delivery | Used to study penetration efficiency in spheroid models [3] |
Advanced Analysis and Validation: From Imaging to Clinical Translation
Troubleshooting Guides
Light Sheet Fluorescence Microscopy (LSFM) Troubleshooting
Problem: Non-uniform illumination or shadows in the image.
- Cause 1: The light sheet is not perfectly aligned with the focal plane of the detection objective.
- Solution: Perform a careful alignment procedure. Use fluorescent beads embedded in a gel to visually confirm the co-planarity of the light sheet and the detection focal plane across the entire field of view.
- Cause 2: The sample is scattering or absorbing the light sheet, causing attenuation across the field of view.
- Solution: Implement a multidirectional light sheet approach, if your system allows it, to illuminate the sample from different angles and average out shadowing effects. For cleared tissues, ensure clearing is complete and homogeneous.
Problem: Poor axial resolution.
- Cause: The light sheet is too thick or has an irregular profile.
- Solution: Optimize the light sheet generation optics. Use a virtual light sheet or Bessel beam illumination if available to create a thinner, more non-diffracting beam. Ensure the excitation beam is properly expanded and centered before the cylindrical lens or scanning mirror.
Problem: Low signal-to-noise ratio.
- Cause 1: The camera exposure time or laser power is too low.
- Solution: Gradually increase the laser power, taking care to avoid saturating the camera or bleaching the sample. Increase the camera exposure time, balancing against the need for imaging speed.
- Cause 2: The sample is not properly mounted and is moving during acquisition.
- Solution: Use low-melting-point agarose or other biocompatible hydrogels to immobilize the sample within the imaging chamber. Ensure the sample holder is secure.
Optical Coherence Tomography (OCT) Troubleshooting
Problem: Poor penetration depth in spheroids.
- Cause: High scattering and optical heterogeneity within the dense spheroid structure.
- Solution: While OCT offers superior penetration compared to confocal in scattering tissues, imaging dense spheroids remains challenging. Consider using longer wavelength light sources (e.g., 1300 nm) if available, as they typically experience less scattering in biological tissues.
Problem: Speckle noise obscures structural details.
- Cause: Speckle is an inherent property of coherent light interference in OCT.
- Solution: Apply post-processing algorithms such as digital filtering or compounding techniques (e.g., angular compounding, frequency compounding) to reduce speckle noise and improve image clarity.
Frequently Asked Questions (FAQs)
FAQ 1: Why should I switch from confocal to light sheet microscopy for imaging my 3D spheroids?
Confocal microscopy illuminates the entire thickness of your sample to capture a single optical section, leading to significant photobleaching and phototoxicity, especially in large, sensitive samples like live spheroids [68]. Light sheet microscopy decouples illumination and detection, using a thin sheet of light to only illuminate the plane in focus. This results in:
- Orders-of-magnitude Faster Imaging: An entire plane is captured at once, not point-by-point, enabling rapid volumetric imaging [68].
- Drastically Reduced Photobleaching & Phototoxicity: By illuminating only what you detect, you preserve your sample's viability and fluorescence signal, which is crucial for long-term live imaging [68].
FAQ 2: My spheroids are very thick and scatter a lot of light. Can light sheet microscopy still image them effectively?
Yes, but sample preparation is key. For highly scattering, large spheroids or organoids, the most effective approach is to pair light sheet microscopy with tissue clearing techniques. Clearing renders the tissue transparent by homogenizing its refractive index, allowing the light sheet to penetrate deeply with minimal scattering and absorption. Light sheet microscopy is uniquely suited for imaging large, cleared samples, as it can acquire high-resolution 3D data of an entire mouse brain hemisphere in as little as 30 minutes, a task that would take a confocal microscope weeks [68].
FAQ 3: What is the main advantage of using OCT for spheroid research?
The primary advantage of OCT is its ability to perform label-free, non-invasive imaging of spheroid morphology. It can visualize the overall 3D structure, necrotic core, and surrounding matrix without requiring any fluorescent dyes or tags, which is valuable for monitoring long-term growth and dynamics without pharmacological perturbation [69].
FAQ 4: Can I image the same spheroid with both light sheet and confocal microscopy to compare?
Yes, this is a powerful correlative imaging approach. You can first perform fast, low-phototoxicity 3D imaging with light sheet to get an overview of the entire structure. Then, you can use confocal microscopy on the same spheroid for higher-resolution imaging of specific regions of interest, though this may come with increased photobleaching in the confocal-imaged areas.
Data Presentation
Table 1: Quantitative Comparison of 3D Imaging Modalities
| Feature | Laser Scanning Confocal | Light Sheet Fluorescence Microscopy (LSFM) | Optical Coherence Tomography (OCT) |
|---|---|---|---|
| Imaging Speed (Volumetric) | Slow (seconds to minutes per volume) [68] | Very Fast (milliseconds to seconds per volume) [68] | Ultra-Fast (real-time video rate) |
| Photobleaching/Phototoxicity | High (entire sample illuminated) [68] | Low (only focal plane illuminated) [68] | None (label-free) [69] |
| Penetration Depth | Limited by scattering (up to ~100s of µm) | Good, especially in cleared tissues (millimeters) [68] | Excellent in scattering tissues (1-2 mm) [69] |
| Optical Sectioning Strength | High (via physical pinhole) [70] | High (via geometric light sheet) [68] | High (via coherence gating) |
| Resolution (Lateral/Axial) | High / Good | High / Good (depends on light sheet thickness) | Moderate / High (axial resolution is a key strength) |
| Labeling Requirement | Fluorescent labels required | Fluorescent labels required | Label-free [69] |
| Primary Application in Spheroid Research | High-resolution subcellular imaging of fixed or small live samples | High-throughput, long-term live imaging of large volumes and cleared samples [68] | Label-free monitoring of gross morphology, growth, and dynamics [69] |
Table 2: Key Parameters Influencing Spheroid Integrity for Imaging
The following parameters, identified through large-scale analysis, critically impact spheroid attributes and must be controlled for reproducible and reliable imaging outcomes [24].
| Parameter | Impact on Spheroid Attributes | Recommended Range for Stable Cultures |
|---|---|---|
| Oxygen Level | Significantly affects size and necrosis; 3% O₂ reduces dimensions and increases necrosis [24]. | Physiological levels (1-5%) often preferable to ambient air. |
| Serum Concentration | Dictates architecture; concentrations >10% promote dense spheroids with distinct zones [24]. | 10-20% for dense, structured spheroids. |
| Media Composition | Regulates viability and structural integrity; glucose and calcium levels are critical [24]. | Must be optimized for cell type; often requires high glucose. |
| Initial Seeded Cell Number | Profoundly influences final spheroid size and structural stability [24]. | 2,000 - 6,000 cells for consistent size and structure. |
Experimental Protocols
Protocol 1: Imaging Fixed and Cleared Spheroids with Light Sheet Microscopy
This protocol is designed for high-resolution, high-throughput 3D imaging of spheroids with optimal penetration.
Materials:
- Spheroids: Mature, fixed spheroids.
- Fixative: e.g., 4% Paraformaldehyde (PFA).
- Permeabilization Buffer: e.g., Phosphate-Buffered Saline (PBS) with 0.5% Triton X-100.
- Staining Solution: Primary and secondary antibodies in blocking buffer.
- Clearing Reagent: e.g., CUBIC, Scale, or CLARITY-based solutions.
- Refractive Index Matching Solution: Specific to your clearing protocol.
- Imaging Chamber: Capillary or custom chamber compatible with your LSFM.
- Low-Melt Agarose: 1-2% solution for embedding.
Methodology:
- Fixation: Fix spheroids in 4% PFA for 24-48 hours at 4°C to ensure complete penetration.
- Permeabilization and Staining: Permeabilize with 0.5% Triton X-100 for several hours. Incubate with primary antibodies for 48-72 hours, followed by secondary antibodies for 48-72 hours, all at 4°C with gentle agitation. Note: Staining times are significantly longer than for 2D cultures to allow for full reagent penetration.
- Clearing: Transfer spheroids to your chosen clearing reagent. The incubation time can vary from days to weeks depending on the protocol and spheroid size. The endpoint is when spheroids become visually transparent.
- Embedding and Mounting: Embed the cleared spheroid in a small cylinder of 1-2% low-melt agarose inside the imaging chamber. Fill the chamber with the refractive index matching solution.
- Image Acquisition on LSFM:
- Mount the chamber onto the microscope stage.
- Align the light sheet with the detection focal plane using a bead sample if necessary.
- Set your acquisition parameters (laser power, exposure time, camera gain). Leverage the speed of LSFM to acquire large z-stacks with minimal delay between planes.
- For large samples, use tiling and stitching to create a complete composite image.
Protocol 2: Label-Free Monitoring of Spheroid Morphology with OCT
This protocol is for non-invasively tracking the growth and structural changes of live spheroids over time.
Materials:
- Spheroids: Live spheroids cultured in standard media.
- OCT-Compatible Culture Dish: Glass-bottom dish or specialized well that minimizes optical distortions.
- Phenol-free Media: To reduce background absorption during imaging.
Methodology:
- Sample Preparation: Gently transfer a single spheroid or multiple spheroids into the OCT-compatible dish containing phenol-free media. Ensure the spheroid is settled at the bottom and is not moving freely.
- System Calibration: Perform standard system calibration procedures (e.g., background subtraction, k-linearization) as per your OCT manufacturer's instructions.
- Image Acquisition:
- Place the dish on the OCT sample stage.
- Locate the spheroid using a low-resolution preview scan.
- Define a 3D scan volume that fully encompasses the spheroid.
- Acquire the 3D dataset. Due to the high speed of OCT, this can often be completed in seconds.
- For time-lapse experiments, define the time intervals and total duration, ensuring the environmental chamber (if used) maintains constant temperature and CO₂.
Experimental Workflow Visualization
Diagram: Spheroid Imaging Workflow Selection. This flowchart guides researchers in selecting the optimal imaging modality (LSFM or OCT) based on their experimental goals, whether for high-resolution fluorescence imaging or label-free morphological monitoring.
The Scientist's Toolkit: Research Reagent Solutions
Table 3: Essential Materials for Advanced 3D Spheroid Imaging
This table details key reagents and materials used in the featured experiments for improving reagent penetration and achieving high-quality 3D imaging.
| Item | Function in Spheroid Research | Application Note |
|---|---|---|
| Fetal Bovine Serum (FBS) | Provides essential growth factors and nutrients for cell viability. Concentration dictates spheroid density and architecture [24]. | Use concentrations of 10-20% to promote the formation of dense spheroids with distinct necrotic and proliferative zones [24]. |
| Tissue Clearing Reagents | Renders dense spheroids and organoids transparent by homogenizing refractive indices, allowing deep light penetration for LSFM [69]. | Protocols like CUBIC or CLARITY are essential for imaging spheroids >200 µm. Incubation times must be optimized for spheroid size and cell type. |
| Low-Melting-Point Agarose | A biocompatible hydrogel used to immobilize spheroids for imaging, preventing motion artifacts during long acquisitions. | Use at 1-2% concentration to embed spheroids without inducing hypoxia or damage. Critical for stable mounting in LSFM chambers. |
| Permeabilization Detergent | Creates pores in cell membranes to allow diffusion of large antibody molecules into the core of fixed spheroids. | Concentrations of 0.1-1.0% Triton X-100 are common. Incubation times are drastically longer (days) for 3D samples compared to 2D cultures. |
| OCT-Compatible Media | Phenol-free cell culture medium used during OCT imaging to reduce background signal (autofluorescence & absorption). | Essential for maintaining spheroid viability during long-term label-free time-lapse studies without interfering with the OCT signal. |
FAQs: X-Ray Fluorescence (XRF) Analysis
Q1: What are the most common causes of inaccurate quantitative results in XRF analysis?
Inaccurate XRF results most commonly stem from three areas: improper sample preparation, incorrect instrument calibration, and neglecting matrix effects [71] [72] [73].
- Sample Preparation: The sample must be homogeneous and have a uniform, flat surface. For solids like metals, surface cleaning is vital. For powders, careful crushing and the use of binders to create consistent pellets are necessary to avoid errors from particle size and heterogeneity [71] [72].
- Instrument Calibration: Using an incorrect calibration for your sample type (e.g., using an alloy calibration for soil analysis) will lead to poor results. Regular calibration and verification are essential for maintaining accuracy [71] [72] [73].
- Fundamental Parameters (FP) Method: The FP method allows for standardless quantification but assumes a uniform sample. Errors in input parameters, such as incorrect sample density or wrong balance components (e.g., oxygen, carbon), can cause significant inaccuracies, especially for light elements [73].
Q2: How can spectral interferences be managed in XRF?
Spectral interferences occur when the emission lines of different elements overlap. They can be managed by:
- Using Advanced Software: Modern XRF software includes mathematical tools to deconvolute overlapping peaks [71].
- Upgrading Hardware: High-resolution detectors, such as Silicon Drift Detectors (SDDs), provide better separation of closely spaced spectral lines [71].
- Optimal Measurement Conditions: Adjusting X-ray tube voltage, filters, and measurement time can help improve spectral clarity and reduce the impact of overlaps [71].
Q3: What are the key limitations of XRF analysis that researchers should be aware of?
XRF is a powerful technique but has several key limitations [74]:
- Light Elements: It cannot analyze elements lighter than sodium (Na) effectively, and cannot detect hydrogen (H), helium (He), or lithium (Li) at all.
- Elemental Information Only: XRF provides total elemental composition but cannot distinguish between different oxidation states (e.g., Fe²⁺ vs. Fe³⁺) or molecular structures.
- Surface Analysis: The analysis penetration depth is typically only a few millimeters, making it a surface-level technique.
- Trace-Level Detection: While it can detect parts-per-million (ppm) for many elements, it is generally not suitable for ultratrace (parts-per-billion, ppb) analysis. Techniques like ICP-MS are better for such applications.
Q4: Why is routine maintenance critical for XRF instruments?
Neglecting maintenance leads to degraded performance and unreliable data [71] [72].
- Contamination: The protective cartridge between the sample and the detector accumulates dirt and sample particles. A dirty cartridge can attenuate X-ray signals and introduce contaminants, distorting results. Cartridges must be replaced regularly, sometimes between different sample types [72].
- Component Wear: X-ray tubes and detectors are sensitive. Regular cleaning and professional servicing prevent issues and extend the instrument's lifespan [71].
- Software Updates: Keeping instrument software updated ensures you have the latest bug fixes and performance improvements [71].
FAQs: Mass Spectrometry (MS) Analysis
Q1: A mass spectrometer shows a loss of sensitivity. What is the first thing to check?
The first and most common issue to check is for a system leak [75]. Gas leaks can contaminate the sample, reduce sensitivity, and potentially damage the instrument. Use a leak detector to check the gas supply, gas filters, shutoff valves, EPC connections, column connectors, and weldment lines. Loose column connectors are a particularly frequent source of leaks [75].
Q2: What should I do if no peaks are appearing in my mass spectrometry data?
The absence of peaks typically indicates a problem with the sample reaching the detector or the detector itself [75]. Follow this troubleshooting path:
- Check the Sample Introduction System: Verify that the auto-sampler and syringe are functioning correctly and that the sample is properly prepared [75].
- Inspect the Column: Look for cracks in the column, which would prevent the sample from traveling to the detector [75].
- Verify Detector Function: Ensure the flame is lit (if applicable) and that all gases are flowing at the correct rates [75].
Troubleshooting Guides
XRF Analysis Troubleshooting Guide
Table: Common XRF Errors and Solutions
| Error Symptom | Potential Cause | Recommended Solution |
|---|---|---|
| High results for some elements | Sample is under-concentrated, leading to weak signal [71] | Ensure proper sample preparation for a homogeneous and representative sample [71]. |
| Low results for some elements | Sample is over-concentrated, absorbing too many X-rays [71] | Dilute or prepare the sample to fall within the optimal analytical range [71]. |
| Large scatter in results | Insufficient measurement time [71] [72]; Non-homogeneous sample [74] | Increase measurement time (often 10-30 seconds is needed) [72]; For heterogeneous materials, take 3-5 readings and average them [71]. |
| Inconsistent results between operators | Improper or inconsistent sample preparation [72] | Implement and follow a standardized sample preparation protocol (cleaning, grinding, pelletizing) [71] [72]. |
| Unexpected elements in results | Contamination during sample preparation (e.g., from grinding tools) [71] [72] | Use clean, dedicated tools for different sample types. For light elements, avoid sandpaper which can introduce silicon [72]. |
Mass Spectrometry Troubleshooting Guide
Table: Common MS Errors and Solutions
| Error Symptom | Potential Cause | Recommended Solution |
|---|---|---|
| Loss of sensitivity | Gas leak in the system [75] | Use a leak detector to check gas lines, connections, and column fittings. Retighten or replace components as needed [75]. |
| No peaks | Sample not reaching detector; Detector failure [75] | Check auto-sampler, syringe, and column for issues. Verify detector flame and gas flows [75]. |
| Contaminated sample | System leak; Contaminated gas supply [75] | Check for and fix gas leaks. Replace the gas filter, especially after installing new gas cylinders [75]. |
Experimental Protocols & Workflows
Standard Protocol for Reliable XRF Analysis of Solid Samples
This protocol is designed to minimize errors from sample preparation, a primary source of inaccuracy [71] [72].
- Sample Cleaning (for solid metals/alloys): Clean the sample surface thoroughly with a file to remove any oxidation or coating. Critical: Use different files for different material types (e.g., one for aluminum, another for steel) to prevent cross-contamination [72].
- Powder Preparation (for soils, catalysts, etc.): Crush the sample to a fine, consistent particle size. This is crucial for minimizing heterogeneity and the "mineral effect" [71] [72] [73].
- Homogenization: Mix the powder thoroughly to ensure an even distribution of all elements [71].
- Pelletization (optional but recommended): Mix the powder with a binder (e.g., cellulose) in a consistent ratio and press it into a pellet using a hydraulic press. This creates a flat, uniform surface ideal for analysis [71] [74].
- Instrument Setup:
- Measurement and Data Analysis: Place the sample in the instrument and start the analysis. For non-homogeneous materials, perform 3-5 readings at different locations and average the results [71].
Spheroid Penetration Barriers and Their Impact on Analysis
For research on reagent penetration in spheroids, it is critical to understand that 3D tumor models present formidable barriers not found in 2D cultures [76] [77]. These barriers directly impact the efficacy and analysis of therapeutic agents.
- Physical Architecture: Spheroids have a dense extracellular matrix (ECM) with fibronectin levels elevated up to 33-fold compared to 2D cultures. Combined with high cell packing density (up to 6 × 10⁷ cells/cm³), this creates a major diffusion barrier [76].
- Chemical Gradients: As spheroids grow, they develop steep oxygen and nutrient gradients. The core can become hypoxic (<0.2% O₂) and acidic (pH ~6.5), which can degrade pH-sensitive compounds before they reach their target [76] [24].
- Zonal Heterogeneity: Spheroids develop spatially distinct regions: a proliferative periphery, a quiescent intermediate zone, and often a necrotic core. Cells in these different zones exhibit varying metabolic activity and drug sensitivities [76] [77].
The Scientist's Toolkit: Research Reagent Solutions
Table: Essential Materials for Spheroid and Formulation Research
| Item | Function & Application | Relevance to Penetration Research |
|---|---|---|
| Nanoparticles & Liposomes | Used as drug delivery vehicles to enhance the penetration of therapeutic compounds into the dense spheroid core [76]. | Achieve 3–20-fold penetration improvements, though incomplete release (10–75%) can limit activity [76]. |
| Cyclodextrins | Molecular carriers that can complex with hydrophobic drugs, improving their solubility and diffusion through the aqueous compartments of the spheroid [76]. | Address the "penetration-activity trade-off" for hydrophobic natural products like resveratrol [76]. |
| Culture Media Optimizers (Glucose, Serum) | Media composition critically regulates spheroid viability and structure. Serum concentrations (>10%) promote dense spheroid formation with distinct zones [24]. | Enables the creation of more physiologically relevant models with penetration barriers that mimic in vivo tumors [24]. |
| Oxygen Control Systems | Hypoxic chambers or incubators to control oxygen levels (e.g., 3% O₂). Oxygen tension significantly affects spheroid size, necrosis, and gene expression [24]. | Allows researchers to study drug penetration and efficacy under the hypoxic conditions found in many solid tumors [76] [24]. |
| Stimuli-Responsive Nanocarriers | Advanced formulations designed to release their payload in response to specific microenvironmental triggers like low pH or enzymes [76]. | A key strategy to improve the specificity and efficiency of drug release within the spheroid, overcoming chemical gradient barriers [76]. |
FAQs: Understanding IC50 Shifts in 3D Models
Why do we consistently observe higher IC50 values (reduced drug efficacy) in 3D spheroid models compared to 2D monolayer cultures?
The shift towards higher IC50 values in 3D models is primarily due to limited drug penetration and altered cellular microenvironments not present in 2D systems [78] [1]. In 2D monolayers, every cell is uniformly exposed to the drug concentration in the medium [78]. In contrast, 3D spheroids develop mass transport limitations, where active drug compounds must diffuse through multiple layers of cells. This often results in a therapeutic gradient, where cells in the spheroid core are exposed to sub-lethal drug concentrations, increasing the apparent IC50 [1] [57]. Additional factors include:
- Presence of quiescent cells: The inner regions of spheroids often contain dormant, non-dividing cells that are less susceptible to chemotherapeutic agents [1].
- Hypoxic cores: Larger spheroids develop hypoxic regions that can alter cell metabolism and drug sensitivity [1].
- Cell-cell interactions & ECM deposition: Enhanced survival signaling in 3D architectures increases drug resistance [1] [79].
How does a drug's physicochemical properties influence its penetration and efficacy in spheroids?
A drug's size, charge, and hydrophobicity critically determine its distribution within a spheroid. However, a crucial and often overlooked property is its membrane activity. Research on cell-penetrating peptides (CPPs) has demonstrated that highly membrane-active compounds can become sequestered in the peripheral layers of a spheroid, binding to the first cells they encounter and failing to reach the core. Conversely, compounds with lower membrane activity often show deeper, more uniform penetration and can be more effective in a 3D context [57]. This explains why a drug's performance in simple 2D assays, where sequestration is not a factor, can poorly predict its 3D efficacy.
What are the critical spheroid size considerations for penetration studies?
Spheroid size directly dictates the development of penetration barriers. The table below summarizes key size-dependent physiological changes:
Table 1: Spheroid Size and Physiological Characteristics
| Spheroid Radius (µm) | Cellular Architecture | Penetration & Microenvironment |
|---|---|---|
| < 150-200 | Mostly proliferating cells [1]. | Limited nutrient/oxygen gradients. Many drugs can penetrate effectively [1]. |
| > 200 | Outer rim of proliferating cells, inner region of quiescent cells [1]. | Distinct oxygen/nutrient gradients form. Drug penetration becomes limited [1]. |
| > 400-500 | Proliferating outer rim, quiescent middle layer, and a necrotic core [1]. | Strong diffusion barriers. Central necrosis and hypoxia are present, severely limiting drug access and efficacy [1]. |
Our drug is highly effective in 2D but fails in 3D models. How do we troubleshoot if the issue is penetration versus cellular resistance?
Use this systematic troubleshooting workflow to isolate the cause of failure in 3D models.
Experimental Protocols & Data Analysis
Protocol 1: Standardized IC50 Assay in 3D Spheroids
This protocol ensures reproducible generation and treatment of spheroids for reliable IC50 determination [79].
Materials:
- Cell Line: Choose relevant cancer cell line (e.g., MCF7, LNCaP).
- Low-Adhesion Plates: U-bottom 96-well or 384-well plates to promote spheroid self-assembly [79].
- Extracellular Matrix (ECM): Matrigel or Collagen I for embedded cultures, if used [79].
- Drug Dilutions: Prepare a 10-point, 1:3 serial dilution in culture medium.
- Viability Assay: ATP-based luminescence (e.g., CellTiter-Glo) is recommended.
Method:
- Spheroid Formation:
- Seed cells in low-adhesion U-bottom plates at optimized density (e.g., 1,000-5,000 cells/well for a 96-well format) [79].
- Centrifuge plates at 300-500 x g for 3 minutes to aggregate cells at the well bottom.
- Incubate for 72-96 hours in a humidified incubator (37°C, 5% CO2) to form compact, single spheroids.
- Drug Treatment:
- After spheroid formation, carefully add 100-200 µL of each drug concentration to the wells. Include a DMSO vehicle control.
- Incubate for the desired period (typically 72-120 hours).
- Viability Assessment:
- Add an equal volume of CellTiter-Glo 3D reagent to each well.
- Shake the plate on an orbital shaker for 5 minutes to lyse cells and ensure homogeneous mixing.
- Incubate for 25 minutes at room temperature to stabilize the luminescent signal.
- Record luminescence using a plate reader.
- Data Analysis:
- Normalize viability data to the vehicle control (100% viability).
- Fit the normalized dose-response data to a 4-parameter logistic model (e.g., in GraphPad Prism) to calculate the IC50 value.
Protocol 2: Quantifying Drug Penetration via Imaging
This protocol uses fluorescently tagged drugs or carriers to visualize and quantify penetration depth [57].
Materials:
- Fluorescent Drug/Carrier: e.g., TAMRA-labeled Cell-Penetrating Peptide (CPP).
- Confocal Microscope: With Z-stack and tile-scanning capabilities.
- Analysis Software: e.g., ImageJ (Fiji) or Imaris.
- Fixative: 4% Paraformaldehyde (PFA).
Method:
- Treatment & Incubation: Treat pre-formed spheroids with the fluorescent compound for a set time (e.g., 4-24 hours).
- Washing & Fixation:
- Gently wash spheroids 3x with PBS to remove surface-bound compound.
- Fix spheroids with 4% PFA for 1 hour at 4°C.
- Imaging:
- Transfer spheroids to a glass-bottom dish for imaging.
- Acquire Z-stack images through the entire spheroid diameter using a confocal microscope. Set consistent laser power and gain across all samples.
- Quantitative Analysis:
- Use software like ImageJ to draw concentric circles from the spheroid periphery to the core.
- Measure the mean fluorescence intensity within each annular ring.
- Plot the normalized fluorescence intensity versus the normalized distance from the periphery (0% = periphery, 100% = core).
- Calculate the Penetration Efficiency as the area under the curve (AUC) of this profile or the distance at which fluorescence drops to 50% of its maximum value.
The following table consolidates key quantitative findings on factors causing IC50 shifts between 2D and 3D models, based on computational and experimental studies.
Table 2: Factors Influencing IC50 Shifts from 2D to 3D Models
| Factor | Experimental Observation | Impact on IC50 (3D vs. 2D) | Key Reference |
|---|---|---|---|
| Drug Penetration (Membrane Activity) | Low membrane-active CPPs show deep penetration; high membrane-active CPPs show peripheral sequestration [57]. | IC50 increases significantly for drugs with high peripheral sequestration [57]. | CPC Biomaterials |
| Spheroid Size & Architecture | Spheroids >200µm develop hypoxic, quiescent cores; >500µm develop necrosis [1]. | IC50 increases with spheroid size due to reduced core exposure and altered cell physiology [1]. | PMC3436947 |
| Drug Mechanism of Action | Cytotoxic drugs require direct contact with all cells; anti-mitotic drugs primarily target proliferating cells [78]. | Computational models show anti-mitotic drugs have a larger IC50 shift due to the quiescent cell population in 3D models [78]. | PMC9773863 |
| Culture Complexity (Stromal Co-culture) | Co-culture with fibroblasts (CAFs, HDFs) in ECM (Matrigel/Collagen) further increases model complexity and resistance [79]. | IC50 values are highest in complex 3D models with stromal components and ECM compared to simple 3D monocultures [79]. | Nature Sci. Rep. |
The Scientist's Toolkit: Research Reagent Solutions
Table 3: Essential Materials for 3D Spheroid Penetration and Efficacy Studies
| Reagent / Material | Function / Rationale | Example Use Case |
|---|---|---|
| U-Bottom Low-Adhesion Plates | Promotes the self-assembly of single, uniformly-sized spheroids via forced cellular aggregation [79]. | Standardized IC50 and penetration screening. |
| Fluorescent Tracers (e.g., TAMRA-dextran) | To visualize and quantify diffusion and penetration barriers independent of a drug's specific chemistry [57]. | Validating spheroid integrity and measuring baseline penetration. |
| d-Amino Acid CPPs | Peptides composed of d-amino acids are more resistant to proteolysis, leading to sustained, lower-activity uptake that benefits deep penetration and long-term retention in spheroids [57]. | As a drug carrier to improve delivery to the spheroid core. |
| Inert Alginate Hydrogels | Used in bioreactors for microencapsulation, providing a controlled, inert 3D microenvironment that allows for cell-derived ECM deposition [79]. | Culturing large, stable spheroids for chronic dosing studies. |
| ATP-based Viability Assays (CellTiter-Glo 3D) | Designed to lyse 3D structures and provide a quantitative measure of viable cell mass, correlated with ATP concentration. | Generating dose-response curves for IC50 calculation in 3D models [79]. |
The transition of nanocarrier-based drug delivery systems from promising in vitro results in spheroids to successful in vivo trials is a critical hurdle in oncology research. Three-dimensional spheroids serve as a vital intermediate, modeling the complex physiology of solid tumors—including complex multicellular architecture, barriers to mass transport, and extracellular matrix (ECM) deposition—more accurately than traditional 2D cultures [1]. A nanocarrier's ability to penetrate these spheroid models deeply correlates with its potential to reach the core of a tumor in vivo.
This technical support center addresses the key experimental challenges and questions that arise when benchmarking nanocarriers for in vivo advancement, providing troubleshooting guides and detailed protocols grounded in recent research.
FAQs and Troubleshooting Guides
What are the most critical nanocarrier properties to optimize for improved spheroid penetration?
The penetration efficacy of a nanocarrier into a spheroid is a complex process governed by several interdependent physicochemical properties. The table below summarizes the key characteristics to optimize and the techniques required for their characterization.
Table 1: Critical Nanocarrier Properties for Spheroid Penetration
| Property | Optimal Range for Penetration | Primary Characterization Techniques |
|---|---|---|
| Particle Size | Typically < 100-150 nm [67] | Dynamic Light Scattering (DLS), Centrifugal Liquid Sedimentation (CLS) [80] |
| Surface Charge (Zeta Potential) | Near-neutral or slightly negative [80] | Electrophoretic Light Scattering [80] |
| Surface Hydrophobicity | Moderate to low [80] | Hydrophobic Interaction Chromatography, X-ray Photon Correlation Spectroscopy [80] |
| Morphology | Spherical or other defined shapes (e.g., rods, discs) [80] | Atomic Force Microscopy (AFM), Scanning/Transmission Electron Microscopy (SEM/TEM) [80] |
Troubleshooting Guide:
- Problem: Poor penetration beyond the spheroid's outer proliferating cell layer.
- Potential Cause & Solution: The nanocarrier size may be too large. Optimize synthesis to produce smaller, more monodisperse particles. Fractionation techniques like Asymmetrical Flow Field-Flow Fractionation (AF4) can help obtain a narrow size distribution [80].
- Problem: Nanocarrier aggregation on the spheroid surface.
- Potential Cause & Solution: A highly positive or negative surface charge can cause non-specific binding. Use PEGylation or other surface coatings to achieve a more neutral zeta potential, which reduces aggregation and improves diffusion [80].
How can I quantitatively measure nanocarrier penetration depth in spheroids?
Accurately quantifying penetration is essential for benchmarking. Multiple techniques can be employed, each with its own advantages and limitations.
Table 2: Techniques for Measuring Nanocarrier Penetration in Spheroids
| Technique | Key Application and Output | Key Advantages | Limitations |
|---|---|---|---|
| Optical Fluorescence Microscopy | Provides a direct visualization of the distribution of fluorescently-labeled nanocarriers [67]. | Relatively accessible; allows for 3D reconstruction via confocal microscopy [81]. | Limited resolution and penetration depth of light; can be semi-quantitative without advanced image analysis [67]. |
| Flow Cytometry (of dissociated spheroids) | Quantifies the total amount of nanocarriers associated with the entire spheroid or specific cell populations [67]. | High-throughput, quantitative data. | Loses all spatial distribution information; requires spheroid dissociation which may alter results [67]. |
| Mass Spectrometry | Precisely quantifies the amount of a drug (or nanocarrier component) in different regions of a spheroid [67]. | Highly sensitive and quantitative; does not require a fluorescent label. | Typically requires sectioning of spheroids, destroying the 3D structure; complex sample preparation [67]. |
| X-ray Fluorescence Microscopy | Maps the distribution of elemental tags (e.g., metals in inorganic nanocarriers) within an intact spheroid [67]. | Element-specific, high-resolution, and label-free for certain carriers. | Requires access to a synchrotron facility; not suitable for all nanocarrier types [67]. |
Experimental Protocol: Quantitative Analysis via Confocal Microscopy and 3D Deconvolution This protocol is adapted from a study optimizing a 3D-aggregated spheroid model (3D-ASM) for high-throughput drug screening [81].
- Spheroid Generation: Generate uniform spheroids using a 96-well U-bottom cell-repellent plate. For consistent aggregation, use a spheroid formation medium that may include a low concentration of methyl cellulose (e.g., 1-5 mg/mL) to enhance cell-cell adhesion [82].
- Nanocarrier Incubation: Incubate the mature spheroids with fluorescently-labeled nanocarriers for a predetermined time.
- Washing and Fixation: Gently wash the spheroids with buffer to remove non-internalized nanocarriers. Fix the spheroids using a fixative like 4% paraformaldehyde.
- Immunofluorescence (IF) Staining: Permeabilize the spheroids and perform IF staining. This can include staining for actin (e.g., with phalloidin) to outline the spheroid structure and DAPI for nuclei to visualize the 3D architecture [81].
- Confocal Imaging: Image the entire spheroid using a confocal microscope, taking Z-stacks at regular intervals through the full depth of the spheroid.
- 3D Deconvolution and Analysis: Use image analysis software to deconvolve the Z-stacks and create a 3D reconstruction. The fluorescence intensity of the nanocarrier channel can be measured along a line from the spheroid periphery to its core to generate a penetration profile [81].
Our nanocarrier shows excellent efficacy in 2D culture but fails in spheroids. What could be the reason?
This common issue often stems from the fundamental physiological differences between 2D monolayers and 3D spheroids.
- Cause 1: Limited Diffusion and Penetration. The compact 3D architecture of spheroids, with dense cell-cell contacts and ECM, creates a significant diffusional barrier that is absent in 2D. Your nanocarrier may be unable to reach cells in the inner layers [1] [4].
- Cause 2: The Tumor Microenvironment (TME). Spheroids develop pathophysiological gradients, such as regions of hypoxia (low oxygen) and an acidic pH in the core. These conditions can alter cellular uptake mechanisms and drug efficacy, a phenomenon not observed in 2D [1] [83].
- Cause 3: Differing Cell States. Cells in a spheroid exist in various states: proliferating on the outside, quiescent in the middle, and often necrotic in the core. Your drug may only be effective against rapidly dividing cells, missing the quiescent population that is more prevalent in 3D models [1].
Solution: Use spheroids as a more rigorous, intermediate testing platform. Benchmark your nanocarriers against the parameters in Table 1. Furthermore, after treatment, dissociate the spheroids and analyze cell death in different populations (e.g., via flow cytometry with markers for proliferation and apoptosis) to determine if the efficacy is limited to the outer cell layers.
Experimental Protocols for Key Experiments
Protocol 1: Generating Robust, Uniform Spheroids for High-Throughput Screening
This protocol, optimized for hepatocellular carcinoma (HCC) cell lines, uses a pillar plate and wet chamber system to produce highly reproducible 3D-Aggregated Spheroid Models (3D-ASM) [81].
Research Reagent Solutions:
- U-bottom Cell-Repellent Plate: A 96- or 384-well plate with a specially coated, U-shaped bottom that prevents cell adhesion and forces aggregation into a single spheroid per well [81] [83].
- Extracellular Matrix (ECM) Hydrogel: Matrigel or similar ECM is mixed with cells to provide a more physiological microenvironment and fix the spheroid in place [81].
- Spheroid Formation Medium: Culture medium potentially supplemented with a low concentration of methyl cellulose (1-5 mg/mL) to encourage cell-cell adhesion and discourage monolayer formation [82].
- Automated Cell Spotter: A dispenser capable of accurately and uniformly spotting the viscous cell-hydrogel mixture into the pillar plate (e.g., ASFA Spotter DZ) [81].
Methodology:
- Cell Preparation: Trypsinize, neutralize, and count your cells. Centrifuge the cell suspension to form a pellet [82].
- Cell-Hydrogel Mixing: Resuspend the cell pellet in the spheroid formation medium mixed with ECM hydrogel (e.g., Matrigel) on ice to prevent premature gelation [81].
- Dispensing: Using the automated spotter, dispense the cell-hydrogel mixture onto the pillar plate.
- Icing and Gelation: Place the spotted pillar plate into a specially designed wet chamber. Perform a critical icing step to aggregate the cells into one spot via gravity, followed by an incubation step to facilitate ECM gelation. This two-step process is key to forming stable, uniform spheroids [81].
- Culture: Combine the pillar plate with a standard 384-well plate containing culture medium. Culture the spheroids for the desired time (e.g., 7 days), refreshing the medium as needed [81].
Protocol 2: Evaluating Drug Efficacy and Penetration in a 3D-HTS Setup
This protocol follows the generation of spheroids from Protocol 1 to test drug response [81].
Methodology:
- Drug Preparation: Prepare a serial dilution of the anticancer drug of interest in a 384-well plate.
- Drug Exposure: After spheroids are formed, stamp the pillar plate containing the spheroids into the 384-well drug plate, exposing each spheroid to a different drug concentration.
- Incubation: Incubate the spheroids with the drugs for a predetermined period (e.g., 7 days).
- Viability Assay: After incubation, stamp the pillar plate into a new 384-well plate containing a live-cell staining solution (e.g., Calcein AM). Incubate for 1 hour to stain viable cells [81].
- Imaging and Analysis: Image the spheroids using confocal microscopy. Use 3D deconvolution software to analyze the volume of live cells and generate dose-response curves. Compare the IC50 values obtained from this 3D-HTS method with those from conventional 2D assays; typically, drugs show increased resistance in the 3D model, providing a more clinically relevant efficacy analysis [81].
The Scientist's Toolkit: Research Reagent Solutions
Table 3: Essential Materials and Reagents for Spheroid-Based Nanocarrier Testing
| Item Name | Function and Rationale |
|---|---|
| U-bottom Cell-Repellent Plate | Hydrophilic polymer coating minimizes protein adsorption, forcing cells to aggregate into a single, central spheroid per well, ensuring uniformity [83] [4]. |
| Methyl Cellulose | An inert, viscous polymer added to medium to promote cell-cell adhesion and prevent the formation of monolayers or satellite spheroids [82]. |
| ECM Hydrogel (e.g., Matrigel) | Provides a biologically relevant 3D scaffold that mimics the in vivo extracellular matrix, influencing cell signaling, morphology, and drug penetration [81]. |
| Tri-Gas Incubator | Maintains hypoxic conditions (e.g., 1-5% O₂) critical for inducing a necrotic core and modeling the true hypoxic tumor microenvironment within spheroids [83]. |
| Automated 3D Cell Spotter | Ensures high-throughput, precise, and consistent dispensing of cell-hydrogel mixtures into multi-well plates, vital for assay reproducibility and scalability [81]. |
| Image-iT Hypoxia Reagent | A fluorogenic probe that fluoresces when oxygen levels drop below 5%, allowing for real-time detection and quantification of hypoxic regions in live spheroids [83]. |
Pathways and Workflows
Experimental Workflow for Nanocarrier Benchmarking
This diagram outlines the logical, iterative process of preparing, testing, and analyzing nanocarriers in spheroid models to select lead candidates for in vivo trials.
Nanocarrier Optimization Pathway for Spheroid Penetration
This diagram visualizes the interconnected strategies for optimizing nanocarrier design to overcome specific barriers within the spheroid and tumor microenvironment.
Conclusion
Enhancing reagent penetration in spheroids is not a single challenge but a multifaceted problem requiring an integrated approach. Success hinges on a deep understanding of the spheroid microenvironment, the intelligent design of nanocarriers and reagents, meticulous optimization of culture conditions, and rigorous validation with advanced analytical tools. The strategies outlined here—from leveraging size-dependent nanoparticle penetration to employing perfused microfluidic systems—collectively bridge a critical gap in preclinical research. By adopting these physiologically relevant models and techniques, the field can significantly improve the predictive accuracy of drug screening, reduce late-stage clinical failures, and accelerate the development of novel nanotherapeutics that can effectively overcome the complex barriers presented by solid tumors.
References
- 1. Opportunities and Challenges for use of Tumor Spheroids as Models... [https://pmc.ncbi.nlm.nih.gov/articles/PMC3436947/]
- 2. of applying multicellular tumor Challenges in preclinical... spheroids [https://cancerci.biomedcentral.com/articles/10.1186/s12935-021-01853-8]
- 3. A 3D spheroid model for assessing nanocarrier-based ... [https://www.nature.com/articles/s44385-025-00041-x]
- 4. in Challenges – faCellitate spheroid research [https://facellitate.com/challenges-in-spheroid-research/]
- 5. HCS-3DX, a next-generation AI-driven automated 3D-oid ... [https://www.nature.com/articles/s41467-025-63955-5]
- 6. Validating Cell-Based Assays for Use with 3D Cultures [https://www.genengnews.com/resources/validating-cell-based-assays-for-use-with-3d-cultures/]
- 7. A multicellular brain spheroid model for studying the ... [https://www.nature.com/articles/s41598-023-50203-3]
- 8. A modular and reconfigurable microfluidic device for culturing ... [https://pmc.ncbi.nlm.nih.gov/articles/PMC12352930/]
- 9. Protocol for AI-assisted quantitative analysis and setup of ... [https://pmc.ncbi.nlm.nih.gov/articles/PMC12547721/]
- 10. Challenges and Opportunities Associated With Drug Delivery ... [https://pmc.ncbi.nlm.nih.gov/articles/PMC10497757/]
- 11. Extracellular Matrix Signaling Cues: Biological Functions ... [https://pmc.ncbi.nlm.nih.gov/articles/PMC12271642/]
- 12. Extracellular matrix [https://en.wikipedia.org/wiki/Extracellular_matrix]
- 13. Biology of the Extracellular Matrix: An Overview - PMC [https://pmc.ncbi.nlm.nih.gov/articles/PMC4185430/]
- 14. Extracellular matrix structure [https://www.sciencedirect.com/science/article/abs/pii/S0169409X15002574]
- 15. Increased nanoparticle penetration in collagenase-treated ... [https://pmc.ncbi.nlm.nih.gov/articles/PMC2673974/]
- 16. Extracellular matrix density regulates the formation of tumour ... [https://pmc.ncbi.nlm.nih.gov/articles/PMC7968691/]
- 17. Extracellular matrix regulation of cell spheroid invasion in a ... [https://www.sciencedirect.com/science/article/abs/pii/S1742706124004215]
- 18. Development of small molecule inhibitors of ECM collagen ... [https://pubs.rsc.org/en/content/articlelanding/2025/md/d5md00284b]
- 19. Advances, challenges, and future directions in the clinical ... [https://www.sciencedirect.com/science/article/abs/pii/S0169409X24001698]
- 20. Fluorescent Molecular Probe for Imaging Hypoxia in 2D ... [https://pmc.ncbi.nlm.nih.gov/articles/PMC12053547/]
- 21. Frequently asked questions in hypoxia research - PMC [https://pmc.ncbi.nlm.nih.gov/articles/PMC5045069/]
- 22. Tumor-on-a-chip: a microfluidic model to study cell response ... [https://pmc.ncbi.nlm.nih.gov/articles/PMC6785375/]
- 23. Analytic Models of Oxygen and Nutrient Diffusion, Metabolism ... [https://pmc.ncbi.nlm.nih.gov/articles/PMC5029285/]
- 24. Influence of experimental variables on spheroid attributes [https://www.nature.com/articles/s41598-025-92037-1]
- 25. Spheroid preparation and immunofluorescence protocol. [https://www.abcam.com/en-us/technical-resources/protocols/spheroid-preparation-and-immunofluorescence-protocol]
- 26. Formulation Strategies for Immunomodulatory Natural ... [https://www.mdpi.com/1999-4923/17/10/1258]
- 27. Cell Adhesion Mediated Drug Resistance (CAM-DR) [https://pmc.ncbi.nlm.nih.gov/articles/PMC5550098/]
- 28. Cancer-stromal interactions: Role in cell survival ... [https://pmc.ncbi.nlm.nih.gov/articles/PMC3230306/]
- 29. Nanocarrier strategies for deep tumour penetration [https://pubs.rsc.org/en/content/articlehtml/2025/lp/d5lp00154d]
- 30. Developments in nanotechnology approaches for the ... [https://pmc.ncbi.nlm.nih.gov/articles/PMC12090476/]
- 31. In vitro methodologies to evaluate nanocarriers for cancer ... [https://cancer-nano.biomedcentral.com/articles/10.1186/s12645-025-00321-6]
- 32. Three-Dimensional In Vitro Tumor Spheroid Models for ... [https://pmc.ncbi.nlm.nih.gov/articles/PMC10571930/]
- 33. Nanocarrier‐Based Systems for Targeted Delivery [https://pmc.ncbi.nlm.nih.gov/articles/PMC12371215/]
- 34. Lecithin-modified hybrid nanocarriers for enhanced ... [https://www.sciencedirect.com/science/article/abs/pii/S0168365925006418]
- 35. Advances in targeted therapy for tumor with nanocarriers [https://www.sciencedirect.com/science/article/pii/S2590006425001413]
- 36. Three-Dimensional Spheroids as In Vitro Preclinical ... [https://www.mdpi.com/1999-4923/12/12/1186]
- 37. Tumor organoid-immune co-culture models - Nature [https://www.nature.com/articles/s41420-025-02407-x]
- 38. A 3D tumor spheroid model with robust T cell infiltration for ... [https://www.sciencedirect.com/science/article/pii/S258900422501257X]
- 39. Stromal cells regulate mechanics of tumour spheroid - PMC [https://pmc.ncbi.nlm.nih.gov/articles/PMC10585335/]
- 40. Modulating extracellular matrix stiffness: a strategic ... [https://www.nature.com/articles/s41419-024-06697-4]
- 41. Dynamic cell patterning and photopolymerization with ... [https://www.sciencedirect.com/science/article/abs/pii/S1742706125008438]
- 42. Gravity-Based Flow Efficient Perfusion Culture System for ... [https://pmc.ncbi.nlm.nih.gov/articles/PMC8533112/]
- 43. Time-resolved non-invasive metabolomic monitoring of a ... [https://www.nature.com/articles/s41598-020-79693-1]
- 44. Advantages and challenges of microfluidic cell culture in ... [https://www.sciencedirect.com/science/article/pii/S0956566314005302]
- 45. Droplet-based cell viability assay for analysis of spheroid ... [https://pubs.rsc.org/en/content/articlehtml/2025/lc/d5lc00495k]
- 46. Droplet-Based Microfluidics: Applications in Pharmaceuticals [https://pmc.ncbi.nlm.nih.gov/articles/PMC10385691/]
- 47. Single-cell analysis and sorting using droplet-based ... [https://pmc.ncbi.nlm.nih.gov/articles/PMC4128248/]
- 48. Essential Microfluidic Techniques for Droplet Manipulation [https://www.ufluidix.com/microfluidics-applications/droplet-microfluidics/droplet-manipulation/]
- 49. High-Content Assays for Characterizing the Viability and ... [https://pmc.ncbi.nlm.nih.gov/articles/PMC4556086/]
- 50. Review on Droplet-based Microfluidics – A Complete Guide [https://www.fluigent.com/resources-support/expertise/white-papers/microfluidic-white-paper-droplet-based-microfluidics/]
- 51. Spheroid Cell Culture – Practical solutions for frequently ... [https://cellculturedish.com/spheroid-cell-culture-practical-solutions-for-frequently-asked-questions/]
- 52. What 32000 3D Spheroids Revealed About Culture ... [https://www.promegaconnections.com/what-32000-3d-spheroids-revealed-about-culture-conditions/]
- 53. SpheroidSync as edge cutting transfer strategy for uniform and ... [https://pmc.ncbi.nlm.nih.gov/articles/PMC12638756/]
- 54. SpheroidSync as edge cutting transfer strategy for uniform ... [https://pubmed.ncbi.nlm.nih.gov/41271864/?utm_source=no_user_agent&utm_medium=rss&utm_campaign=pubmed-2&utm_content=1PsNRxjiL26fMVfhrDtLYKB1O6QZLASTfxwTGnHpg8mn90aQ-S&fc=20250727011803&ff=20251122174705&v=2.18.0.post22+67771e2]
- 55. Spheroid-Based 3D Models to Decode Cell Function and ... [https://pmc.ncbi.nlm.nih.gov/articles/PMC12606745/]
- 56. Three-dimensional spheroid models for cardiovascular ... [https://pmc.ncbi.nlm.nih.gov/articles/PMC12270648/]
- 57. Penetration in 3D tumor spheroids and explants [https://www.sciencedirect.com/science/article/pii/S0005273618300877]
- 58. Direct Measurements of Oxygen Gradients in Spheroid ... [https://pmc.ncbi.nlm.nih.gov/articles/PMC4764677/]
- 59. Mimicking the Complexity of Solid Tumors: How Spheroids ... [https://pmc.ncbi.nlm.nih.gov/articles/PMC11987746/]
- 60. Comparison of three-dimensional cell culture techniques ... [https://www.frontiersin.org/journals/cell-and-developmental-biology/articles/10.3389/fcell.2024.1362696/full]
- 61. Nanoparticle accumulation and penetration in 3D tumor ... [https://pmc.ncbi.nlm.nih.gov/articles/PMC11802510/]
- 62. Comparative Analysis of 3D Culture Methodologies in ... - PMC [https://pmc.ncbi.nlm.nih.gov/articles/PMC11952452/]
- 63. Matrix confinement modulates 3D spheroid sorting and ... [https://www.sciencedirect.com/science/article/abs/pii/S1742706124001260]
- 64. Impact of different 3D culture environments on spheroid ... [https://bmcresnotes.biomedcentral.com/articles/10.1186/s13104-025-07524-5]
- 65. Experimental and modeling study of the formation of cell ... [https://pmc.ncbi.nlm.nih.gov/articles/PMC7001941/]
- 66. Collagen-Embedded Three-Dimensional Spheroid Model ... [https://pmc.ncbi.nlm.nih.gov/articles/PMC12587204/]
- 67. Size-dependent penetration depth of colloidal ... [https://www.sciencedirect.com/science/article/pii/S0169409X2500078X]
- 68. Light Sheet vs. Confocal Microscopy for 3D Imaging [https://lifecanvastech.com/light-sheet-vs-confocal-microscopy-for-3d-imaging/]
- 69. Imaging 3D cell cultures with optical microscopy - PMC [https://pmc.ncbi.nlm.nih.gov/articles/PMC12402705/]
- 70. Optical sectioning methods in three-dimensional bioimaging [https://www.nature.com/articles/s41377-024-01677-x]
- 71. Avoiding Common Pitfalls in XRF Analysis [https://www.vrxrf.com/avoiding-errors-in-xrf-analysis/]
- 72. Top 5 most common mistakes made by beginners when ... [https://elvatech.com/top-5-most-common-mistakes-made-by-beginners-when-operating-a-handheld-xrf-analyzer/]
- 73. What Are the Causes of Errors in FP Quantitative Results? [https://www.malvernpanalytical.com/en/learn/knowledge-center/insights/xrf-fp]
- 74. What XRF Can and Can't Analyze: A Guide for Beginners [https://rigaku.com/products/xrf-spectrometers/learning/blog/what-xrf-can-and-cannot-analyze-a-guide-for-beginners]
- 75. A Guide To Troubleshooting Mass Spectrometry [https://gentechscientific.com/a-guide-to-troubleshooting-mass-spectrometry/]
- 76. Formulation Strategies for Immunomodulatory Natural ... [https://pmc.ncbi.nlm.nih.gov/articles/PMC12567283/]
- 77. Modeling Tumor Microenvironment Complexity In Vitro [https://www.mdpi.com/2073-4409/14/10/732]
- 78. Comparison of Drug Inhibitory Effects (IC50) in Monolayer and ... [https://pmc.ncbi.nlm.nih.gov/articles/PMC9773863/]
- 79. Comparative analysis of 2D and 3D tumor models for drug ... [https://www.nature.com/articles/srep28951]
- 80. Nanocarrier Drug Delivery Systems: Characterization ... [https://pmc.ncbi.nlm.nih.gov/articles/PMC9026217/]
- 81. Optimization of 3D-aggregated spheroid model (3D-ASM) ... [https://www.nature.com/articles/s41598-022-23474-5]
- 82. An Efficient and Flexible Cell Aggregation Method for 3D ... [https://pmc.ncbi.nlm.nih.gov/articles/PMC5564434/]
- 83. Advanced Research Using Spheroid Culture [https://www.thermofisher.com/us/en/home/life-science/cell-culture/cell-culture-learning-center/cell-culture-resource-library/cell-culture-transfection-application-notes/harnessing-new-dimensions-research-coming-round-spheroid-culture.html]