Comprehensive Cleaning Protocols for Biological Safety Cabinets: From Basic Procedures to Evidence-Based Validation
This article provides researchers, scientists, and drug development professionals with a complete guide to establishing and validating effective cleaning protocols for Biological Safety Cabinets (BSCs).
Comprehensive Cleaning Protocols for Biological Safety Cabinets: From Basic Procedures to Evidence-Based Validation
Abstract
This article provides researchers, scientists, and drug development professionals with a complete guide to establishing and validating effective cleaning protocols for Biological Safety Cabinets (BSCs). It covers foundational principles of BSC operation and contamination risks, detailed step-by-step cleaning and disinfection methodologies, troubleshooting for common issues, and a comparative analysis of disinfectant efficacy based on recent scientific studies. The content synthesizes manufacturer guidelines, institutional safety protocols, and peer-reviewed research to offer evidence-based strategies for preventing cross-contamination, ensuring personnel safety, and maintaining the integrity of sensitive cell-processing and microbiological work.
Understanding Biological Safety Cabinets: The Critical Role of Cleaning in Containment
The Function and Importance of BSCs in Laboratory Safety
Biological Safety Cabinets (BSCs) are engineered enclosures that provide a critical primary barrier between laboratory personnel and potentially hazardous biological agents. By utilizing High-Efficiency Particulate Air (HEPA) filters and controlled airflow patterns, they create a contained workspace essential for modern research, clinical diagnostics, and pharmaceutical development [1] [2]. Their function extends beyond personnel protection to also safeguarding the experimental sample integrity and the external environment from contamination [3] [4]. Within the specific context of research on cleaning protocols, the BSC itself becomes both the object of study and a vital tool, ensuring that decontamination methodologies are tested in a controlled and safe manner. This technical support center addresses the key operational, troubleshooting, and procedural questions researchers encounter while integrating BSCs into their experimental workflows.
Troubleshooting Guides
Q1: The airflow alarm on my BSC is activated. What steps should I take?
An activated airflow alarm indicates a potential compromise in cabinet containment, which requires immediate and careful action.
- Step 1: Cease all work immediately. Stop your experiment as soon as it is safe to do so. Do not ignore the alarm [5].
- Step 2: Check the alarm panel. Consult the BSC's interface for an error code or message that can specify the issue, such as low inflow velocity, high sash, or a system failure [5] [6].
- Step 3: Refer to the user manual. The manufacturer's manual will provide specific troubleshooting steps for the displayed error code.
- Step 4: Safely back out. If the alarm persists, slowly and carefully remove your arms and materials from the cabinet, ensuring not to disrupt the remaining airflow barrier further. Seal any biohazardous materials [7].
- Step 5: Report and quarantine. Report the issue to your lab manager or biosafety officer. The BSC should be taken out of service until a qualified technician can diagnose and repair the fault. Do not attempt to use the cabinet until it has been recertified [5].
Q2: I suspect my BSC's HEPA filters are clogged. What are the signs and solutions?
HEPA filters have a finite lifespan and can become loaded with particles over time, reducing the cabinet's performance and safety.
Signs of a Clogged Filter:
- A noticeable reduction in airflow velocity, often indicated by the cabinet's gauges or alarms [5].
- Increased noise from the cabinet's blower as it works harder to maintain airflow [5].
- Inability to maintain proper face velocity during annual certification [7].
- Visible damage or an unusual odor, though these are less common [5].
Solutions:
- Cease use and contact a qualified technician. Filter replacement is not a user-level task. The BSC must be decontaminated, typically with formaldehyde gas, before any filter work is performed [7] [5].
- Adhere to a preventative maintenance schedule. Filters should be tested during annual certification, and replaced as needed based on performance metrics, not a fixed timeline [7] [6].
Q3: My experiments are consistently showing contamination. Could my aseptic technique or BSC be the cause?
Consistent contamination points to a breach in sterile procedure, which could involve both user technique and cabinet status.
Investigate Your Aseptic Technique:
- Movement: Ensure you are using slow, deliberate movements to avoid creating turbulent air currents that can pull contaminated air into the work zone [7] [8] [4].
- Organization: Keep "clean" and "dirty" (contaminated) items clearly separated within the cabinet. Do not pass contaminated materials over clean items [7].
- Placement: Perform all work at least 4 inches inside the cabinet window and avoid blocking the front and rear grilles [7].
- Preparation: Place all necessary items inside the cabinet before starting work and minimize the frequency of moving arms in and out [7] [4].
Investigate Your BSC's Status and Placement:
- Certification: Confirm the BSC has a current certification (within the last year) for HEPA filter integrity and airflow velocity [7] [9].
- Location: The BSC should be placed away from doors, high-traffic areas, and air conditioning vents, as these can create disruptive drafts [7] [9].
- Purge Time: Allow the BSC to run for at least 5-15 minutes with no activity before beginning work to purge airborne contaminants from the work area [7] [9] [4].
Frequently Asked Questions (FAQs)
Q1: What is the proper daily cleaning protocol for a BSC within a research context?
A rigorous daily cleaning protocol is fundamental for preventing contamination and ensuring reproducible results in cleaning research.
- Pre-cleaning: Turn on the cabinet and allow it to run for a minimum of 5 minutes to purge airborne particles [9] [4].
- Surface Disinfection: Thoroughly wipe all interior surfaces—work surface, side walls, and back wall—with a disinfectant such as 70% ethanol or a suitable alternative. Use a clean cloth or paper towel, moving from the cleanest area (typically the top) towards the drain [7] [9].
- Post-cleaning: After the disinfection contact time, a rinse with sterile water may be necessary to remove corrosive disinfectant residues. Wipe the surfaces dry [7] [4].
- Final Purge: After cleaning, let the cabinet run for 2-3 more minutes before shutting it down to remove any dislodged particles [7].
Q2: How often should a BSC be certified, and what does the process involve?
Certification is not optional; it is a mandatory requirement for safety and data integrity.
- Frequency: BSCs must be certified at the time of installation, after being moved, after any internal servicing or filter replacement, and at least annually thereafter [7] [10].
- Process: Performed by a qualified technician, certification involves several key tests [7] [10]:
- HEPA Filter Integrity Test: Verifies there are no leaks in the HEPA filter.
- Airflow Velocity Tests: Measures inflow (air drawn into the front) and downflow (air flowing down onto the work surface) velocities to ensure they meet specifications.
- Draft Inflow Visualization (Smoke Test): Visually confirms that air from the room flows into the cabinet front without escaping.
- Particle Count Test: Determines the air quality and cleanliness level inside the cabinet.
Q3: Is it safe to use a Bunsen burner inside a Class II BSC?
No. The use of an open flame, such as a Bunsen burner, is strongly discouraged within a Class II BSC [7] [9]. The heat from the flame creates convective currents that disrupt the critical laminar airflow, potentially compromising both personnel and product protection. It also poses a fire hazard. Alternatives like flameless electric incinerators or disposable sterile loops should be used for sterilization within the cabinet [7].
Q4: What is the role of UV lights in BSC decontamination?
UV lights can serve as an optional supplementary decontamination method but must never be relied upon as the primary means of disinfection [7] [8].
- Function: UV irradiation can help maintain surface decontamination between uses and can reach difficult-to-access areas [8].
- Limitations and Safety:
- Effectiveness requires direct, uninterrupted line-of-sight and is reduced by dust or shadows [7].
- UV lamps must be cleaned weekly with 70% ethanol and tested periodically to ensure sufficient energy output [7].
- The UV light must never be on while the room is occupied, as exposure can cause severe skin burns and eye damage [7] [4].
- The cabinet's sash must be closed when the UV light is on to contain hazardous UV illumination [7].
Experimental Protocols for Cleaning Research
For researchers developing and validating new cleaning protocols, the following methodologies provide a standardized framework for evaluating disinfectant efficacy within a BSC environment.
Protocol 1: Quantitative Surface Decontamination Efficacy
This protocol tests the log reduction of a microbial population on BSC surfaces after disinfectant application.
- Objective: To quantitatively determine the efficacy of a disinfectant against specific bacterial or fungal spores on stainless-steel coupons simulating a BSC work surface.
- Materials:
- Sterile stainless-steel coupons (e.g., 2cm x 2cm)
- Test organism suspension (e.g., Bacillus subtilis spores, ~10^6 CFU/mL)
- Disinfectant solutions under test (e.g., 70% Ethanol, fresh bleach solution)
- Neutralizing broth (to halt disinfectant action)
- Sterile swabs or contact plates
- Incubator and materials for colony counting
- Methodology:
- Inoculation: Apply a known volume (e.g., 10µL) of the test organism suspension onto the center of each coupon and allow to dry completely inside the BSC.
- Application: Apply the test disinfectant to the inoculated surface for a predetermined contact time (e.g., 1, 5, 10 minutes), ensuring full coverage.
- Neutralization: After contact time, immediately neutralize the disinfectant by adding neutralizing broth or using a pre-moistened neutralizing swab.
- Sampling and Enumeration: Vigorously swab the entire surface of the coupon and transfer the swab to a known volume of neutralizer. Serially dilute and plate for viable colony count.
- Control: Include a positive control (inoculated, not disinfected) and a negative control (non-inoculated) to validate the method.
- Data Analysis:
Calculate the log reduction using the formula:
Log Reduction = log10(Control CFU) - log10(Test CFU after disinfection)A effective disinfectant should demonstrate a ≥3-log (99.9%) reduction under the tested conditions.
Protocol 2: Aerosol Containment Validation during Cleaning Procedures
This experiment assesses whether aerosol-generating cleaning activities compromise the BSC's containment.
- Objective: To verify that simulated cleaning actions (e.g., spraying, vigorous wiping) do not cause the release of aerosolized particles from within the operating BSC.
- Materials:
- Aerosol generator (nebulizer) and non-pathogenic tracer organism (e.g., Bacillus atrophaeus)
- Microbial air samplers (e.g., slit-to-agar samplers or gelatin filters)
- Culture media and incubator
- Methodology:
- Setup: Place an air sampler immediately outside the BSC's front opening and another inside the laboratory room.
- Aerosol Generation: Inside the operating BSC, use the nebulizer to generate an aerosol of the tracer organism for a fixed duration.
- Simulated Cleaning: Simultaneously, perform the cleaning action being tested (e.g., spray disinfectant onto a cloth inside the BSC, then wipe surfaces).
- Air Sampling: Run the external and room air samplers throughout the aerosol generation and cleaning procedure.
- Analysis: Incubate the air sampler collection media and count the resulting colonies.
- Data Analysis: Compare the colony counts from the samplers placed outside the BSC to those from a control sampler placed inside the BSC during the test. Effective containment is demonstrated by a significant reduction (ideally, zero growth) in the external samplers, confirming that aerosols were not released.
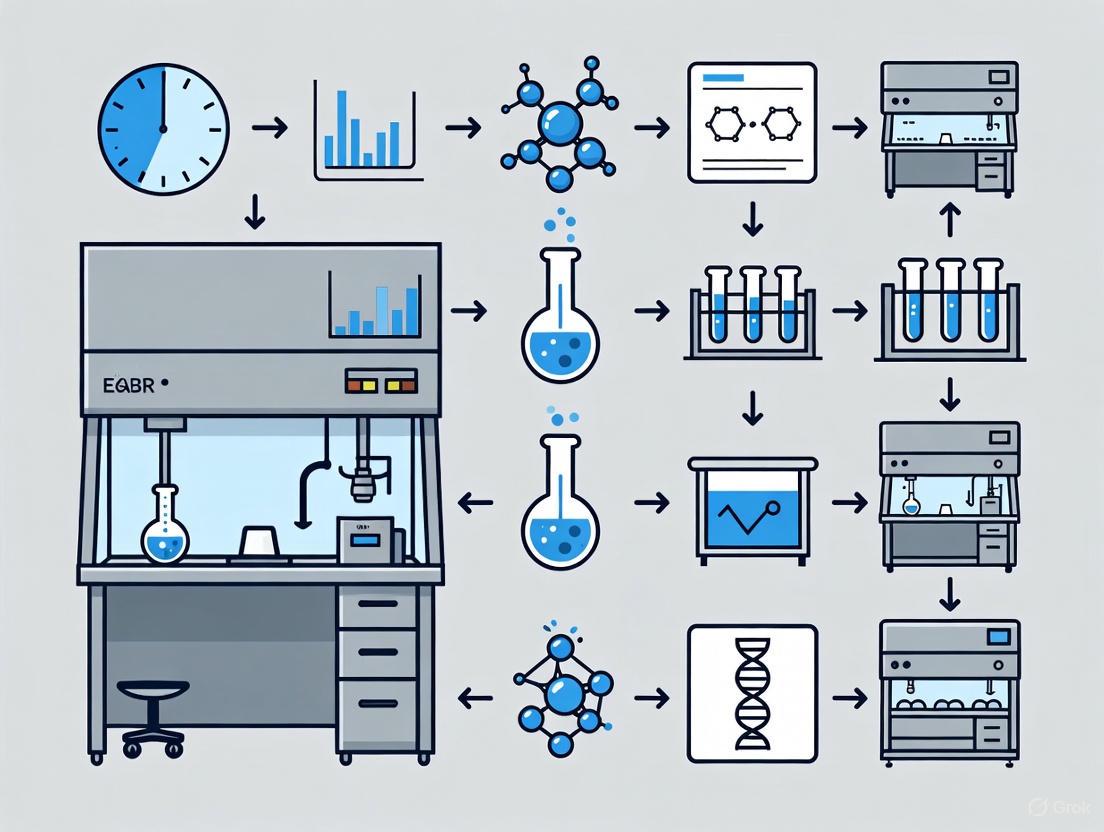
The logical workflow for designing and executing these cleaning validation experiments is outlined below.
Research Reagent Solutions for BSC Cleaning Studies
The following table details key materials and reagents used in experimental protocols for evaluating BSC decontamination.
| Reagent/Material | Function in Experiment | Key Considerations |
|---|---|---|
| 70% Ethanol | A common disinfectant for routine surface decontamination; effective against many bacteria and fungi. | Evaporates quickly, no residue; not sporicidal; can damage some plastics over time [8] [4]. |
| Sodium Hypochlorite (Bleach) | A strong oxidizing agent used for broad-spectrum disinfection, including sporicidal activity. | Corrosive to stainless steel; must be rinsed with sterile water or ethanol after use; concentration and contact time are critical [7] [9]. |
| Stainless-Steel Coupons | Inert, non-porous surfaces used to simulate the BSC work surface for standardized efficacy testing. | Easy to clean, autoclave, and reusable; representative of the actual cabinet material [10]. |
| Neutralizing Broth | Used to halt the antimicrobial action of disinfectants at the end of the contact time for accurate microbial counting. | Essential for obtaining valid quantitative data; must be validated for the specific disinfectant used. |
| Bacillus subtilis spores | A common biological indicator for validating sporicidal activity due to their high resistance to disinfectants. | Provides a rigorous challenge for testing the efficacy of a decontamination protocol [4]. |
| HEPA/ULPA Filters | The primary containment engineering control that removes airborne particles and microorganisms. | Must be integrity tested annually; requires professional decontamination before replacement [7] [6]. |
FAQs: Understanding and Mitigating Contamination Risks
1. What are the most common sources of contamination in a Biological Safety Cabinet (BSC)?
The most common sources come from both the laboratory environment and researcher practices:
- Airborne Microorganisms: Non-sterile ambient laboratory air and personnel are key sources. Humans constantly shed skin cells covered in bacteria [11].
- Improperly Disinfected Materials: Any items brought into the BSC, including equipment and containers, can introduce contaminants if not properly disinfected [11].
- Poor Work Practices: Rapid movements, working with the BSC sash at the wrong height, and cluttering the work surface can disrupt airflow and compromise the protective barrier [12] [11].
- Inadequate Cleaning: Failure to decontaminate all interior surfaces (sides, back, and underside of the view screen) before and after work leads to cross-contamination [12].
2. How does a BSC's airflow protect my samples and me, and what can compromise it?
A Class II BSC, the most common type, provides protection through a balanced system of HEPA-filtered air [13] [11]:
- Inflow: Room air is drawn in through the front grille, creating a barrier that protects the researcher from aerosols generated inside the cabinet.
- Downflow: HEPA-filtered air is blown vertically down onto the work surface, protecting samples from airborne contaminants in the room.
- Exhaust: Contaminated air from the work area is HEPA-filtered before being exhausted back into the room or to the outside.
This balance is compromised by: blocking the front or rear grilles with materials [11], using the BSC for storage [11], placing the cabinet in a high-traffic area where people walking by create cross-drafts [12], and raising the sash above its designated operating height [12].
3. Are UV lights an effective method for decontaminating a BSC?
No, ultraviolet (UV) lights are not a reliable primary method for decontamination. Experts advise that good chemical disinfection is much more effective [13] [12]. UV light has poor penetrating power and only works on surfaces directly in its line of sight, not on contaminants underneath materials or in shadows. Dust and other materials can condense on the bulb, reducing its effectiveness, and its germicidal function diminishes over time [12]. Therefore, UV is not a substitute for aseptic technique and thorough chemical disinfection.
4. What is the proper sequence for cleaning and decontaminating a BSC?
A systematic protocol is essential to prevent spreading contaminants [14]:
- Prepare: Before starting, gather all necessary cleaning supplies. Operators should wipe their gloves with 70% Isopropyl Alcohol (IPA) to avoid introducing contaminants [14].
- Apply Disinfectant: Use an appropriate disinfectant (e.g., a 1:10 fresh bleach solution). To avoid aerosolizing contaminants, do not spray corrosive disinfectants liberally; instead, use a squirt bottle or apply the disinfectant to a cloth [12].
- Wipe Systematically: Clean all interior surfaces in a specific order: top to bottom and from the cleanest to the dirtiest areas (typically back to front, and from one side to the other) [14]. This workflow ensures that any dislodged contaminants are moved toward the front grille and away from sterile areas.
- Rinse (if needed): If using a corrosive disinfectant like bleach, follow with a rinse of 70% ethanol or sterile water to prevent damage to the BSC's stainless steel surfaces [12].
- Final Steps: Remove waste and gloves properly, and wash hands upon completion [15].
Troubleshooting Guides
Problem: Consistent Sample Contamination
Potential Causes and Solutions:
| Potential Cause | Diagnostic Steps | Corrective Action |
|---|---|---|
| Compromised HEPA Filters | Check certification sticker; filters require integrity testing annually [13]. | Contact a certified professional to test and replace filters if needed [13]. |
| Improper Aseptic Technique | Review workflow: are you moving from "clean to dirty" and using slow, deliberate motions? [11] | Re-train on aseptic technique. Ensure all items are disinfected before entering BSC [11]. |
| Blocked Airflow | Inspect front and rear grilles for obstructions like papers or supplies [11]. | Remove all items blocking the grilles. Never use the BSC for storage [11]. |
| Inadequate Surface Decontamination | Review cleaning SOP. Are all surfaces, including hard-to-reach areas, being wiped? [12] | Use a tool like a Swiffer-style mop handle to properly clean the back and sides of the BSC [12]. |
Problem: A Large Spill of Biohazardous Material Occurs Inside the BSC
Immediate Action Protocol:
- Contain: Immediately cover the spill with absorbent towels or pads soaked in an appropriate disinfectant. Let it sit for the required contact time (e.g., 15-20 minutes for bleach) to ensure decontamination [11].
- Clean: While wearing gloves and other appropriate PPE, carefully wipe up the spill, working from the edges toward the center to avoid spreading. Place all cleanup materials in a biohazard bag [11].
- Decontaminate: Thoroughly clean the entire spill area and any other potentially contaminated surfaces with disinfectant. If the spill reached the drain valve or under the work surface, these areas must also be decontaminated [12].
- Dispose: Seal the biohazard bag inside the BSC. Never place waste from a spill outside the cabinet during cleanup [11].
Problem: The BSC Alarm Sounds or Airflow Feels Abnormal
Steps to Take:
- Immediate Action: Stop all work inside the cabinet. Inform your lab manager and contact your institutional biosafety officer or maintenance department [13].
- Do Not Use: The BSC must not be used until a qualified professional can test and re-certify it [13]. Using an uncertified or malfunctioning BSC provides a false sense of security and poses a significant safety risk.
Experimental Data on Airborne Contamination
A study measured Total Airborne Bacteria (TAB) concentrations in front of 11 BSCs at universities and hospitals to assess if TAB is a good indicator of BSC performance [16]. The results showed no significant difference in TAB concentrations between accredited (passed performance tests) and non-accredited BSCs, indicating that TAB concentration outside the BSC is not a reliable index of its containment performance [16].
Table: Total Airborne Bacteria (TAB) Concentrations in Laboratory Settings [16]
| Sampling Condition | TAB Concentration Range (CFU/m³) | Mean TAB Concentration (CFU/m³) |
|---|---|---|
| BSC Off, Shield Open | 21 to 702 | 164 |
| BSC Off, Shield Closed | 28 to 543 | 182 |
| BSC On and Operating | 57 to 205 | Not Reported |
| Background (Room Center) | 14 to 386 | 146 |
Research Reagent Solutions for Decontamination
Table: Essential Materials for BSC Decontamination and Cleaning
| Item | Function | Key Consideration |
|---|---|---|
| 70% Isopropyl Alcohol (IPA) | Effective disinfectant for routine surface decontamination; evaporates quickly without residue [14]. | Used to wipe gloves before starting work and for general surface disinfection [14]. |
| Sodium Hypochlorite (Bleach) | Broad-spectrum disinfectant at a 1:10 dilution; effective against viruses, bacteria, and fungi [12]. | Corrosive; surfaces must be rinsed with 70% ethanol or sterile water after use to prevent damage [12]. |
| Ethanol (70%) | Effective disinfectant; less corrosive than bleach [12]. | Often used as a rinse after bleach disinfection or as a primary disinfectant for certain applications [12]. |
| Wipes (Lint-Free) | For applying disinfectants; lint-free material prevents introducing new particles into the critical work zone [11]. | |
| Swiffer-Style Mop Handle | Allows for safe and effective cleaning of hard-to-reach areas at the back and sides of the BSC without the user having to lean in [12]. | Important for maintaining a consistent cleaning protocol for all interior surfaces [12]. |
Workflow for Contamination Control
The following diagram illustrates the critical "clean-to-dirty" workflow that must be followed when setting up and working within a BSC to maintain aseptic conditions and prevent cross-contamination.
Within life sciences research, Biological Safety Cabinets (BSCs) serve as a critical engineering control, providing a protected environment for working with biohazardous materials. The integrity of this containment is fundamentally dependent on the correct cleaning and maintenance of its key physical components. A single compromised surface or a clogged filter can break the chain of containment, jeopardizing both experimental validity and personnel safety. This article examines the cleaning protocols for five essential components—the work surface, walls, sash, front grille, and HEPA filters—framing them not as routine chores but as foundational practices for rigorous and reproducible science.
▎Troubleshooting Guides & FAQs
Work Surface and Interior Walls
Q: What is the proper technique for disinfecting the work surface and walls, and why does the order of wiping matter?
A systematic wiping technique is crucial to prevent the spread of contaminants from dirtier areas to cleaner ones.
- Protocol: Disinfect all interior surfaces, including the work surface, side walls, back wall, and the interior of the glass sash, before and after each use [17] [9]. The established methodology is to wipe in a consistent order: top to bottom and from the cleanest areas to the dirtiest [18]. This prevents contaminants from higher or dirtier surfaces from being transferred to already-cleaned zones.
- Troubleshooting: If you notice persistent contamination in cell cultures after working in the BSC, it may be due to improper disinfection. Ensure the disinfectant remains in contact with the surface for the full manufacturer-recommended contact time to be effective [17]. Avoid spraying disinfectants directly inside the BSC, as aerosolized chemicals can corrode sensitive components like HEPA filters; instead, apply the disinfectant to a wipe or use pre-moistened wipes [17].
Q: How do I prevent corrosion on the stainless steel work surface?
Certain disinfectants, while effective, can damage the cabinet over time.
- Protocol: A common and effective method is a two-step process: wipe down the interior with a disinfectant like a 1:10 fresh bleach solution, then follow with a rinse wipe using 70% ethanol or sterile water to remove corrosive residues [7] [6] [19].
- Troubleshooting: If you observe discoloration or pitting on the stainless steel, it is likely caused by the prolonged presence of corrosive disinfectants like bleach or iodine. Consistent use of a second wiping with ethanol or water is required to prevent this damage [7] [6].
Sash and Front Grille
Q: Why is it critical to keep the front grille unobstructed?
The front grille is the intake for the cabinet's airflow, which creates the vital air barrier protecting the user.
- Protocol: Never place supplies, notes, or any other items on or over the front intake grille or the rear exhaust grille [7] [17]. Maintain a clear pathway for air to flow into the grille unimpeded.
- Troubleshooting: A disrupted air curtain can allow contaminants to escape. If your BSC alarm triggers for low airflow, or if you see smoke tests during certification failing to be contained, immediately check for and remove any blockages at the front grille [20].
Q: What are the key points for cleaning the sash and the area around the front grille?
These areas require careful attention to maintain a sealed and clean environment.
- Protocol: The interior of the glass sash should be included in the standard wiping procedure [17]. When cleaning the basin or underside of the work surface near the grille, use heavy, disinfectant-soaked wipes or towels rather than lightweight ones. This prevents them from being sucked into the cabinet's riser, which would necessitate a major decontamination [7].
- Troubleshooting: If lightweight wipes are drawn into the riser, the BSC will require formal decontamination with formaldehyde gas and recertification before it can be used again, a costly and time-consuming process [7].
HEPA Filters
Q: How does routine cleaning impact the longevity and function of the HEPA filters?
HEPA filters are the final barrier preventing contaminated air from escaping. Proper cleaning protects them from damage.
- Protocol: Avoid using corrosive chemicals and never spray aerosolized disinfectants inside the BSC, as these can degrade the filter media and its seals [7] [17]. Decontaminate the entire cabinet before any internal filter servicing to protect the technician [7].
- Troubleshooting: HEPA filters cannot be cleaned and must be replaced when they become clogged or damaged. If the BSC's airflow monitor indicates a problem, or if certification fails the integrity test, the filters likely need replacement. This must be performed by a qualified technician after cabinet decontamination [7] [21].
Q: What is the certification schedule for HEPA filters?
Regular certification is non-negotiable for safety.
- Protocol: BSCs must be tested and certified upon installation, after being moved, after any filter service, and at least annually thereafter [7] [9] [21]. This ensures airflow velocity, integrity, and containment are all within specifications.
- Troubleshooting: Operating a BSC without a current certification is a significant safety risk. Laboratory managers must arrange for annual certification through a qualified vendor [7] [21].
▎Experimental Data on Cleaning Efficacy
The following table summarizes quantitative data from a controlled study that evaluated the effectiveness of different cleaning methods against specific contaminants in a BSC environment [22].
Table 1: Efficacy of BSC Cleaning Methods Against Various Contaminants
| Cleaning Method | Mycoplasma orale | Feline Calicivirus (FCV) | Endotoxins (E. coli) | Notes / Key Findings |
|---|---|---|---|---|
| UV Irradiation (200 mJ/cm²) | Inhibited growth | Eliminated (Below detection limit) | No significant reduction | Ineffective on endotoxins; direct exposure required for microbes. |
| Wiping with Benzalkonium Chloride (BKC) | Inhibited growth | Eliminated (Below detection limit) | Significantly reduced | Showed broad efficacy across all tested contaminant types. |
| Wiping with 70% Ethanol (ETH) | Growth detected | Not specified in results | No significant reduction | Ineffective against mycoplasma and endotoxins in this study. |
| Wiping with Distilled Water (DW) | Not specified | Eliminated (Below detection limit) | Significantly reduced | Effective for virus and endotoxin removal, but not antimicrobial. |
Source: Adapted from ScienceDirect, 2024 [22]
▎BSC Surface Cleaning and Contaminant Removal Workflow
The diagram below outlines the logical decision-making process for selecting a cleaning method based on the target contaminant, derived from experimental evidence [22].
▎The Scientist's Toolkit: Essential Research Reagent Solutions
Table 2: Key Reagents for BSC Cleaning and Decontamination
| Reagent / Material | Primary Function | Key Considerations |
|---|---|---|
| 70% Ethanol (ETH) | Rapid evaporation and broad-spectrum disinfection for routine surface cleaning. | Ineffective against mycoplasma and endotoxins per some studies; requires corrosion follow-up if used after bleach [22] [19]. |
| Benzalkonium Chloride (BKC) | Broad-efficacy disinfectant. | Shown in studies to be effective against mycoplasma, viruses, and to reduce endotoxins [22]. |
| Sodium Hypochlorite (Bleach) | Strong oxidation for potent disinfection, often used at 1:10 dilution. | Corrosive to stainless steel; must be followed by a rinse wipe with ethanol or sterile water [7] [6]. |
| Distilled Water (DW) | Rinsing agent to remove disinfectant residue and prevent corrosion. | Not a disinfectant on its own, but effective for physical removal of some contaminants like endotoxins [22]. |
| HEPA Filter | Final barrier for particulate containment; cannot be cleaned. | Requires annual certification and replacement by a qualified technician after formal decontamination [7] [21]. |
A guide to ensuring your biological safety cabinet remains a safe and compliant primary barrier.
Biological safety cabinets (BSCs) are fundamental engineering controls in laboratories working with biohazardous materials. Their primary function is to provide three-way protection: for the personnel, the product, and the environment [17] [23]. Maintaining this protection is not just a matter of best practice—it is a requirement enforced by a robust framework of standards and regulations. This technical support center outlines the mandatory requirements and procedures to keep your BSC safe and compliant.
FAQs: Decontamination & Certification
Q1: What is the difference between daily cleaning, decontamination, and certification?
These are three distinct levels of maintenance, each with a specific purpose:
- Daily Cleaning: A routine surface disinfecting process performed by the user before and after each work session to remove general contaminants and maintain a sterile work area. It typically involves wiping surfaces with an appropriate disinfectant like 70% ethanol or a fresh 1:10 bleach solution followed by a rinse to prevent corrosion [7] [17] [24].
- Decontamination: A deeper process that eliminates viable biological agents. This can be a surface-level "deep cleaning" or a full gas decontamination that fumigates the entire interior, including plenums and filters. Gas decontamination uses chemical sterilants like chlorine dioxide, hydrogen peroxide vapor, or formaldehyde and must be performed by qualified professionals [25].
- Certification: A rigorous performance verification conducted by an accredited professional to ensure the BSC meets all manufacturer and standard (e.g., NSF/ANSI 49) operational specifications. This includes testing airflow velocities, HEPA filter integrity, and containment [26] [23].
Q2: When is gas decontamination of a BSC mandatory?
A risk assessment or specific regulations dictate the need for gas decontamination. According to industry standards, it is required in the following situations [25]:
- Before changing HEPA filters.
- Before any maintenance, repair, or replacement of internal BSC components.
- Before the cabinet is relocated or moved.
- Before final decommissioning, disposal, or surplus of the cabinet.
- After significant spills if surface decontamination is considered insufficient.
- Before field certification of cabinets used in BSL-3 (recommended) and BSL-4 (required) facilities.
Q3: What are the key regulatory triggers for BSC certification?
Certification is not a one-time event. The following table summarizes the mandatory triggers as outlined by multiple safety sources [7] [24] [26].
| Trigger | Regulatory/Safety Basis |
|---|---|
| Initial Installation | Ensures correct assembly and calibration before first use [26] [23]. |
| Annually | Required by CDC/NIH BMBL, NSF/ANSI 49, and other guidelines to verify ongoing performance [7] [23]. |
| After Relocation | Any movement can affect airflow balance and cabinet integrity [24] [26]. |
| After Filter Changes/Servicing | Verifies that the cabinet is safe and operational post-repair [7] [26]. |
| Following Contamination Incidents | Confirms the cabinet is safe to resume use after a significant spill [26]. |
Q4: Can I use a Bunsen burner or ultraviolet (UV) light in my BSC?
- Bunsen Burners: The use of open flames is strongly discouraged and is prohibited in many institutions [24] [23]. The flame creates turbulence that disrupts the protective air curtain, compromises containment, and the heat can damage HEPA filters [7] [24]. Alternatives include micro-burners with pilot lights, disposable loops, or small electric incinerators [7] [24].
- UV Lights: UV lamps are not recommended nor required by the CDC and NIH if proper aseptic technique is followed [7] [23]. Their effectiveness is limited by dust, lamp age, and humidity. They also pose a safety hazard to skin and eyes and should never be on while the room is occupied [7].
Troubleshooting Common BSC Issues
Problem: The BSC fails certification due to low inflow or downflow velocity.
- Possible Cause 1: Blocked front intake grille or rear exhaust grill. Even a single piece of paper can disrupt airflow [23].
- Solution: Ensure nothing is placed over the grilles. Organize supplies to keep them clear [17].
- Possible Cause 2: Overloading the cabinet with equipment or supplies.
- Possible Cause 3: Disruptive room air currents.
- Possible Cause 4: Failure of the blower motor or a clogged HEPA filter.
Problem: Contamination is suspected in cell cultures processed within the BSC.
- Possible Cause 1: Improper aseptic technique or workflow.
- Possible Cause 2: Inadequate surface decontamination.
- Possible Cause 3: Contaminated stored supplies.
- Solution: Do not use the BSC for storage. All extra supplies should be kept outside the cabinet [7].
The Scientist's Toolkit: Essential Reagents & Materials
The table below lists key materials required for the proper daily maintenance and decontamination of a biological safety cabinet.
| Item | Function & Application |
|---|---|
| 70% Ethanol or Isopropyl Alcohol (IPA) | Common disinfectant and rinse agent. Effective for general surface decontamination and for removing corrosive residues from bleach [7] [17] [27]. |
| Sodium Hypochlorite (Bleach) | A strong oxidizing agent used as a disinfectant, typically diluted 1:10. Effective against a broad spectrum of microorganisms. Must be rinsed with ethanol or sterile water after use to prevent corrosion of stainless steel surfaces [7] [24]. |
| Sterile Water | Used as a rinse after applying corrosive disinfectants like bleach to remove residues that could damage the cabinet [7] [9]. |
| Wipes (Heavy-weight, Lint-free) | For applying disinfectants. Heavy-weight wipes are recommended to prevent them from being drawn into the cabinet's internal riser, which would require major decontamination [7]. |
| Reach-Assisting Tool (e.g., Swiffer, extendable mop) | Allows for safe and thorough cleaning of all interior surfaces, including the back wall, without the user having to place their head inside the BSC [17] [24]. |
BSC Decontamination & Certification Workflow
The following diagram illustrates the logical workflow for maintaining a biological safety cabinet, from daily operations to mandatory professional interventions.
Experimental Protocol: Standard Surface Decontamination
This detailed methodology outlines the proper procedure for decontaminating the interior surfaces of a BSC.
Objective: To remove and inactivate biological contaminants from all accessible interior surfaces of the biological safety cabinet, ensuring a sterile work environment for personnel and product protection.
Materials:
- Appropriate disinfectant (e.g., 1:10 fresh bleach, or a laboratory-validated disinfectant)
- 70% Ethanol or Isopropyl Alcohol (in a squirt bottle or as pre-wetted wipes)
- Heavy-weight, lint-free wipes
- Reach-assisting tool (e.g., Swiffer, extendable mop)
- Biohazard bag for waste
- Personal Protective Equipment (PPE): lab coat, gloves, and safety glasses
Methodology:
- Preparation: Turn on the BSC and allow it to run for at least 5 minutes to purge stagnant air and airborne particles [7] [9]. Don appropriate PPE. Ensure the sash is at the correct operational height [17].
- Remove Materials: Remove all items from the cabinet, including racks, trays, and waste containers. Decontaminate the outer surfaces of any items that will remain near the BSC [17].
- Apply Disinfectant: Apply the primary disinfectant to all interior surfaces, including the work surface, side walls, back wall, and the interior of the glass view screen. Do not spray disinfectant directly into the cabinet, as aerosolized chemicals can damage HEPA filters and components. Instead, apply the disinfectant to a wipe or use a squirt bottle aimed at the wipe [17].
- Systematic Wiping: Wipe all surfaces using a systematic pattern—top to bottom and from the cleanest area to the dirtiest—to avoid recontaminating cleaned areas [9] [27]. Use the reach-assisting tool to clean the back wall and upper areas without leaning into the cabinet.
- Contact Time: Ensure all surfaces remain wet for the full contact time specified by the disinfectant manufacturer to achieve effective kill [17].
- Rinse (if required): If using a corrosive disinfectant like bleach, perform a second wiping with 70% ethanol or sterile water to remove residual chlorine and prevent corrosion of stainless steel surfaces [7] [24].
- Final Steps: Place all used wipes and cleaning materials into a biohazard bag for disposal. Allow the BSC to run for 2-3 more minutes with no activity to purge any dislodged particles before beginning work or shutting down [7].
Personal Protective Equipment (PPE) and Preparatory Steps for Safe Cleaning Operations
Frequently Asked Questions (FAQs)
What is the minimum PPE required for cleaning a Biological Safety Cabinet (BSC)? At a minimum, you must wear a lab coat and gloves (pulled over the cuff of the lab coat) [17] [15]. Depending on the biological agents used and the disinfectants selected for cleaning, additional PPE such as eye or face protection may be warranted based on a risk assessment [17] [28].
How long should the BSC blower run before I start cleaning or working? Operate the cabinet blowers for at least 3 to 5 minutes before you begin work or cleaning procedures [15] [29]. This purge time allows the cabinet to remove airborne contaminants and establish proper airflow patterns [7].
Why shouldn't I use spray bottles to apply disinfectant inside the BSC? Aerosolizing disinfectant via spraying is not recommended because it can damage the HEPA filters or mechanical components and lead to corrosion [17]. Instead, apply disinfectant using a squirt bottle (to pour onto a wipe) or use pre-moistened wet wipes [17] [30].
Can I use a Bunsen burner inside a BSC for sterility? No, open flames are not recommended in modern BSCs [7] [29]. They create turbulence that disrupts the protective air curtain, can compromise sterility by generating aerosols, and pose a fire risk [29]. The sterile environment is maintained by HEPA-filtered air, making flames unnecessary [29]. Use sterile disposable loops or electric "furnaces" as alternatives [29].
What is the most critical ergonomic adjustment before starting? Ensure the sash is at the correct height (typically 8-10 inches, but consult manufacturer guidelines) and that you are able to sit and work comfortably [17] [15]. Your face should be above the front opening to both see properly and remain outside the containment area [15].
Troubleshooting Common Issues
| Problem | Possible Cause | Solution |
|---|---|---|
| Alarming or erratic airflow [17] | Sash at incorrect height; blocked front or rear grilles; mechanical failure. | Check and adjust sash height [17]. Ensure no items obstruct grilles [17]. Contact your facility manager or certification professional for service and recertification [17]. |
| Ineffective surface decontamination | Incorrect disinfectant contact time; improper wiping technique; unsuitable disinfectant for the biological agent. | Ensure surfaces remain wet for the full contact time per manufacturer instructions [17]. Adopt a systematic wiping pattern (top-to-bottom, clean-to-dirty) [30]. Select an agent-appropriate disinfectant [17]. |
| Contamination of cell cultures | Disrupted airflow curtain; working too close to grille; contaminated gloves or supplies. | Allow cabinet purge time pre-use [15]. Perform all work at least 4-6 inches inside the cabinet [17] [7]. Disinfect gloves with 70% IPA before starting and minimize quick movements [30]. |
| Physical strain or inability to reach all surfaces | Poor ergonomics; lack of proper tools for deep cleaning. | Adjust stool height for a comfortable position [15]. Use an extendable wet mop or reach-assisting tool to clean all surfaces without inserting your head inside the BSC [17]. |
Experimental Protocol: BSC Decontamination and Cleaning
Objective
To establish a standardized methodology for the safe and effective decontamination and cleaning of a Class II Biological Safety Cabinet (BSC) prior to and following experimental procedures involving biological agents.
Pre-Cleaning Preparatory Steps
- PPE Donning: Put on a buttoned lab coat and gloves. Select additional eye protection if splashes are anticipated [15] [28].
- Cabinet Activation: Turn on the BSC and allow the blower to run for a minimum of 5 minutes to purge stagnant air [15] [7].
- Material Gathering: Gather all necessary cleaning supplies, ensuring they are compatible with the BSC surface and the biological agents used. Limit supplies to only what is needed to reduce clutter [17].
- Sash Adjustment: Verify that the sash is at the manufacturer's recommended height, usually between 8 and 10 inches [17] [15].
- Glove Disinfection: Wipe gloves with 70% Isopropyl Alcohol (IPA) and deionized water to prevent introducing external contaminants [30].
Detailed Cleaning Methodology
- Apply Disinfectant: Pour an agent-appropriate disinfectant onto a heavy, non-shedding wipe or apply a pre-moistened wipe. Do not spray [17].
- Systematic Wiping: Wipe all interior surfaces in a systematic pattern.
- Contact Time: Ensure all disinfected surfaces remain wet for the full contact time specified by the disinfectant manufacturer to achieve effective decontamination [17].
- Rinsing (if required): If using a corrosive disinfectant like bleach, wipe the surfaces a second time with 70% ethanol or sterile water to prevent corrosion of the stainless steel [7].
- Final Drying: Allow all surfaces to air dry completely.
Post-Cleaning Procedures
- Material Removal: Remove and properly dispose of all cleaning materials and waste from the BSC.
- Surface Decontamination: Disinfect the outer surfaces of any items removed from the BSC [17].
- Cabinet Operation: Let the BSC run for 2-3 minutes with no activity after cleaning to purge any airborne contaminants generated during the process [7].
- PPE Doffing: Remove gloves and lab coat in a manner that prevents skin contamination, followed by handwashing [15].
BSC Cleaning Workflow
Research Reagent Solutions
| Item | Function/Brief Explanation |
|---|---|
| 70% Ethanol (IPA) | A common disinfectant and cleaning agent; effective for surface decontamination and degreasing. Water content aids in protein coagulation, enhancing efficacy [17] [29]. |
| Sodium Hypochlorite (Bleach) | A broad-spectrum chemical disinfectant effective against viruses and bacteria. Requires a follow-up wipe with ethanol or water to prevent corrosion of BSC stainless steel surfaces [7]. |
| Sterile, Deionized Water | Used as a rinse to remove corrosive disinfectant residues from surfaces, preventing long-term damage to the BSC [17] [7]. |
| Non-Shedding Wipes | Heavy-duty wipes or disposable towels used to apply disinfectants without leaving lint or fibers that could clog HEPA filters or contaminate work [17] [7]. |
| Extendable Wet Mop/Reach Tool | A tool that allows the operator to safely and effectively reach all interior surfaces of the BSC (e.g., the back wall and ceiling) without compromising posture or inserting their head into the cabinet [17]. |
Quantitative Data for BSC Operations
| Operational Parameter | Required Time/Distance | Key Rationale |
|---|---|---|
| Pre-Use Purge | 3 - 5 minutes [15] [29] | Allows cabinet airflow to stabilize and purge airborne contaminants from the work area [7]. |
| Post-Use Purge | 2 - 3 minutes [7] | Lets cabinet air flow purge contaminants generated during work before the cabinet is shut down [7]. |
| Work Distance from Grille | Minimum 4 inches [7] | Performing work at this distance prevents disruptive airflow and maintains the integrity of the air curtain at the front opening [17] [7]. |
| Disinfectant Contact Time | Manufacturer-specified duration | Surfaces must remain wet for the full contact time to ensure effective killing of the target biological agents [17]. |
| Annual Recertification | Every 12 months [17] [7] | Ensures the BSC's filters, airflow, and containment capabilities remain in good working condition [17]. |
Step-by-Step Guide: Daily, Weekly, and Deep Cleaning Procedures for BSCs
Preparation Checklist for Biosafety Cabinet Cleaning
| Preparation Step | Key Actions | Technical Specifications & Rationale |
|---|---|---|
| Power Purge | Allow the cabinet to run with no activity before cleaning. [31] [7] | Duration: 5-15 minutes. [32] [31] [7] Purpose: Allows the cabinet's airflow to stabilize and purge airborne contaminants from the work area. |
| Personal Protective Equipment (PPE) | Don appropriate PPE before gathering materials or starting the clean. [32] [33] | Required Gear: Lab coat or gown, gloves, and safety goggles. [32] [33] [31] Rationale: Protects the user from exposure to disinfectants and any residual biohazards. |
| Material Gathering & Inspection | Assemble all necessary cleaning materials before beginning. [33] | Essential Items: Appropriate disinfectants (e.g., 70% ethanol), lint-free wipes, biohazard bags for waste, and a dedicated cleaning kit. [32] [33] Inspection: Visually check the cabinet for any obvious damage or obstructions. [31] |
Research Reagent Solutions for Decontamination
| Item | Primary Function & Application Notes |
|---|---|
| 70% Ethanol / Isopropyl Alcohol | General-purpose disinfectant; effective against a wide range of microorganisms and evaporates quickly without residue. [33] [7] |
| Bleach Solution (e.g., 1:10 dilution) | Broad-spectrum disinfectant for more stubborn contaminants; requires a subsequent wipe with ethanol or sterile water to prevent corrosion of stainless steel surfaces. [33] [7] |
| Lint-Free Wipes | For applying disinfectants; designed to clean surfaces without leaving behind particulates that could contaminate the work zone. [33] |
| Biohazard Bags/Containers | For the safe containment and disposal of contaminated cleaning waste, such as used wipes. [7] |
Pre-Cleaning Workflow
Troubleshooting Guide: Pre-Cleaning FAQs
Q1: The airflow alarm on my biosafety cabinet is sounding when I turn it on for the pre-cleaning purge. What should I do?
A: If the airflow alarm activates, pause and do not begin cleaning. [31] First, check for any obvious blockages at the front or rear grilles and ensure the viewing sash is at the correct height. [31] If the alarm persists, the issue may be with the cabinet's blower motor, a clogged HEPA filter, or a sensor malfunction. [34] Do not use the cabinet until the issue is resolved by a qualified technician. [31]
Q2: Can I use wipes with chloride-based disinfectants for routine cleaning?
A: It is recommended to use caution with chloride-based cleaners (like bleach) as they can be corrosive to the cabinet's stainless steel surfaces over time. [33] [7] If you must use them for specific decontamination, a second wiping with 70% ethanol or sterile water is necessary to remove residual chlorine and prevent corrosion. [7] Always check the cabinet manufacturer's guidelines for approved cleaning agents.
Q3: How crucial is the 5-15 minute air purge if I'm in a hurry?
A: The air purge is a critical safety step and should not be skipped. [31] [7] This period allows the cabinet to establish stable laminar airflow, which is essential for sweeping airborne contaminants away from the user and out of the work zone. [32] Beginning work or cleaning without a proper purge compromises the cabinet's primary containment function.
Maintaining a systematic cleaning order inside a biological safety cabinet (BSC) is a critical component of contamination control in research and drug development. Adhering to the top-to-bottom and clean-to-dirty principles ensures that contaminants are physically removed from the environment instead of being redistributed over clean surfaces. This protocol is not merely about cleanliness; it is a fundamental engineering control designed to protect both the research personnel and the integrity of the experimental materials being handled [17].
A Class II Biosafety Cabinet, the most common type in labs, protects personnel, products, and the environment through HEPA-filtered inward and downward airflow [35] [36]. Proper cleaning technique is essential to maintain this protection. Disorganized or incorrect cleaning can disrupt the protective air curtain, potentially leading to cross-contamination, compromised research results, or exposure to hazardous biological agents. This guide provides detailed methodologies and troubleshooting advice to integrate these core principles into your daily routine.
Experimental Protocols & Workflows
Detailed Methodology for Systematic Wiping
This protocol provides a step-by-step guide for the correct disinfection of a Biosafety Cabinet before and after use.
Research Reagent Solutions & Essential Materials
| Item | Function & Specification |
|---|---|
| 70% Ethanol | Common disinfectant; effective against many agents, evaporates quickly without residue. Water content aids in microbial membrane penetration [17]. |
| Appropriate Chemical Disinfectant | Selected based on the biological agents used (e.g., diluted bleach, hydrogen peroxide). Must be agent-appropriate [17]. |
| Sterile Wipes (Lint-Free) | For applying disinfectant. Lint-free material prevents introduction of particulate contaminants. |
| Squirt Bottle or Wet Wipes | For applying disinfectant without aerosolization. Spray bottles should not be used as aerosolized disinfectants can damage HEPA filters [17]. |
| Extendable Wet Mop/Reach Tool | Allows for safe and effective cleaning of all interior surfaces without requiring the user to place their head inside the BSC [17]. |
| Biohazard Bag | For the disposal of contaminated wipes and other solid waste. |
Step-by-Step Procedure:
Preparation:
- Turn on the BSC and allow the blower to run for at least 5 minutes to purge stagnant air [17].
- Gather all necessary materials from the "Research Reagent Solutions" table.
- Don appropriate Personal Protective Equipment (PPE): a lab coat and gloves, with eye/face protection as warranted by the biological agents in use [17].
Initial Surface Wetting:
- Apply disinfectant to a lint-free wipe using a squirt bottle or use a pre-moistened wipe. Ensure the wipe is thoroughly damp but not dripping.
Systematic Wiping Execution:
- Top-to-Bottom: Begin wiping the uppermost interior surface of the cabinet (the ceiling).
- Clean-to-Dirty:
- Start with the back wall, wiping from the top to the bottom.
- Then, move to the side walls, again wiping from top to bottom.
- Finally, clean the work surface. Divide the work surface into a grid. Start from the innermost section (farthest from you) and wipe towards the front grill (closest to you). This technique ensures that contaminants are moved towards the front exhaust where they are captured, rather than back into the clean work area.
Contact Time and Final Wipe:
Deeper Cleaning (Periodic):
- Periodically, a deeper clean is required. Lift or remove the work surface to access and clean the spill tray underneath, where spills and debris can accumulate [17].
Systematic Cleaning Workflow: This diagram illustrates the strict sequence of cleaning actions, emphasizing the top-to-bottom and clean-to-dirty progression.
Quantitative Data Table: BSC Performance & Cleaning Metrics
The following table summarizes key quantitative specifications from the NSF/ANSI 49 standard and critical cleaning parameters that ensure BSC performance is maintained.
| Parameter | Specification / Value | Reference / Standard |
|---|---|---|
| Minimum Inflow Velocity | 100 ft/min (0.51 m/s) for Type A2, B1, B2 | NSF/ANSI 49 [35] [37] |
| Typical Downflow Velocity | 55 ft/min (0.28 m/s) | NSF/ANSI 49 [37] |
| HEPA Filter Efficiency | 99.99% for particles ≥ 0.3 μm | NSF/ANSI 49 [37] |
| Maximum Noise Level | ≤ 67 dBA | NSF/ANSI 49 [37] |
| Minimum Illumination | ≥ 800 lux at work surface | NSF/ANSI 49 [37] |
| Disinfectant Contact Time | Manufacturer's specified time (e.g., 5-10 minutes) | Best Practice [17] |
| Work Distance Inside Cabinet | At least 6 inches from front grill | Best Practice [17] |
Troubleshooting Guides
Problem: Consistent Microbial Contamination in Cell Cultures
- Potential Cause 1: Incorrect cleaning technique is spreading contaminants.
- Solution: Strictly re-train on the clean-to-dirty workflow. Ensure the work surface is wiped in sections from the inner, clean area towards the front, dirty exhaust grill. Never use a circular or back-and-forth motion.
- Potential Cause 2: Inadequate disinfectant contact time.
- Solution: Verify that surfaces remain wet for the full manufacturer-recommended contact time. Use a timer to ensure consistency.
- Potential Cause 3: The BSC is due for annual recertification or has a damaged HEPA filter.
- Solution: Contact your facility's Biological Safety Cabinet Program for annual recertification. BSCs must be recertified annually to ensure proper airflow and containment [17].
Problem: Visible Residue on BSC Work Surface After Cleaning
- Potential Cause: Buildup of disinfectant or other chemical residues.
- Solution: After the primary disinfectant contact time is complete, use a wipe moistened with sterile water or 70% ethanol to rinse the surface and remove residues, as this can prevent corrosion [17].
Problem: Disinfectant Dries Too Quickly During Cleaning
- Potential Cause: Low ambient humidity or cleaning too large an area at once.
- Solution: Clean the BSC in smaller sections. For example, completely finish the ceiling and back wall before moving to the sides, and subdivide the work surface to ensure each section stays wet for the required contact time.
Frequently Asked Questions (FAQs)
Q: Can I use a spray bottle to apply disinfectant inside the BSC? A: No. Spraying or aerosolizing disinfectants inside the BSC is strongly discouraged. Aerosolized droplets can be drawn into the sensitive internal components, including the HEPA filters, leading to corrosion and damage. They can also contaminate the supply HEPA filter. Always apply disinfectant directly to a wipe or use pre-moistened wipes [17].
Q: How often should I perform a deeper clean of the spill tray? A: The frequency of deep cleaning depends on how heavily and frequently the BSC is used. A weekly or monthly schedule may be appropriate for high-use cabinets. Inspect the spill tray during deep cleans for accumulated spills, dust, or broken glass, which can lead to contamination events if not addressed [17].
Q: Is a laminar flow hood or fume hood an acceptable substitute for a BSC? A: No. Laminar flow hoods (or clean benches) only protect the product by blowing HEPA-filtered air outward towards the user, offering no personnel protection. Fume hoods are designed for chemical vapors and do not have HEPA filtration for biological agents. Using anything other than a properly certified BSC for work with biohazards poses a significant safety risk [17].
Q: What is the most critical mistake to avoid when wiping the BSC? A: The most critical error is using a disordered or circular wiping pattern that spreads contaminants from dirty areas (like the front grill) back over clean areas (like the back of the work surface). Always adhere to the systematic top-to-bottom and clean-to-dirty principles.
Troubleshooting Contamination Problems: This diagram outlines the logical relationship between a common problem, its potential causes, and the corresponding solutions.
In the context of a broader thesis on cleaning protocols for biological safety cabinets, the selection and correct application of disinfectants are paramount. Biosafety cabinets (BSCs) serve as the primary containment barrier for researchers working with biological agents. Their interior surfaces can become contaminated with a variety of biological materials, including viruses, mycoplasmas, bacteria, and endotoxins, during cell-processing operations and other microbiological procedures. The effectiveness of decontamination procedures directly impacts the safety of personnel, the integrity of research, and the quality of drug development products.
A disinfectant's efficacy is not inherent to its chemical composition alone; it is equally dependent on two critical application parameters: sufficient contact time and proper wiping techniques. Inadequate attention to either factor can result in residual contamination, potentially leading to cross-contamination of experiments, exposure of personnel to biohazards, and compromised cell-product manufacturing. This article addresses specific, evidence-based issues researchers encounter by providing troubleshooting guides and FAQs grounded in current research and established biosafety protocols, thereby supporting the development of robust, risk-based cleaning strategies for the laboratory.
Disinfectant Selection: A Data-Driven Approach
Quantitative Efficacy of Common Disinfectants
Selecting an appropriate disinfectant requires a risk-based assessment that considers the biological material in use. Different classes of microorganisms exhibit varying levels of resistance to chemical disinfectants, influenced by features such as the presence of a lipid envelope or spore formation [38]. The following table synthesizes quantitative data on the efficacy of various disinfectants against different contaminant types, providing a basis for evidence-based selection.
Table 1: Disinfectant Efficacy Against Common Laboratory Contaminants
| Disinfectant | Concentration | Mycoplasma orale | Feline Calicivirus | Endotoxins | Key Considerations |
|---|---|---|---|---|---|
| Benzalkonium Chloride (BKC) | Not Specified | Growth Inhibited [22] | Eliminated [22] | Significantly Reduced [22] | Wiping method effective against viruses and mycoplasma [22]. |
| Ethanol (ETH) | 70% | Detected After Wiping [22] | Information Missing | Not Significantly Reduced [22] | Requires up to 20-minute contact time; evaporates quickly [38]. |
| Sodium Hypochlorite (Bleach) | 1:10 Household Dilution (~0.5%) | Information Missing | Information Missing | Information Missing | Corrosive to stainless steel; inactivated by organic matter [38]. |
| Distilled Water (DW) | N/A | Information Missing | Eliminated [22] | Significantly Reduced [22] | Wiping alone can be effective for viruses and endotoxins [22]. |
Experimental Protocols for Validating Disinfectant Efficacy
The data presented in Table 1 is derived from controlled experimental methodologies designed to objectively evaluate cleaning methods. The following protocol outlines a standard approach for testing disinfectant efficacy on hard surfaces, such as those found in a BSC [22].
Protocol: Evaluating Disinfectant Efficacy on Stainless Steel Surfaces
- Contaminant Preparation and Inoculation: Apply standardized concentrations of test contaminants (e.g., Mycoplasma orale, Feline Calicivirus (FCV) as a viral surrogate, or E. coli endotoxins) onto sterile stainless steel plates (e.g., SUS304 grade). Allow the inoculum to dry under controlled conditions.
- Application of Cleaning Method: Subject the contaminated plates to the test cleaning methods. These methods can include:
- UV Irradiation: Expose plates to UV light at a defined intensity and duration (e.g., 200 mJ/cm² for 20 minutes) [22].
- Chemical Wiping: Wipe the plate surface with a cloth soaked in a specific disinfectant (e.g., BKC, 70% ethanol, or distilled water) using a standardized technique.
- Post-Treatment Analysis: After application of the cleaning method, analyze the plates for residual contamination using appropriate assays:
- Mycoplasma: Culture the plate surface in liquid medium for up to two weeks to detect any viable growth [22].
- Virus (FCV): Use the TCID₅₀ assay (50% Tissue Culture Infective Dose) on Crandell Rees feline kidney (CRFK) cells to quantify remaining infectious viral particles [22].
- Endotoxins: Employ a standardized endotoxin testing method (e.g., Limulus Amebocyte Lysate) to measure the quantity of residual endotoxins [22].
- Data Comparison: Compare the results from the treated plates against positive (contaminated, not cleaned) and negative (sterile) controls to determine the log reduction in contamination achieved by each method.
Troubleshooting Common Disinfection Problems
Frequently Asked Questions (FAQs)
Table 2: Troubleshooting Common Disinfection Issues
| Question | Answer |
|---|---|
| Why is my disinfectant not working despite regular use? | The most common causes are insufficient contact time (the disinfectant is wiped off before it can act) and inactivation by organic matter (e.g., blood, serum). Always check the manufacturer's recommended contact time and pre-clean visibly soiled surfaces [38]. |
| Is 70% ethanol a sufficient disinfectant for all applications? | No. While 70% ethanol is effective against many organisms, it failed to eliminate mycoplasma and did not significantly reduce endotoxins in a controlled study. Its effectiveness is highly dependent on saturating the surface and allowing for a contact time of up to 20 minutes, which is often not achieved in practice due to rapid evaporation [38] [22]. |
| How should I apply disinfectant in a BSC to avoid damage? | Never spray disinfectants directly inside the BSC. Spraying can introduce corrosive chemicals into sensitive internal components and create aerosols. Instead, apply the disinfectant with a squeeze bottle onto a cloth or wipe, and then carefully wipe the surface. After using corrosive agents like bleach, a rinse with 70% ethanol or sterile water is recommended to prevent corrosion of the stainless steel [38] [11]. |
| What is the proper wiping technique to ensure full decontamination? | Use a systematic, overlapping "S"-pattern, moving from the cleanest area to the dirtiest. After wiping a surface with disinfectant, the surface must remain wet for the entire recommended contact time to ensure microbial inactivation. Do not use a dry cloth to immediately wipe off the applied disinfectant [38] [39]. |
Decision Guide for Disinfectant Selection
The following diagram illustrates a logical pathway for selecting an appropriate disinfectant based on the primary contaminant of concern, integrating findings from recent research.
Diagram 1: Disinfectant Selection Logic
The Scientist's Toolkit: Essential Research Reagent Solutions
Table 3: Essential Materials for Biosafety Cabinet Decontamination
| Item | Function / Purpose |
|---|---|
| 70% Ethanol (ETH) | A broad-spectrum disinfectant effective against many vegetative bacteria and lipid-enveloped viruses. Requires careful attention to contact time as it evaporates quickly [38] [22]. |
| Sodium Hypochlorite (Bleach) | A powerful oxidizing agent that kills most organisms, including viruses and bacteria. Must be diluted appropriately (e.g., 1:10) and is inactivated by organic matter. Corrosive to stainless steel [38]. |
| Benzalkonium Chloride (BKC) | A quaternary ammonium compound effective against viruses like feline calicivirus and mycoplasma, particularly when combined with UV irradiation [22]. |
| Distilled Water (DW) | Used as a control in studies and found to be effective in removing viruses and endotoxins via the physical action of wiping. Also used to rinse corrosive disinfectant residues from stainless steel surfaces [22] [11]. |
| Lint-free Wipes | Critical for applying disinfectants without leaving fibers behind, which can interfere with airflow or contaminate sensitive samples. |
| Squeeze Bottle | The recommended tool for applying disinfectants within a BSC to prevent aerosol generation and avoid driving corrosive chemicals into the cabinet's internal components [38]. |
Daily and Session-Based Cleaning Protocols for Routine Decontamination
Standard Operating Procedures for Routine Decontamination
Session-Based Cleaning Protocol
Perform this procedure before and after every work session within the Biological Safety Cabinet (BSC).
- Preparation: Turn on the BSC and allow the blower to run for at least 5 minutes to purge airborne contaminants from the work area [7]. Gather all necessary cleaning materials, including appropriate disinfectants and lint-free wipes or towels [33].
- Personal Protective Equipment (PPE): Don a long-sleeved lab coat with knit cuffs and disposable gloves [7] [40]. Eye or face protection may be warranted based on the biological agents used [17].
- Surface Disinfection: Thoroughly disinfect all interior surfaces—including the work surface, walls, and the interior of the view screen—using an appropriate disinfectant [17]. Apply the disinfectant by pouring it onto a wipe or using pre-moistened wipes; never spray disinfectant inside the BSC, as aerosolized chemicals can damage HEPA filters or other components [17]. Ensure surfaces remain wet for the full contact time specified by the disinfectant manufacturer [17].
- Final Steps: After the contact time, if a corrosive disinfectant like bleach was used, wipe the surfaces a second time with sterile water or 70% ethanol to remove residual chlorine that can corrode stainless steel [7]. Allow the BSC to run for 2-3 minutes with no activity after removing all materials before shutting it down [7].
Daily and End-of-Day Cleaning
A more thorough cleaning should be performed at the end of each day or if the cabinet is used multiple times per day by different users.
- Work Surface: The work surface must be cleaned daily or after each use to prevent cross-contamination between experiments [33].
- Full Interior Wipe-Down: In addition to the session-based protocol, ensure all corners, crevices, and the underside of the work surface (if accessible) are wiped down. Be careful when cleaning the underside of the work surface and the basin of the BSC that wipes are not pulled into the riser on the backside, as this can necessitate a major decontamination [7].
- Visual Inspection: Check for any spilled or splashed nutrients that may support microbial growth and lead to future contamination [7].
Weekly and Monthly Cleaning
- Weekly Tasks: Clean the interior walls and view screen thoroughly [33]. Ultraviolet (UV) lamps, if present and used, should be turned off and cleaned with 70% ethanol to remove dust and dirt that block germicidal effectiveness [7].
- Monthly Tasks: Clean the front and back grilles by vacuuming and disinfecting to maintain proper airflow [33].
The following workflow summarizes the complete routine decontamination process:
Troubleshooting Guides for Common Decontamination Issues
Airflow and Containment Problems
| Problem | Possible Cause | Solution |
|---|---|---|
| Low or unbalanced airflow [34] | Clogged HEPA filters [34] | Contact qualified technician for inspection and potential filter replacement [5] |
| Excessive turbulence [34] | Obstructed front grill or rear exhaust [7] [34] | Clear all obstructions from grilles; do not place items over air intakes [7] |
| Disruptive room air currents [7] | BSC located near doors, vents, or high-traffic areas [7] | Relocate BSC to a quiet area; minimize door opening/closing during use [7] |
| Inadequate containment | Overloaded BSC or large objects impeding airflow [7] | Remove unnecessary items; keep equipment at least 4 inches inside cabinet window [7] |
Cleaning and Disinfection Failures
| Problem | Possible Cause | Solution |
|---|---|---|
| Persistent contamination [34] | Inadequate cleaning technique or contact time [17] | Ensure surfaces are wet for full manufacturer-recommended contact time [17] |
| Corrosion of stainless steel surfaces [7] | Residual chlorine from bleach not removed [7] | Always follow bleach disinfection with a wipe of 70% ethanol or sterile water [7] |
| Fungal growth or spore liberation [7] | Spilled nutrients not thoroughly removed [7] | Perform careful check for spilled materials after each use [7] |
| Wipes sucked into rear riser [7] | Using lightweight wipes during cleaning [7] | Use heavy clean wipes or disposable towels pre-soaked with disinfectant [7] |
Equipment and Mechanical Issues
| Problem | Possible Cause | Solution |
|---|---|---|
| Alarm activation [5] | Low/high airflow, filter clogging, or system failure [5] | Check alarm panel for error codes; refer to user manual or contact manufacturer [5] |
| Sash movement issues [34] | Dirty tracks, worn cables, or counterbalance problems [34] | Clean and lubricate tracks; contact technician for cable replacement or adjustment [34] |
| UV light ineffective [7] | Dusty bulb, decreased output, or end of lamp life [7] | Clean lamp weekly with 70% ethanol; test output periodically; replace as needed [7] |
Frequently Asked Questions (FAQs)
Q1: Which cleaning agents are appropriate for routine decontamination of a BSC? A1: Common and effective disinfectants include 70% isopropyl alcohol (effective against a wide range of microorganisms and evaporates quickly) and dilute bleach solutions (typically 1:10 dilution for broad-spectrum effectiveness) [33]. However, bleach can be corrosive to metal surfaces if not properly rinsed, so a second wipe with 70% ethanol or sterile water is recommended [7]. The choice of disinfectant should be based on its effectiveness against the biological agents used in the BSC, compatibility with cabinet materials, and safety for personnel [33].
Q2: How often does a BSC require certification, and what triggers the need for it? A2: BSCs must be certified at least annually, according to CDC/NIH guidelines [7]. Additionally, certification is required at the time of initial installation, after moving a BSC, after servicing internal plenums, and after replacing HEPA filters [7]. This certification must be performed by qualified personnel using approved test methods to ensure the cabinet contains biohazardous aerosols effectively [7] [17].
Q3: Can I use a UV light as the primary method for decontaminating my BSC? A3: No. Ultraviolet lamps are not recommended as a primary decontamination method and should never be relied upon alone to disinfect a contaminated work area [7]. Their effectiveness is limited to direct exposure, as dust, dirt, or organic matter can shield microorganisms [7]. UV lights can be used as an optional extra precaution for maintaining decontamination between uses but must be turned off when the room is occupied to protect occupants' skin and eyes from exposure [7].
Q4: What is the proper sequence for cleaning the interior surfaces of the BSC? A4: The cleaning process should always proceed from the cleanest areas to the most contaminated, and from top to bottom [33]. Begin with the ceiling, then move to the back and side walls, followed by the work surface, and finish with the front and back grilles [33]. This method ensures that contaminants are not spread from dirtier areas to cleaner ones during the process.
Q5: What should I do if a spill occurs inside the BSC during an experiment? A5: Keep the cabinet blower on and clean the spill immediately [40]. Replace contaminated PPE, cover the spill with paper towels, and carefully pour an appropriate disinfectant over it, starting at the outside edge and working inward [40]. Allow for the required contact time (e.g., 20 minutes for a 10% bleach solution), then wipe up the material, dispose of it as biohazardous waste, and decontaminate the entire interior surface of the BSC [40].
The Scientist's Toolkit: Essential Reagents and Materials
| Item | Function | Key Considerations |
|---|---|---|
| 70% Isopropyl Alcohol | General disinfection; effective against a wide range of microorganisms and evaporates without residue [33]. | Flammable; requires caution. Less corrosive than bleach but may not be effective against all agents [33]. |
| Sodium Hypochlorite (Bleach) | Broad-spectrum disinfectant; effective against most pathogens at a 1:10 dilution [33]. | Corrosive to stainless steel; must be rinsed with sterile water or 70% ethanol after use [7]. |
| Lint-Free Wipes/Cloths | Applying disinfectant to all interior surfaces without leaving fibers or residue [33]. | Use heavy-duty wipes to prevent them from being drawn into the rear riser, which can damage the cabinet [7]. |
| Personal Protective Equipment (PPE) | Protects the researcher from exposure to hazardous materials and disinfectants [33] [40]. | Includes a long-sleeved lab coat with knit cuffs, disposable gloves, and safety goggles [7] [40]. |
| HEPA Filters | The primary containment barrier; removes airborne particles and microorganisms from incoming and outgoing air [17]. | Must be certified annually and replaced by a qualified professional when needed [7] [5]. |
FAQs on Spill Tray and Drain Pan Cleaning
Q1: What is the step-by-step procedure for cleaning the spill tray or drain pan after a spill?
After a spill, the spill tray or drain pan requires immediate and thorough decontamination. Follow this detailed protocol:
- Leave the BSC running: Keep the cabinet operational during the initial cleanup to contain aerosols [41] [42].
- Gain access: Lift or remove the main work surface to access the catch basin or drain pan beneath it [41] [17].
- Flood with disinfectant: Ensure the drain valve is closed, then pour an appropriate disinfectant (e.g., a 1:10 dilution of fresh bleach) directly onto the work surface and through the front and rear grilles so that it flows into the drain pan [41]. Do not use large quantities of alcohol due to fire hazard [42].
- Ensure contact time: Allow the disinfectant to sit in the drain pan for an extended period, typically 20 to 30 minutes, to ensure effective decontamination [41] [9].
- Empty the drain pan: After contact time, place a collection vessel containing fresh disinfectant below the drain valve. Attach flexible tubing to the valve, submerging the open end in the disinfectant to minimize aerosols. Open the valve and empty the drain pan contents into the vessel [41].
- Final rinse and disposal: Flush the drain pan with water [41]. Manage all contaminated fluids and materials, such as paper towels and gloves, as infectious waste and autoclave them [41] [42].
Q2: How frequently should the spill tray and drain pan be cleaned as part of routine maintenance?
Routine cleaning frequency depends on usage but should be part of a scheduled maintenance program.
Table: Spill Tray and Drain Pan Cleaning Frequency
| Maintenance Level | Recommended Frequency | Key Actions |
|---|---|---|
| Routine Inspection & Cleaning | Monthly [10] | Perform thorough surface decontamination of the drain pan [10]. |
| After a Spill Event | Immediately | Follow the comprehensive decontamination procedure outlined in Q1 [41] [42]. |
| Heavy Usage | Increase frequency | Clean more often than monthly if the cabinet is used frequently or for high-risk materials [17]. |
Q3: What is the safest and most effective method for removing stubborn residues from stainless steel surfaces?
A systematic approach is required to remove stubborn residues without damaging the cabinet's stainless steel interior.
- Initial Disinfection: Wipe the area with your standard laboratory disinfectant to eliminate surface biohazards [33].
- Apply a Specialized Polish: For residues that persist, use a small amount of a stainless steel polisher, such as Autosol, applied with a soft cloth [10].
- Immediate Rinsing: After polishing, it is crucial to immediately wash the stainless-steel surface with sterile water and a mild liquid detergent to remove any residual polish that could damage the finish [10].
- Final Disinfection: Complete the process by wiping the area again with 70% ethanol or sterile water to remove any detergent residue and ensure the surface is disinfected [7]. Avoid using bleach for routine cleaning of stainless steel, as residual chlorine can be corrosive [10] [7].
Troubleshooting Guides
Problem: Recurring contamination in the cabinet despite surface cleaning.
- Potential Cause: Spill material has seeped into the drain pan and is not being routinely cleaned, leading to contamination of the cabinet's internal environment [41] [17].
- Solution: Incorporate monthly cleaning of the drain pan and spill tray into your maintenance schedule. After any spill, ensure the drain pan decontamination procedure is followed completely [41] [10].
Problem: Discoloration or corrosion on stainless steel work surface.
- Potential Cause: Using corrosive disinfectants like bleach and failing to rinse the surface afterward with 70% ethanol or sterile water [7] [17].
- Solution: Always perform a second wipe with 70% ethanol or sterile water after using bleach [7]. For existing corrosion or stains, use a stainless-steel polisher as described in the FAQ above [10].
Problem: Persistent odor coming from the biosafety cabinet.
- Potential Cause: Organic matter or microbial growth in the drain pan or underlying catch basin [17].
- Solution: Perform a deep clean of the drain pan with a disinfectant detergent to remove both dirt and microorganisms. Ensure the pan is thoroughly dried after cleaning [43].
Research Reagent Solutions for Deep Cleaning
The following table details essential materials and their specific functions for executing the deep cleaning protocols described.
Table: Essential Reagents for BSC Deep Cleaning
| Reagent/Material | Function/Application | Key Considerations |
|---|---|---|
| Sodium Hypochlorite (Bleach) | Primary disinfectant for spill decontamination; effective against a broad spectrum of microorganisms [41] [43]. | Use a 1:10 dilution for surface and drain pan decontamination [41] [43]. It is corrosive; surfaces must be rinsed with 70% ethanol or sterile water after use to prevent damage to stainless steel [7] [17]. |
| 70% Ethanol or Isopropyl Alcohol | General surface disinfection and, critically, as a rinse to remove corrosive chlorine residues from bleach [7] [17] [33]. | Evaporates quickly, which limits contact time; not suitable for large spills in drain pans due to flammability risk [41] [42]. |
| Stainless Steel Polisher (e.g., Autosol) | Removal of stubborn stains, spots, or residues on the cabinet's interior without damaging the factory finish [10]. | Must be followed by immediate and thorough washing with sterile water and detergent to prevent long-term damage to the stainless steel [10]. |
| Lint-free Wipes/Paper Towels | Applying disinfectants and mechanically removing residues from all surfaces [41] [33]. | Use heavy-duty towels or wipes when cleaning grilles to prevent them from being drawn into the cabinet's riser, which can cause major operational issues [7]. |
| Personal Protective Equipment (PPE) | Protects the researcher during cleaning and decontamination procedures. | Always includes a lab coat and gloves [41] [17]. Safety goggles and face masks are warranted based on the biological agents and disinfectants used [17] [44]. |
Experimental Protocol: Validating Drain Pan Decontamination
Objective: To confirm the efficacy of the drain pan decontamination protocol against a specific biological agent.
Methodology:
- Simulated Contamination: Apply a known titer (e.g., 10^6 CFU) of a non-pathogenic surrogate organism (e.g., Bacillus atrophaeus spores for chemical disinfectants) to a sterile coupon placed within the BSC drain pan.
- Application of Disinfectant: Follow the standard operating procedure for drain pan decontamination, flooding the pan with the validated disinfectant at the specified concentration.
- Contact Time: Allow the disinfectant to remain in contact with the contaminated coupon for the prescribed time (e.g., 20-30 minutes) [41] [9].
- Neutralization and Sampling: After contact time, drain the disinfectant into a vessel containing a neutralizer. Transfer the coupon to a tube of neutralizer broth and mix thoroughly.
- Viability Assessment: Plate serial dilutions of the neutralizer broth onto appropriate culture media. Incubate plates and enumerate surviving microorganisms. A successful decontamination is confirmed by no growth of the surrogate organism.
Workflow for Comprehensive Spill Response and Deep Cleaning
The following diagram illustrates the logical decision-making process and procedural workflow for addressing spills and performing deep cleaning, integrating the management of the spill tray, drain pan, and stubborn residues.
Within the broader context of research on cleaning protocols for biological safety cabinets (BSCs), establishing standardized post-cleaning procedures is paramount for maintaining continuous contamination control. These final steps—encompassing the final rinse, equipment removal, and systematic shutdown—are critical for ensuring that the cabinet is not only clean at the conclusion of one procedure but is also prepared for subsequent use without compromising the integrity of future experiments or the safety of laboratory personnel. This guide provides detailed, evidence-based protocols to address the specific challenges researchers face during this crucial phase of biosafety cabinet maintenance.
Experimental Data on Cleaning Efficacy
Selecting an appropriate disinfectant is the foundation of an effective cleaning protocol. The table below summarizes experimental data on the efficacy of various cleaning methods against different types of contaminants, providing a scientific basis for protocol development.
Table 1: Efficacy of Different BSC Cleaning Methods Against Various Contaminants
| Cleaning Method | Mycoplasma Efficacy | Viral Efficacy (FCV) | Endotoxin Efficacy | Key Findings |
|---|---|---|---|---|
| UV Irradiation (200 mJ/cm²) | Inhibited growth | Eliminated (below detection limit) | No significant reduction | Effective against mycoplasma and viruses, but not endotoxins [22]. |
| Wiping with BKC | Inhibited growth | Eliminated (below detection limit) | Significant reduction | Effective against all tested contaminants; superior to ethanol for endotoxins [22]. |
| Wiping with 70% Ethanol (ETH) | Detected after cleaning (ineffective) | Not specified | No significant reduction | A widely used but potentially ineffective method against certain resilient contaminants [22]. |
| Wiping with Distilled Water (DW) | Not specified | Eliminated (below detection limit) | Significant reduction | Effectively eliminated virus and reduced endotoxins [22]. |
Step-by-Step Post-Cleaning Protocol
The following workflow outlines the comprehensive post-cleaning, shutdown, and restart procedure for a biological safety cabinet.
Diagram of the comprehensive post-cleaning, shutdown, and restart workflow for a Biological Safety Cabinet.
Final Rinse and Surface Drying
- Purpose of the Final Rinse: The primary goal is to remove any residual disinfectant from the cabinet's interior surfaces. This prevents chemical corrosion of the stainless steel and avoids potential carry-over of the disinfectant into future experiments, which could inhibit cell growth or interfere with sensitive assays [45] [6].
- Recommended Rinse Agents:
- Sterile Distilled Water: This is the preferred agent for a final rinse, especially after using chemical disinfectants like bleach, as it effectively removes residues without leaving any of its own [22] [6].
- 70% Ethanol: If a disinfectant is desired during the final wipe, 70% ethanol is suitable. It is effective against many contaminants and evaporates quickly, leaving minimal residue. It is specifically recommended for a final wipe after a bleach disinfectant step to prevent corrosion [6].
- Procedure: Using a clean, low-lint cloth or wipe moistened (but not saturated) with the chosen rinse agent, thoroughly wipe all interior surfaces—work surface, side and back walls, and the interior of the glass sash. After wiping, allow all surfaces to air dry completely with the cabinet's blower running. This ensures no wet surfaces remain that could become a contamination source [46].
Equipment Removal and Decontamination
- Surface Decontamination: Before removing any equipment, containers, or samples from the BSC, decontaminate their external surfaces. Wipe each item down with a disinfectant appropriate for the materials used in the BSC, such as 70% ethanol or a diluted bleach solution, ensuring the disinfectant remains in contact with the surface for the recommended contact time [45] [46].
- Safe Removal Technique: To minimize disruption of the protective airflow curtain, remove all items slowly and by moving your arms perpendicularly to the face of the cabinet. Avoid sweeping motions parallel to the sash [46].
- Post-Removal Handling: Once removed from the BSC, place all decontaminated items on a clean, disinfectant-wiped tray or cart for transport to their storage locations or for further processing.
Systematic Shutdown Steps
- Purge Cycle: After all equipment has been removed and the interior is dry, allow the cabinet blower to run for an additional 5 to 15 minutes. This "purge cycle" is critical to evacuate any lingering aerosolized particles from the work area and ensure the interior environment is clean [46].
- Sash Closure: Once the purge cycle is complete, fully close the viewing sash. This acts as a physical barrier against dust and contaminants and is a safety feature on many modern cabinets [45].
- Power Down: Turn off the cabinet's blower motor and interior lights. On some models, this may be a single switch, while others may have separate controls. Note that germicidal UV lamps, if present and used, should only be operated when the room is unoccupied to protect skin and eyes from UV exposure [46].
The Scientist's Toolkit: Essential Research Reagents & Materials
Table 2: Key reagents and materials for BSC cleaning and maintenance, with their primary functions.
| Reagent/Material | Primary Function in Protocol | Key Considerations |
|---|---|---|
| Sterile Distilled Water (DW) | Final rinse agent to remove disinfectant residues [22]. | Prevents corrosion of stainless steel surfaces; leaves no residue. |
| 70% Ethanol (ETH) | Final disinfectant and rinse agent; surface decontamination [22] [6]. | Evaporates quickly; flammable; ineffective against some mycoplasmas and endotoxins [22]. |
| Benzalkonium Chloride (BKC) | Broad-spectrum disinfectant effective against mycoplasma, viruses, and endotoxins [22]. | An effective alternative when ethanol proves insufficient for specific contaminants [22]. |
| Sodium Hypochlorite (Bleach) | Primary disinfectant for broad microbial inactivation [45] [6]. | Must be followed by a rinse (e.g., with ethanol or water) to prevent corrosion of metal surfaces [6]. |
| Low-Lint Wipes/Cloths | Physical application and wiping of disinfectants and rinse agents [46]. | Critical for preventing fiber contamination in sensitive cell cultures. |
Troubleshooting FAQs
Q1: Why is a final rinse with water or ethanol necessary after I've already disinfected the surface? A final rinse is crucial for two reasons. First, it removes corrosive residues from chemical disinfectants like bleach, protecting the stainless steel interior of your BSC from damage and rust [6]. Second, it prevents the carryover of active disinfectant into your next experiment, which could potentially kill cell cultures or interfere with biochemical assays [22].
Q2: How long should I let the blower run after cleaning, and what happens if I skip this step? The blower should run for a minimum of 5 minutes after cleaning is complete [46]. This purge cycle is essential to evacuate any aerosolized particles or chemical vapors stirred up during the cleaning process. Skipping this step risks leaving suspended contaminants in the cabinet, which could settle on your work surface and compromise your next procedure.
Q3: I routinely use 70% ethanol for cleaning. The data shows it's ineffective against some contaminants. When should I consider an alternative? You should consider an alternative disinfectant like benzalkonium chloride (BKC) when working with materials known to be contaminated with, or susceptible to, mycoplasma or bacterial endotoxins [22]. Ethanol's inefficacy against these specific contaminants highlights the need for a risk-based approach to disinfectant selection, tailored to the biological agents used in your BSC.
Q4: Is it acceptable to store frequently used equipment inside the BSC after shutdown? No. The BSC work area should be kept clear when not in use [46]. Storing items inside can obstruct airflow grilles, make the next decontamination cycle less effective, and increase the risk of contaminating the stored items. All equipment should be removed, surface-decontaminated, and stored properly after each use.
Troubleshooting Common Cleaning Challenges and Optimizing Workflow
FAQs and Troubleshooting Guide
This guide addresses common mistakes made during work in a Biological Safety Cabinet (BSC) that can compromise both personnel protection and experimental integrity. Proper technique is a critical component of cleaning protocols and contamination control research.
How do disruptive motions inside the BSC affect containment, and what is the correct technique?
Answer: Rapid or sweeping arm movements create turbulent air currents that disrupt the critical air barrier at the front of the cabinet. This turbulence can cause contaminated air from inside the cabinet to escape into the laboratory, posing a risk to personnel, and can also lead to cross-contamination of samples [7] [47].
The correct technique involves moving your arms slowly and perpendicularly (straight in and out) to the face of the cabinet [46] [47]. After placing your arms inside, wait about a minute before beginning work to allow the airflow to restabilize and "sweep" contaminants from your arms [46].
Why is it critical to avoid blocking the front and rear grilles?
Answer: The front and rear grilles are essential components of the BSC's airflow system. The front grille draws room air inward to protect the user, while the rear grille pulls air downward to protect samples. Blocking these grilles disrupts the balanced airflow, creating turbulence that can compromise both personnel and product protection [34] [47].
To prevent this, never rest your arms on the front grille and ensure that all materials and equipment are placed at least 4 inches inside from the front grille [7] [46] [47]. Keep the rear grille clear and do not place materials directly on it [34].
What are the consequences of overloading the BSC with materials and equipment?
Answer: Overloading the BSC has several negative consequences. Large objects can impede and create uneven airflow across the work surface, reducing the cabinet's containment efficiency [7]. Furthermore, equipment with fans or moving parts, such as centrifuges or blenders, can generate their own air currents, which may be sufficient to allow contaminated air to escape into the lab [7].
Only materials and equipment needed for the immediate work should be placed inside the BSC. Extra supplies should be stored outside [7] [47]. A cluttered workspace also makes proper aseptic technique and thorough cleaning more difficult.
Troubleshooting Common Problems
The table below summarizes the issues, their impact, and the required corrective actions.
| Common Mistake | Impact on BSC Function | Corrective Action & Prevention |
|---|---|---|
| Disruptive Motions [7] [47] | Creates turbulent airflow, potentially releasing contaminants from the cabinet and causing cross-contamination. | Move arms slowly and perpendicular to the cabinet face [46] [47]. Allow the air to stabilize for ~1 minute after inserting arms [46]. |
| Grille Blockages [34] [47] | Disrupts the balanced inward and downward airflow, compromising the primary barrier and containment. | Keep front and rear grilles completely clear. Perform all work at least 4 inches inside the cabinet [7] [46]. |
| Overloading [7] | Impedes uniform airflow, creates dead spots, and equipment fans can cause disruptive currents. | Place only essential items for the procedure inside. Store extra supplies outside the BSC [7] [47]. |
Research Reagent Solutions for BSC Decontamination
The following table details essential reagents used for cleaning and disinfection within a BSC, which is a foundational part of any research on cleaning protocols.
| Reagent | Function & Role in Protocol |
|---|---|
| 70% Ethanol / Isopropanol | Primary disinfectant for routine surface decontamination before and after work sessions. Effective against many pathogens and evaporates quickly [7] [47]. |
| 10% Sodium Hypochlorite (Bleach) | Used for more robust decontamination, particularly effective against nucleic acid contaminants (e.g., in PCR workflows) [48]. Note: Requires a secondary wipe with ethanol or sterile water to prevent corrosion of stainless steel [7]. |
| Germicidal Soap | Used for washing hands and arms before and after working in the BSC to minimize the shedding of skin flora into the work area [7]. |
| Sterile Water | Used as a rinse agent after cleaning with corrosive chemicals like bleach to remove residue and protect cabinet surfaces [7]. |
Troubleshooting Guide: Common Disinfectant-Related Corrosion Issues
Problem 1: Visible brown or black stains (rouge) on stainless steel surfaces inside the BSC.
- Potential Cause: The breakdown of the protective passive layer on stainless steel due to repeated exposure to moisture and corrosive disinfectants, particularly those containing chlorides (e.g., bleach) [49] [50].
- Solution: Implement a routine derouging and passivation procedure. This involves cleaning with an alkaline solution to remove organic residues, followed by an acid treatment to remove iron oxides, and finally adding a new protective layer to the steel [49].
Problem 2: Micro-pitting and surface scratches on the work surface.
- Potential Cause: The use of abrasive cleaning tools (e.g., Scotch-Brite pads) or harsh chemical cleaners that scratch the surface. These scratches create microscopic crevices that trap moisture and corrosive agents, accelerating corrosion [51] [50].
- Solution: Use only non-abrasive tools like soft cloths, plastic scouring pads, or specialized water-activated buffing pads for cleaning. Always scrub in the direction of the polish lines or "grain" [50] [51].
Problem 3: White, scaly deposits on stainless steel.
- Potential Cause: Use of hard water for rinsing or in cleaning solutions. The mineral deposits from hard water can trap moisture against the steel surface, creating an environment conducive to corrosion [50].
- Solution: Treat water to reduce mineral content by using softened or filtered water for the final rinse after disinfection [50].
Problem 4: Persistent contamination or biofilm formation despite disinfection.
- Potential Cause: Certain disinfectants, like quaternary ammonium compounds (e.g., benzalkonium chloride) or some sporicides, can leave behind legacy residues. These residues can create a barrier that shields microorganisms and interferes with subsequent disinfection efforts [52] [51].
- Solution: Ensure disinfectants are thoroughly rinsed with water or followed by an ethanol wipe as recommended. For residue removal, use a controlled, chemical-free method such as specialized buffing pads with USP water [51] [12].
Frequently Asked Questions (FAQs)
Q1: Why is stainless steel in my biosafety cabinet corroding if it's "stainless"? Stainless steel is more accurately "stain-resistant." Its resistance comes from a thin, protective chromium oxide layer on the surface. This passive layer can be broken down by chlorides in disinfectants, abrasive cleaning, hard water, or physical damage, allowing the underlying iron to rust [49] [50].
Q2: Which disinfectants are least likely to cause corrosion? Based on recent research, phenol-based disinfectants worked relatively well without major corrosion concerns [52]. Ultraviolet (UV) light is also an effective non-chemical option for surface decontamination and damaging bacterial DNA without causing chemical corrosion [52]. Always follow manufacturer dilution and contact time instructions.
Q3: What is the recommended procedure for decontaminating my BSC without damaging it? A common and effective method is to use a 1:10 dilution of fresh household bleach, applied with a squirt bottle to minimize aerosols, followed by a thorough rinse with 70% ethanol. The ethanol rinse neutralizes the corrosive bleach and aids in drying [12]. Always decontaminate before and after each use.
Q4: How can I remove existing rust or disinfectant residue? For legacy residues, a chemical-free approach using specialized buffing pads with only USP water is effective and avoids further damage [51]. For established rust (rouge), a professional derouging process is recommended, which uses chemicals to break down iron oxides and restores the protective layer [49].
Quantitative Data on Disinfectant Efficacy and Material Compatibility
The table below summarizes key findings from a recent study on the efficacy of common disinfectants, which should inform selection for use on stainless steel surfaces [52].
Table 1: Disinfectant Efficacy Against Bacteria and Antibiotic Resistance Genes
| Disinfectant / Method | Efficacy Against Bacterial Cells | Efficacy Against Resistance Genes | Notes on Material Compatibility |
|---|---|---|---|
| UV Light | High | High (Significant damage) | No chemical corrosion; ideal for sensitive equipment [52]. |
| Phenol | High | Moderate (Worked relatively well) | A notable stand-out for also damaging DNA [52]. |
| Hydrogen Peroxide | High | Low (Negligible impact on DNA) | Can be corrosive at high concentrations; requires compatibility check [50]. |
| Ethanol | High | Low (Negligible impact on DNA) | Generally safe for stainless steel; evaporates quickly [12]. |
| Benzalkonium Chloride | High | Low (Negligible impact on DNA) | A quaternary ammonium compound; can leave residues that lead to pitting [52] [50]. |
| Chlorine (Bleach) | High | Low (Less effective than anticipated) | Highly corrosive to stainless steel; must be thoroughly rinsed [52] [12]. |
Experimental Protocol: Evaluating Disinfectant Corrosion and Efficacy
This protocol outlines a method to simultaneously test the antimicrobial efficacy of a disinfectant and its potential to corrode stainless steel, simulating conditions in a biosafety cabinet.
Objective: To evaluate the corrosive effects of common disinfectants on stainless steel coupons while assessing their ability to inactivate bacterial pathogens and degrade antibiotic resistance genes (ARGs).
Materials:
- Stainless Steel Coupons: 1cm x 1cm squares with a specified surface finish (e.g., #4 brush or 2B finish).
- Test Microorganisms: Antibiotic-resistant bacterial strains (e.g., Methicillin-resistant Staphylococcus aureus (MRSA)).
- Disinfectants: Prepare working solutions of disinfectants under test (e.g., 1:10 bleach, 70% ethanol, 3-6% hydrogen peroxide, quaternary ammonium compounds).
- Neutralizing Broth: To halt the action of the disinfectant at the end of the contact time.
- Equipment: Laminar flow hood, vortex mixer, incubator, materials for polymerase chain reaction (PCR) or quantitative PCR (qPCR).
Methodology:
- Coupon Preparation and Inoculation:
- Clean and sterilize all stainless steel coupons using an autoclave.
- Spot-inoculate a known concentration (e.g., 10^7 CFU) of the test bacterium in a small volume (e.g., 10 µL) onto the surface of the coupon and allow it to dry [52].
- Disinfectant Application:
- Apply the disinfectant to the inoculated coupon, ensuring complete coverage of the inoculated area.
- Allow the disinfectant to remain in contact for the manufacturer-recommended time (e.g., 1-10 minutes).
- Neutralization and Microbial Recovery:
- After the contact time, transfer the coupon to a tube containing neutralization broth and vortex vigorously to neutralize the disinfectant and recover any surviving bacteria.
- Analysis:
- Viability Assay: Serially dilute the neutralization broth and plate on agar to determine the number of surviving colony-forming units (CFU).
- Genetic Damage Assay: Extract total DNA from the suspension and use qPCR to quantify the integrity and copy number of specific antibiotic resistance genes [52].
- Corrosion Assessment: Visually inspect coupons under magnification for pitting or discoloration. Over multiple test cycles, use techniques like profilometry to measure surface roughness.
Logical Workflow for Disinfectant Selection and Corrosion Prevention
The diagram below outlines a decision-making workflow to guide the selection of disinfectants for stainless steel surfaces in a BSC, balancing efficacy with material compatibility.
The Scientist's Toolkit: Key Research Reagents & Materials
Table 2: Essential Materials for Disinfection and Corrosion Studies
| Item | Function / Relevance |
|---|---|
| Stainless Steel Coupons | Standardized test surfaces with controlled finish and composition to simulate BSC work surfaces. |
| Antibiotic-Resistant Bacteria (e.g., MRSA) | Model pathogens for testing disinfectant efficacy against highly resistant, clinically relevant strains [52]. |
| Neutralizing Broth | Stops the disinfectant's action at a precise time, allowing for accurate measurement of surviving microbes. |
| Quaternary Ammonium Compounds (e.g., Benzalkonium Chloride) | A common disinfectant class known to be ineffective against resistance genes and can leave corrosive residues [52] [50]. |
| Phenol-based Disinfectant | A chemical option highlighted for its relatively good performance in damaging bacterial DNA [52]. |
| Polymerase Chain Reaction (PCR) Reagents | Used to amplify and quantify specific antibiotic resistance genes (e.g., icaA, icaD) to assess genetic damage post-disinfection [52] [53]. |
| Non-Abrasive Cleaning Pads & Tools | Specialized pads (e.g., Sahara Buffing Pads) for removing corrosive residues without scratching the stainless steel surface [51]. |
| Passivation Chemicals | Acidic solutions used to restore the protective chromium oxide layer on stainless steel, re-establishing corrosion resistance [49]. |
Optimizing BSC Placement and Laboratory Environment to Minimize Airflow Disruption
Troubleshooting Guides
Guide 1: Resolving Common BSC Airflow Disruptions
Problem: Inconsistent or turbulent airflow within the biological safety cabinet (BSC), leading to potential containment failures.
Diagnosis and Solution: Airflow issues can compromise the primary containment function of your BSC. The table below outlines common symptoms, their probable causes, and evidence-based solutions.
Table 1: Troubleshooting Common BSC Airflow Issues
| Observed Symptom | Potential Root Cause | Recommended Solution |
|---|---|---|
| Low inflow velocity [34] | Clogged HEPA filter [34] | Replace HEPA filter following formal decontamination [7]. |
| Uneven airflow distribution [34] | Improper calibration [34] | Recalibrate airflow settings; ensure annual recertification [17]. |
| Excessive turbulence [34] | Obstructed front or rear air grilles [34] | Clear all obstructions; ensure nothing blocks intake or exhaust [17]. |
| Fluctuating face velocity | Disruptive room drafts from doors, vents, or high-traffic areas [54] | Relocate BSC away from disruptive sources [10] or install physical barriers. |
| Consistent contamination of samples | Cross-contamination due to poor workflow or disruptive movements [7] | Establish a clean-to-dirty workflow and use slow, deliberate motions [17]. |
Experimental Protocol: Visualizing Airflow Integrity To empirically assess if your BSC's airflow is being disrupted by external factors, you can perform a qualitative smoke test.
- Gather Materials: A commercial smoke generator or a single Tyndall-style smoke tube.
- Preparation: Ensure the BSC is running and has been purged for at least 15 minutes. Disinfect all surfaces.
- Procedure:
- Slowly release a small, localized stream of smoke at the four front corners of the cabinet opening, about 6 inches away from the sash.
- Observe the path of the smoke. Proper inflow should immediately pull smoke into the cabinet without hesitation or outward escape.
- Place the smoke source near the front grille and the rear exhaust grille inside the cabinet to check for obstructions that cause turbulence.
- Interpretation: Any smoke that escapes the front opening or shows erratic, swirling patterns inside the work zone indicates compromised airflow due to filter issues, external drafts, or internal obstructions. A well-functioning BSC will show smooth, predictable inflow and downflow patterns [10] [34].
Guide 2: Diagnosing and Mitigating External Airflow Interference
Problem: The laboratory's ambient environment is causing disruptions to the BSC's protective air curtain.
Diagnosis and Solution: The BSC does not operate in isolation. The design and activity within the laboratory room itself are critical for maintaining containment.
Table 2: Addressing External Environmental Disruptions
| Environmental Factor | Impact on BSC Performance | Mitigation Strategy |
|---|---|---|
| HVAC Supply Vents [54] | Creates drafts that can overcome the BSC's inflow velocity, allowing contaminants to escape. | Maintain a minimum 1.5-meter (5-foot) clearance between BSC and supply diffusers [10]. |
| Room Traffic & Doorways [7] | Sudden movements and door openings create transient pressure changes and air currents. | Position BSC away from doors and high-traffic pathways; a minimum of 60 inches from a rear doorway is recommended [10]. |
| Other Laboratory Equipment [54] | Equipment with fans (e.g., centrifuges) generates heat and turbulent air. | Place heat-generating and fan-powered equipment far from the BSC. Do not operate such equipment inside the BSC while conducting other activities [7]. |
| Improper Room Pressure [55] | Can destabilize the delicate balance of the BSC's airflow, leading to aerosol leaks [54]. | Ensure labs are maintained at negative pressure relative to corridors to support containment [55]. |
Experimental Protocol: Mapping Room Airflow Patterns This protocol helps visualize how the room's environment interacts with the BSC.
- Gather Materials: A handheld anemometer for measuring air velocity and a smoke tube.
- Preparation: Conduct the test under normal laboratory operating conditions.
- Procedure:
- Use the anemometer to measure air velocities at various points around the BSC, particularly near the front opening. Note any areas with velocities exceeding 0.2 m/s towards the BSC.
- Use the smoke tube to trace airflow patterns in the space surrounding the BSC. Observe if room air currents flow toward or across the BSC opening.
- Interpretation: Significant air currents ( > 0.2 m/s) directed at the BSC front, or turbulent patterns near the opening, confirm an suboptimal placement. The mitigation strategies in the table above should be implemented [10] [54].
Frequently Asked Questions (FAQs)
Q1: What is the single most important factor when choosing a location for a new BSC? The most critical factor is placing the BSC in a "low-traffic, low-turbulence" zone. This means it should be sited away from doors, operable windows, busy aisles, and directly under HVAC supply diffusers. The goal is to minimize any and all external air currents that could disrupt the critical air curtain at the cabinet's front opening [10] [54] [7].
Q2: What are the minimum clearance distances required around a BSC for safe operation and service? The NSF/ANSI 49 standard provides clear guidance on clearances. Key distances include:
- Sides & Rear: At least 6 inches (150 mm) from walls or other obstructions for service access [10].
- Front: A minimum of 40 inches (1020 mm) of open space for the user [10].
- Above: At least 12 inches (300 mm) clearance from overhead obstructions for exhaust filter testing and maintenance [10].
Q3: Can I place my BSC directly next to a fume hood or another BSC? While possible, it requires careful planning. A minimum of 6 inches should be maintained between adjacent cabinets. More importantly, if two BSCs face each other, a substantial distance of 100 inches (2540 mm) is recommended to prevent their airflow patterns from interfering with each other. The operation of fume hoods can create significant room airflow disturbances, so proximity should be evaluated carefully [10] [54].
Q4: How do personnel practices affect BSC airflow? User technique is a major factor. Rapid arm movements in and out of the cabinet, talking directly into the opening, or overloading the work surface can create turbulence that breaches the air barrier. Always work with slow, deliberate motions, and minimize the number of times arms are moved in and out after work begins [7].
Q5: Our BSC is in a cramped lab. If we can't move it, what can we do to improve the environment? If relocation is not feasible, you can:
- Install Barriers: Use transparent acrylic shields or partitions between the BSC and nearby doors or aisles to deflect air currents.
- Adjust HVAC: Work with facilities engineers to adjust the direction, velocity, or location of nearby supply air diffusers.
- Enforce Protocols: Implement strict lab policies to minimize traffic and rapid movement near the cabinet during sensitive operations [54].
The Scientist's Toolkit: Essential Materials for BSC Environmental Management
Table 3: Key Resources for BSC Placement and Airflow Management
| Item / Tool | Primary Function | Application in Research |
|---|---|---|
| Handheld Anemometer | Measures air velocity. | Quantifying BSC inflow and downflow velocities and detecting drafts in the lab environment. |
| Smoke Tube Generator | Provides visual tracing of airflow patterns. | Qualitatively verifying BSC containment (inflow) and identifying turbulent room air currents. |
| Digital Inclined Manometer | Measures very low pressure differentials. | Verifying laboratory room pressure relationships (negative vs. positive pressure). |
| Laser Particle Counter | Counts and sizes airborne particles. | Certifying HEPA filter integrity and verifying the cleanliness of the BSC's work zone. |
| Stainless Steel Polisher (e.g., Autosol) | Cleans and maintains stainless steel surfaces. | Removing stubborn residues from the BSC work surface without causing corrosion [10]. |
BSC Placement Optimization Workflow
The diagram below outlines a logical decision-making process for optimal BSC placement and environmental management.
Managing Stubborn Contaminants and Spill Response Protocols
Troubleshooting Guides
How do I troubleshoot persistent contamination in my BSC despite regular cleaning?
Persistent contamination often stems from overlooked areas or improper techniques.
- Issue: Contamination recurs even after standard disinfection.
- Solution:
- Check for Hidden Spills: Lift the work surface to inspect and clean the spill tray and drain pan beneath. Spills can flow into these areas, becoming a source of continuous contamination [41] [17].
- Review Cleaning Technique: Ensure you are cleaning from the cleanest to the dirtiest areas and from top to bottom to avoid spreading contaminants. Always use fresh wipes for each surface [33].
- Inspect Cabinet Integrity: Check for any breaches in gaskets, seals, and the HEPA filter housing. A certified technician should perform integrity testing during annual recertification [7] [34].
- Evaluate Work Practices: Ensure that all materials placed inside the BSC have their surfaces decontaminated first. Avoid quick, disruptive movements that can pull contaminated room air into the workspace [7] [17].
What should I do if there is a major biological spill inside the biosafety cabinet?
A prompt and methodical response is critical for personnel safety.
- Issue: A significant spill of biological material occurs within the BSC.
- Solution:
- Keep the BSC On: Immediately leave the cabinet running to contain the spill. Close the room door, notify coworkers, and post a warning sign [41] [56].
- Wait for Aerosols to Settle: If the spill may have generated aerosols, all occupants should leave the room for 30 minutes before beginning cleanup [41] [56].
- Contain and Flood the Spill: Put on appropriate Personal Protective Equipment (PPE). Contain the spill with absorbent towels or bench liners, then flood the area with an appropriate disinfectant (e.g., a 1:10 dilution of fresh bleach). Let it sit for a 10-20 minute contact time [41] [56].
- Clean from Perimeter to Center: Push the absorbent material from the edges toward the center to avoid spreading the spill. Discard all waste as regulated medical waste [41].
- Perform Extensive Decontamination: Wipe down all interior surfaces of the BSC, including the walls, glass, and grilles. If liquid flowed into the drain pan, decontaminate it by closing the drain valve and pouring disinfectant through the front and rear grills, allowing 20-30 minutes of contact time before draining [41].
What causes airflow alarms, and how should I respond?
Airflow alarms indicate a potential breach in containment.
- Issue: The biosafety cabinet's airflow alarm is activated.
- Solution:
- Stop Work Immediately: Cease all activities within the BSC to ensure safety [57].
- Check for Obstructions: Look for and remove any items that may be blocking the front intake grill or the rear exhaust grill [7] [17].
- Verify Sash Height: Ensure the viewing sash is at the correct, certified height as indicated on the cabinet. An improperly raised sash can disrupt airflow [17].
- Contact a Certified Technician: If no simple obstruction is found, the issue may be with the blower, filters, or sensors. The cabinet must be inspected and repaired by a qualified professional before further use [57] [34].
Frequently Asked Questions (FAQs)
What is the correct sequence for routine cleaning of a BSC?
Always follow a top-to-bottom, clean-to-dirty sequence to prevent recontamination of cleaned areas.
- Preparation: Gather all supplies (disinfectant, lint-free wipes, PPE). Let the BSC run for 5-10 minutes to purge the air. Wear a lab coat and gloves [33] [17].
- Interior Surfaces: Start with the ceiling (upper interior), then wipe the back and side walls, moving downward [33].
- Work Surface: Thoroughly disinfect the entire work surface.
- Grilles: Clean the front and rear air grilles last.
- Final Steps: After removing all materials, wipe down the exterior surfaces. Allow the BSC to run for an additional 2-5 minutes before shutting it down [7].
Which disinfectants are most effective, and what are their drawbacks?
The choice of disinfectant depends on the biological agents used and material compatibility.
Table 1: Common Disinfectants for Biosafety Cabinets
| Disinfectant | Concentration | Key Advantages | Key Disadvantages | Contact Time |
|---|---|---|---|---|
| Sodium Hypochlorite (Bleach) | 1:10 dilution (10%) | Broad-spectrum efficacy, inactivates most pathogens [41] [56] | Corrosive to metal surfaces, requires rinsing with ethanol or water [7] [17] | 10-20 minutes [41] [56] |
| 70% Ethanol | 70% solution | Effective general disinfectant, fast evaporation, non-corrosive if used correctly [33] | Evaporates too quickly for full contact time; not a standalone disinfectant for spills [41] | 1-5 minutes [33] |
| Vaporous Hydrogen Peroxide (VHP) | Varies | Excellent sporicidal activity, penetrates hard-to-reach areas, leaves no residue [58] | Requires specialized equipment and procedures; typically for full cabinet decontamination [58] | 45 minutes to several hours [58] |
How often should different parts of the BSC be cleaned and maintained?
Adherence to a strict schedule is key to preventative maintenance.
Table 2: Biosafety Cabinet Maintenance Schedule
| Component | Frequency | Action |
|---|---|---|
| Work Surface & Interior Walls | Before and after each use [33] [17] | Disinfect with an appropriate agent. |
| Viewing Sash & Grilles | Weekly [33] | Thorough wiping and disinfection. |
| Spill Tray & Drain Pan | Monthly or after a spill [41] [17] | Lift work surface, inspect, and clean. |
| HEPA Filters & Airflow | Annually (or after moving/repairs) [7] [57] [17] | Full certification and integrity testing by a qualified technician. |
| UV Light (if present) | Weekly cleaning; periodic output testing [7] | Clean bulb with 70% ethanol; check intensity annually. |
Experimental Protocols
Protocol 1: Systematic Decontamination Validation for Stubborn Contaminants
This protocol is adapted from a study validating the decontamination of a Class II Type A2 BSC using room fumigation [58].
- Objective: To achieve and validate the sterilization of all internal surfaces and components of a BSC, including HEPA filter pleats and internal plenums.
- Materials:
- Vaporous Hydrogen Peroxide (VHP) generator or Peracetic Acid (PAA) dry fogging system.
- Geobacillus stearothermophilus Biological Indicators (BIs).
- Trypticase soy broth with phenol red.
- Incubator set to 56°C.
- Methodology:
- Placement of Biological Indicators: Place BIs at critical internal locations, including the work surface, below the work tray, within the pleats of the supply and exhaust HEPA filters, and in the common and negative plenums [58].
- Fumigation Cycle: Seal the room containing the BSC. Initiate the fumigation cycle (e.g., using VHP or PAA) while ensuring the BSC is left running. The operational blower is crucial for circulating the fumigant through the entire cabinet interior and filter pleats [58].
- Aeration and Retrieval: After the cycle and room aeration, retrieve the BIs.
- Incubation and Analysis: Transfer each BI to a tube of culture broth and incubate at 56°C for up to 7 days. The absence of bacterial growth (no turbidity or color change) indicates successful decontamination [58].
- Key Finding: Decontamination was successful only when the BSC was operational during fumigation, demonstrating that cabinet airflow is essential for sterilizing internal plenums and HEPA filters [58].
Protocol 2: Internal Drain Pan Decontamination After a Spill
This protocol details the steps for decontaminating the catch basin after a liquid spill, as referenced in the troubleshooting guide [41].
- Objective: To safely decontaminate the drain pan area after a spill has resulted in liquids flowing into the basin beneath the work surface.
- Materials: Disinfectant (e.g., fresh 10% bleach), paper towels, collection vessel, flexible tubing, biohazard bag.
- Methodology:
- Close Drain Valve: Ensure the drain valve under the cabinet is closed [41].
- Flood with Disinfectant: Pour disinfectant onto the work surface and through the front and rear grills into the drain pan. Allow a 20-30 minute contact time [41].
- Absorb and Discard: Absorb the fluid from the work surface with paper towels and discard them in a biohazard bag [41].
- Drain the Pan: Place a collection vessel with fresh disinfectant below the drain. Attach flexible tubing to the drain valve, submerging the open end in the disinfectant to minimize aerosols. Open the drain valve and empty the pan into the vessel [41].
- Final Flush: Flush the drain pan with water and manage all contaminated materials as infectious waste [41].
Workflow and Relationship Diagrams
BSC Spill Response and Decontamination Workflow
Routine BSC Cleaning Sequence Logic
The Scientist's Toolkit: Research Reagent Solutions
Table 3: Essential Materials for BSC Decontamination and Spill Response
| Item | Function | Key Considerations |
|---|---|---|
| Disinfectants (e.g., Bleach, 70% Ethanol) | To inactivate biological agents on surfaces [41] [33]. | Bleach for broad-spectrum kill on spills; ethanol for routine cleaning. Check for agent-specific efficacy. Bleach is corrosive [7]. |
| Lint-free Wipes | To apply disinfectant without leaving particles [33]. | Pre-moisten to prevent them from being drawn into cabinet risers [7]. |
| Biological Indicators (BIs) | To validate the efficacy of decontamination protocols (e.g., fumigation) [58]. | Use appropriate microorganisms (e.g., G. stearothermophilus for VHP). |
| Absorbent Materials (Pads, Towels) | To contain and soak up liquid spills quickly [41] [56]. | Should be part of a pre-assembled spill kit. |
| Personal Protective Equipment (PPE) | To protect the researcher during cleaning and spill response [41] [56]. | Includes lab coat, gloves (double-gloving recommended for spills), and eye protection. |
| HEPA Filters | The primary engineering control for containing particulates and maintaining air purity [7] [3]. | Must be certified annually and decontaminated before replacement [7]. |
| Spill Kit Container | A central, portable bucket or tub to store all spill response materials [56]. | Should be clearly labeled and accessible to all lab personnel. |
Understanding the Limitations and Efficacy of UV Lamps
Ultraviolet (UV) radiation, particularly in the UV-C spectrum at 253.7 nanometers, is known for its germicidal properties. It works by causing photochemical damage to microbial DNA, rendering microorganisms unable to replicate [59]. However, its effectiveness is highly situational and depends on several factors, which are summarized in the table below.
Table 1: Factors Affecting UV Lamp Efficacy
| Factor | Impact on UV Efficacy |
|---|---|
| Line of Sight | UV light cannot penetrate surfaces or effectively disinfect shadowed areas, cracks, or through the grill work of a BSC [60] [61]. |
| Surface Penetration | It is ineffective on porous or opaque materials like wood or foam and cannot reach microbes protected by dust, dirt, or organic matter [60] [61]. |
| Environmental Conditions | High humidity can absorb UV radiation, reducing its effectiveness. The accumulation of dust and dirt on the bulb surface also diminishes its output [59] [60]. |
| Lamp Age and Output | A UV lamp's intensity decreases with age. The bulb may remain lit long after its germicidal effectiveness is gone [60] [61]. |
| Distance | The intensity of UV light follows the inverse square law, decreasing significantly with distance from the source. |
It is crucial to understand that UV irradiation should only be used as a secondary method for maintaining the disinfected status of a biosafety cabinet [60]. It must never replace routine chemical decontamination, which is the primary and required method for disinfecting the interior surfaces of a BSC [59] [61].
UV Efficacy Relationship Diagram: This chart illustrates how various limitations can block or reduce the path of UV light from effectively damaging microbial DNA.
Safety Hazards and Personal Protective Equipment (PPE)
Exposure to UV-C radiation poses significant health risks. Unfortunately, there are no immediate warning symptoms to indicate overexposure, with the effects often appearing hours later [62]. The stainless-steel interior of a BSC can reflect hazardous UV illumination out of the cabinet opening, creating a risk for nearby personnel [60].
Table 2: UV Radiation Health Hazards and Protections
| Hazard Type | Specific Risks | Required Personal Protective Equipment (PPE) |
|---|---|---|
| Ocular Damage | Photokeratitis (a feeling of sand in the eyes), corneal injuries, cataracts, and retinal burns [62] [60]. | A polycarbonate face shield stamped with ANSI Z87.1-1989 UV certification [62]. Ordinary prescription eyeglasses are not sufficient. |
| Skin Damage | Erythema (sunburn), increased skin pigmentation (tanning), and skin cancer [62] [60]. | Lab coat with no gap between the cuff and the glove [62] [60]. |
| Other Risks | Prolonged UV exposure can cause deterioration of some plastics and polymers within the work zone [59] [61]. | Gloves that protect the hands and wrists [62]. |
Critical Safety Protocols:
- The UV lamp must never be on while an operator is working in the cabinet or when the laboratory is occupied by other unprotected personnel [60] [61].
- The sash should be completely closed when the UV light is operating [60].
- Clear signage is required on the front of the cabinet with a warning such as: "CAUTION: High Intensity Ultraviolet Energy. Protect Skin and Eyes" or "CAUTION: Turn off UV light before working" [62] [61].
Proper Maintenance and Monitoring Protocols
Proper maintenance is critical for ensuring any level of efficacy from a UV lamp and for safety. Without it, the lamp can provide a false sense of security.
Cleaning Procedure:
- Frequency: Clean UV lamp bulbs weekly or every other week [60] [61].
- Method: Turn off and allow the UV lamp to cool completely. Wipe the surface of the bulb gently with a soft cloth dampened with 70% ethanol [62] [60].
- Precaution: Do not touch the bulb with bare hands, as natural oils can create dead space on the bulb’s surface and affect performance [60].
Efficiency Monitoring and Replacement:
- Monitor Output: Check the lamp's efficiency monthly using a UV meter to ensure it delivers the proper intensity (approximately 40 µW/cm² at 253.7nm at the center of the work surface) [60].
- Lifespan: UV lamps have a finite lifespan (e.g., some are rated for 8,000 hours). Newer BSC models may have a UV compensation feature, but the bulb must be replaced according to the manufacturer's instructions or when monitoring indicates a drop in efficacy [60].
- Safe Handling: Always wear gloves when handling bulbs for replacement or cleaning to prevent oil transfer [60].
- Waste Disposal: Due to their mercury content, spent UV lamps must be decontaminated and disposed of as hazardous universal waste [60].
Troubleshooting Common UV Lamp Issues
FAQ 1: The UV lamp in my BSC is on and emitting a blue glow, but my cultures are still getting contaminated. Why? This is a common issue stemming from over-reliance on UV. The blue glow is not a guarantee of disinfection. The cause is likely one or more of the limitations in Table 1. Remember, UV light is only a supplemental tool. The primary decontamination method must be a liquid chemical disinfectant applied to all interior surfaces before and after work [59] [61].
FAQ 2: My BSC's UV lamp is relatively new. Do I still need to chemically decontaminate the interior surfaces? Yes, absolutely. Chemical decontamination is non-negotiable and is the primary, required method for disinfection. UV irradiation is, at best, a secondary measure to help maintain a disinfected state between chemical cleanings [60] [61].
FAQ 3: What is the proper sequence for shutting down and activating the UV lamp in my workflow?
- Before starting work: Turn off the UV lamp as soon as you enter the room. Decontaminate all interior surfaces with an appropriate chemical disinfectant. Never work in the cabinet while the UV light is on [61].
- After completing work: After chemically decontaminating the interior and removing all materials, close the sash. Then, you may turn on the UV lamp. Note that the lamp should be off when the room is occupied [60] [61].
FAQ 4: Are there any materials I should be cautious about placing in the BSC when the UV lamp is on? Yes. Prolonged exposure to UV radiation can cause material degradation, including the deterioration of plastics, polymers, and some types of tubing (e.g., natural gas tubing for burners) within the work zone [59] [61]. Remove all non-essential items before activating the UV lamp.
The Scientist's Toolkit: Essential Materials for UV Lamp Maintenance and Safety
Table 3: Key Research Reagent Solutions for UV Maintenance
| Item | Function | Key Usage Notes |
|---|---|---|
| UV Meter | Measures the intensity (µW/cm²) of UV-C light to verify germicidal output. | Critical for monthly efficiency checks to ensure the lamp is still functional beyond just emitting visible light [60]. |
| 70% Ethanol | Used for weekly cleaning of the UV bulb surface to remove dust and dirt that can block UV rays. | Apply with a soft cloth to a cool, turned-off bulb [62] [60]. |
| Chemical Disinfectants | Primary method for decontaminating all interior BSC surfaces. | Use an EPA-registered disinfectant appropriate for the biological agents in use. UV is not a substitute [60] [61]. |
| UV-Blocking Face Shield | Protects eyes and facial skin from harmful UV radiation exposure. | Must be made of polycarbonate and stamped with ANSI Z87.1 UV certification [62]. |
| Long-Cuffed Lab Coat & Gloves | Protects skin on arms and hands from erythema and burns. | Ensure no gap between the cuff of the coat and the glove [62]. |
| Warning Signs | Alerts personnel to the hazard of active UV light. | Must be posted on the BSC; should read "Caution: High Intensity Ultraviolet Energy" [62] [61]. |
Evidence-Based Disinfectant Validation and Advanced Decontamination Methods
This guide supports research on cleaning protocols for biological safety cabinets (BSCs) by providing a comparative analysis of three common disinfectants: Ethanol, Benzalkonium Chloride (BKC), and Bleach. The efficacy of a disinfectant is not universal; it depends on the specific microbial challenge, contact time, and the nature of the surface being treated. This resource offers troubleshooting guides and frequently asked questions to help researchers, scientists, and drug development professionals select and use the most appropriate disinfectant for their specific experimental context, thereby minimizing the risk of cross-contamination and ensuring the integrity of cell-processing operations [63].
Disinfectant Profiles and Efficacy Data
The table below summarizes the key characteristics, advantages, and disadvantages of 70% Ethanol, Benzalkonium Chloride, and Bleach.
Table 1: Comparative Overview of Common Laboratory Disinfectants
| Property | 70% Ethanol | Benzalkonium Chloride (BKC) | Bleach (Sodium Hypochlorite) |
|---|---|---|---|
| Recommended Uses | Cleaning some instruments, skin antisepsis [64] | Disinfection of non-critical surfaces, some semicritical equipment [64] | Floors, spills, bench tops, contaminated clothing [64] |
| Microbial Efficacy | Bactericidal, tuberculocidal, fungicidal, virucidal (lipophilic viruses) [64] [65]. Not sporicidal [64]. | Bactericidal (excellent), fungicidal (good), virucidal (good, but not as effective as phenols) [64]. Does not eliminate spores or TB bacteria [64]. | Effective against vegetative bacteria, fungi, lipid and non-lipid viruses, Coxiella burnetii and TB [64]. Has some effect on bacterial spores [64]. |
| Advantages | Fairly inexpensive, rapid action [64]. | Colorless, odorless, non-staining, contains a detergent, rapid action [64]. | Broad-spectrum efficacy, inexpensive, penetrates well, rapid kill [64]. |
| Disadvantages | Evaporates quickly (insufficient contact time), not effective when organic matter is present, not sporicidal [64]. | Inactivated by organic matter and hard water, does not eliminate spores or TB [64]. | Corrosive to metals, inactivated by organic matter, unpleasant odor, can bleach fabrics [64]. |
| Hazards | Flammable, eye irritant, toxic [64]. | Skin and eye irritant, toxic [64]. | Corrosive, skin and respiratory irritant, toxic [64]. |
Quantitative Efficacy Against Specific Pathogens
The following tables summarize quantitative data on the efficacy of these disinfectants against specific pathogens, critical for evidence-based disinfectant selection.
Table 2: Efficacy Against Mycoplasma, Viruses, and Endotoxins in BSC Changeover Cleaning [63]
| Cleaning Method | Mycoplasma orale | Feline Calicivirus (FCV) | Endotoxins (E. coli) |
|---|---|---|---|
| UV Irradiation (200 mJ/cm²) | Growth inhibited | Reduced below detection limit | No significant reduction |
| Wiping with BKC | Growth inhibited | Reduced below detection limit | Significant reduction |
| Wiping with 70% Ethanol | Detected after cleaning | Not specified in results | No significant reduction |
| Wiping with Distilled Water | Not effective | Reduced below detection limit | Significant reduction |
Table 3: Virucidal Efficacy of Disinfectants Against SARS-CoV-2 [66]
| Disinfectant Active Ingredient | Working Concentration | Exposure Time | SARS-CoV-2 Reduction Rate | Cytotoxicity Notes |
|---|---|---|---|---|
| Ethanol | 83% | 10 minutes | 100% | Safe |
| Propanol/Ethanol | 60% | 10 minutes | 100% | Safe |
| Benzalkonium Chloride (BAC) | 0.05% - 0.4% | 5-10 minutes | 90.7% - 100% | Exhibited cytotoxicity |
| Sodium Hypochlorite | 0.00108% - 0.0011% | 15 minutes | 100% | Not specified |
| Potassium Peroxymonosulfate | 0.497% | 10 minutes | 100% | Not specified |
| Citric Acid | 0.4% | 10 minutes | 0% | Not specified |
Troubleshooting Common Disinfection Issues
Problem 1: Recurring Mycoplasma Contamination in Cell Culture After BSC Use
- Potential Cause: Relying solely on 70% ethanol for decontamination. A 2024 study demonstrated that mycoplasma was detected on surfaces after wiping with 70% ethanol, indicating its inadequacy for eliminating this contaminant [63].
- Solution: Implement a two-step cleaning protocol. For changeover cleaning where mycoplasma risk is present, use a disinfectant proven effective against mycoplasma, such as BKC [63] or a diluted bleach solution [64], followed by a rinse with sterile water or 70% ethanol to remove corrosive residues if necessary [64].
Problem 2: Corrosion of Stainless Steel Surfaces in the BSC
- Potential Cause: Frequent or prolonged use of bleach (hypochlorite), which is corrosive to metals, especially at high concentrations [64].
- Solution: Use bleach at the recommended dilution (e.g., 1:10 for general surface decontamination, providing ~5000 ppm) [64]. Ensure contact time does not exceed 10 minutes. After disinfection, neutralize and remove residue by wiping the surface with sterile water [39] or 70% ethanol [64].
Problem 3: Inactivation of Disinfectant by Organic Load
- Potential Cause: Attempting to disinfect surfaces contaminated with culture media, serum, or other biological fluids without prior cleaning. Organic matter can inactivate many disinfectants, including bleach and quaternary ammonium compounds like BKC [64].
- Solution: Meticulously clean surfaces with a detergent or water to remove organic debris before applying the disinfectant. This is a critical first step for reliable disinfection [67].
Problem 4: Incomplete Viral Inactivation on Non-Critical Equipment
- Potential Cause: Using a disinfectant with limited virucidal scope or insufficient contact time. For example, 70% ethanol is not effective against all non-lipid viruses [65], and BKC's virucidal efficacy can vary [66].
- Solution: For broad-spectrum virucidal activity, including against hardy, non-enveloped viruses, use a disinfectant with proven efficacy. Bleach is highly effective [64]. For alcohol-based solutions, ensure a high enough concentration (e.g., 83% ethanol) and contact time against the target virus [66].
Frequently Asked Questions (FAQs)
Q1: Why is 70% ethanol more effective than 100% ethanol for disinfection? A1: The presence of water in 70% ethanol slows evaporation, allowing for longer contact time with microorganisms. Furthermore, water is essential for denaturing proteins, which is a key mechanism of microbial destruction by alcohol [65].
Q2: Is BKC an effective disinfectant against all viruses, including SARS-CoV-2? A2: BKC has shown effectiveness against SARS-CoV-2 at specific concentrations (0.05-0.4%) with a 5-10 minute contact time [66]. However, it is generally considered less effective than phenols against some viruses and is not active against certain types of non-enveloped viruses [64]. Always verify the label claims for the specific pathogen.
Q3: How should I prepare and handle a bleach solution for BSC decontamination? A3:
- Preparation: Dilute household bleach (typically 5.25-6.15% sodium hypochlorite) 1:10 in water to achieve a ~5000 ppm solution for general surface decontamination [64].
- Handling: Prepare fresh solutions before each use, as bleach degrades over time [64]. Wear appropriate PPE (gloves, lab coat, eye protection) as it is a skin and respiratory irritant [64].
- Neutralization: After a 10-minute contact time, rinse surfaces with sterile water or 70% ethanol to prevent corrosion [64] [39].
Q4: What is the single most important factor in successful disinfection? A4: While the choice of disinfectant is critical, meticulous cleaning of the surface before disinfection is paramount. Organic material (e.g., blood, serum, media) can inactivate many disinfectants. Cleaning removes this physical barrier and organic load, allowing the disinfectant to make direct and effective contact with microorganisms [67].
Experimental Protocols for Disinfectant Validation
This protocol describes a methodology to test whether a disinfectant can eliminate mycoplasma contamination from stainless steel surfaces, simulating BSC work surfaces.
- Contaminant Preparation: Thaw and dilute Mycoplasma orale to a concentration of 1 × 10^6 CFU/200 μL in saline. Dispense this volume onto a sterile SUS304 stainless steel plate (5x5 cm) and allow it to air-dry.
- Application of Disinfectant: Apply the disinfectant (e.g., 2 mL of BKC or 70% ethanol) to the contaminated plate. Wipe the surface using a sterile, non-shedding cloth (e.g., 7x7 cm BEMCOT wipe) with a standardized, controlled pressure and speed.
- Sample Collection: After cleaning, use a swab moistened with saline to collect residual material from the entire plate surface.
- Culture and Detection: Inoculate the collected sample into a specialized liquid mycoplasma culture medium (e.g., Hayflick broth). Incubate the culture at 32.5°C for up to two weeks.
- Analysis: Monitor the culture medium for color changes indicating mycoplasma growth. The absence of color change after two weeks signifies no detectable mycoplasma and effective disinfection.
This protocol uses the Tissue Culture Infectious Dose 50 (TCID50) assay to quantify the reduction in viral infectivity after disinfectant treatment.
- Virus-Disinfectant Mixing: Dilute the disinfectant to the desired working concentration in ultrapure water. Mix the disinfectant directly with a known titer of the virus (e.g., SARS-CoV-2) in a ratio defined by the experimental design.
- Incubation and Neutralization: Incubate the virus-disinfectant mixture for the desired contact time (e.g., 10 minutes) at room temperature. After incubation, immediately neutralize the disinfectant's action by adding a neutralization medium, typically Dulbecco's Modified Eagle Medium (DMEM) supplemented with 10% fetal bovine serum (FBS).
- Titration of Residual Virus: Serially dilute the neutralized mixture (e.g., 10^-1 to 10^-7) in serum-free medium. Add each dilution to susceptible host cells (e.g., Vero E6 cells) seeded in a 96-well plate.
- Observation and Calculation: Incubate the cells for 3-5 days and observe for cytopathic effect (CPE). The viral titer (TCID50/mL) in the disinfectant-treated sample is calculated using the Reed-Muench method and compared to an untreated virus control to determine the percentage reduction in viral infectivity.
The Scientist's Toolkit: Essential Reagents and Materials
Table 4: Key Research Reagent Solutions for Disinfectant Testing
| Reagent/Material | Function in Disinfectant Testing | Example Use Case |
|---|---|---|
| SUS304 Stainless Steel Plates | Simulates the common work surface material of a Biosafety Cabinet for contamination and cleaning studies [63]. | Used as a carrier to test the efficacy of disinfectants on a hard, non-porous surface [63]. |
| Mycoplasma Culture Medium (Hayflick Broth) | A specialized growth medium used to support the growth and detection of fastidious microorganisms like mycoplasma [63]. | Detecting the presence of viable Mycoplasma orale after a disinfection procedure [63]. |
| Vero E6 Cells | A cell line derived from African green monkey kidney epithelial cells, highly susceptible to infection by many viruses, including SARS-CoV-2 [66]. | Used in the TCID50 assay to propagate virus and quantify viral infectivity after disinfectant treatment [66]. |
| Dulbecco's Modified Eagle Medium (DMEM) with FBS | A standard cell culture medium used to grow and maintain mammalian cells. The FBS provides essential nutrients. Also used to neutralize disinfectants [66]. | Serves as a culture medium for Vero E6 cells and as a neutralizing agent to stop the chemical action of disinfectants after the contact time has elapsed [66]. |
| BEMCOT Wipe | A non-woven, low-linting wiping cloth suitable for critical cleaning and disinfection applications in cleanrooms and laboratories [63]. | Used to apply disinfectants to test surfaces in a standardized, reproducible manner that mimics real-world wiping practices [63]. |
Visual Workflows for Disinfectant Selection and Testing
Disinfectant Selection Logic
Diagram 1: Disinfectant Selection Logic
Disinfectant Testing Workflow
Diagram 2: Disinfectant Testing Workflow
Troubleshooting Guides
Guide 1: Addressing Ineffective Decontamination of Mycoplasma
Problem: Standard 70% ethanol (ETH) wiping does not effectively eliminate mycoplasma contamination from biosafety cabinet (BSC) work surfaces, leading to potential cross-contamination of cell products [68] [63].
Explanation: Mycoplasmas are unique microorganisms with high adhesiveness and mobility. Their resistance to common disinfectants like ethanol necessitates a re-evaluation of standard cleaning protocols in cell-processing facilities [63].
Solution: Implement a combination cleaning approach. A recent 2024 study demonstrates that ultraviolet (UV) irradiation at 200 mJ/cm² for 20 minutes or wiping with benzalkonium chloride (BKC) effectively inhibits mycoplasma growth, whereas mycoplasma was detected on all stainless-steel plates cleaned with 70% ETH [68] [63].
Steps for Resolution:
- Pre-cleaning: Remove all visible debris from the work surface using a sterile wipe.
- Primary Decontamination: Wipe down the entire work surface, including the walls and grille, using a BKC-soaked wipe (0.1% w/v BKC with a corrosion inhibitor) [63].
- Supplementary Treatment: After wiping, subject the cabinet to UV-C irradiation at a dose of 200 mJ/cm² for 20 minutes for an additional layer of protection [68] [63].
- Verification: Establish a routine monitoring program using liquid culture medium to verify the absence of mycoplasma post-cleaning [63].
Guide 2: Managing Persistent Viral and Endotoxin Contamination
Problem: Endotoxins and certain viruses persist on BSC surfaces after standard decontamination protocols, compromising product safety [68] [63].
Explanation: Endotoxins, which are heat-stable lipopolysaccharides from Gram-negative bacteria, are not living organisms. Therefore, methods like UV irradiation that target genetic material are ineffective against them. Physical removal is required [63]. Similarly, the efficacy of disinfectants varies against different virus types.
Solution: Adopt a targeted, evidence-based cleaning strategy. Research indicates that wiping with distilled water (DW) or BKC is highly effective against viruses like Feline Calicivirus (FCV) and also reduces endotoxin levels. UV irradiation and 70% ETH wiping, however, do not significantly remove endotoxins [68] [63].
Steps for Resolution:
- Virus Elimination: For viral decontamination, use a protocol of wiping with BKC or DW. Both methods reduced FCV to below the detection limit in controlled studies [63].
- Endotoxin Removal: To eliminate endotoxins, wiping with BKC or DW is required. ETH wiping was found to be ineffective, leaving endotoxin residues comparable to not cleaning at all [68] [63].
- Combined Contaminant Load: For a comprehensive clean targeting multiple contaminant types, a two-step process of wiping with BKC followed by a DW rinse is recommended to address viruses, mycoplasma, and endotoxins simultaneously.
Guide 3: Recovering from Major Spills and Cross-Contamination Incidents
Problem: A significant spill of biohazardous material occurs inside the BSC, or routine monitoring indicates a cross-contamination event, posing a high risk to personnel and ongoing research [69].
Explanation: Major incidents often surpass the cleaning capability of standard wipe-down procedures. Internal components, such as the HEPA filters and the space under the work tray, can become contaminated, requiring a full cabinet decontamination [69].
Solution: Cease all work immediately and initiate a gas decontamination procedure. This should not be performed by laboratory personnel but by a specialized professional service [69].
Steps for Resolution:
- Containment: Leave the BSC blower running to contain the aerosolized contaminants. Alert all lab personnel of the incident.
- Initial Decontamination: For the immediate work surface, carefully pour a suitable disinfectant (e.g., a 1:10 diluted bleach solution) over the spill area to neutralize the bulk of the contaminant. Avoid spraying to prevent aerosolization [12].
- Professional Service: Contact a certified decontamination service provider. They will typically use a validated method, such as chlorine dioxide gas decontamination, to sterilize the entire cabinet interior, including all internal components and filters [69].
- Re-certification: Before the BSC is returned to service, it must be professionally certified to ensure it meets all performance and safety standards [12] [5].
Frequently Asked Questions (FAQs)
FAQ 1: Why is 70% ethanol, a widely used disinfectant, ineffective against some contaminants like mycoplasma and endotoxins? Recent evidence indicates that 70% ethanol (ETH), while effective against many bacteria and viruses, has limitations. Studies show mycoplasma was detected on all stainless-steel plates after ETH wiping [68] [63]. Furthermore, ETH wiping did not significantly reduce endotoxin levels compared to not cleaning at all [63]. This highlights the need for a risk-based selection of disinfectants tailored to the specific contaminants in your workflow.
FAQ 2: Is UV light alone sufficient for decontaminating my biosafety cabinet between uses? No, UV light should only be used as a supplementary decontamination method, not as a primary one. UV irradiation is ineffective against non-living contaminants like endotoxins [63] [12]. Its efficacy is also limited to direct line-of-sight surfaces and can be reduced by dust on the bulb [12]. Good chemical disinfection through physical wiping is a much more reliable and comprehensive method [12].
FAQ 3: How often should my biosafety cabinet be professionally certified and decontaminated? BSCs must be professionally certified at least annually, or every six months in BSL-3 laboratories [12]. Certification is also required after any relocation, repair, or filter change [5]. Full gas decontamination is necessary before moving or disposing of a cabinet, after a major spill that cannot be contained by routine cleaning, and prior to any maintenance that involves entering the contaminated plenum [69].
FAQ 4: What are the most common sources of contamination in a BSC that I can control? Common preventable sources of contamination include spills, cross-contamination from improperly handled materials, poor cell culture management, a generally dirty work environment, and the use of unclean lab coats or gloves [69]. Adherence to strict personal hygiene and standard operating procedures (SOPs) for workflow is critical.
Experimental Data on Cleaning Efficacy
Table 1: Efficacy of Different Cleaning Methods Against Specific Contaminants
Summary of quantitative data from Mizuno et al. (2024) on cleaning methods for biosafety cabinets. ND = Not Detected [68] [63].
| Contaminant | Measurement Method | Control (Wet Group) | UV Irradiation | BKC Wiping | 70% ETH Wiping | DW Wiping |
|---|---|---|---|---|---|---|
| Mycoplasma (M. orale) | Culture in liquid medium; detection after 2 weeks | Detected (Baseline) | Not Detected | Not Detected | Detected (100% of plates) | Detected (66.7% of plates) |
| Virus (Feline Calicivirus) | TCID₅₀ Test (TCID₅₀/plate) | 132,000 | ≤ Detection Limit | ≤ Detection Limit | Not Specified | ≤ Detection Limit |
| Endotoxin (E. coli) | Endotoxin Testing | Baseline Level | No Significant Reduction | Reduced | No Significant Reduction | Reduced |
Table 2: Research Reagent Solutions for BSC Decontamination
Key materials and their functions for evaluating and executing the cleaning protocols cited in the featured research [63].
| Reagent/Material | Function in Decontamination Protocol |
|---|---|
| Benzalkonium Chloride (BKC) | Disinfectant solution (0.1% w/v) effective against mycoplasma and viruses; also shows efficacy in reducing endotoxins. |
| 70% Ethanol (ETH) | A commonly used disinfectant; however, studies show it may be ineffective against mycoplasma and endotoxins. |
| Distilled Water (DW) | Effective for physical removal of viruses and endotoxins from surfaces via wiping. |
| UV-C Germicidal Lamp | Provides ultraviolet irradiation (200 mJ/cm²) effective for inactivating mycoplasma and viruses. |
| Liquid Culture Medium (for Mycoplasma) | Used post-cleaning to verify the presence or absence of viable mycoplasma via culture. |
| HEPA Filter | Critical cabinet component that traps particles and microorganisms to maintain sterile airflow; requires regular certification. |
Experimental Workflow and Protocol Diagrams
Cleaning Efficacy Experimental Workflow
Diagram 1: Flowchart of the experimental process used to evaluate cleaning efficacy.
Decontamination Decision Pathway
Diagram 2: A decision pathway for selecting cleaning methods based on contaminant type.
Within the context of research on cleaning protocols for biological safety cabinets (BSCs), validation through biological indicators and performance testing is a cornerstone of ensuring biosafety and experimental integrity. BSCs are engineered containment devices essential for protecting personnel, products, and the environment from biohazardous materials [17]. Their effectiveness, however, is not solely dependent on their mechanical function but is critically supported by rigorous and validated cleaning and decontamination protocols [7] [9]. This guide details the principles of using biological indicators and performance testing to validate these essential procedures, providing a technical resource for researchers and scientists dedicated to upholding the highest standards of laboratory safety.
FAQs: Fundamentals of Biological Indicators and BSC Cleaning
What are biological indicators and how are they used in validation?
Biological Indicators (BIs) are test systems containing viable microorganisms that provide a defined, high resistance to a specific sterilization process [70]. They typically employ bacterial spores, such as Geobacillus stearothermophilus for steam and vaporized hydrogen peroxide sterilization, due to their exceptional toughness [70]. A BI provides a direct measure of the lethality of a decontamination process; if the process is effective, the spores are killed and no growth occurs upon incubation. This offers a high level of confidence that the process can eliminate less resistant environmental contaminants [70]. In practice, BIs are often used within Process Challenge Devices (PCDs), which are designed to represent the most challenging conditions routinely processed, ensuring that the validation test reflects real-world difficulties [70].
How often should a Biological Safety Cabinet be certified?
Annual recertification is a mandatory minimum for ensuring a BSC remains in good working order and provides adequate containment [7] [17]. Furthermore, a BSC must be certified in the following additional situations [7]:
- At the time of initial installation.
- Any time the BSC is moved or relocated.
- After any servicing of the internal plenums.
- After replacing the HEPA filters. This certification must be performed by qualified personnel using approved test methods and equipment to ensure validity [7].
What is the difference between daily cleaning, scheduled decontamination, and certification?
The maintenance of a BSC involves three distinct tiers of activity, each with a specific purpose, as outlined in the table below.
Table: Tiers of Biological Safety Cabinet Maintenance
| Activity | Frequency | Primary Goal | Key Actions |
|---|---|---|---|
| Daily Cleaning [9] [17] | Before and after each use | Remove aerosols and contaminants from surface to prevent cross-contamination | Wiping interior surfaces with 70% ethanol or suitable disinfectant; clearing debris. |
| Scheduled Decontamination [9] | Periodic (e.g., quarterly), after spills, or before filter changes [7] | Deep cleaning and disinfection of all interior surfaces | Applying disinfectant to all surfaces with full contact time; cleaning drain pans; may require formal decontamination (e.g., with formaldehyde gas) for major servicing [7]. |
| Annual Certification [7] [9] | At least annually, and after moving or repairs | Verify the cabinet's engineering controls and containment performance | Testing HEPA filter integrity, inflow and downflow velocities, and airflow patterns by a qualified professional. |
Why are HEPA filters critical, and what are the signs of filter failure?
High-Efficiency Particulate Air (HEPA) filters are the primary containment barrier in a BSC, trapping particles and microorganisms to prevent their escape [7] [17]. They are constructed to remove airborne biological contaminants from the air stream [7]. Signs that a HEPA filter may be failing or is compromised include [34]:
- A noticeable decrease in airflow velocity.
- Increased noise levels from the blower motor.
- The cabinet's monitoring alarms for low airflow or pressure differential.
- Visible particles or contamination in the work area.
- Failed integrity testing during annual certification. Addressing HEPA filter issues requires professional intervention, as filter replacement must be preceded by decontamination of the cabinet [7].
What are the best practices for disinfecting a BSC?
Proper disinfection is a core component of any BSC cleaning protocol. Key best practices include [7] [9] [17]:
- Systematic Wiping: Wipe all interior surfaces in a systematic order—top to bottom and from the cleanest to the dirtiest areas—to avoid re-contaminating cleaned surfaces [71].
- Proper Disinfectant Use: Use an agent-appropriate disinfectant (e.g., bleach, quaternary ammonium) and ensure surfaces remain wet for the full manufacturer-specified contact time. If using bleach, a second wipe with 70% ethanol or sterile water is needed to prevent corrosion of stainless steel [7].
- Avoid Spraying: Do not spray disinfectant directly inside the BSC, as aerosolized chemicals can damage HEPA filters or other components and pose an inhalation risk. Apply disinfectant to a wipe or towel instead [17].
- Glove Hygiene: Clean gloves with 70% isopropyl alcohol (IPA) before starting the interior cleaning to avoid introducing external contaminants [71].
- Post-Cleaning Purge: After cleaning and before starting work, allow the BSC to run for 2-5 minutes to purge airborne contaminants from the work area [7] [9].
Troubleshooting Guide: Common BSC Issues and Solutions
Table: Common Biosafety Cabinet Problems and Resolutions
| Problem | Potential Causes | Troubleshooting Steps | Preventive Measures |
|---|---|---|---|
| Airflow Alarms or Insufficient Airflow [34] | Clogged HEPA filter, motor malfunction, obstructed front or rear grilles, improper calibration. | Check for obstructions at air grilles; verify gauge readings; contact qualified technician for filter testing/motor repair. | Annual certification; keep grilles clear; avoid overloading the cabinet. |
| Contamination of Experiments [34] | Improper aseptic technique, compromised HEPA filter, inadequate surface disinfection, disrupted airflow (e.g., by rapid arm movement). | Review and reinforce user technique; perform thorough decontamination; check cabinet for integrity and filter failure. | Strict adherence to aseptic technique; systematic workflow (clean to dirty); minimize arm movement [7]. |
| Positive Biological Indicator [72] | Sterilization cycle failure, incorrect BI used, equipment malfunction, improper cycle settings. | 1. Take sterilizer out of service. 2. Recall items if a defect is confirmed. 3. Check for correct use and settings. 4. Repeat BI test in three consecutive cycles. 5. If repeat tests are positive, close the sterilizer until professionally serviced [72]. | Use correct BIs per manufacturer's IFU; follow validated cycle parameters; perform routine monitoring. |
| Sash Movement Problems [34] | Worn cables or pulleys, misaligned tracks, dirty tracks. | Clean and lubricate tracks per manufacturer's instructions; contact facilities or technician for component replacement. | Regular inspection of sash mechanism; gentle operation during use. |
| UV Light Not Effective [7] | Dusty bulb, end of lamp life, insufficient output intensity. | Clean lamp weekly with 70% ethanol; test energy output periodically; replace lamp as needed. | Never rely on UV light as a sole disinfectant; it is only an optional supplement to chemical disinfection [7]. |
Experimental Protocols for Validation
Protocol: Management of a Positive Biological Indicator in a Steam Sterilizer
This protocol outlines the steps to be taken when a biological indicator test from a steam sterilizer (autoclave) returns a positive result, indicating a potential sterilization failure [72].
Workflow for Managing a Positive Biological Indicator
Procedure:
- Immediate Action: Take the sterilizer out of service immediately. Notify the area supervisor and the infection control department [72].
- Item Recall Decision: Recall of processed items is not typically required for a single positive BI, unless the sterilizer or procedure is found to be defective. Implantable objects should be quarantined until BI results are known, as per AAMI guidelines [72] [70].
- Initial Verification:
- Check that the sterilizer was used correctly, including cycle parameters (time, temperature) and loading practices [72].
- Check with maintenance for any irregularities in the hospital steam supply or electrical systems [72].
- Verify that the correct biological indicator was used and that the result was interpreted according to the manufacturer's instructions for use (IFU) [72].
- Repeat Testing: As soon as possible, repeat the biological indicator test in three consecutive empty sterilizer cycles. If any of these additional tests are positive, the items from the suspect load(s) should be considered nonsterile and recalled for reprocessing [72].
- Resolution:
- If the three repeat BIs are negative, the sterilizer can be returned to service.
- If one or more repeat BIs are positive, escalate the issue. This involves requesting an inspection by sterilizer maintenance personnel, having the steam supply lines inspected, and discussing the abnormalities with the sterilizer manufacturer. The sterilizer must remain out of service until the problem is resolved and subsequent testing confirms three consecutive negative BI results [72].
Protocol: Routine Daily Disinfection of a Biological Safety Cabinet
This protocol describes the standard procedure for disinfecting a BSC before and after use to maintain an aseptic work environment [7] [9] [71].
Materials Required:
- Personal Protective Equipment (PPE): Lab coat and gloves [7] [17].
- Appropriate disinfectant (e.g., 70% Ethanol, diluted bleach).
- Wipes (e.g., lint-free, low-lint wipes, or disposable towels). Use heavy-duty wipes to prevent them from being drawn into the rear exhaust grille [7].
- 70% Isopropyl Alcohol (IPA) in a squirt bottle (not a spray bottle) [71] [17].
- Biohazard bag for waste.
Procedure:
- Preparation: Turn on the BSC and allow it to run for at least 5 minutes to purge stagnant air and airborne particles [9].
- Personal Hygiene: Wash hands and arms with a germicidal soap. Put on a long-sleeved lab coat and gloves [7]. Wipe gloved hands with 70% IPA to decontaminate them before beginning the interior cleaning [71].
- Interior Disinfection:
- Soak a wipe with the approved disinfectant.
- Wipe all interior surfaces in a systematic pattern: top to bottom, and from the back (cleanest) to the front (dirtiest). This includes the back wall, side walls, the interior of the glass sash, and the work surface [71].
- Ensure all surfaces are thoroughly wetted and allow the disinfectant to remain for the full manufacturer-recommended contact time to achieve efficacy.
- Final Wipe (if using corrosive disinfectant): If bleach was used, perform a second wipe with 70% ethanol or sterile water to remove residual chlorine and prevent corrosion of the stainless steel [7].
- Waste Disposal: Place used wipes and other cleaning waste into a biohazard bag inside the BSC. Seal the bag before removing it from the cabinet [7].
- Completion: Allow the BSC to run for 2-3 more minutes after cleaning is complete before beginning work or shutting it down [7].
The Scientist's Toolkit: Key Research Reagents and Materials
Table: Essential Materials for BSC Cleaning and Decontamination Validation
| Item | Function / Purpose | Application Notes |
|---|---|---|
| Biological Indicator (BI) [70] | Provides a defined microbial challenge to validate the lethality of a sterilization/decontamination process. | Contains highly resistant bacterial spores (e.g., G. stearothermophilus). A passing result (no growth) indicates process efficacy. |
| Process Challenge Device (PCD) [70] | Holds the BI and simulates the most challenging conditions encountered during sterilization (e.g., within a lumen). | Ensures validation testing represents real-world use. Used for routine monitoring, preferably daily and in every implant load [70]. |
| 70% Ethanol [7] [9] | Effective disinfectant for routine use; evaporates without residue. | Commonly used for daily cleaning of BSC interior surfaces. Effective against many pathogens, but requires adequate contact time. |
| Sodium Hypochlorite (Bleach) [7] [9] | Broad-spectrum disinfectant effective against viruses, bacteria, and spores. | Requires dilution; corrosive to stainless steel. Must be followed by a rinse with ethanol or sterile water to remove residues [7]. |
| HEPA Filter [7] [17] | The primary engineering control that captures airborne particulates and microorganisms, providing containment. | Must be integrity tested annually. Failure can lead to escape of pathogens. Requires professional decontamination before replacement [7]. |
| Adenosine Triphosphate (ATP) Monitoring System [73] | Provides rapid, quantitative measurement of organic residue on surfaces to verify cleaning effectiveness. | Used for audit-and-feedback programs. Not a substitute for microbial culture or BIs, but effective for monitoring routine cleaning compliance. |
Troubleshooting Guides
VHP System Troubleshooting
Why is my VHP chamber not reaching the target H₂O₂ concentration? Failure to achieve the target Hydrogen Peroxide (H₂O₂) concentration can compromise the entire sterilization process. The root causes and solutions are outlined below. [74]
| Potential Cause | Diagnostic Step | Corrective Action |
|---|---|---|
| Sensor Calibration Error | Check sensor calibration status. | Recalibrate H₂O₂ sensors in-situ to minimize downtime. [74] |
| Chamber Leaks | Inspect chamber seals and gaskets for integrity. | Replace any damaged or worn seals to prevent vapor escape. [74] |
| Injection System Blockage | Check H₂O₂ supply lines and nozzles. | Clean or replace blocked nozzles to ensure proper vapor delivery. [74] |
How can I troubleshoot uneven distribution of H₂O₂ vapor in the chamber? Uneven distribution creates "cold spots" where microorganisms can survive. To address this: [74]
- Conduct a Vapor Distribution Study: Use chemical indicators placed throughout the chamber to identify areas of low concentration.
- Inspect Circulation System: Verify that fans and baffles are operating correctly to ensure proper airflow.
- Review Loading Procedures: Ensure items within the chamber are arranged to allow for optimal vapor circulation and are not obstructing airflow paths.
What should I do if the VHP chamber's cycle keeps aborting prematurely? Premature cycle aborts waste resources and pose a sterility risk. A systematic investigation is required. [74]
| Abort Cause | Diagnostic Step | Potential Solution |
|---|---|---|
| Sensor Malfunction | Review system error logs for patterns. | Recalibrate or replace faulty sensors. [74] |
| Pressure Irregularity | Monitor chamber pressure against specifications. | Inspect and replace damaged seals or valves. [74] |
| Software Glitch | Check for software error codes. | Update or patch the system control software. [74] |
How can I address fluctuating H₂O₂ levels during the sterilization cycle? Stable concentration is critical for microbial inactivation. To stabilize levels: [74]
- Examine VHP Generator: Ensure it is providing a consistent vapor output.
- Check H₂O₂ Supply: Verify that the sterilant is at the correct concentration and that the supply is adequate.
- Review Control System Settings: Optimize parameters for your specific chamber volume and load characteristics.
PAA Dry Fogging System Troubleshooting
How do I ensure effective decontamination of a Biosafety Cabinet (BSC) using PAA dry fogging? A key operational factor is the status of the BSC during fumigation. Research demonstrates that successful decontamination of all internal parts, including HEPA filter pleats and plenums, is achieved only when the BSC is running during the process. The operational fans ensure circulation of the dry fog throughout the internal compartments. [58]
What are the best practices for maintaining PAA solution concentration and equipment?
- Solution Testing: Use appropriate methods to quantify PAA in solution. Options include test strips for quick approximations, proprietary drop test kits that avoid interference from hydrogen peroxide, or digital electronic meters for precise, bias-free readings. [75]
- Material Compatibility: PAA is a strong oxidizer. Storage tanks should be made of cross-linked polyethylene with an antioxidant system to resist degradation. Integrally Molded Flanged Outlet (IMFO) tanks are recommended for complete discharge and to prevent sediment buildup. [76]
Frequently Asked Questions (FAQs)
Q1: What are the key advantages of VHP and PAA dry fogging over traditional fumigants like formaldehyde? Both VHP and PAA offer significant user and environmental benefits:
- Safety: They break down into innocuous by-products (water, oxygen, and acetic acid). [77] [58]
- No Neutralization Required: Unlike formaldehyde, they do not require a complex neutralization step after decontamination. [77]
- Material Compatibility: They are generally less corrosive and have better material compatibility, though correct grades and concentrations must be used. [76] [77] [78]
Q2: How do I select the appropriate grade of Hydrogen Peroxide for my VHP generator? Using the incorrect grade can damage equipment and affect efficacy. [78]
- Technical Grade: Has the highest stabilizer content and is typically more suited for liquid applications.
- Food and Semiconductor Grades: These are recommended for vapor systems due to their lower stabilizer levels, which reduce residue buildup and equipment wear. The application (e.g., food and beverage) may also dictate the required grade for regulatory compliance. [78]
Q3: What is a typical effective concentration and exposure time for PAA dry fogging against resistant spores? Validation is critical, but one study found that an aerosol concentration of 1.0% PAA and 5% H₂O₂ during a 30-minute exposure was sufficient to achieve a 10⁶ reduction of Geobacillus stearothermophilus spores placed at various locations within a BSC. [77]
Q4: What is the recommended frequency for maintaining VHP chamber sensors? A proactive maintenance schedule is essential for sensor reliability. [74]
| Sensor Type | Maintenance Frequency | Key Tasks |
|---|---|---|
| H₂O₂ Sensor | Monthly | Calibration, electrode cleaning. [74] |
| Temperature Sensor | Quarterly | Calibration, integrity check. [74] |
| Pressure Sensor | Bi-annually | Zero-point calibration, leak test. [74] |
Experimental Validation Protocols
Workflow for Validating a BSC Decontamination Cycle
The following diagram illustrates the critical steps for validating a fumigation cycle for a Biological Safety Cabinet.
Detailed Methodology for Cycle Validation
Objective: To validate that a VHP or PAA dry fogging cycle achieves a 6-log (10⁶) reduction of a biological indicator organism throughout a Biosafety Cabinet. [77] [58]
Selection and Placement of Biological Indicators (BIs):
- Use commercial spore strips or custom-prepared carriers containing at least 1 x 10⁶ spores of Geobacillus stearothermophilus. [77] [58]
- Place BIs at a minimum of 9 critical and challenging locations within the BSC. Essential locations include:
- Within the pleats of the supply HEPA filter (both clean and dirty sides).
- Within the pleats of the exhaust HEPA filter.
- Inside the common plenum and negative plenum.
- On the work surface and back wall.
- Below the work tray. [58]
- Include an unexposed BI as a positive growth control.
Execution of Fumigation Cycle:
- Ensure the BSC is operational (turned on) to facilitate fumigant circulation through all plenums and across HEPA filters. [58]
- For PAA Dry Fogging: Use a system that generates an aerosol with a droplet size of ~7.5 µm. A working solution of 1.3% PAA and 6.8% H₂O₂ has been used effectively. Fog until the relative humidity in the room reaches ~85%. [77] [58]
- For VHP: Follow the equipment manufacturer's cycle instructions, which typically include dehumidification, conditioning, decontamination, and aeration phases. [58]
Post-Cycle Analysis:
- After aeration, retrieve all BIs aseptically.
- Transfer each BI to a tube of Trypticase Soy Broth with phenol red.
- Incubate the tubes at 55-60°C for up to 7 days.
- Observe for color change (from pink to yellow) and turbidity, which indicate bacterial growth and cycle failure. [58]
Interpretation of Results:
- Validation Success: All exposed BIs show no growth, while the positive control shows normal growth.
- Validation Failure: Growth in any exposed BI indicates a need for process adjustment (e.g., increasing concentration, exposure time, or checking fumigant distribution) and re-validation. [58]
The Scientist's Toolkit: Research Reagent Solutions
This table details essential materials and their functions for conducting and validating fumigation experiments.
| Item | Function & Application | Key Notes |
|---|---|---|
| Hydrogen Peroxide (35%) | Sterilant for VHP biodecontamination. [78] | Use food or semiconductor grade for vapor applications due to lower stabilizer content, which reduces residue. [78] |
| Peracetic Acid (PAA) Solution | Stabilized equilibrium mixture for dry fogging. [77] | Typical working solution: ~1.3% PAA & 6.8% H₂O₂. Effective against viruses and spores. [77] |
| G. stearothermophilus Spores | Biological Indicators (BIs) for cycle validation. [77] [58] | Gold standard for validating sporicidal efficacy. A 10⁶ reduction confirms a successful cycle. [77] |
| Chemical Indicators | For qualitative vapor distribution studies. [74] | Used to identify "cold spots" and uneven vapor distribution during cycle development. [74] |
| PAA Test Strips / Meter | For quantifying PAA concentration in solution. [75] | Test strips offer quick checks; electronic meters provide precise, unbiased measurements. [75] |
| Cross-linked Polyethylene Tanks | Safe storage for PAA and H₂O₂. [76] | Resistant to strong oxidizers. IMFO design allows for complete discharge, preventing residue buildup. [76] |
Decision Pathway for Fumigation Method Selection
The following diagram outlines a logical process for selecting between VHP and PAA dry fogging based on experimental constraints and goals.
FAQs: Maintaining Your Biosafety Cabinet
How often does a Biosafety Cabinet need to be recertified?
Recertification must be performed at least annually under normal use conditions [79].
However, certification is also legally required in several specific situations [80] [79]:
- At the time of initial installation
- Whenever the cabinet is moved or relocated
- Following any repairs or filter changes
- After any event that could affect the cabinet's performance, such as an accident or extended shutdown
Some guidelines recommend more frequent, semiannual (every six months) testing for cabinets that contain a Grade A or ISO 5 environment [81].
What is included in the annual recertification process?
Annual recertification is a comprehensive process performed by qualified personnel to verify that your BSC meets stringent safety standards like NSF/ANSI 49 [82]. The core tests are designed to validate the three pillars of protection: personnel, product, and environment.
The table below summarizes the key tests and their purpose [83] [82] [79]:
| Test Name | Purpose of the Test | Acceptance Criteria (Example for Class II Type A2) |
|---|---|---|
| Inflow Velocity | Verifies personnel protection by ensuring air entering the front grill is sufficient to prevent aerosol escape [82]. | Typically 100-105 feet per minute (fpm) [82]. |
| Downflow Velocity | Verifies product protection by ensuring uniform, HEPA-filtered air over the work surface [82]. | Establishes average speed and uniformity; specific profile per manufacturer/standard [83]. |
| HEPA Filter Integrity | Determines integrity of HEPA filters, filter housings, and mounting frames for leaks [83]. | Aerosol penetration must not exceed 0.01% at any point [81]. |
| Airflow Smoke Pattern | Visually verifies proper airflow direction and containment with no dead spots or reflux out of the cabinet [83] [81]. | Smoke must be drawn in smoothly without escaping the front opening [83]. |
Other tests often included are site installation assessments, alarm calibration, particle counts, lighting intensity, and noise level checks [83] [79] [10].
What daily and weekly maintenance should lab staff perform?
Routine maintenance by lab staff is crucial for safety between annual certifications.
Daily Maintenance Tasks:
- Surface decontamination of the work zone with an appropriate disinfectant [80] [10].
- Cabinet power-up alarm verification [80] [10].
- Removal of all unnecessary items from the BSC [80].
- A basic flow check (inflow and downflow) [80].
- Entry of all checks and activities in a BSC logbook [80].
Weekly Maintenance Tasks:
- Thorough surface decontamination of the drain pan [80].
- Cleaning of fluorescent (FL) and ultraviolet (UV) lamps, if present [80] [10].
- Cleaning of the front sash and exterior surfaces [10].
I observe turbulent airflow inside the cabinet. What should I do?
Immediate Action:
- Stop all work immediately and leave the cabinet running.
- Decontaminate all open containers and the work surface.
- Notify your lab manager/supervisor and the institution's biological safety professional.
Potential Causes:
- Overcrowded Work Surface: Too many items can disrupt the laminar airflow. Ensure the rear air grille is not blocked and the workspace is decluttered [83].
- Improper User Technique: Rapid arm movements or working with raised arms can pull contaminated air from the lab into the cabinet and create turbulence. Always move arms slowly and deliberately in and out of the cabinet [84].
- Room Air Currents: The cabinet may be placed in a poor location, such as directly under an air supply diffuser, near a door, or in a high-traffic area [83] [10].
- Cabinet Malfunction: A failure of the internal blower or a blockage in the filtration system could be the cause.
Troubleshooting: After ensuring the work area is clear and user technique is correct, the cabinet will likely require service and recertification by a qualified engineer to diagnose and fix the underlying issue [79].
The inflow alarm is sounding. What does this mean, and what are my next steps?
What it means: The inflow alarm indicates that the airflow at the front of the cabinet has dropped below a safe setpoint, which compromises personnel protection [83] [82].
Next Steps:
- Do not ignore the alarm. It is a critical safety warning.
- Stop all work immediately with hazardous materials.
- Securely close all containers and decontaminate the work surface if possible.
- Check for obvious obstructions at the front grille and remove them.
- Ensure the front sash is at the correct, marked height. A sash raised too high can trigger the alarm.
- If the alarm persists after checking for obstructions and sash height, cease use of the cabinet, post an "Out of Service" sign, and contact facilities management or a certification technician for service [79].
The Scientist's Toolkit: Key Reagents & Materials for BSC Testing
The following table details essential materials used by engineers during BSC certification [83] [81].
| Research Reagent / Material | Function in BSC Testing |
|---|---|
| Polyalphaolefin (PAO) | A polydispersed oil mist aerosol used for HEPA filter integrity testing. It is the most frequently used and standard-approved challenge aerosol [83]. |
| Di(2-ethylhexyl) Sebecate (DES) | An accepted alternative to PAO for generating aerosol particles in filter leak tests [81]. |
| Dioctyl Phthalate (DOP) | A historically used aerosol for filter integrity testing; modern standards often approve alternatives like PAO [81]. |
| Neutrally Buoyant Smoke | Used for airflow visualization testing. This can be a chemical smoke or, increasingly, an ultrasound-nebulised aerosol of ultra-pure water that doesn't rise or fall on its own in still air [83] [81]. |
| Hot-Wire Anemometer | A calibrated instrument used to measure downflow and inflow air velocities. It must be calibrated at least every nine months [83]. |
| Photometer | A calibrated instrument used in conjunction with an aerosol generator to detect leaks during the HEPA filter integrity test by measuring aerosol concentration [83]. |
Experimental Protocols: Core BSC Testing Methodologies
Protocol 1: HEPA Filter Integrity Leak Test
This test is critical for verifying that the HEPA filter has no leaks, that it is properly seated in its housing, and that the seals are intact [83] [81].
Method:
- Aerosol Generation: A Laskin nozzle aerosol generator is used to produce a polydispersed aerosol of PAO oil upstream of the HEPA filter being tested. This creates a known upstream concentration of 10-100 micrograms per litre [83].
- Scanning: A calibrated photometer probe is used to systematically scan the entire downstream side of the filter, including the filter media, its seals, and the mounting frame. The probe is held no more than 25 mm from the surface and moved at a speed no greater than 50 mm/s [83].
- Measurement: The photometer measures any aerosol that penetrates through the filter or bypasses its seals. Any reading exceeding 0.01% of the upstream concentration is considered a fail and must be addressed [81].
Protocol 2: Airflow Smoke Pattern Test
This test provides a visual confirmation of the cabinet's airflow dynamics, ensuring containment and proper flow direction [83] [81].
Method:
- Setup: The test is performed with the cabinet's sash at the standard working height.
- Smoke Generation: A device that produces a neutrally buoyant smoke (e.g., an electronic smoke generator or an ultrasound nebulizer using distilled water) is used to introduce a visible vapor at key locations [83].
- Visualization:
- Inflow: Smoke is released just outside and below the front opening. It should be drawn smoothly and immediately into the front grille without spilling out or rolling back into the room [81].
- Downflow: Smoke is released at the center of the work surface near the top of the opening. It should flow downward in a smooth, laminar pattern without dead spots, turbulence, or billowing over the work surface [83] [81].
BSC Maintenance and Troubleshooting Workflow
The following diagram outlines the logical relationship between routine maintenance, common issues, and required actions to ensure ongoing BSC performance.
Conclusion
Effective cleaning of Biological Safety Cabinets is not a one-size-fits-all process but a multifaceted strategy grounded in foundational knowledge, meticulous application, proactive troubleshooting, and scientific validation. Adherence to systematic cleaning orders and an understanding of disinfectant limitations are paramount. Emerging evidence indicates that common practices like 70% ethanol wiping may be insufficient against endotoxins and some mycoplasma, necessitating the integration of validated disinfectants like BKC or advanced fumigation for high-risk applications. For the biomedical research community, implementing these evidence-based protocols is critical for mitigating cross-contamination risks in advanced therapies like cell-product manufacturing. Future directions will involve developing more robust, real-time monitoring technologies and standardized validation frameworks to further enhance the safety and quality of clinical and research outcomes.
References
- 1. The Importance of Laboratory Biosafety Cabinets in ... [https://ziebaq.com/blog/the-importance-of-laboratory-biosafety-cabinets-in-modern-research]
- 2. What is a Biosafety Cabinet Used For [https://www.nuaire.com/en/resources/what-is-a-biosafety-cabinet-used-for]
- 3. The Role of the Biosafety Cabinet in Preventing Infection ... [https://pmc.ncbi.nlm.nih.gov/articles/PMC10823295/]
- 4. How to avoid contamination in your biological safety ... [https://www.medical-supply.ie/2022/08/how-to-avoid-contamination-in-a-bsc/]
- 5. Troubleshooting Common BSC Problems and Errors [https://www.linkedin.com/advice/0/how-do-you-troubleshoot-common-bsc-problems-errors]
- 6. Best Practices for Biosafety Cabinet Maintenance and Use [https://www.labmanager.com/best-practices-for-biosafety-cabinet-maintenance-and-use-32002]
- 7. Biological Safety Cabinets - EHSO Manual 2025-2026 [https://labman.ouhsc.edu/hbSections.aspx?ID=612]
- 8. Preventing Contamination in Your Biological Safety Cabinet [https://www.thermofisher.com/blog/cellculture/preventing-contamination-biological-safety-cabinet/]
- 9. Keeping it Clean: Best Practices for Biosafety Cabinets [https://www.dhlab.com/keeping-it-clean-best-practices-for-biosafety-cabinets/]
- 10. BSC Installation and Maintenance Best Practices [https://www.escolifesciences.com/news/optimizing-safety-bsc-installation-and-maintenance-best-practices]
- 11. Best Practice Tips for Biological Safety Cabinets [https://www.labmanager.com/best-practice-tips-for-biological-safety-cabinets-817]
- 12. Biological Safety Cabinets | Environment, Health and Safety [https://ehs.cornell.edu/research-safety/biosafety-biosecurity/biological-safety-manuals-and-other-documents/biological/biological-safety-cabinets]
- 13. Biological Safety Cabinets | UW Environmental Health & Safety [https://www.ehs.washington.edu/biological/biological-safety-cabinets]
- 14. How To Clean a Biological Safety Cabinet [https://berkshire.com/how-to-clean-a-biological-safety-cabinet/?srsltid=AfmBOoo-rg8nukaxRI-20aZIu1Gx9kM0ZxNET_wdqsZAGKRlpYSX93TI]
- 15. Working Safely in a Biosafety Cabinet - Princeton EHS [https://ehs.princeton.edu/laboratory-research/biological-safety/biological-safety-cabinets/working-safely-biosafety-cabinet]
- 16. Analysis of Variation in Total Airborne Bacteria Concentration to Assess the Performance of Biological Safety Cabinets in Microbial Laboratories - PMC [https://pmc.ncbi.nlm.nih.gov/articles/PMC4048000/]
- 17. Learn how a biosafety cabinet protects you [https://www.ehs.washington.edu/about/latest-news/biosafety-month-2025-learn-how-biosafety-cabinet-protects-you]
- 18. How To Clean a Biological Safety Cabinet [https://berkshire.com/how-to-clean-a-biological-safety-cabinet/?srsltid=AfmBOoqejmx8YrZXbJ_ssy7XoR64zDLyphq1oQ6_sYZvZ4AOsrWF14OZ]
- 19. Quick Protocol: How to Work Safely and Effectively with a ... [https://bitesizebio.com/13678/quick-protocol-how-to-work-safely-and-effectively-with-a-biological-safety-cabinet-culture-hood/]
- 20. Best practices for using and maintaining 'Biological Safety ... [https://cleanroomtechnology.com/best-practices-for-using-and-maintaining-biological-safety]
- 21. BSC Certification and Maintenance [https://hsrm.umn.edu/research-safety/biosafety/laboratorysafety-equipment/biological-safety-cabinets/bsc-certification]
- 22. Cleaning methods for biosafety cabinet to eliminate ... [https://www.sciencedirect.com/science/article/pii/S2352320424002128]
- 23. Biological Safety Cabinets - Environmental Health and Safety [https://www.umaryland.edu/ehs/research-safety/biosafety/biological-safety-cabinets/]
- 24. Biosafety Cabinets [https://www.ehs.ucsb.edu/programs-services/biological-safety/biosafety-cabinets]
- 25. Biosafety Cabinet Gas Decontamination Considerations [https://www.labmanager.com/biosafety-cabinet-gas-decontamination-considerations-32998]
- 26. Why Biosafety Cabinet Certification is Crucial in 2025 [https://toptec.pk/biosafety-cabinet-certification-2025/]
- 27. How To Clean a Biological Safety Cabinet [https://berkshire.com/how-to-clean-a-biological-safety-cabinet/?srsltid=AfmBOor-dfHhGIEl5apJqWzoUvAWU8GAdAHC7Wx6GbTS1-ivdzGDz1uJ]
- 28. Personal Protective Equipment (PPE) Assessment: Best ... [https://www.aatmunn.com/blog/personal-protective-equipment-ppe-assessment-best-practices]
- 29. Safe Use of Biosafety Cabinets [https://www.colgate.edu/about/campus-services-and-resources/safe-use-biosafety-cabinets]
- 30. How To Clean a Biological Safety Cabinet [https://berkshire.com/how-to-clean-a-biological-safety-cabinet/?srsltid=AfmBOooas0TqUvHo5uM92Oy3HGwpeim4Xycrx4ONq3OnHmZ1f0NCsYtQ]
- 31. Working Safely in your Class II, Type A2 Biosafety Cabinet [https://www.nuaire.com/en/resources/working-safely-class-ii-type-a2-biosafety-cabinet]
- 32. How to Use a Biological Safety Cabinet: 5 Step Guide [https://ziebaq.com/blog/how-to-use-a-biological-safety-cabinet-5-step-guide]
- 33. Biosafety Cabinet Cleaning: Step-by-Step Guide - QUALIA [https://qualia-bio.com/blog/biosafety-cabinet-cleaning-step-by-step-guide/]
- 34. Common Biosafety Cabinet Issues and Solutions - QUALIA [https://qualia-bio.com/blog/common-biosafety-cabinet-issues-and-solutions/]
- 35. Class II Biosafety Cabinets, as Specified in NSF/ANSI 49- ... [https://blog.ansi.org/ansi/class-ii-biosafety-cabinets-nsf-ansi-49/]
- 36. Industry Standards Your Biosafety Cabinet Should Meet [https://www.nuaire.com/en/resources/biosafety-cabinet-standards]
- 37. NSF/ANSI 49: Biosafety Cabinet Standard Explained - QUALIA [https://qualia-bio.com/blog/nsf-ansi-49-biosafety-cabinet-standard-explained/]
- 38. Disinfectant Selection and Use | Environment, Health and Safety [https://ehs.cornell.edu/research-safety/biosafety-biosecurity/biological-safety-manuals-and-other-documents/disinfectant-selection]
- 39. Surface Decontamination in a Biosafety Cabinet Guide [https://www.nuaire.com/en/resources/surface-decontamination-in-a-biosafety-cabinet]
- 40. Biosafety Guide - Environmental Health & Safety [https://www.ehs.ucsb.edu/programs-services/biological-safety/biosafety-guide]
- 41. Spills inside of a Biological Safety Cabinet (BSC) [https://ehs.princeton.edu/laboratory-and-research-safety/biological-safety/emergencies-exposures-and-spills/biological-spill-2]
- 42. Biological Spills | UMN University Health & Safety [https://hsrm.umn.edu/research-safety/biosafety/incidents-emergencies/biological-spills]
- 43. Laboratory Spills [https://www.unf.edu/ehs/manuals/biosafety/laboratory-spills.html]
- 44. Best Practices For Effective Biosafety Cabinet ... [https://www.locscientific.com/best-practices-for-effective-biosafety-cabinet-decontamination]
- 45. Safe Disposal of a Biosafety Cabinet [https://www.labmanager.com/safe-disposal-of-a-biosafety-cabinet-32542]
- 46. Biological Safety Cabinets [https://drs.illinois.edu/Page/SafetyLibrary/BiologicalSafetyCabinets]
- 47. Is Improper BSC (Biological Safety Cabinets) Use the ... [https://safetypartnersinc.com/is-improper-bsc-biological-safety-cabinets-use-the-cause-of-contamination-at-your-facility/]
- 48. Why do most new biosafety cabinets still have UV lights? [https://www.labconscious.com/blog/why-most-biosafety-cabinets-still-have-uv]
- 49. Stainless Steel Corrosion: How to Prevent and Address [https://www.steris.com/healthcare/knowledge-center/sterile-processing/guide-to-stainless-steel-corrosion-removal]
- 50. 8 Ways to Protect Stainless Steel [https://www.thenafemshow.org/8-ways-to-protect-stainless-steel/]
- 51. Rust Prevention and Stainless Steel Maintenance in GMP ... [https://www.foamtecintlwcc.com/rust-prevention-and-stainless-steel-maintenance-in-gmp-facilities-a-chemical-free-approach/]
- 52. UW researchers test common disinfectants' abilities to fight ... [https://www.washington.edu/news/2025/08/11/test-common-disinfectants-fight-antibiotic-resistance-genetic-level-bacteria-hospitals-health-care/]
- 53. The dual-species biofilm formed by Staphylococcus aureus ... [https://pubmed.ncbi.nlm.nih.gov/41213994/]
- 54. Biological Safety Cabinet Airflow for Labs: Ducts and More [https://www.triumvirate.com/blog/biological-safety-cabinet-airflow]
- 55. Keeping Airflow Safe: Essential Pathways For Laboratory ... [https://thesafetygeek.com/keeping-airflow-safe-essential-pathways-for-laboratory-environments/?srsltid=AfmBOooPiqASjomu3t-UDW46rglTId04MwL2QUr1z0et3GPTzttjryQy]
- 56. Responding to Biological Spills - Cornell EHS [https://ehs.cornell.edu/research-safety/biosafety-biosecurity/biological-safety-manuals-and-other-documents/responding-biological-spills]
- 57. Class II Biological Safety Cabinets and Enclosures [https://www.nuaire.com/en/products/biosafety-cabinets]
- 58. Decontamination Validation of a Class II Type A2 Biosafety ... [https://pmc.ncbi.nlm.nih.gov/articles/PMC9134616/]
- 59. Biosafety Cabinet UV Light White Paper [https://www.nuaire.com/en/resources/biosafety-cabinet-uv-light]
- 60. 18 safe work practices when using UV radiation in ... [https://www.thesafetymag.com/ca/news/opinion/18-safe-work-practices-when-using-uv-radiation-in-biological-safety-cabinets/224932]
- 61. Read guidelines for safely working with a biological . safety cabinet [https://blink.ucsd.edu/safety/research-lab/biosafety/containment/bsc/usage.html]
- 62. Occupational Safety: UV Light Guidelines [https://www.safety.rochester.edu/ih/uvlight.html]
- 63. Cleaning methods for biosafety cabinet to eliminate ... [https://pmc.ncbi.nlm.nih.gov/articles/PMC11655690/]
- 64. Comparing Different Disinfectants [https://ehs.stanford.edu/reference/comparing-different-disinfectants]
- 65. Chemical Disinfectants | Infection Control [https://www.cdc.gov/infection-control/hcp/disinfection-sterilization/chemical-disinfectants.html]
- 66. Comparative efficacy evaluation of disinfectants against ... [https://pmc.ncbi.nlm.nih.gov/articles/PMC9639569/]
- 67. Recommendations for Disinfection and Sterilization in ... [https://www.cdc.gov/infection-control/hcp/disinfection-sterilization/summary-recommendations.html]
- 68. Cleaning methods for biosafety cabinet to eliminate ... [https://pubmed.ncbi.nlm.nih.gov/39703815/]
- 69. Common Sources of BSC Contamination to Watch Out For [https://www.triumvirate.com/blog/common-sources-of-bsc-contamination-to-watch-out-for]
- 70. Biological Indicators for Sterilization | Knowledge Center [https://www.steris.com/healthcare/knowledge-center/sterile-processing/biological-indicators]
- 71. How To Clean a Biological Safety Cabinet [https://berkshire.com/how-to-clean-a-biological-safety-cabinet/?srsltid=AfmBOooqDN1o2jlDRS8Ue0bt554uvbo1CBa-N0iEQ2PJ06h_Y7XpOCfj]
- 72. Table 12: Suggested protocol for management of positive ... [https://www.cdc.gov/infection-control/hcp/disinfection-and-sterilization/management-positive-indicator.html]
- 73. How Cleaning Protocols Influence Patient Safety and ... [https://aihcp.net/2025/09/23/how-cleaning-protocols-influence-patient-safety-and-accreditation-metrics/]
- 74. VHP Chamber Troubleshooting: 10 Common Issues - Youth [https://youthfilter.com/news/vhp-chamber-troubleshooting-10-common-issues/]
- 75. PAA Testing Options [https://envirotech.com/paa-testing-options/]
- 76. Safely Storing and Handling Peracetic Acid [https://blog.polyprocessing.com/blog/safely-storing-and-handling-peracetic-acid]
- 77. Dry-fog decontamination of microbiological safety cabinets ... [https://pmc.ncbi.nlm.nih.gov/articles/PMC8430234/]
- 78. Understanding H2O2 For Vaporized Hydrogen Peroxide ... [https://www.sterislifesciences.com/Resources/Technical-Learning-Library/Technical-Learning-Library-Folder/Technical-Tips/Understanding-H2O2-For-Vaporized-Hydrogen-Peroxide-Biodecontamination]
- 79. How Often Should Biological Safety Cabinets Be Certified? [https://techsafety.com/blog/biological-safety-certification]
- 80. Cleaning and Maintenance of the Biosafety cabinet [BSC] [https://ntep.in/node/1510/CP-cleaning-and-maintenance-biosafety-cabinet-bsc]
- 81. Biosafety Cabinet Ventilation Testing, Servicing & Validation - Total Clean Air [https://totalcleanair.com/biosafety-cabinet-ventilation-testing-servicing-validation/]
- 82. A Guide to Biological Safety Cabinet Certification [https://labs-usa.com/2025/11/04/biological-safety-cabinet-certification/amp/]
- 83. Integrity testing of biosafety cabinets [https://cleanroomtechnology.com/integrity-testing-of-biosafety-cabinets--147568]
- 84. Biological Safety Cabinet Performance Study [https://ijournals.in/journal/index.php/ijshre/article/view/338]