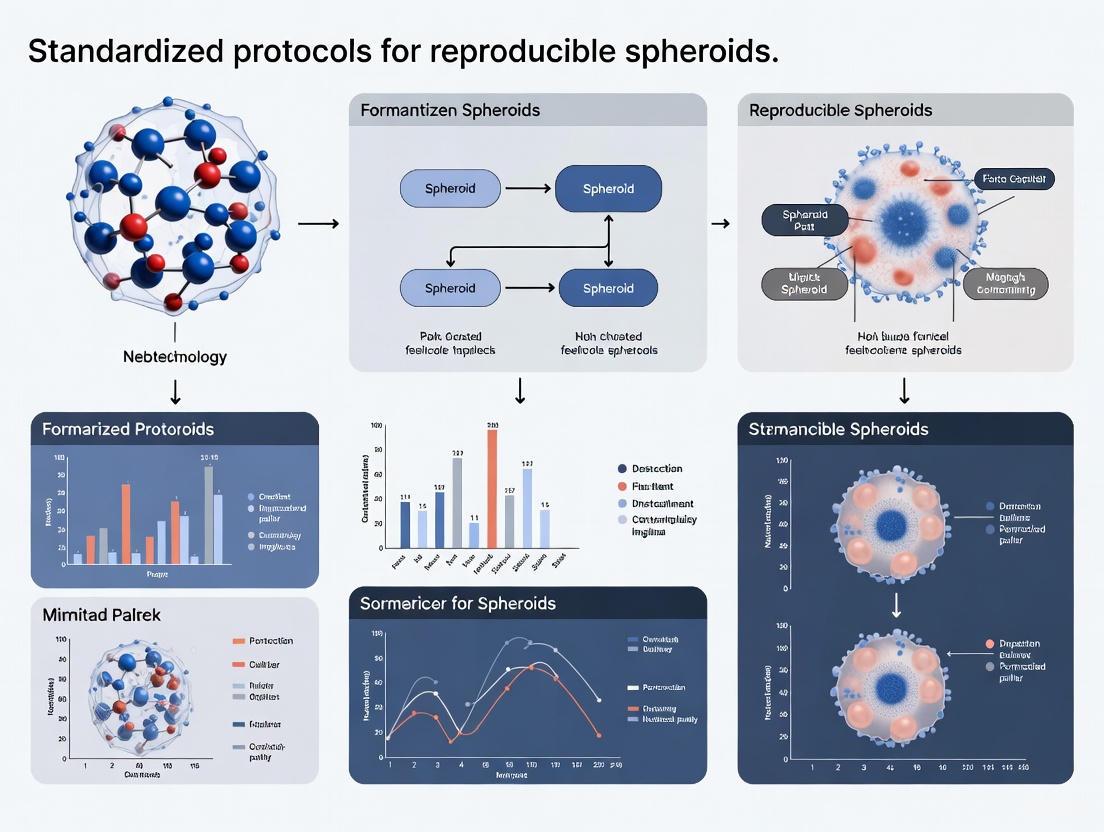
Standardized Protocols for Reproducible Spheroids: A Guide for High-Throughput Screening and Disease Modeling
This article provides a comprehensive guide for researchers and drug development professionals on establishing standardized and reproducible spheroid models.
Standardized Protocols for Reproducible Spheroids: A Guide for High-Throughput Screening and Disease Modeling
Abstract
This article provides a comprehensive guide for researchers and drug development professionals on establishing standardized and reproducible spheroid models. It covers the foundational principles of 3D cell culture, detailing optimized protocols for generating uniform spheroids using various platforms such as ultra-low attachment plates, hanging drop methods, and micro-molded scaffolds. The content explores critical parameters for troubleshooting, including initial cell density, viability assessment, and matrix embedding techniques. Furthermore, it validates these models through direct comparisons with traditional 2D cultures and in vivo systems, highlighting their enhanced physiological relevance for anti-cancer drug screening, invasion assays, and personalized medicine applications. The synthesized protocols and best practices aim to bridge the gap between simple in vitro models and complex in vivo environments, facilitating more predictive pre-clinical research.
The Critical Role of Spheroids in Modern Biomedical Research
Traditional two-dimensional (2D) cell culture, where cells grow in a single layer on flat plastic surfaces, has been a workhorse of biological research for decades [1]. However, its limitations in mimicking the complex architecture of human tissues are increasingly apparent, particularly in drug discovery where approximately 90% of compounds that pass 2D tests fail in clinical trials [1] [2]. The transition to three-dimensional (3D) spheroid models represents a paradigm shift toward more physiologically relevant systems. Spheroids are defined as three-dimensional cellular aggregates that self-assemble into structures that better recapitulate the in vivo microenvironment [3]. This guide provides a technical framework for understanding the critical differences between 2D and spheroid cultures, with standardized protocols and troubleshooting advice to ensure reproducible research outcomes.
Core Differences: A Structural and Functional Comparison
Structural Architecture
The fundamental architectural differences between 2D monolayers and 3D spheroids create dramatically different microenvironments for cells.
- 2D Architecture: In traditional culture, cells are forced to adopt flattened, unnatural morphologies on rigid plastic surfaces. They exhibit limited cell-cell interactions and no spatial organization, with uniform exposure to nutrients, oxygen, and drugs [1] [4].
- 3D Spheroid Architecture: Spheroids develop a complex 3D structure characterized by distinct cellular zones, mirroring the architecture of avascular tumors or microtissues [3] [4]:
- Proliferative Outer Layer: Composed of rapidly dividing cells with direct access to oxygen and nutrients.
- Quiescent Intermediate Layer: Contains dormant, senescent cells due to limited nutrient availability.
- Hypoxic/Apoptotic Core: Features necrotic or apoptotic cells resulting from severe oxygen and nutrient deprivation, which also mimics a key feature of solid tumors.
Functional Consequences
These structural differences translate directly to critical functional variations that impact experimental outcomes.
- Gene Expression and Protein Profiles: Cells in spheroids demonstrate gene expression profiles that are more representative of in vivo conditions compared to 2D cultures. For instance, studies show upregulation of genes related to hypoxia, epithelial-to-mesenchymal transition (EMT), and stemness in 3D models [4].
- Drug Response and Resistance: Spheroids develop gradients of drug penetration and exhibit increased drug resistance, providing a more accurate platform for therapeutic screening. The dense structure and presence of quiescent cells create physical and biological barriers that are absent in 2D [1] [3].
- Metabolic Activity: Spheroids display distinct metabolic patterns, including elevated per-cell glucose consumption and increased lactate production (Warburg effect) under glucose restriction, highlighting more metabolically active cells compared to 2D cultures [2].
Table 1: Quantitative Comparison of Key Functional Metrics in 2D vs. 3D Cultures
| Functional Parameter | 2D Culture Findings | 3D Spheroid Findings | Experimental Context |
|---|---|---|---|
| Cell Proliferation | High, exponential growth until confluence [2]. | Reduced proliferation rates due to diffusion limitations and heterogeneous zones [2]. | U251-MG glioblastoma & A549 lung adenocarcinoma cells [2]. |
| Glucose Dependence | Critical for survival; proliferation stops completely under glucose deprivation [2]. | Cells survive longer under glucose deprivation by activating alternative metabolic pathways [2]. | U251-MG glioblastoma & A549 lung adenocarcinoma cells [2]. |
| Lactate Production | Lower per-cell lactate production [2]. | Higher lactate production, indicating an enhanced Warburg effect [2]. | U251-MG glioblastoma & A549 lung adenocarcinoma cells [2]. |
| Drug Penetration | Uniform exposure, often leading to overestimation of drug efficacy [1]. | Limited and gradient-dependent penetration, modeling in vivo diffusion barriers [1] [3]. | Various cancer cell lines; a key reason for clinical trial failures [1]. |
| Gene Expression | Altered, less representative of in vivo profiles [4]. | Better fidelity; unique profiles for EMT, hypoxia, and stemness markers [4]. | Lung, breast, and colorectal cancer cell models [4]. |
The Scientist's Toolkit: Essential Reagents and Materials
Success in spheroid culture relies on specialized materials that prevent cell adhesion and promote aggregation.
Table 2: Key Research Reagent Solutions for Spheroid Culture
| Item | Function/Description | Example Use Case |
|---|---|---|
| Ultra-Low Attachment (ULA) Plates | Plates with a engineered surface that inhibits cell attachment, forcing cells to aggregate into a single spheroid per well. Prevents satellite colony formation [5]. | The primary method for consistent, scaffold-free spheroid formation (e.g., Nunclon Sphera plates) [5]. |
| Extracellular Matrix (ECM) Hydrogels | Natural or synthetic scaffolds (e.g., Matrigel, collagen) that provide a 3D microenvironment mimicking in vivo conditions, supporting cell-matrix interactions [2] [4]. | Used in matrix-based 3D cultures and tumor-on-chip models to study invasion and organization [2]. |
| Wide-Bore Pipette Tips | Tips with a large orifice to prevent shear stress and physical damage when transferring mature spheroids [5]. | Essential for aspirating and moving spheroids without disrupting their structure for downstream analysis [5]. |
| Tissue Clearing Reagents | Chemical solutions that render large, dense spheroids transparent for deep and high-resolution imaging [5]. | Enables fluorescent imaging of structures up to 1000 µm deep within a spheroid [5]. |
| 3D-Optimized Viability Dyes | Cell health assays (e.g., PrestoBlue, alamarBlue, caspase 3/7 probes) with modified protocols for better penetration into dense 3D structures [5]. | Requires higher dye concentrations or longer incubation times than 2D protocols (see Table 3) [5]. |
Standardized Workflow for Spheroid Formation
The following diagram illustrates a generalized, robust workflow for generating spheroids using ULA plates, integrating the centrifugation method to enhance consistency.
Protocol: Spheroid Formation by Centrifugation [6] [5]
- Cell Preparation: Harvest cells using standard trypsinization. Count cells and prepare a suspension at a concentration of 2x10⁶ cells/mL in complete medium. Tip: Seeding density controls final spheroid size.
- Dispensing: Pipette the cell suspension into each well of a 96-well round-bottom ULA plate. A typical volume is 150 µL/well.
- Centrifugation: Place the plate in a balanced centrifuge with a plate rotor. Spin at room temperature at 300 x g for 4 minutes. Tip: This step pellets cells to the well bottom, initiating uniform aggregation.
- Incubation and Maturation: Carefully transfer the plate to a 37°C, 5% CO₂ incubator. Compact spheroids typically form within 24-72 hours. For long-term cultures (e.g., >5 days), perform half-media changes every 2-3 days by gently removing old media and adding fresh pre-warmed media without disturbing the spheroid.
Troubleshooting FAQs and Technical Guidance
Q1: How can I consistently grow uniform spheroids of a specific size? A: The most reliable method is to use ULA round-bottom plates and control the initial cell seeding density. Using a confined physical space like a round-bottom well ensures the formation of a single, central spheroid. Centrifuging the plate after seeding (150-300 x g for 3-5 minutes) significantly improves consistency by rapidly collecting all cells at the bottom of the well [6] [5].
Q2: My cell lines do not form compact spheroids. What can I do? A: Not all cell types form tight spheroids readily. If centrifugation is insufficient:
- Patience is key: Some cell lines require several days to form compact spheroids.
- Media refreshment: For slow-forming spheroids, replace half of the culture media with fresh media every 2-3 days to maintain nutrient levels and remove waste, but do so gently to avoid disruption [5].
Q3: How do I handle and perform media changes without damaging spheroids? A: Manual handling requires care.
- For media changes: Tilt the plate at a 45° angle. Slowly aspirate the old media from the surface, ensuring the pipette tip does not contact the spheroid at the bottom. Add new media by dispensing it gently against the side of the well.
- For transfer: Use wide-bore or wide-orifice pipette tips to prevent shearing or crushing the spheroid during pipetting [5].
Q4: Can I use my standard 2D cell viability and staining assays on spheroids? A: Yes, but protocols require significant optimization. The dense 3D structure impedes reagent penetration. Key adjustments include:
- Increasing reagent incubation times.
- Using higher concentrations of dyes and antibodies.
- Incorporating tissue-clearing reagents for immunostaining to enable deep imaging.
Table 3: Protocol Adjustments for Common Assays in 3D Spheroids [5]
| Assay / Reagent | 2D Protocol | 3D Spheroid Protocol | Reason for Change |
|---|---|---|---|
| Viability (e.g., PrestoBlue) | Standard concentration, 30-60 min incubation. | May require longer incubation (e.g., 2+ hours) and occasional plate rotation. | To allow for full diffusion of the reagent into the spheroid core. |
| Apoptosis (Caspase 3/7) | 1X concentration, 30 min incubation. | Lower concentration (e.g., 1/3X) with longer incubation (e.g., 2 hours). | Prevents over-staining of the outer layer and allows detection in the interior. |
| Immunostaining | Standard antibody incubation (few hours). | Significantly longer incubation (often overnight) and the use of clearing kits. | Antibodies penetrate slowly; clearing reduces light scattering for better imaging. |
The transition from 2D culture to 3D spheroid models is more than a technical upgrade; it is a necessary step toward biologically relevant and predictive in vitro research. Spheroids, with their defined structural zones and resulting functional complexity—from gradient-driven metabolism to more accurate drug response profiles—offer a superior system for disease modeling, drug discovery, and personalized medicine. By adhering to standardized protocols like the ULA plate method and applying the troubleshooting solutions outlined herein, researchers can overcome initial technical hurdles and reliably generate high-quality data that better translates to clinical success.
Frequently Asked Questions (FAQs)
What are the core advantages of 3D models over traditional 2D cell cultures? 3D models, such as spheroids and organoids, offer a more physiologically relevant environment than 2D monolayers. They mimic the 3D architecture of human tissues, enabling critical cell-cell and cell-extracellular matrix (ECM) interactions, and facilitating the formation of physiological gradients (e.g., oxygen, nutrients, metabolic waste). This leads to more predictive data for drug efficacy, toxicity, and human-specific responses, ultimately reducing the reliance on animal models and improving the success rate of clinical translations [7] [8] [9].
How do 3D models improve drug discovery and development? In drug discovery, 3D models demonstrate superior predictive power. They more accurately replicate in vivo drug responses, including penetration, metabolism, and toxicity. For instance, 3D tumor spheroids can replicate patient-derived drug resistance mechanisms, helping to identify false positives or negatives earlier in the development process. This allows researchers to "fail faster" and focus resources on the most promising drug candidates [7] [10] [9].
What is the difference between a spheroid and an organoid? While both are common 3D culture formats, they have distinct characteristics. Spheroids are self-assembled, spherical aggregates of cells that can be derived from a wide range of cell types, including cell lines. They model basic tissue features like nutrient gradients and zonation. Organoids are more complex structures generated from stem cells that self-organize to replicate the functional and structural complexity of specific organs, making them powerful for disease modeling and personalized medicine [8] [9].
Why is standardization a significant challenge in 3D cell culture, and how is it being addressed? A major challenge is reproducibility, as protocol variability across labs leads to inconsistent spheroid morphology and behavior. Key variables include media composition, serum concentration, oxygen levels, and initial seeding density [11] [10]. In response, initiatives like the NIH's $87 million Standardized Organoid Modeling (SOM) Center are using AI-driven optimization and robotic automation to create validated, reproducible organoid protocols and samples [11].
Troubleshooting Guides
Issue: Inconsistent Spheroid Size and Morphology
Inconsistent spheroid formation can compromise experimental reproducibility and data reliability.
Potential Cause & Solution: Initial Seeded Cell Number The initial cell number directly determines spheroid size. A study analyzing 32,000 spheroid images found that varying the seeding density (2000-6000 cells) led to significant differences in spheroid dimensions and growth kinetics. Establish and strictly adhere to an optimized seeding density for your specific cell type [10].
Potential Cause & Solution: Serum Concentration Serum concentration in the culture medium critically regulates spheroid density and architecture. Research shows that concentrations above 10% promote the formation of dense spheroids with distinct necrotic and proliferative zones, while serum-free conditions can cause spheroid shrinkage and reduced density [10]. Standardize the serum percentage in your media formulation.
Potential Cause & Solution: Culture Media Composition Variations in media components like glucose and calcium levels significantly impact spheroid growth and viability. For example, one study noted that RPMI 1640 medium resulted in significantly elevated cell death signals compared to other media [10]. Use a consistent, well-defined media formulation and avoid switching between different media types without re-optimization.
Issue: Poor Cell Viability in 3D Constructs
Unexpected cell death can occur in both encapsulated and bioprinted 3D cultures.
Potential Cause & Solution: Oxygen and Nutrient Gradients Oxygen tension is a pivotal factor. Cultures under 3% O₂ exhibited reduced spheroid size, decreased cell viability, and increased necrosis in the core [10]. In thicker constructs, nutrient diffusion can be limited. Consider using specialized culture plates, incorporating microfluidic perfusion systems, or leveraging bioprinting to create structures with microchannels to improve transport [8] [12].
Potential Cause & Solution: Crosslinking Process If using hydrogels or bioprinting, the crosslinking method can expose cells to harsh chemicals or physical stress. Varying the degree of crosslinking can also alter the mechanical properties of the matrix, affecting cell behavior. Optimize the crosslinking parameters (e.g., concentration, duration) for your specific material and cell type to ensure biocompatibility [12].
Potential Cause & Solution: Sample Thickness In encapsulated systems, samples thicker than 0.2 mm can lead to core necrosis due to diffusion limitations. If possible, reduce the thickness of the construct. As noted in the troubleshooting guide, bioprinting can help by allowing precise control over geometry and the integration of microchannels to enhance nutrient flow and waste removal [12].
Issue: High Variability in Drug Response Data
Unreliable drug screening results can stem from underlying inconsistencies in the 3D models themselves.
Root Cause Analysis: This issue is often a downstream effect of the problems described above. Inconsistent spheroid size, morphology, and viability directly impact drug penetration and cellular response, leading to highly variable IC50 values and other readouts [10].
Solution: Implement Rigorous Quality Control Before proceeding with drug testing, implement quality control checks. Use automated image analysis and AI-powered software to quantify key spheroid metrics (e.g., diameter, circularity, viability) and only use batches that meet predefined criteria for size and uniformity [7] [10]. The NIH SOM Center emphasizes such quality benchmarks for reliable research [11].
The following tables consolidate key experimental data from large-scale studies on factors affecting spheroid attributes.
Table 1: Impact of Culture Conditions on Spheroid Attributes [10]
| Experimental Variable | Condition | Observed Impact on Spheroids |
|---|---|---|
| Oxygen Level | 3% O₂ | Reduced dimensions (equivalentDiameter, volume), significant decrease in cell viability and ATP content, heightened signal in necrotic area. |
| Serum Concentration | 0.5% - 1% | Highest levels of cell death (fluorescence intensity per spheroid area). |
| 10% - 20% | Densest spheroid formation, distinct necrotic/quiescent/proliferative zones, stable ATP levels. | |
| Culture Medium | RPMI 1640 | Significantly elevated death signal intensity compared to other media. |
| DMEM/F12 | Lowest spheroid viability. |
Table 2: Key Experimental Protocols for Reproducible Spheroids
| Protocol Step | Key Parameter | Recommendation for Standardization |
|---|---|---|
| Cell Seeding | Initial Cell Number | Optimize and fix the cell number for each cell line (e.g., within 2000-6000 range); this is a primary determinant of final spheroid size [10]. |
| Media Formulation | Serum Percentage | Use concentrations ≥10% for dense, structured spheroids; document and maintain batch-to-batch consistency [10]. |
| Culture Environment | Oxygen Tension | Control and document oxygen levels (e.g., physioxic 3-5% O₂ for many tumor models) to manage gradients and necrosis [10]. |
| Quality Control | Imaging & Analysis | Use automated high-content imaging and AI-based analysis software (e.g., IN Carta Image Analysis Software) to quantify size, circularity, and viability for pre-screening before assays [7]. |
Essential Research Reagent Solutions
Table 3: Key Materials and Tools for 3D Cell Culture Research
| Item | Function/Application |
|---|---|
| Hydrogels (e.g., Alginate, Matrigel, Collagen) | Serve as scaffold-based systems to provide a 3D extracellular matrix (ECM) environment that supports cell growth and signaling [8] [9]. |
| Low-Adhesion / Microwell Plates | Enable scaffold-free spheroid formation by promoting cell aggregation in a controlled manner [8] [9]. |
| Specialized Culture Media | Formulations (e.g., DMEM, RPMI) are tailored for 3D cultures, with specific adjustments to components like glucose and calcium to support spheroid health [10] [13]. |
| Automated Imaging & Analysis Software | Systems like the ImageXpress HCS.ai and IN Carta Software are crucial for high-throughput, quantitative analysis of 3D model morphology and health [7]. |
| Microfluidic Devices (Organ-on-a-chip) | Provide precise control over the cellular microenvironment, enable perfusion, and allow for the modeling of complex tissue interfaces and fluid flow [7] [8]. |
Experimental Workflow and Variable Relationships
The following diagrams illustrate the standardized workflow for creating reproducible spheroids and the complex relationships between key experimental variables.
Standardized Spheroid Workflow
Key Variables Affecting Drug Response
Frequently Asked Questions (FAQs) and Troubleshooting Guides
Spheroid Formation
Q1: How can I consistently grow uniform spheroids to get repeatable results?
The most critical parameter for controlling spheroid size is adjusting the initial cell seeding density [14] [5]. Using cultureware that confines cells physically promotes the consistent formation of a single spheroid per well.
- Recommended Solution: Use 96-well ultra-low attachment (ULA) plates with U-bottom wells [14] [5] [15]. The hydrophilic polymer coating inhibits protein adsorption and cell attachment, forcing cells to aggregate into a single, central spheroid [5] [16]. This method is simple, affordable, and compatible with high-throughput screening (HTS) platforms.
- Troubleshooting Tip: If cells do not form compact spheroids, centrifuge the plate at a low speed (e.g., 150 x g for 5 minutes) after seeding to help cells quickly settle at the bottom of the wells. For some cell types, spheroid formation may take several days; during this time, replace 50% of the media with fresh media every 2-3 days to maintain culture health [5].
Q2: My cell lines are not forming tight spheroids. What can I do?
Not all cell types readily form compact spheroids. In addition to centrifugation, ensure you are using a high-quality low-attachment plate. The surface modification must be superb, as imperfections can cause cells to attach to the plastic instead of aggregating with each other [5]. Selecting a reputable manufacturer with expertise in surface modification is highly recommended for reproducibility.
Spheroid Culture and Handling
Q3: What are the best practices for handling spheroids during media changes and transfer?
Spheroids are delicate structures that require careful handling to prevent damage.
- Media Changes: Carefully tilt the microplate and slowly aspirate half of the supernatant from each well without touching the bottom. Gently dispense fresh, pre-warmed media along the well wall to avoid breaking the spheroids. For a complete media change, performing repeated half-media changes is often safer than a full change [5].
- Transferring Spheroids: Always use wide-bore or wide-orifice pipette tips to accommodate the diameter of the spheroids and prevent shear stress that can damage their structure during aspiration [5] [17].
Spheroid Analysis and Assaying
Q4: Can I use my standard 2D cell viability assays for spheroid cultures?
Yes, but standard protocols require optimization. The 3D, dense nature of spheroids impedes reagent penetration [5].
- Required Protocol Adjustments: You will typically need to increase the concentration of the detection reagent and/or extend the incubation time compared to 2D protocols [5]. For example, when using a caspase 3/7 reagent for apoptosis, one might reduce the concentration to one-third of the 2D recommendation but extend the incubation time from 30 minutes to 2 hours [5].
- General Tip: When adding reagents, avoid pipetting directly onto the spheroid. For larger, denser spheroids, gentle agitation during incubation can improve reagent penetration [5].
Q5: How do I successfully perform immunostaining on my spheroids?
Staining 3D spheroids is challenging due to limited penetration of stains and antibodies, high background signal, and the risk of damaging the structure [17].
- Optimized Staining Protocol:
- Fixation: Gently collect spheroids with a wide-bore tip and fix with 4% Paraformaldehyde (PFA) for 15-20 minutes at room temperature. Larger spheroids may require longer fixation [17].
- Permeabilization: Incubate with a permeabilization agent (e.g., 0.1-1.0% Triton X-100) for several hours at room temperature [17].
- Blocking: Incubate in a blocking buffer (e.g., 1% BSA with serum) for at least 1 hour to reduce non-specific antibody binding [17].
- Staining: Incubate with primary and secondary antibodies for 24-72 hours at 4°C to ensure deep penetration [17].
- Washing: Perform gentle, multi-step washing with PBS between each step. Low-speed centrifugation or allowing spheroids to settle by gravity can prevent loss [17].
- Imaging: Use mounting media designed for 3D imaging. For thick spheroids, confocal or light-sheet microscopy with Z-stacking is essential for complete visualization [17].
Quantitative Data for Spheroid Formation
The table below summarizes key quantitative findings from a systematic study on glioma cell line spheroid formation, providing a reference for your experiments [14] [15] [18].
Table 1: Experimentally Determined Parameters for Glioma Spheroid Formation in ULA Plates
| Parameter | Finding | Experimental Detail |
|---|---|---|
| Optimal Seeding Density | 250 - 500 cells/well [14] | Fewer cells generally resulted in better growth than higher numbers. |
| Size Control | Linear correlation with initial cell number [14] [15] | Spheroid diameter and volume can be predictably controlled via seeding density. |
| Spheroid Structure | Outer layer of viable cells, inner core of dead cells [14] [15] | The size of the necrotic core varies by cell line and incubation time. |
| Culture Maintenance | Half-media change every 3-4 days [15] | Using 150 µL culture medium in a 96-well ULA plate. |
| Viability Staining | Propidium Iodide (PI) at 0.1 µg/mL [15] | Lower than standard 2D concentration to avoid toxicity for long-term monitoring. |
The Scientist's Toolkit: Essential Research Reagents and Materials
Table 2: Key Reagent Solutions for Spheroid Research
| Item | Function/Application | Example Use-Case |
|---|---|---|
| ULA Plates | Promotes cell aggregation into single spheroids by inhibiting attachment. | High-throughput spheroid formation for drug screening [14] [5]. |
| Extracellular Matrix (ECM) | Scaffold to support complex 3D growth and differentiation. | Culturing patient-derived organoids [19] [20]. |
| Wide-Bore Pipette Tips | Handles spheroids without causing damage during transfer. | Aspirating and moving spheroids for staining or analysis [5] [17]. |
| PrestoBlue / alamarBlue | Cell viability assays optimized for 3D penetration. | Assessing metabolic activity and drug response in spheroids [5] [16]. |
| Propidium Iodide (PI) | Fluorescent stain for dead cells, passively diffuses into necrotic cores. | Longitudinal monitoring of cell death within spheroids [14] [15]. |
| Triton X-100 | Detergent for permeabilizing cell membranes before staining. | Enabling antibody and dye penetration for internal spheroid markers [17]. |
| Tissue Clearing Reagents | Enhances optical transparency for deep imaging. | Enabling high-resolution 3D imaging of entire spheroids via confocal microscopy [5] [17]. |
| Image-iT Hypoxia Reagent | Fluorogenic compound detecting oxygen levels below 5%. | Visualizing and quantifying hypoxic regions within large spheroids [16]. |
Experimental Workflow and Relationships
The following diagram illustrates the core workflow for establishing reproducible spheroids for drug screening applications, highlighting the critical parameters identified in the research.
The relationship between the initial cell seeding number and the resulting spheroid characteristics is a fundamental principle for standardizing experiments.
Technical Support Center
Troubleshooting Guide: Common Spheroid Formation Issues
FAQ 1: How can I consistently grow uniform spheroids to get repeatable results?
The Challenge: Well-to-well variability in spheroid size, shape, and growth is a frequently encountered problem that prevents reliable data generation [21].
Solutions:
- Adjust Initial Cell Seeding Density: Control spheroid size by optimizing the number of cells seeded per well [5].
- Select Appropriate Cultureware: Avoid vessels with large surface areas like T-flasks. Instead, use round-bottom microplates (e.g., 96-well U-bottom plates) with ultra-low attachment (ULA) surfaces to promote single spheroid formation per well [5].
- Ensure Homogeneous Cell Suspension: Start with a uniformly mixed cell suspension throughout the plating process to prevent different-sized spheroids from forming due to cellular clumping [22].
- Control Evaporation: Use culture conditions that prevent evaporation-induced medium loss, which is crucial for 384-well plates and other high-throughput formats [21].
FAQ 2: What can I do when my cell lines do not form compact spheroids?
The Challenge: Some cell types resist forming tight, compact spheroids, leading to irregular structures that compromise experimental consistency [5].
Solutions:
- Use Centrifugation: After seeding cells, centrifuge the plate at low speed (e.g., 150 × g for 5 minutes) to help cells quickly settle at the bottom of wells and initiate aggregation [5].
- Allow Extended Formation Time: While some cells form spheroids within hours, others require several days. Be patient and consider replacing half the media volume with fresh media every 2-3 days to maintain culture health during extended formation periods [5].
- Consider ROCK Inhibition: Treatment with ROCK1 inhibitor (Y-27632) can enhance holosphere formation, preserve stemness markers, and reduce premature differentiation in challenging cell types [23].
FAQ 3: How should I handle spheroids for media changes and transfers without damaging them?
The Challenge: The dense, fragile nature of spheroids makes them susceptible to damage during routine handling, which can disrupt experimental timelines [5].
Solutions:
- Gentle Media Changes: Carefully tilt the microplate and slowly aspirate half the supernatant without touching the bottom where spheroids settle. Dispense fresh media along the well wall to avoid breaking spheroids apart [5].
- Use Specialized Pipette Tips: When transferring spheroids between containers, use wide-bore tips or wide-orifice pipette tips to accommodate spheroid diameter and prevent structural damage [5] [24].
- Optimized Centrifugation: For recovering spheroids from suspension, spin tubes briefly (20 seconds at 20 × g) using low centrifugal force to prevent dissociation [24].
FAQ 4: Why do my spheroids develop hypoxic cores and necrotic centers, and how can I manage this?
The Challenge: Spheroids with radii exceeding 200 micrometers develop diffusion limitations, leading to oxygen and nutrient gradients that create hypoxic regions and necrotic cores [25].
Solutions:
- Control Spheroid Size: Regulate initial seeding density to maintain spheroids below critical size thresholds where central necrosis typically develops [25].
- Optimize Feeding Schedules: Larger spheroids have greater nutrient needs and require more frequent media changes to prevent waste accumulation [22].
- Incorporate Transport in Experimental Design: Recognize that hypoxia and nutrient gradients are physiological features of spheroids. For drug testing, account for the limited penetration of therapeutic compounds, which mimics the in vivo barrier to drug delivery [25].
FAQ 5: What modifications are needed for cell viability assays and immunostaining in 3D spheroids?
The Challenge: Reagents and protocols optimized for 2D monolayers often fail to adequately penetrate the thicker, denser structure of 3D spheroids [5].
Solutions for Viability Assays:
- Increase Incubation Times: Allow longer duration for reagents like PrestoBlue HS and alamarBlue HS to penetrate the 3D structure [5].
- Optimize Concentrations: Adjust reagent concentrations specifically for 3D models, as standard 2D concentrations may be insufficient [5].
- Implement Rotation: For tighter, more compact spheroids, consider gentle rotation during incubation to improve reagent penetration [5].
Solutions for Immunostaining:
- Extended Fixation and Permeabilization: Increase incubation times with fixatives and permeabilization buffers (e.g., Triton X-100) to ensure complete penetration through the spheroid [24].
- Incorporate Antigen Retrieval: For formaldehyde-fixed spheroids, include a heat-induced antigen retrieval step (20 minutes at 96-98°C) to unmask epitopes cross-linked during fixation [24].
- Use Tissue Clearing Reagents: Apply commercial tissue clearing reagents specifically designed for 3D cultures to improve antibody penetration and image resolution throughout the spheroid [5].
- Extended Washing and Staining: Implement longer washing steps (e.g., four 1-hour washes) and overnight incubations for primary and secondary antibodies to ensure adequate penetration [24].
Quantitative Data for Spheroid Standardization
Table 1: Spheroid Size Distribution in Heterogeneous Cultures (6-Well ULA Plates)
| Spheroid Type | Cross-Sectional Area (μm²) | Morphological Characteristics | Stem Cell Potential |
|---|---|---|---|
| Holospheres | 408.7 | Large, smooth, compact | BMI-1+ stem cell reservoirs |
| Merospheres | 99.0 | Intermediate size | Moderate regenerative capacity |
| Paraspheres | 14.1 | Small, irregular | Limited stemness potential |
Data adapted from standardized scaffold-free epithelial spheroid systems [23]
Table 2: Protocol Adjustments for 3D vs. 2D Cell Analysis
| Assay Type | Detection Reagent | 2D Protocol | 3D Protocol | Key Modifications for 3D |
|---|---|---|---|---|
| Apoptosis | CellEvent Green Caspase 3/7 | 1X, 30 min | 1/3X, 2 hours | Lower concentration, longer incubation |
| Mitochondrial Health | MitoTracker Orange | 1X, 30 min | 2X, 1 hour | Higher concentration, extended time |
| Immunostaining | Primary/Secondary Antibodies | Standard overnight | Extended overnight with rotation | Increased penetration time with agitation |
Data compiled from 3D spheroid optimization guidelines [5]
Standardized Experimental Protocols
Protocol 1: High-Throughput Uniform Spheroid Formation
Application: Drug screening, toxicity testing, and high-content analysis requiring standardized spheroid sizes [23].
Methodology:
- Platform Selection: Use either Elplasia 96-well Black Round Bottom Microcavity plates or BIOFLOAT 96-well U-Bottom plates
- Cell Preparation: Trypsinize cells, count via trypan blue exclusion, and resuspend at appropriate density:
- Elplasia plates: 1.0 × 10⁶ cells/mL (50 μL aliquot = 5.0 × 10⁴ cells/well)
- BIOFLOAT plates: 1.0 × 10⁵ cells/mL (50 μL aliquot = 5.0 × 10³ cells/well)
- Plate Equilibration: Pre-incubate plates with complete medium for 30 minutes at 37°C
- Seeding and Incubation: Gently dispense cell suspension into wells and incubate undisturbed for 48 hours at 37°C, 5% CO₂
- Quality Control: Image multiple non-overlapping fields per well at 4× magnification and quantify spheroid number, diameter, and circularity using automated analysis software [23]
Protocol 2: Spheroid Immunofluorescence for 3D Architecture
Application: Protein localization, cell-cell interactions, and drug penetration studies in intact spheroids [24].
Methodology:
- Fixation: Remove culture medium, wash spheroids 3× with PBS, and fix with either:
- 4% paraformaldehyde in PBS (pH 7.4) for 10 minutes at room temperature
- 100% methanol (chilled at -20°C) for 5 minutes at 4°C
- Wash 3× with PBS after fixation
- Antigen Retrieval (if needed): For formaldehyde-fixed spheroids, incubate in antigen retrieval buffer (Tris/EDTA pH 9.0 or sodium citrate pH 6.0) for 20 minutes at 96-98°C
- Permeabilization: Incubate with permeabilization buffer (PBS with 0.5-2% Triton X-100) for 1 hour at room temperature with gentle shaking
- Blocking: Incubate overnight at room temperature with blocking buffer (PBS containing 0.1% Tween, 1% BSA, 22.52 mg/mL glycine, and 10% goat serum) on a flat shaker
- Antibody Staining:
- Apply primary antibodies at optimized concentration overnight
- Wash 4× with wash buffer (PBS containing 0.1% Tween), 1 hour per wash
- Apply secondary antibodies and/or nuclear stain overnight
- Repeat washing protocol (4×1 hour washes)
- Imaging: Mount in appropriate media and image using confocal microscopy with z-stack capability [24]
Experimental Workflow Visualization
Standardized Spheroid Workflow
The Scientist's Toolkit: Essential Research Reagents
Table 3: Key Reagent Solutions for Spheroid Research
| Reagent Category | Specific Products | Function in Spheroid Research |
|---|---|---|
| Low-Attachment Surfaces | Nunclon Sphera plates, Corning ULA plates, BIOFLOAT plates | Inhibit cell attachment to promote 3D aggregation through surface modification or coating [5] [23] |
| Hydrogels/ECM Substrates | Matrigel, synthetic scaffolds, collagen, hyaluronic acid | Provide physiological 3D environment for invasion studies and stemness maintenance [26] [22] |
| Cell Signaling Modulators | ROCK inhibitor (Y-27632) | Enhance stemness, improve viability, and promote compact spheroid formation [23] |
| Viability & Staining Reagents | PrestoBlue HS, alamarBlue HS, CellEvent Caspase 3/7, MitoTrackers | Assess metabolic activity, apoptosis, and organelle function in 3D structures [5] |
| Tissue Clearing Reagents | CytoVista 3D Cell Culture Clearing/Staining Kit | Improve antibody and dye penetration for enhanced imaging depth and resolution [5] |
| Specialized Handling Tools | Wide-bore pipette tips, Organoid Harvesting Solution | Enable gentle spheroid manipulation without structural damage during transfer and processing [5] [24] |
Advanced Troubleshooting: Addressing Complex Challenges
FAQ 6: How can I minimize edge effects and evaporation in high-throughput screening?
The Challenge: In 384-well plates, edge effects and evaporation-induced medium loss significantly contribute to well-to-well variability, compromising data reproducibility [21].
Solutions:
- Evaporation Control Systems: Implement culture conditions specifically designed to prevent evaporation-induced medium loss, which has been shown to enable formation of uniform spheroids across entire plates [21].
- Plate Sealing Optimization: Use breathable seals that allow gas exchange while minimizing evaporation during extended incubation periods.
- Environmental Humidification: Ensure adequate humidity levels in incubators to reduce evaporation gradients between edge and center wells.
FAQ 7: How do I standardize spheroid classification and analysis across different experimental setups?
The Challenge: Without standardized classification systems, comparing spheroid populations across experiments and between laboratories remains challenging [23].
Solutions:
- Implement Automated Imaging and Analysis: Use systems like ImageXpress Micro with MetaXpress High-Content Image Acquisition and Analysis Software to quantitatively assess spheroid number, diameter, and circularity [23].
- Establish Size/Shape Categories: Adopt standardized classification based on cross-sectional area and morphology:
- Holospheres: >200 μm, compact, smooth (stem cell reservoirs)
- Merospheres: Intermediate size, moderate regenerative capacity
- Paraspheres: <50 μm, limited stemness potential [23]
- Reference Standard Materials: Include control spheroids with known characteristics in each experimental run to normalize results between batches and platforms.
Standardization Framework for Reliable Data
Step-by-Step Protocols for Robust Spheroid Generation
Three-dimensional (3D) spheroid cultures are pivotal for bridging the gap between traditional two-dimensional (2D) cell cultures and complex in vivo environments, offering a more physiologically relevant model for studying tissue biology, disease mechanisms, and drug responses [27]. The reproducibility of spheroid formation is critical for high-throughput screening (HTS) in drug discovery, yet well-to-well variability in size, shape, and growth remains a significant challenge [21]. This guide compares three scaffold-free platforms for spheroid formation—Ultra-Low Attachment (ULA) Plates, Hanging Drop, and Agarose Micro-Molds—within the context of standardized protocols for reproducible research. We provide detailed troubleshooting and FAQs to address common experimental issues.
Comparative Platform Analysis: Data and Workflows
Quantitative Comparison of Spheroid Formation Platforms
The table below summarizes the key characteristics, advantages, and challenges of each platform to inform your selection.
| Platform | Key Principle | Best For | Throughput Potential | Key Advantages | Common Challenges & Variability Sources |
|---|---|---|---|---|---|
| Ultra-Low Attachment (ULA) Plates | Hydrophilic polymer-coated wells prevent cell attachment, forcing aggregation. | High-throughput screening, long-term culture [18] [28]. | High (96-, 384-well formats) [18] | Simple protocol, amenable to automation, suitable for long-term culture and drug testing [18]. | Edge effects and evaporation-induced medium loss; variability in spheroid size and shape; critical dependence on initial cell seeding density [21] [18]. |
| Hanging Drop | Gravitational force aggregates cells in a suspended droplet of medium. | Forming spheroids of uniform size from a defined cell number; forced aggregation [27]. | Medium | Promotes uniform spheroid size; no surface contact prevents aberrant adhesion [27]. | Low-to-medium throughput; cumbersome medium changes; not suitable for long-term culture due to droplet instability. |
| Agarose Micro-Molds | Non-adhesive microwells physically confine cells to guide aggregation. | Maximizing yield and uniformity; applications requiring highly reproducible spheroids [27]. | Medium | Excellent spheroid uniformity; entirely 3D culture environment maximizes cell differentiation potential [27]. | Requires specific mold equipment; medium throughput; potential cell loss during loading. |
Experimental Workflow for Spheroid Formation
The following diagram illustrates the generalized workflow for forming spheroids, applicable across the platforms discussed.
Key Research Reagent Solutions
The table below lists essential materials and their functions for successful spheroid culture.
| Item | Function / Role | Example |
|---|---|---|
| Ultra-Low Attachment (ULA) Plates | Provides a non-adhesive surface to force cell-cell interactions and spheroid self-assembly. | Corning 96-well Round Bottom ULA Microplates [18] |
| Agarose | Used to create non-adhesive micro-molds or coat plates to prevent cell attachment. | Low-melting point Agarose [28] |
| Serum-Free / Low-Serum Medium | Promotes cellular aggregation and maintains stem cell phenotype; reduces unwanted differentiation. | DMEM/F12 supplemented with EGF and bFGF [27] [28] |
| Dissociation Reagent | Generates a single-cell suspension for accurate counting and uniform spheroid formation. | Accutase [18] |
| Viability Stain | Enables longitudinal monitoring of cell death and necrotic core formation within spheroids. | Propidium Iodide (PI) [18] |
Frequently Asked Questions (FAQs) and Troubleshooting
FAQ 1: How does initial cell seeding density impact spheroid quality and experimental outcomes?
- Answer: Seeding density is a critical parameter. A low initial cell number (e.g., 250-500 cells/well for glioma lines) often promotes better growth and viability than higher densities [18]. There is a linear correlation between the initial cell number and the resulting spheroid size [18]. However, excessively high densities can lead to large spheroids with a substantial necrotic core due to diffusion limits of oxygen and nutrients, which may not be desirable for all assays [18]. You must empirically determine the optimal density for your specific cell line and application.
FAQ 2: We observe high well-to-well variability in spheroid size and growth in our 384-well ULA plates. What could be the cause and how can we improve reproducibility?
- Answer: A primary cause of variability in microtiter plates is evaporation-induced medium loss, which is more pronounced in edge wells and alters growth conditions [21].
- Solution: Implement culture conditions that minimize evaporation. This can include using humidity chambers, plate sealers, or ensuring the incubator has a well-humidified environment. These steps significantly improve the formation of uniform spheroids across the entire plate [21].
FAQ 3: For studying cell differentiation, is there an advantage to using one platform over the others?
- Answer: Yes. Research indicates that the culture microenvironment itself instructs cell differentiation. Studies on cardiac progenitor cells showed that performing spheroid formation and subsequent differentiation exclusively in a 3D microenvironment using agarose micro-molds maximized cardiomyocyte yield compared to methods requiring a 2D-to-3D switch (like ULA plates and hanging drop) [27]. A 3D culture system is necessary for robust differentiation [27].
FAQ 4: Our spheroids are forming, but we notice a significant central core of dead cells. Is this a problem?
- Answer: The development of a necrotic core is a natural consequence of spheroid growth and mimics the nutrient and oxygen gradients found in real tumors [18]. The size of this core is cell-line dependent and changes over time [18]. For drug screening, this structure can be desirable as it models a therapeutic barrier. However, if a large necrotic core is undesirable for your specific experiment, you should reduce the spheroid size by lowering the seeding density or the culture period.
FAQ 5: What is the recommended method for feeding spheroids during long-term culture without disrupting them?
- Answer: A standard protocol is to perform partial medium changes every 3 to 4 days [18]. Carefully remove approximately 50% of the spent medium from the well (e.g., using a multi-channel pipette with a slow, steady hand) and gently replace it with an equal volume of fresh, pre-warmed culture medium. This approach maintains nutrient and waste levels while minimizing physical disturbance to the spheroids.
Welcome to the Technical Support Center for 3D Cell Culture. This resource addresses the critical challenge of cell seeding optimization to enhance the reproducibility of spheroid research. Inconsistent initial seeding is a primary source of variability, affecting spheroid size, morphology, structural integrity, and experimental outcomes. The following guides and FAQs, grounded in recent large-scale studies, provide actionable strategies to standardize your protocols and achieve reliable results.
★ Key Factor Tables for Experimental Design
Table 1: Influence of Culture Conditions on Spheroid Attributes
| Factor | Optimal Range / Condition | Impact on Spheroid Attributes | Key Findings |
|---|---|---|---|
| Initial Seeding Density | 2,000 - 6,000 cells/spheroid (cell line-dependent) | Size & Stability: Higher density (6,000-7,000) increases size but can cause structural instability and rupture [10]. | - MCF-7 spheroids shrink over time; HCT 116 spheroids grow [10].- Densities of 6000 cells showed lowest compactness, solidity, and sphericity [10]. |
| Serum Concentration (FBS) | 10% - 20% | Structural Integrity: Concentrations below 5% lead to spheroid shrinkage, reduced density, and increased cell death [10] [29]. | - 10-20% FBS promotes dense spheroids with distinct necrotic and proliferative zones [10].- ATP content drops over 60% in serum concentrations below 5% [10]. |
| Oxygen Level | Physioxia (e.g., 3% O₂) | Viability & Morphology: Hypoxic conditions (3% O₂) reduce spheroid dimensions, viability, and ATP content [10]. | - 3% O₂ is associated with a heightened PI signal in the necrotic core and can influence co-culture outcomes [10] [29]. |
| Media Composition | Cell line-specific | Growth & Death Profiles: Varying glucose and calcium levels significantly affect spheroid size, shape, and viability [10]. | - HEK 293T spheroids in RPMI 1640 showed significantly elevated cell death signals [10] [29]. |
Table 2: Recommended Seeding Densities for Different Platforms
| Platform / Cell Type | Typical Seeding Density Range | Key Considerations |
|---|---|---|
| Standard Adherent Culture [30] | Varies by vessel surface area | - Passage cells at log phase with >90% viability.- Optimize density for 50-90% confluency. |
| XFp Miniplates (Adherent Cells) [31] | 5 x 10³ - 4 x 10⁴ cells/well | - Density should result in 50-90% confluency for dynamic metabolic rates. |
| XF HS Miniplates (Adherent Cells) [31] | 1.0 x 10³ - 1.0 x 10⁴ cells/well | - Seeding area is ~30% of a standard XFp plate; requires density optimization. |
| 96-Well U-Bottom Plate (for Spheroids) [32] | 10,000 cells/well in 100 µL | - Mixed with 1% methylcellulose to promote aggregation. |
FAQs and Troubleshooting Guides
FAQ: How does initial seeding density affect my 3D spheroid model?
The initial cell number is a primary determinant of final spheroid size and integrity. However, the relationship is not always linear and is cell line-dependent [10].
- Low Density (<2,000 cells/spheroid): May yield small, less dense spheroids that lack robust cell-cell interactions.
- High Density (>6,000 cells/spheroid): Can lead to large but unstable spheroids. Studies show that spheroids formed from 6,000-7,000 cells can rupture, releasing necrotic and proliferative areas [10]. Interestingly, some cell lines like MCF-7 can exhibit self-repair capabilities after structural failure [10].
FAQ: Why are my spheroids inconsistent across a multi-well plate?
Well-to-well variability is a common challenge in high-throughput screening, often caused by evaporation-induced medium loss at the plate edges, leading to the "edge effect" [21].
- Solution: Use culture conditions that prevent evaporation, such as humidity chambers or plate seals. Ensuring uniform medium volume across all wells is critical for forming identical spheroids [21].
Troubleshooting Guide: Spheroid Disintegration or Rupture
- Problem: Spheroids break apart, lose structural integrity, or release cells.
- Potential Cause & Solution:
- Excessive Seeding Density: This is a common cause. Solution: Titrate the initial cell number downward. Establish a growth curve for your cell line to find the density that maintains stability over your desired culture period [10].
- Insufficient Cell-Cell Adhesion: Solution: Optimize media composition, particularly serum concentration. For MCF-7 cells, maintaining at least 10% FBS promotes the formation of compact, dense spheroids [10] [29]. For serum-free cultures, consider incorporating natural polymers like methylcellulose to support aggregation [32].
Troubleshooting Guide: High or Variable Cell Death in Spheroids
- Problem: Excessive central necrosis or uneven cell death signals.
- Potential Cause & Solution:
- Incorrect Media Formulation: Solution: Be aware that standard media like RPMI 1640 can intrinsically promote higher death signals in some cell types (e.g., HEK 293T) [10] [29]. Test different media to find the optimal one for your specific cell line.
- Sub-optimal Serum Concentration: Solution: Avoid very low serum (0.5%-1%). Data shows cell death is highest at these concentrations. Use 10-20% FBS for improved viability, unless experimentally required otherwise [10].
- Severe Hypoxic Core: Solution: If excessive necrosis is undesirable, consider reducing the initial seeding density to create a smaller spheroid with less pronounced nutrient/waste gradients.
Essential Experimental Protocols
Protocol 1: Forming Spheroids in U-Bottom Plates with Methylcellulose
This is a widely used, scaffold-free method for generating uniform spheroids [32].
Workflow: Spheroid Formation
Materials:
- U-bottom 96-well plate (not tissue culture treated) [32]
- Methylcellulose (1% in PBS): Acts as a viscosity enhancer to prevent cell adhesion to the plate bottom and force aggregation [32].
- Complete Growth Medium: e.g., RPMI 1640 or DMEM, supplemented with FBS and antibiotics [32].
- Wide-orifice pipette tips: Essential for transferring formed spheroids without causing shear stress [32].
Procedure:
- Prepare a 1% solution of methylcellulose in PBS and sterilize [32].
- Harvest and count your cells. Calculate the volume needed for 10,000 cells per spheroid [32].
- In a tube, mix the cell suspension with an equal volume of 1% methylcellulose. The final volume per spheroid will be 100 µL [32].
- Seed 100 µL of the cell-methylcellulose mixture into each well of the U-bottom plate.
- Centrifuge the plate at a low speed (e.g., 300-500 x g for 1-2 minutes) to gently pellet the cells into the well bottom and initiate aggregation.
- Incubate the plate for 3 days at 37°C and 5% CO₂. Spheroids should form within this period [32].
Protocol 2: Passaging and Seeding Adherent Cells for 2D Culture
Proper subculture is fundamental to ensuring healthy, reproducible starting material for spheroid formation [30].
Materials:
- Pre-warmed Dissociation Reagent: e.g., trypsin or TrypLE [30].
- Balanced Salt Solution: without calcium and magnesium (e.g., PBS) [30].
- Complete Growth Medium: containing serum to inactivate the dissociation reagent [30].
- Hemocytometer or Automated Cell Counter [30].
Procedure:
- Monitor Cell Confluency: Only passage adherent cells when they are in the log phase of growth and have a viability >90% [30].
- Remove and Discard spent culture media from the vessel [30].
- Wash Cells with the balanced salt solution (~2 mL per 10 cm²) to remove traces of serum and ions. Gently rock the vessel and discard the wash [30].
- Add Dissociation Reagent (~0.5 mL per 10 cm²) to cover the cell layer. Rock the vessel for complete coverage [30].
- Incubate at room temperature for ~2 minutes (time varies by cell line). Observe under a microscope until ≥90% of cells detach. Gently tap the vessel if needed [30].
- Neutralize the reaction by adding 2 volumes of complete growth medium. Pipette thoroughly to disperse the cells [30].
- Transfer the cell suspension to a conical tube and centrifuge at 200 x g for 5-10 minutes. Resuspend the pellet in a known volume of fresh medium [30].
- Count Cells and calculate total cell number and viability using Trypan Blue exclusion or an automated counter [30].
- Dilute the cell suspension to the desired seeding density for your experiment or for continued 2D maintenance [30].
The Scientist's Toolkit: Research Reagent Solutions
| Item | Function in Cell Seeding & Spheroid Culture |
|---|---|
| Methylcellulose | A polymer used in scaffold-free spheroid formation to increase medium viscosity, preventing cell adhesion to the plate and promoting 3D aggregation [32]. |
| U-Bottom Microplates | Non-adherent plates with a round well bottom that guide cells to aggregate into a single spheroid per well, ideal for uniform high-throughput production [32]. |
| Wide-Orifice Pipette Tips | Tips with a larger opening to minimize shear forces when aspirating or transferring delicate 3D structures like spheroids, preserving their integrity [32]. |
| Trypsin/TrypLE | Enzymatic dissociation reagents used to detach adherent cells from culture vessels for passaging and counting before setting up seeding experiments [30]. |
| CellTiter-Glo 3D | A luminescent assay optimized for 3D models that measures ATP content, providing a quantitative readout of cell viability within dense spheroids [29]. |
| Automated Cell Counter | Provides a fast and consistent count of cell concentration and viability, reducing human error inherent to manual hemocytometer counting [30] [31]. |
Advanced Analysis: From Images to Quantitative Data
Modern spheroid research relies on high-throughput image analysis to extract robust, quantitative data. Studies analyzing tens of thousands of spheroids use software like AnaSP and ReViSP to compute metrics such as sphericity, compactness, solidity, and Feret diameter [10] [29]. These parameters allow researchers to move beyond subjective descriptions and statistically compare spheroid morphology across different experimental conditions.
Parameter Relationships in Spheroid Analysis
Furthermore, AI-based segmentation pipelines like 3DCellScope and DeepStar3D are now enabling high-speed 3D analysis of entire organoids, quantifying cellular morphology and topology at the single-cell level within these complex structures [33]. Integrating these tools is key for the future of standardized, reproducible 3D research.
Protocol for 384-Well Hanging Drop Plates for Patient-Derived Cells
The 384-well hanging drop plate is a high-throughput, scaffold-free three-dimensional (3D) cell culture platform designed to generate uniform tumor spheroids, particularly from patient-derived cells such as cancer stem cells (CSCs) [34]. This system excels in creating a physiologically representative microenvironment that recapitulates critical features of the in vivo tumor niche, including physiological cell-cell contacts, diffusion gradients, cell densities, and naturally produced extracellular matrix (ECM) proteins [34]. Its primary application in personalized medicine is for high-throughput drug screening to identify patient-specific treatment strategies and develop new therapeutics, as it allows for rapid screening using small numbers of precious patient-derived cells and is highly amenable to various downstream analyses [34].
Experimental Workflow
The following diagram outlines the complete experimental workflow for generating and analyzing spheroids using the 384-well hanging drop platform.
Detailed Protocols & Methodologies
Plate Preparation and Sterilization
Proper plate preparation is critical for preventing spheroid adhesion and ensuring experimental success.
- Sonication and Cleaning: Place the hanging drop plate in a sonicator filled with sterile deionized (DI) water and sonicate for 20 minutes. Remove and wash with running DI water [34].
- Pluronic Coating: Submerge the plate in a bath of 0.1% Pluronic acid for 24 hours to prevent protein adsorption and spheroid adherence [34].
- Rinsing and Drying: Thoroughly rinse both sides of the plate with running DI water. Inside a biosafety cabinet, vigorously tap or shake the plate to remove water from the wells [34].
- Sterilization: Sterilize the plate by exposing each side to UV light for 30–60 minutes. Alternatively, use an ethylene oxide gas chamber [34].
Humidity Chamber Assembly
Evaporation from the hanging drops must be minimized to maintain culture stability.
- Procedure: Fill each well of a 6-well plate with 4–5 mL of sterile autoclaved DI water. Sandwich the prepared hanging drop plate between the lid and bottom of the 6-well plate. Add 800–1,000 µL of sterile DI water around the rim of the hanging drop plate to create a humid, stable environment [34]. A 3D-printed humidity chamber can also be used for this purpose [35].
Spheroid Generation from Patient-Derived Cells
- Cell Suspension Preparation: For patient-derived cells collected from primary or metastatic solid tumors or ascites, prepare a single-cell suspension in an appropriate serum-free medium (SFM) [34]. Resuspend the cell pellet in culture medium supplemented with 0.5-1.0% methylcellulose to facilitate stable spheroid morphology. Methylcellulose increases the viscosity of the medium, preventing sedimentation of cells to the bottom of the drop and promoting uniform spheroid formation [36].
- Plate Seeding: Pipette a 28 µL aliquot of the cell suspension into each well of the hanging drop plate. A common seeding density is 20,000 cells in 28 µL of medium [36].
- Incubation and Spheroid Formation: Carefully place the assembled humidity chamber containing the seeded plate in a 37°C, 5% CO₂ incubator. Spheroids typically form within 3 to 7 days [36].
Spheroid Transfer for Downstream Analysis
The TRIM (Transfer and Imaging) plate is a complementary tool designed for facile handling of hanging drop spheroids [37].
- Contact-Based Transfer:
- Align the TRIM plate with the hanging drop plate using the physical plate guides.
- Lower the hanging drop plate to make contact with the TRIM plate.
- Allow spheroids to settle into the transfer wells for 1–2 minutes.
- Evenly lift and separate the hanging drop plate. This process results in nearly 100% spheroid capture efficiency [37].
- Advantages: The low-aspect ratio wells of the TRIM plate facilitate bulk spheroid collection for flow cytometry and enable high-resolution, low-working-distance immersion imaging [37].
The Scientist's Toolkit: Essential Research Reagents
Table 1: Key reagents and materials for the 384-well hanging drop protocol.
| Item | Function/Application | Example/Note |
|---|---|---|
| 384-Well Hanging Drop Plate | Platform for spheroid formation in a pendant droplet. | Available from commercial suppliers (e.g., Sigma-Aldrich #HDP1385) [36]. |
| Pluronic F-127 (0.1%) | Non-ionic surfactant to coat plates and prevent spheroid adhesion. | Critical for preventing protein adsorption [34]. |
| Methylcellulose | Agent to increase medium viscosity, stabilizing the hanging drop and promoting uniform spheroid formation. | e.g., Methocel A4M [36]. |
| TRIM Plate | Complementary plate for high-fidelity transfer, bulk collection, and immersion imaging of spheroids. | Fabricated using SLA 3D printing [37]. |
| Patient-Derived Cell Suspension | Primary cells from solid tumors or ascites for physiologically relevant spheroid generation. | Prepared in serum-free medium (SFM) [34]. |
| Humidity Chamber | System to maintain a humid environment and minimize droplet evaporation. | Can be a 6-well plate with water or a custom 3D-printed chamber [34] [35]. |
Troubleshooting Common Experimental Issues
Spheroid Morphology and Uniformity
Issue: High variability in spheroid size and shape. Poor spheroid uniformity is a significant source of data variability in drug response assays [38]. Both spheroid volume and shape (sphericity index) can affect treatment response [38].
- Solution: Use morphological pre-selection before initiating experiments. Software tools like AnaSP (open-source) can automatically analyze brightfield images and quantify parameters like volume and sphericity. Select only spheroids with homogeneous volume and a high sphericity index (SI ≥ 0.90) for treatment assays to drastically improve data reproducibility [38].
Issue: Spheroids are loose or do not form properly.
- Solution: Ensure the cell suspension is a true single-cell suspension. Optimize the concentration of methylcellulose (e.g., 0.5-1.0%) in the culture medium to enhance cell aggregation and spheroid compaction [36].
Technical and Handling Problems
Issue: Excessive evaporation from hanging drops.
- Solution: Verify the integrity of the humidity chamber. Ensure an adequate volume of sterile water is present in the reservoir wells and around the plate rim. Consider using a dedicated 3D-printed humidity chamber for better sealing [35].
Issue: Spheroids stick to the plate or are difficult to transfer.
- Solution: Confirm the Pluronic coating step was performed correctly and that the plate was rinsed thoroughly after coating. For transfer, use a dedicated TRIM plate or ensure pipetting techniques are gentle and consistent to avoid spheroid disruption [34] [37].
Issue: Contamination in the cultures.
- Solution: Maintain strict aseptic technique during all steps, particularly during the plate seeding process. Ensure the plate sterilization step (UV or ethylene oxide) is performed effectively [34].
Frequently Asked Questions (FAQs)
Q1: What are the key advantages of the 384-well hanging drop platform over other 3D culture methods like hydrogels or ultra-low attachment (ULA) plates? The 384-well hanging drop platform offers several key advantages:
- High Throughput: The 384-well format allows for many parallel experiments with minimal cell numbers, ideal for drug screening [34].
- High Uniformity: It generates spheroids with a narrow size distribution (variation coefficients of 10-15%), superior to many non-adherent surface methods (40-60%) [36].
- Physiological Relevance: Spheroids exhibit higher compaction, remodeling, and chemoresistance compared to those from ULA plates, better mimicking in vivo conditions [34].
- Ease of Analysis: It is highly amenable to downstream analysis like imaging, flow cytometry, and viability assays [34].
Q2: How can I modify the size of the spheroids? Spheroid size can be controlled by adjusting two key parameters:
- Cell Seeding Density: Higher cell numbers will yield larger spheroids [36].
- Volume of the Droplet: The platform allows for control of spheroid size by adjusting the volume of the droplet or the concentration of cells in the suspension [36].
Q3: My drug screening results are variable. What could be the cause? The most common cause is morphological heterogeneity in the spheroid population used for the assay [38]. Pre-select spheroids based on volume and shape (sphericity index) to ensure a homogeneous population before treatment. Additionally, confirm that your viability assay is validated for 3D cultures, as conventional 2D assays may not be suitable [38].
Q4: What downstream applications are compatible with spheroids from this platform? The platform is compatible with a wide range of analyses:
- Imaging: Brightfield, confocal, and multiphoton microscopy (facilitated by the TRIM plate) [34] [37].
- Viability and Cytotoxicity Assays: e.g., ATP-based assays, WST-1 proliferation assay [35] [38].
- Flow Cytometry: For cell phenotype analysis after spheroid dissociation [34] [37].
- Molecular Biology: PCR, gene expression analysis [34].
- Other: Immunofluorescence, immunohistochemistry, ELISA on conditioned medium [34].
Decision-Making Guide for Spheroid Quality Issues
The following flowchart provides a systematic approach to diagnosing and resolving common spheroid quality problems.
Protocol for 96-Well ULA Plates for Rapid, Large-Scale Production
The adoption of three-dimensional (3D) cell cultures, particularly spheroids, represents a significant advancement in preclinical research, bridging the gap between traditional two-dimensional (2D) monolayers and in vivo models. Spheroids better mimic the complex architecture and microenvironment of solid tumors by incorporating dynamic cell-cell interactions and developing an extracellular matrix (ECM), which influences critical processes like drug penetration and the development of resistance gradients [4]. Ultra-Low Attachment (ULA) plates provide a scaffold-free method for generating uniform, self-assembled spheroids, making them indispensable for high-throughput screening and drug efficacy evaluation [39]. Standardized protocols are essential to overcome challenges in reproducibility and scalability, ensuring that data generated from these advanced models is both reliable and translatable.
Frequently Asked Questions (FAQs) and Troubleshooting
General Protocol and Spheroid Formation
Q: What is the key advantage of using U-bottom ULA plates over flat-bottom plates for spheroid formation?
- A: U-bottom plates are engineered to guide the self-assembly of cells into a single, uniform spheroid that is centered within each well. In contrast, flat-bottom plates often result in multiple, non-uniform cell aggregates, leading to inconsistent data [39].
Q: How do I control the size of the spheroids?
- A: Spheroid size is primarily dependent on the initial plating density and the cell type used. The duration of the culture and the desired size at the time of analysis are also key factors. Optimization of seeding density is required for each new cell line [39].
Q: How long does it take for spheroids to form?
- A: Many common cell lines will form a spheroid within 24 hours. However, some cell types may form looser aggregates and require optimization, such as media supplementation with methylcellulose or co-culture with fibroblasts [39].
Q: What is the recommended workflow to ensure consistent spheroid formation?
- A: A standardized workflow is critical for reproducibility. The key steps are summarized in the following diagram:
Spheroid Production Workflow
- A: A standardized workflow is critical for reproducibility. The key steps are summarized in the following diagram:
Common Issues and Solutions
Even with a standardized protocol, researchers may encounter specific challenges. The table below outlines common problems, their likely causes, and recommended solutions.
| Problem | Possible Cause | Solution |
|---|---|---|
| Multiple aggregates form per well | - Damaged ULA coating from pipette tip- Pre-existing cell clumps in suspension | - Avoid touching well bottom/sides during pipetting [39]- Filter cell suspension through a 40 µm cell strainer [39] |
| Spheroid does not form; cells remain loose | - Cell type requires matrix support- Incorrect media composition | - Optimize media (e.g., add methylcellulose) [39]- Consider a scaffold-based method [40] |
| High well-to-well variability in size | - Inconsistent cell seeding density- Evaporation in edge wells | - Ensure homogeneous cell suspension by gentle pipetting before seeding [41]- Maintain >95% incubator humidity; use low-evaporation lids [41] |
| Spheroid is aspirated during medium exchange | - Pipetting too close to the spheroid- Excessive pipetting speed | - Use a pipette tip placed at the ledge of the well, away from the spheroid [41] [39]- Aspirate and dispense media slowly (<30-50 µL/sec) [41] |
Quantitative Data and Experimental Parameters
Successful large-scale production relies on precise control of quantitative parameters. The following table consolidates key data for planning experiments with 96-well ULA plates.
| Parameter | Specification / Recommended Value | Notes / Application |
|---|---|---|
| Max Well Volume | 250-300 µL [39] | A working volume of 70 µL is often used for optimal spheroid formation [41]. |
| Recommended Seeding Density | 250 - 2,500+ cells/well [41] | Low end (250-500) for long-term growth; high end for non-proliferating cells or large spheroids. Must be optimized per cell line. |
| Centrifugation after Seeding | 250 RCF for 2 minutes [41] | Promotes cell aggregation and removes air bubbles. |
| Residual Volume after Aspiration | 5-7 µL [41] | Achieved by using the plate's built-in ledge during medium exchange to prevent spheroid loss. |
| Plate Storage Conditions | Room temperature, low humidity [39] | Protect from direct sunlight. Do not use if packaging is damaged. |
The Scientist's Toolkit: Essential Research Reagents and Materials
A standardized protocol requires the use of specific, high-quality materials. The table below lists essential items for spheroid production in 96-well ULA plates and their critical functions.
| Item | Function in Spheroid Production |
|---|---|
| 96-Well ULA U-bottom Plate | The core platform that prevents cell attachment, forcing cells to aggregate into a single, centered spheroid in each well [39]. |
| Phenol Red-Free Medium | Prevents coloring of the medium and potential imaging artifacts, especially when used with ECM components for embedded cultures [40]. |
| Single-Cell Suspension | The starting point for uniform spheroid formation. Achieved via trypsin-EDTA dissociation and optional filtration [40] [39]. |
| Fetal Bovine Serum (FBS) | A standard supplement (e.g., 10%) in complete media that supports cell growth and viability [40]. |
| Methylcellulose | A media additive used to increase viscosity for cell types that form loose aggregates, promoting tighter spheroid formation [39]. |
| Automation-Compatible Seals/Lids | Low-evaporation lids are critical for long-term cultures to minimize media concentration in edge wells and ensure experimental consistency [41]. |
Advanced Applications and Analysis
The 96-well ULA plate format is compatible with a wide range of downstream applications, making it a powerful tool for drug development.
- Drug Efficacy and Screening: Spheroids are ideal for evaluating anti-cancer drugs, especially for assessing penetration and effects on the hypoxic inner core [4] [39]. The 96-well format is suited for high-throughput screening of compound libraries.
- Live/Dead Staining and Fluorescence Imaging: The plates are optically clear, allowing for in-well fluorescent assays to monitor cell viability, cell division, and other physiological processes within the spheroid over time [39].
- High-Content Analysis (HCA): Spheroids generated in this format can be analyzed using HCA to extract quantitative features at both the whole-spheroid level and the individual cell level, providing deep phenotypic data [40].
The relationships between the spheroid model, the experimental perturbations, and the resulting data outputs are complex. The following diagram illustrates this integrated experimental and analysis pipeline:
Spheroid Research Feedback Loop
The implementation of a standardized protocol for 96-well ULA plates, as outlined in this guide, is a critical step toward achieving reproducible, large-scale production of spheroids. By adhering to detailed methodologies for plate handling, cell seeding, and medium exchange, and by understanding the troubleshooting principles, researchers can minimize variability and generate robust, high-quality data. The ability to create uniform 3D models in a high-throughput format directly addresses the growing demand for more physiologically relevant systems in drug discovery and cancer research, ultimately helping to bridge the gap between in vitro studies and clinical outcomes.
The AggreWell System Guide for Production of Size-Controlled Spheroids
The pursuit of highly reproducible, physiologically relevant three-dimensional (3D) cell models is a central goal in modern life sciences. The AggreWell microwell system addresses this need by providing a standardized platform for the robust production of size-controlled spheroids and embryoid bodies (EBs). This technology utilizes forced cellular aggregation to generate large numbers of uniform 3D microtissues, directly supporting the broader thesis that standardized protocols are paramount for achieving reproducible and reliable results in spheroid-based research [42]. By controlling the initial seeding parameters, researchers can directly determine the final spheroid size, a critical factor that influences diffusion gradients, cellular differentiation, and overall morphology, thereby reducing experimental variability and enhancing data quality [43] [44] [42].
The AggreWell system consists of plates containing a high-density array of pyramid-shaped microwells. The operational principle involves centrifuging a single-cell suspension into these microwells, where cells cluster at the bottom of each well to form a single aggregate [42]. The size of the resulting spheroid or EB is controlled by adjusting the initial cell seeding number, while the microwell geometry ensures consistent shape and size across thousands of aggregates simultaneously [43] [45]. The system is compatible with a wide range of cell types, including pluripotent stem cells (PSCs) for EB formation, cancer cell lines for tumor spheroids, and other primary cells [43] [42] [45].
The table below summarizes the key specifications for the different AggreWell plate formats to guide appropriate selection based on experimental needs.
Table 1: AggreWell Plate Specifications and Selection Guide
| Plate Format | Microwell Diameter (µm) | Aggregate Size Range (Cells/Spheroid) | Approx. Aggregates per Well | Total Aggregates per Plate | Primary Applications |
|---|---|---|---|---|---|
| AggreWell400 | 400 | 50 - 3,000 [43] | 1,200 (24-well) [43] | ~28,000 [43] | Embryoid bodies for ES/iPS cell differentiation; smaller cancer spheroids; high-throughput imaging [45] |
| AggreWell800 | 800 | 3,000 - 20,000 [43] | 300 (24-well) [43] | ~7,200 [43] | Larger embryoid bodies; large cancer spheroids; 3D tissue engineering [45] |
| AggreWellHT | 900 | 50 - 20,000 [43] | 32 (96-well) [43] | ~3,072 [43] | Drug screening; applications requiring individual well handling [45] |
The following workflow diagram illustrates the core process of spheroid formation using the AggreWell system.
Figure 1: Standardized Workflow for AggreWell Spheroid Formation. This diagram outlines the key steps from cell preparation to spheroid harvest, highlighting critical actions for success.
Detailed Experimental Protocol
Microwell Plate Preparation
Proper plate preparation is critical for preventing cell adhesion and ensuring the efficient formation and retrieval of spheroids.
- Aseptic Technique: Perform all steps in a sterile laminar-flow biosafety cabinet. The plates are sterile as supplied [42].
- Anti-Adherence Coating:
- Add 0.5 mL of Anti-Adherence Rinsing Solution (e.g., STEMCELL Technologies Catalog #07010) to each well that will be used. To minimize air bubble trapping, add the solution to the side of the well and allow it to flow across the surface rather than dispensing it directly onto the microwells [43] [42].
- Centrifuge the plate at 2000 x g for 5 minutes using a swinging-bucket rotor with plate holders. This forces the solution into the microwells and displaces trapped air [43].
- Verify bubble removal under a low-magnification inverted microscope. If bubbles persist, repeat centrifugation [42].
- Incubate the plate with the solution for at least 30 minutes at room temperature. Plates can be coated overnight at 4°C if properly sealed to prevent evaporation [42].
- Final Rinse: Immediately before adding cells, thoroughly aspirate the Rinsing Solution and wash each well with sterile PBS or culture medium. Do not allow the plates to dry out after this final rinse [42].
Cell Preparation and Seeding
This section details the process for creating a single-cell suspension and calculating the correct cell number for seeding.
- Cell Dissociation: Harvest and dissociate your cell culture (e.g., HT29 cancer cells or human pluripotent stem cells) into a single-cell suspension using a standard dissociation protocol (e.g., trypsin or TrypLE). It is critical to achieve a suspension with minimal cell clumps [42].
- Cell Counting: Perform a viable cell count using a hemocytometer or automated cell counter.
- Calculate Seeding Density: The total number of cells to seed per well is determined by the following formula:
- Total Cells per Well = (Number of Aggregates Desired per Well) × (Target Cell Number per Spheroid)
- Example: For an AggreWell400 plate (1,200 microwells/well) to make spheroids of 1,000 cells each, you need: 1,200 × 1,000 = 1.2 million cells per well [42].
- The cell suspension is typically loaded in a volume of 0.4 mL. For the example above, the cell density would be 1.2 million cells / 0.4 mL = 3.0 million cells/mL [42].
- Seed Cell Suspension:
- Add 0.4 mL of fresh growth medium to each prepared well.
- To ensure even cell distribution, gently pipette the calculated volume of cell suspension up and down to mix, avoiding introduction of air bubbles, and add it to the well [42].
- Forced Aggregation: Centrifuge the plate at 200 x g for 5 minutes to pellet cells into the bottom of the microwells. Ensure the centrifuge rotor is properly balanced to prevent convection currents that can lead to uneven cell distribution [42].
Spheroid Culture and Harvesting
- Incubation and Monitoring: Place the sealed plate in a 37°C, 5% CO₂ incubator. Observe spheroid formation after 24-48 hours using an inverted microscope. Most cell lines will form compact, round spheroids within this timeframe [42] [45].
- Harvesting Spheroids:
- For larger EBs or spheroids (≥2,000 cells/EB), use a large-bore pipette tip to prevent damage. You can create one by carefully cutting the end off a standard 1 mL pipette tip with sterile scissors [43].
- Gently pipette the medium up and down over the microwell surface to dislodge the spheroids.
- Transfer the spheroid suspension to a fresh tube or plate for downstream culture or analysis. Spheroids can be maintained in the AggreWell plates with medium exchange or harvested for transfer to suspension culture platforms like spinning bioreactors [44] [42].
The Scientist's Toolkit: Essential Research Reagents
Table 2: Key Reagents and Materials for AggreWell Experiments
| Item | Function / Purpose | Example / Catalog Number |
|---|---|---|
| AggreWell Plates | Microwell platform for standardized spheroid formation. Choice of 400 µm, 800 µm, or 900 µm (HT) microwells. | AggreWell400, #34411; AggreWell800, #34821 [43] |
| Anti-Adherence Rinsing Solution | Prevents cell adhesion to microwell surface; critical for efficient spheroid formation and harvest. | STEMCELL Technologies, Catalog #07010 [43] |
| Defined Culture Media | Supports cell viability and specific differentiation pathways (e.g., neural, cardiac). | Varies by cell type and application (e.g., DMEM + 10% FBS for HT29 cells [42]) |
| Cell Dissociation Reagent | Generates a high-viability single-cell suspension for seeding (e.g., trypsin, TrypLE). | TrypLE Select [42] |
| Growth Factors / Cytokines | Directs differentiation of stem cell-derived EBs (e.g., induces neuroectoderm). | Basic FGF (bFGF) [44] |
| Large-Bore Pipette Tips | Protects large, fragile spheroids from mechanical damage during harvesting. | Custom-cut 1 mL pipette tips [43] |
Troubleshooting FAQs
Q1: My spheroids are not forming, and cells remain loose in the microwells. What could be wrong?
- A: This is often due to insufficient plate preparation. Ensure the Anti-Adherence Rinsing Solution was used and centrifuged properly into the microwells. Inadequate coating can cause cells to stick to the plastic instead of aggregating with each other [43] [42]. Also, verify that your cell suspension is truly a single-cell suspension; clumps will prevent uniform aggregation [42]. Finally, some sensitive cell types may require longer incubation times (up to 72 hours) to form compact spheroids.
Q2: The size of my spheroids is inconsistent across the plate. How can I improve uniformity?
- A: Inconsistent size typically results from an uneven distribution of cells during the seeding centrifugation step. Ensure the centrifuge rotor is perfectly balanced, both internally within the carrier and against the opposing carrier. Applying lubrication to the plate carrier pivots (per manufacturer instructions) can also help achieve a level spin [42]. Furthermore, always gently but thoroughly mix the cell suspension by pipetting before seeding to ensure a homogeneous distribution of cells throughout the medium [42].
Q3: My large embryoid bodies (EBs) break apart when I try to harvest them. How can I prevent this?
- A: This is a common issue when using standard pipette tips. Always use a large-bore pipette tip for harvesting EBs of 2,000 cells or more. You can create these by using sterile scissors to cut the end off a 1 mL pipette tip, which significantly reduces shear stress on the aggregates [43].
Q4: I observe fluid-filled cysts or excessive cell death in my organoid cultures after the EB stage. What factors should I check?
- A: The initial EB size is a critical parameter for subsequent differentiation. Research shows that smaller EBs favor ectoderm differentiation, and incorrect sizing can lead to aberrant morphologies like cysts [44]. Ensure you are using the correct cell seeding number for your target EB size (refer to Table 1). Additionally, for complex protocols like cerebral organoid generation, complete removal of Matrigel after embedding is crucial to allow for uniform growth and prevent morphological abnormalities [44].
Q5: Can I reuse an AggreWell plate?
- A: No. The manufacturer explicitly states that AggreWell plates are intended for one-time use only. Reuse increases the risk of contamination and can lead to poor performance due to residual cells or matrix proteins affecting the microwell surface properties [43].
The following decision tree helps diagnose and resolve the most common spheroid formation issues.
Figure 2: AggreWell Troubleshooting Decision Tree. This guide helps diagnose and resolve common experimental issues.
Incorporating Basement Membrane Extract (BME) for Invasion and Complex Co-Culture Assays
Core Principles and Handling of BME
What is Basement Membrane Extract (BME) and why is it used in 3D cell culture?
Basement Membrane Extract (BME) is a biological hydrogel isolated from the Engelbreth-Holm-Swarm (EHS) mouse sarcoma tumor, which is rich in extracellular matrix (ECM) proteins. It is a crude mixture that typically includes laminin, collagen IV, entactin, and heparan sulfate proteoglycans [46]. In the context of 3D cell culture, BME serves as a scaffold that recapitulates the natural ECM environment found in tissues. It provides structural support and essential biochemical cues that promote cell adhesion, differentiation, and the formation of complex 3D structures like spheroids and organoids, making it invaluable for assays investigating cell invasion, migration, and cell-cell interactions within a more physiologically relevant context [46] [47].
What are the fundamental handling guidelines for BME to ensure experimental success?
Proper handling of BME is critical for experimental reproducibility. The following principles must be adhered to:
- Temperature Sensitivity: BME polymerizes rapidly at elevated temperatures. It must be thawed overnight at 2-8°C and kept on ice at all times during use. All pipettes, plates, and media should be pre-cooled [46].
- Dilution: If needed, BME can be diluted with cold serum-free medium (e.g., DMEM) to reduce viscosity. Dilutions must be prepared before adding the BME to the plate [46].
- Prolonged Manipulations: All work involving BME in its liquid state should be conducted on ice and ideally in a cold room to maintain temperatures below 10°C and prevent premature gelling [46].
Table 1: Fundamental BME Handling Checklist
| Step | Critical Action | Purpose |
|---|---|---|
| Thawing | Thaw overnight at 2-8°C. Never at room temperature or in a water bath. | Prevents premature polymerization and maintains bioactivity. |
| Working State | Always keep on ice during use. Use pre-chilled tools and media. | Ensures BME remains liquid for accurate pipetting and dispensing. |
| Dilution | Use ice-cold medium for any dilution. Prepare before plating. | Reduces viscosity for thin coatings; must be done cold. |
| Polymerization | Incubate at 37°C for the recommended time (e.g., 30 mins for coatings, 2 hrs for thick gels). | Forms a stable, reconstituted basement membrane for cell culture. |
| Storage | Aliquot and store at -20°C or below. Avoid repeated freeze-thaw cycles. | Preserves protein integrity and function for long-term use. |
Troubleshooting Common BME Assays
Why did my BME gel fail to polymerize or polymerize too quickly?
Improper temperature management is the most common cause of polymerization failure. If the BME is not kept sufficiently cold before plating, it will begin to gel in the pipette tip or tube. Conversely, if the incubation time or temperature at 37°C is insufficient, the gel will not form properly. Ensure all working surfaces and materials are pre-cooled and that the plate is incubated at 37°C for the full duration specified in the protocol (typically 30 minutes to 2 hours) [46].
Why is there high well-to-well variability in my cell invasion assay using BME-coated transwells?
High variability in cell invasion assays can stem from inconsistencies in the BME coating itself. To ensure a uniform gel layer in every transwell insert [46]:
- Pre-chill Components: Chill the inserts and the plate on ice before adding BME.
- Consistent Coating Volume: Use a precise, calibrated pipette to dispense the same volume of BME into each insert.
- Gentle Polymerization: Immediately place the plate in a stable, level 37°C incubator for the full polymerization time (e.g., 2 hours) without disturbing it.
- Avoid Bubbles: Take care when dispensing the BME to avoid introducing air bubbles, which create holes in the gel and provide easy paths for cells to invade non-specifically.
How can I dissociate cells from a 3D BME gel for subsequent analysis or passaging?
To recover cells embedded within a 3D BME gel, enzymatic digestion is required. Dispase is the recommended enzyme for this purpose, as it degrades the basement membrane components without significantly damaging cell surface proteins. Use Dispase at a concentration of 0.6-2.4 units/mL in PBS without calcium, magnesium, and EDTA. After incubation, collect the cells by centrifugation and wash them with culture medium before downstream applications [46].
Table 2: Troubleshooting Guide for Common BME Assay Problems
| Problem | Potential Causes | Solutions & Preventive Measures |
|---|---|---|
| Failed Gelation | BME was not kept cold before use; insufficient incubation time/temperature at 37°C. | Thaw at 4°C overnight; keep on ice; ensure full 37°C incubation time [46]. |
| High Assay Variability | Inconsistent BME coating thickness; bubble formation in the gel; edge effects in multi-well plates. | Pre-chill all materials; use precise pipetting; avoid bubbles; use plate seals to minimize evaporation [21]. |
| Poor Cell Invasion/Migration | BME gel is too thick or dense; inappropriate cell type or cell viability; lack of chemoattractant. | Optimize BME dilution and coating thickness; use a proven chemoattractant like FBS in the lower chamber [46]. |
| Low Cell Viability in 3D Culture | Inadequate nutrient diffusion; excessive gel density; hypoxic core in spheroids. | Use a lower BME concentration; ensure proper media volume and change schedule; control spheroid size [10]. |
Advanced Applications: Co-culture and Standardization
How can I incorporate immune cells into BME-based tumor spheroid models for co-culture studies?
Incorporating immune cells into 3D tumor models is technically challenging, as pre-formed spheroids can physically impede immune cell infiltration. An effective strategy involves forming the spheroid in the presence of the immune cells from the outset. One proven protocol uses magnetic nanoparticles to draw tumor cells and T cells together [48]:
- Isolate and activate T cells from healthy donor PBMCs.
- Bind both tumor cells and T cells with biologically inert magnetic nanoparticles.
- Seed the cell mixture into a low-attachment multi-well plate placed on a magnetic drive.
- The magnet draws the cells together to form a spheroid within 24 hours, after which the magnet is removed. This method ensures consistent and robust T cell incorporation throughout the tumor spheroid, maintaining T cell function and tumor-killing activity [48]. For some applications, BME-free methods using gelatin-coated plates have also been reported for facilitating immune cell-organoid interactions [49].
What are the critical experimental variables for standardizing BME-based spheroid models?
Reproducibility in 3D spheroid models is highly sensitive to culture conditions. Systematic analyses have identified key parameters that must be controlled [10]:
- Oxygen Levels: Physiologically relevant (3%) oxygen tension can significantly reduce spheroid size and increase necrosis compared to ambient oxygen [10].
- Serum Concentration: Higher serum levels (e.g., 10-20%) promote the formation of dense, structured spheroids with distinct proliferative and necrotic zones, while low serum leads to smaller, less dense spheroids [10].
- Media Composition: The specific base medium (e.g., DMEM, RPMI) and its components like glucose and calcium can drastically alter spheroid growth kinetics, viability, and morphology [10].
- Initial Seeding Cell Number: This is a primary determinant of final spheroid size. Different cell types may exhibit opposite growth trends over time based on the initial seed density [10].
Table 3: Key Experimental Variables for Reproducible Spheroid Formation [10]
| Variable | Impact on Spheroid Attributes | Recommendation for Standardization |
|---|---|---|
| Oxygen Level | 3% O2 reduces size & increases necrosis vs. 21% O2. | Use a tri-gas incubator to maintain physiologically relevant and consistent O2 levels. |
| Serum Concentration | 0-5% FBS: Lower viability, smaller size.>10% FBS: Dense spheroids, distinct zones. | Define and consistently use a specific serum percentage for all experiments. |
| Media Formulation | Varies spheroid size, regularity, and death signals. | Use the same commercial media source and lot for a single project. |
| Seeding Density | Directly controls final spheroid size and structure. | Perform initial seeding number optimization for each cell line. |
| Culture Time | Size and necrosis increase over time; gene expression profiles shift dramatically. | Fix and rigorously adhere to endpoint analysis time points. |
The Scientist's Toolkit
What are the essential reagents and materials for establishing BME-based invasion and co-culture assays?
A successful BME-based assay requires a suite of specialized reagents and tools.
Table 4: Research Reagent Solutions for BME-Based Assays
| Item | Function / Application | Example Products / Comments |
|---|---|---|
| BME / ECM Gel | Provides the 3D scaffold for cell growth and invasion. | Sigma-Aldrich ECM Gel (E1270); Growth Factor Reduced (GF-reduced) ECM Gel (E6909) for sensitivity to endogenous growth factors [46]. |
| Cell Dissociation Enzyme | Recovers cells from 3D BME gels for subculture or analysis. | Dispase (e.g., D4818); effective for digesting BME without severe damage to cell receptors [46]. |
| Transwell Inserts | Physical platform for cell invasion and migration assays. | Millicell Insert; used to create a barrier with a BME coating that cells must invade through [46]. |
| Low-Attachment Plates | Promotes 3D spheroid formation by preventing cell adhesion to the plastic surface. | Corning Spheroid Microplates; essential for consistent, free-floating spheroid formation [48] [21]. |
| Magnetic Nanoparticles | Enables consistent incorporation of immune cells during spheroid formation. | NanoShuttle PL; used with a magnetic drive to form spheroids containing multiple cell types [48]. |
| Viability/Cytotoxicity Kits | Assesses cell health and death within 3D structures. | Live/Dead Cell Double Staining Kit (e.g., KGAF001); uses calcein-AM (green/live) and propidium iodide (red/dead) [49] [48]. |
Workflow and Process Diagrams
BME Handling and Cell Invasion Assay Workflow
Tumor-Immune Spheroid Co-culture Formation
Frequently Asked Questions (FAQs)
Is BME derived from cell lysates or the actual extracellular matrix?
BME is not derived from cell lysates. It is produced from a total extraction of the entire Engelbreth-Holm-Swarm (EHS) tumor, which is exceptionally rich in extracellular matrix proteins. This process results in a product that contains the complex mixture of proteins and glycosaminoglycans that constitute the natural basement membrane [46].
What is the difference between standard and growth factor-reduced BME?
Growth factor-reduced (GFR) BME undergoes an additional processing step to lower the concentration of certain endogenous growth factors. Compared to standard BME, GFR BME has lower levels of cytokines including bFGF, EGF, IGF-1, TGF-β, PDGF, and NGF. GFR BME is often preferred for experiments where the effects of exogenously added growth factors need to be isolated, or when studying pathways that could be confounded by these endogenous factors [46].
Why is my spheroid size and morphology inconsistent across experiments, even when using BME?
Even with consistent BME handling, spheroid attributes are influenced by other critical parameters. Key factors to control include [10]:
- Oxygen tension
- Serum concentration and media composition
- Initial seeding cell number
- Evaporation in outer wells of plates (use plate seals or only interior wells) Inconsistent spheroid size often traces back to variations in one of these parameters. Implementing strict protocol standardization and using automated image analysis (e.g., AnaSP) can help quantify and control this variability [21] [10].
Solving Common Challenges: A Guide to Consistent Spheroid Quality
In three-dimensional (3D) cell culture, the initial seeded cell number is a fundamental experimental variable that directly governs the size, structural integrity, and physiological relevance of the resulting spheroids. This parameter profoundly influences experimental outcomes by controlling the establishment of nutrient and oxygen gradients, which in turn dictate the development of characteristic zones of proliferation, quiescence, and necrosis. Optimizing this variable is therefore essential for generating reproducible and reliable spheroid models, particularly for applications in drug screening and personalized medicine where consistency is paramount [10] [29].
Key Findings: How Initial Cell Number Shapes Spheroid Attributes
Large-scale studies analyzing thousands of spheroids have quantified the precise relationships between initial cell number and key spheroid attributes. The data reveal that while increasing cell numbers generally produces larger spheroids, this relationship is not always linear and can lead to structural instability at higher densities [10] [29].
Table 1: Impact of Initial Seeding Density on Spheroid Size and Morphology
| Initial Cell Number | Equivalent Diameter | Sphericity/Compactness | Structural Stability | Necrotic Core Development |
|---|---|---|---|---|
| 2,000 cells | Smaller spheroids | Higher regularity | High stability | Minimal or absent |
| 6,000 cells | Largest dimensions | Lowest compactness & sphericity | Frequent rupture and release of necrotic material | Extensive |
| 7,000 cells | Variable, often reduced compared to 6,000 | Moderate regularity | Instability in some cell lines | Present, but may be externalized |
Table 2: Cell Line-Specific Variations in Growth Kinetics
| Cell Line | Growth Trend Over Time | Response to High Seeding Density (6,000-7,000 cells) | Unique Characteristics |
|---|---|---|---|
| MCF-7 (Breast Cancer) | Gradual decrease in size over time [10] | Structural instability after 8 days, but self-repair capability observed by day 6 [10] | Forms distinct necrotic, quiescent, and proliferative zones with adequate serum [10] |
| HCT 116 (Colon Cancer) | Increase in size over time [10] | Rupture at high cell numbers, releasing necrotic and proliferative areas [10] | Exhibits different parameter correlations compared to MCF-7 [10] |
Detailed Experimental Protocols
Protocol for Optimizing Initial Cell Number in Agarose Molds
This protocol, adapted from a 2025 study, provides a systematic approach for determining the optimal seeding density for spheroid formation [50].
Materials Required:
- MicroTissues 3D Petri Dish (agarose molds with 81-well arrays)
- Saline solution (0.9% NaCl in water)
- Agarose powder
- Complete cell culture medium (appropriate for cell line)
- Trypan Blue staining solution
- Cell counter
Procedure:
- Prepare agarose molds:
- Autoclave 200 mL saline solution and 4 g agarose powder separately.
- Mix saline and agarose under sterile conditions.
- Heat the mixture in a microwave until completely melted.
- Add 600 μL of 2% agarose to each MicroTissues 3D Petri Dish.
- Wait 5 minutes for complete solidification.
- Transfer each agarose mold to individual wells of a 12-well culture plate by inverting the MicroTissues 3D Petri Dish and allowing it to drop gently into each well.
- Add 2 mL of complete medium to hydrate the mold at least 2 hours before cell seeding [50].
Prepare cell suspensions:
- Trypsinize adherent cells and neutralize with complete medium.
- Centrifuge at 310 rcf for 5 minutes at room temperature.
- Resuspend in complete medium to create a homogeneous unicellular suspension.
- Determine cell concentration using Trypan Blue exclusion [50].
Calculate required cell numbers:
- Prepare different cell suspensions for testing. For example:
- 1,000 cells/well: 1,000 cells × 81 wells × 3 molds = 243,000 total cells
- 2,500 cells/well: 2,500 cells × 81 wells × 3 molds = 607,500 total cells
- 5,000 cells/well: 5,000 cells × 81 wells × 3 molds = 1,215,000 total cells [50]
- Prepare different cell suspensions for testing. For example:
Seed cells into molds:
- Remove medium from the hydrated molds.
- Add 190 μL of cell suspension per mold.
- Incubate for 30 minutes to allow spheroid settling.
- Add 2 mL of complete medium to each well.
- Culture under standard conditions (37°C, 5% CO₂) [50].
Monitor spheroid development:
Assessment and Analysis Methods
Image Analysis:
- Use AnaSP software for quantitative assessment of spheroid diameter, circularity, and compactness [50].
- Follow MISpheroID consortium guidelines for standardized reporting [50].
- Take a minimum of 4 images per condition, ensuring random selection of spheroids [50].
Viability Assessment:
- Collect spheroids from molds by gentle pipetting.
- Centrifuge at 480 rcf for 5 minutes.
- Wash with PBS and centrifuge again.
- Dissociate with TrypLE Select (300 μL, 20 minutes at 37°C).
- Analyze viability using flow cytometry or mitochondrial activity assays [50].
Troubleshooting Guide: Initial Cell Number Optimization
Table 3: Troubleshooting Common Issues with Initial Cell Seeding
| Problem | Potential Causes | Solutions | Preventive Measures |
|---|---|---|---|
| Structural instability/rupture | Excessive initial cell number (e.g., 6,000-7,000 cells) [10] | Test lower seeding densities (1,000-2,500 cells); monitor self-repair capacity over time [10] | Perform preliminary range-finding experiments with multiple cell densities [50] |
| Excessive necrotic core | Overly large spheroids limiting nutrient diffusion [4] | Reduce initial cell number to decrease spheroid size | Aim for viability of approximately 80% at experiment endpoint [50] |
| Inconsistent spheroid shape | Inadequate cell concentration for self-assembly [10] | Increase cell number within optimal range; ensure homogeneous unicellular suspension [50] | Use ultra-low attachment surfaces to promote aggregation [4] |
| Cell line-specific variations | Intrinsic growth kinetics of different cell types [10] | Optimize seeding density separately for each cell line | Reference published protocols for specific cell types when available |
Frequently Asked Questions (FAQs)
Q1: What is the recommended initial cell number for spheroid formation? A: The optimal cell number depends on your specific cell line and research objectives. Generally, a range of 1,000-5,000 cells per spheroid provides good results, but this must be empirically determined for each cell type. MCF-7 and HCT 116 cells showed different growth kinetics and structural stability across the 2,000-7,000 cell range [10]. Always conduct preliminary experiments to establish the ideal density for your specific application.
Q2: Why do spheroids rupture at high cell densities? A: Spheroids formed from high initial cell numbers (6,000-7,000 cells) experience structural instability due to complex internal stresses, limited nutrient availability, and accumulation of necrotic material. This can lead to rupture and release of necrotic and proliferative areas outside the spheroid structure [10]. Different cell types show varying susceptibility to this phenomenon.
Q3: How does initial cell number affect drug screening results? A: Initial cell number directly determines spheroid size, which in turn affects drug penetration and gradient formation. Larger spheroids (from higher cell numbers) develop more pronounced necrotic cores and may overestimate drug resistance due to physical barriers rather than biological mechanisms. Consistency in initial cell number is therefore critical for reproducible drug screening [10] [4].
Q4: Can spheroids recover from structural instability? A: Some cell types, like MCF-7, demonstrate self-repair capabilities. Research has shown that after 8 days of culture, structurally compromised spheroids can return to normal architecture by day 6 [10]. However, this capacity varies by cell type and should not be relied upon for experimental consistency.
Q5: How do I determine the optimal cell number for a new cell line? A: Follow a systematic optimization protocol: (1) Test a range of densities (e.g., 1,000, 2,500, and 5,000 cells); (2) Monitor size, circularity, and compactness over time; (3) Assess viability at endpoint (target ~80%); (4) Evaluate structural stability throughout culture period [50].
Research Reagent Solutions
Table 4: Essential Materials for Spheroid Formation and Analysis
| Reagent/Software | Function | Application Example |
|---|---|---|
| AnaSP Software | Quantitative analysis of spheroid size, circularity, and compactness [50] | Following MISpheroID consortium guidelines for standardized spheroid characterization [50] |
| CellTiter-Glo 3D Assay | Luminescent measurement of ATP content as a viability metric [29] | Quantifying metabolic activity in dense 3D structures where fluorescent assays may have penetration issues [29] |
| MicroTissues 3D Petri Dish | Agarose mold system with 81-well arrays for spheroid formation [50] | High-throughput production of uniform spheroids for drug screening applications [50] |
| Ultra-Low Attachment Plates | Surface that prevents cell adhesion, promoting self-assembly into spheroids [4] | Scaffold-free spheroid formation through liquid overlay technique [4] |
| TrypLE Select | Gentle enzyme solution for spheroid dissociation | Dissociating spheroids for viability analysis without compromising cell integrity [50] |
Visualizing the Impact of Initial Cell Number
Diagram 1: How initial cell number impacts spheroid biology and experimental outcomes. High initial cell numbers increase spheroid size, which intensifies nutrient and oxygen gradients, leading to distinct zone formation but potentially compromising structural stability.
Frequently Asked Questions (FAQs)
Q1: Why do my spheroids consistently develop a core of dead cells? This is a common and often expected characteristic in large, mature spheroids. It results from the limited diffusion of nutrients and oxygen from the culture medium into the spheroid's core, coupled with the buildup of metabolic waste products. As the spheroid grows, cells in the inner core become subjected to hypoxic (low oxygen) and acidic conditions, leading to necrotic cell death [4]. This creates a distinctive structure: an outer layer of proliferating cells, an intermediate layer of quiescent cells, and an inner core of dead cells and debris [4].
Q2: How does dead cell debris negatively affect my experiments? Accumulated dead cells and cellular debris can significantly compromise your culture and downstream data. The debris releases proteins, nucleic acids, and metabolites into the culture environment, which can:
- Deplete nutrients intended for living cells [51].
- Alter the culture's pH [51].
- Increase background noise in assays like flow cytometry because dead cells tend to be more auto-fluorescent and bind antibodies non-specifically [51].
- Interfere with molecular assays such as DNA/RNA sequencing by introducing extraneous genetic material [51].
Q3: What are the critical timeframes for spheroid viability, and when should I intervene? The optimal timeframe for experiments is highly dependent on your cell line and spheroid size. For instance, in a BxPC-3 pancreatic cancer spheroid model, visible debris appears from day 5 onwards, restricting its use for certain studies to days 2–5 [52]. Other spheroid types may have different viability windows. Regular monitoring and viability assays are essential to establish the ideal timeframe for your specific model.
Q4: What is the best method to remove dead cells from my spheroid samples for downstream analysis? While the search results do not detail specific protocols for disaggregated spheroids, established methods for dead cell removal exist. These often involve density gradient centrifugation or the use of specialized kits, such as those leveraging microbubble technology, which selectively bind and remove dead cells without damaging viable cells [51]. The choice of method depends on your downstream application and the need to minimize loss of live cells.
Troubleshooting Guide: Dead Core in Spheroids
| Symptom | Potential Cause | Recommended Solution |
|---|---|---|
| Extensive central necrosis at a small spheroid size | Overly rapid spheroid growth; nutrient diffusion insufficient even at small diameters. | Optimize seeding density. Reduce the number of cells per well to form smaller, more manageable spheroids. |
| High variability in necrosis between spheroids in the same batch | Inconsistent spheroid formation leading to heterogeneous size and density. | Standardize formation protocol. Use methods that promote uniformity, such as centrifugation to force cell-cell contact or the hanging drop technique [52]. |
| Necrotic core forms earlier than expected based on literature | Suboptimal culture conditions; nutrient medium may be depleted. | Increase feeding frequency. Replace the culture medium more regularly to ensure a steady supply of nutrients and remove waste. |
| Significant debris affecting flow cytometry data | Dead cells and debris are being analyzed alongside live cells. | Implement a dead cell exclusion step. Use a viability dye (e.g., propidium iodide) during sample preparation to identify and gate out dead cells before analysis [51]. |
Experimental Protocol: Assessing and Managing Spheroid Viability
This protocol outlines a method for generating consistent spheroids and monitoring the development of a necrotic core.
Objective: To establish a reproducible co-culture spheroid model and quantitatively track its growth and viability over time.
Materials (Research Reagent Solutions):
| Item | Function in the Protocol |
|---|---|
| Low-attachment 96-well plate | Prevents cell adhesion to the plate surface, forcing cells to aggregate and form spheroids [52]. |
| Matrigel / Collagen I | Extracellular matrix (ECM) components used to promote spheroid compaction and mimic the in vivo tumor microenvironment [52]. |
| Live-cell analysis system (e.g., Incucyte) | Allows for automated, non-invasive monitoring of spheroid size and morphology over time [52]. |
| Viability Stain (e.g., Propidium Iodide) | A fluorescent dye that is excluded by live cells but penetrates dead cells with compromised membranes, labeling the necrotic core. |
| Centrifuge | Used to pellet cells together at the bottom of the well at the start of the protocol, initiating spheroid formation [52]. |
Methodology:
- Cell Seeding: Prepare a co-culture cell suspension of your cancer cells and relevant stromal cells (e.g., pancreatic stellate cells for a PDAC model) [52].
- Spheroid Formation: Seed the cell suspension into a low-attachment 96-well plate. Centrifuge the plate to pellet the cells together, promoting cell-cell contact. Incubate under standard culture conditions [52].
- Matrix Supplementation (if needed): For cell lines that form loose aggregates (e.g., PANC-1), supplement the culture medium with 2.5% Matrigel to increase spheroid density and uniformity [52].
- Live-Cell Monitoring: Place the plate in a live-cell analysis system to automatically capture images and quantify spheroid size and circularity daily [52].
- Viability Staining: At critical timepoints (e.g., days 3, 5, 7), add a viability stain like propidium iodide to the culture medium. After incubation, image the spheroids using fluorescence microscopy to visualize the necrotic core.
- Endpoint Analysis: Process spheroids for downstream applications such as histology (to confirm layered structure) or molecular analysis.
Diagram: Spheroid Viability Workflow
Understanding the Underlying Biology: Nutrient Gradients and Cell Death
The development of a necrotic core is a direct consequence of the physiological gradients that form within the 3D spheroid structure. The following diagram illustrates the relationship between nutrient diffusion, spatial organization, and cell viability.
Diagram: Spheroid Zonation and Viability
Frequently Asked Questions (FAQs)
Q1: Why are air bubbles particularly problematic in microfluidic spheroid cultures? Air bubbles can cause significant issues in microfluidic systems, including flow instability, increased fluidic resistance, channel clogging, and pressure spikes. Most critically, the air-liquid interface possesses surface tension that can apply stress to cells, leading to cellular damage or even cell death [53] [54]. These disruptions compromise the reproducibility of spheroid experiments by creating variable microenvironments.
Q2: How does uniform cell distribution impact spheroid formation? A uniform cell suspension is the foundation for generating consistent spheroids. If the initial cell suspension is heterogeneous, the resulting spheroids will vary in size and shape, as cells will aggregate unpredictably [22]. Seeding density must be optimized to control the final spheroid size; larger spheroids have greater nutrient demands and may develop necrotic cores if these needs are not met, directly impacting viability and experimental outcomes [22].
Q3: What is a simple, non-invasive method to encourage spheroid formation after seeding? Centrifugation is an effective technique. Forcing cells into close proximity by centrifuging them in low-attachment plates, such as U-shaped-bottom microplates, promotes cell-cell contact and initiates aggregation, leading to more uniform spheroid formation [52] [55].
Troubleshooting Guides
Problem 1: Air Bubbles in Microfluidic System
Air bubbles are a common and critical obstacle, especially in long-term microfluidic cultures. The table below summarizes a systematic approach to prevention and removal.
Table: Comprehensive Bubble Management Strategies
| Method Type | Specific Technique | Key Procedure / Principle | Key Reference |
|---|---|---|---|
| Preventive | PDMS Hydrophilic Treatment | Render PDMS channels hydrophilic via a multi-step process: flush with EtOH, apply vacuum, exchange with DI water, and autoclave. | [54] |
| Preventive | Liquid Degassing | Degas culture media and buffers before the experiment to remove dissolved gasses that can form bubbles, particularly when heated. | [53] |
| Preventive | Leak-Free Fittings | Ensure all connections are tight; use Teflon tape on threaded fittings to prevent air from being drawn into the system. | [53] |
| Corrective | Bubble Trap | Integrate a dedicated bubble trap chamber into the fluidic path. Bubbles rise out of the flow and can be discharged via a release valve. | [54] |
| Corrective | Pressure Pulses | Use a pressure controller to apply short, square-wave pressure pulses, which can help dislodge adhered bubbles from channel walls. | [53] |
| Corrective | Soft Surfactants | Flush the system with a buffer containing a soft surfactant (e.g., SDS) to reduce surface tension and help detach bubbles. | [53] |
Experimental Protocol: PDMS Hydrophilic Surface Treatment This protocol modifies the inherently hydrophobic surface of PDMS to a hydrophilic state, preventing bubble formation and entrapment [54].
- Immersion and Flushing: Place the assembled microfluidic device in a vessel and flush it with 100% ethanol for 10 minutes.
- Vacuum Treatment: Transfer the ethanol-filled device to a vacuum desiccator. Apply a vacuum (approximately 110-120 kPa) for 30 minutes to evacuate air from the PDMS matrix and channels.
- Solvent Exchange: While still under vacuum, carefully exchange the ethanol with distilled water.
- Secondary Vacuum: Continue the vacuum treatment for an additional 30 minutes.
- Sterilization: Remove the device, wrap it in foil, and autoclave at 125°C for 30 minutes to sterilize and complete the surface modification.
Problem 2: Irregular and Non-Uniform Spheroid Size
Inconsistent spheroid size and shape are frequently caused by non-uniform cell seeding and suboptimal culture conditions.
Table: Techniques for Achieving Even Cell Distribution
| Technique | Principle | Best for | Considerations |
|---|---|---|---|
| Uniform Cell Suspension | Ensuring a single-cell, homogenous suspension before seeding to prevent clumps. | All spheroid formation methods. | Critical first step. Resuspend cells thoroughly and use a uniform seeding technique [22]. |
| Low-Attachment Plates | Using plates with ultra-low attachment (ULA) coatings to force cell-cell adhesion over cell-surface adhesion. | High-throughput screening, simplicity. | Seeding density must be optimized for each cell type to control final spheroid size [22] [52]. |
| Hanging Drop | Using gravity to aggregate a defined number of cells in a droplet suspended from a surface. | Low-cell number studies, high uniformity. | Can be labor-intensive; challenging for media changes; specialized plates available [55]. |
| Agitation-Based (RPM/Slow Rotation) | Using constant motion (e.g., Random Positioning Machine, orbital shaker) to prevent sedimentation and promote 3D aggregation. | Simulating microgravity effects, suspension cultures. | Motion and associated fluid flow can induce shear stress and detach adherent cells to form spheroids [56] [57]. |
Experimental Protocol: Seeding Spheroids in Low-Attachment Plates This is a foundational protocol for generating scaffold-free spheroids [22] [52].
- Preparation: Create a single-cell suspension of known concentration. It is crucial to keep this suspension well-mixed during the entire seeding process to ensure homogeneity.
- Seeding Calculation: Calculate the volume needed to seed the desired number of cells per well. For example, to seed 5,000 cells in a 96-well ULA plate, prepare a suspension of 100,000 cells/mL and aliquot 50 µL per well.
- Centrifugation: After seeding, centrifuge the plate at low speed (e.g., 100-500 x g for 1-3 minutes) to gently pellet the cells together at the bottom of each well, encouraging aggregation.
- Incubation: Incubate the plate under standard culture conditions (37°C, 5% CO2). Spheroids should begin to form within 24-48 hours.
The Scientist's Toolkit: Research Reagent Solutions
Table: Essential Materials for Bubble-Free and Uniform Spheroid Cultures
| Item | Function / Application | Example Products / Components |
|---|---|---|
| Ultra-Low Attachment (ULA) Plates | Provides a hydrophilic, non-adhesive surface that promotes cell aggregation into spheroids instead of monolayer attachment. | Corning ULA plates, Nunclon Sphera plates, PrimeSurface plates [22] [55]. |
| Hydrogels / ECM Supplements | Mimics the native extracellular matrix to increase spheroid compaction and uniformity; can be used as a supplement or for embedding. | Corning Matrigel matrix, Collagen I [52]. |
| Bubble Trap | A modular or integrated device that captures and removes air bubbles from a microfluidic circuit, ensuring stable flow for long-term culture. | Custom PDMS bubble traps, Elveflow Bubble Trap Kit [53] [54]. |
| Degassing Module | Removes dissolved gasses from buffers and culture media prior to use, preventing bubble formation during experimental runs. | Integrated in many pressure-based flow control systems. |
| Microfluidic Flow Control System | Provides precise, pulse-free pressure or flow control; capable of applying defined pressure pulses to dislodge bubbles. | Peristaltic pumps, pressure-pump systems (e.g., from Elveflow, ibidi) [56] [53]. |
Standardized Workflow for Reproducible Spheroid Generation
The following diagram illustrates a logical workflow integrating the techniques discussed to achieve uniform, bubble-free spheroids.
FAQ: Troubleshooting Common Medium Exchange Challenges
Q1: What is the most critical practice to avoid dislodging or damaging spheroids during medium exchange?
The most critical practice is avoiding direct pipette contact with the spheroid. When performing a half-media change, carefully tilt the microplate to a 45-degree angle. This causes the spheroid to settle away from the area where you are aspirating. Slowly aspirate the spent medium from the corner of the well, ensuring the pipette tip never touches the bottom where the spheroid resides. When adding fresh, pre-warmed medium, dispense it gently against the sidewall of the well to prevent shear forces from breaking the spheroid apart [5].
Q2: My spheroids are fragile and break apart easily during handling. What tools can help?
Using wide-bore or large-diameter pipette tips is essential for handling intact spheroids. Standard pipette tips have a narrow opening that can generate high shear stress, physically damaging or sucking up the spheroid. Wide-bore tips accommodate the spheroid's diameter, minimizing pressure and shear forces during transfer or re-suspension, thus preserving structural integrity [5].
Q3: How frequently should I perform medium changes for long-term spheroid cultures?
The frequency depends on the spheroid size, cell density, and nutrient consumption rate. Larger, denser spheroids have greater nutrient needs and produce more waste, requiring more frequent changes—sometimes every 2-3 days. For smaller or less dense cultures, changes may be needed every 3-4 days. Monitor the medium color (phenol red indicator) and schedule changes based on empirical observation of acidification (yellowing). Overly frequent changes can cause unnecessary handling stress, while infrequent changes lead to nutrient depletion and waste buildup [5] [16].
Q4: After medium exchange, my spheroids show signs of central necrosis. What might be the cause?
Central necrosis often indicates inadequate nutrient penetration or hypoxia, typically in spheroids exceeding 500-700 µm in diameter. While medium exchange addresses bulk nutrient levels, it cannot overcome diffusion limitations within the spheroid's core. This phenomenon actually mirrors the necrotic cores found in real tumors and can be a subject of study. To manage it, optimize initial seeding density to control final spheroid size or consider incorporating the hypoxic core into your experimental model [58] [4].
Standardized Protocols for Medium Management
Detailed Protocol: Half-Media Exchange for 96-Well U-Bottom Plates
This protocol is designed for ultra-low attachment (ULA) plates, a common platform for generating single, uniform spheroids [5] [59].
- Step 1: Preparation. Warm fresh culture medium in a 37°C water bath. Pre-warm a PBS buffer if a wash step is included in your specific protocol. Prepare a waste container for aspirated medium.
- Step 2: Tilting the Plate. Place the culture plate on a stable, flat surface. Gently tilt it to a 30-45 degree angle. Allow the spheroids to settle for 10-15 seconds at the lowest point of the well, away from the meniscus.
- Step 3: Aspiration.
- Set a pipette to 50% of the well's total medium volume.
- Slowly insert the tip into the well at the highest point, opposite the settled spheroid.
- Aspirate the spent medium carefully and smoothly. Continuously watch the tip to ensure the spheroid is not disturbed.
- If performing a wash, gently add the pre-warmed PBS along the wall, tilt again, and aspirate as above.
- Step 4: Replenishment.
- Dispense an equal volume of fresh, pre-warmed medium gently against the sidewall of the well, ensuring it runs down into the well without directly hitting the spheroid.
- For a complete exchange without a single large-volume aspiration, perform two sequential half-media changes. This replaces 75% of the medium with minimal disturbance.
- Step 5: Return to Incubator. Once medium exchange is complete for all wells, carefully place the plate back into the 37°C, 5% CO2 incubator. Avoid shaking or swirling the plate.
Quantitative Data for Medium Exchange Planning
The table below summarizes key parameters to guide medium exchange strategies for different spheroid types, based on data from the literature.
Table 1: Medium Exchange Guidance for Different Spheroid Models
| Spheroid Model | Typical Size Range | Recommended Exchange Frequency | Critical Handling Notes |
|---|---|---|---|
| High-Throughput (e.g., 96-well) [59] | 100 - 300 µm | Every 2-3 days | Use half-media changes; perfect for screening. |
| Large/Cancer Spheroids (e.g., MCF7, PANC-1) [58] [52] | 300 - 1000 µm | Every 2-3 days to prevent core necrosis | Prone to central necrosis; size control via seeding density is critical. |
| Heterogeneous Populations (e.g., Holospheres) [59] | 14 - 400 µm² | Tailored to sub-population size | Larger holospheres require less frequent changes than smaller, proliferative subtypes. |
Workflow Visualization: Standardized Medium Exchange Process
The following diagram illustrates the core workflow for a safe and effective medium exchange, integrating the key troubleshooting advice.
The Scientist's Toolkit: Essential Research Reagent Solutions
The table below lists key materials and reagents essential for successful long-term spheroid culture and maintenance.
Table 2: Essential Reagents for Long-Term Spheroid Maintenance
| Item | Function / Application | Specific Examples / Notes |
|---|---|---|
| Ultra-Low Attachment (ULA) Plates | Prevents cell attachment to the plastic, forcing cell-cell interaction and promoting spheroid formation. Hydrophilic polymer coatings minimize ECM protein adsorption. | Nunclon Sphera plates, BioFloat plates, Elplasia microcavity plates [5] [16] [59]. |
| Wide-Bore Pipette Tips | Enables safe transfer and handling of intact spheroids by reducing shear stress and physical damage. | Finntip Wide Orifice pipette tips [5]. |
| Specialized 3D Viability Assays | Optimized dyes and reagents that penetrate dense 3D structures for accurate assessment of cell health. | PrestoBlue HS, alamarBlue HS, LIVE/DEAD assays, CellTiter-Glo 3D [5] [16] [60]. |
| ROCK Inhibitor (Y-27632) | Enhances cell survival and spheroid integrity, especially after passaging or during single-cell seeding, by inhibiting apoptosis. | Added to culture medium at 10 μM during critical phases to improve viability [60] [59]. |
| Extracellular Matrix (ECM) | Used in scaffold-based or composite systems to provide structural support and biochemical cues, influencing spheroid growth and morphology. | Matrigel, Collagen I. Concentration must be optimized per cell line (e.g., 2.5% for PANC-1 spheroids) [52] [59]. |
Cryopreservation and Recovery of Intact Spheroids for Biobanking
Frequently Asked Questions (FAQs)
Q1: Why is spheroid size so critical for successful cryopreservation? The viability of spheroids after thawing is highly dependent on their diameter. Spheroids smaller than 200 µm (specifically around 140 µm) rapidly regain normal metabolism and form continuous cell layers post-thaw. In contrast, larger spheroids (e.g., 220 µm) lose compactness, show extensive central cell death, and form stable layers in only 75% of samples. This is due to size-related limitations in cryoprotectant (CPA) diffusion and the development of a hypoxic, necrotic core. [61]
Q2: What are the main cellular stress pathways activated during spheroid cryopreservation? The freeze-thaw process triggers a significant cellular stress response. Transcriptomic analyses reveal that cryopreservation consistently upregulates genes for heat shock proteins (e.g., HSPA1A/HSP70 and HSP90AB1), which are markers of proteotoxic stress. Concurrently, it downregulates the anti-apoptotic gene BCL2, tilting the balance toward apoptotic pathways and compromising cell survival, particularly in larger spheroids. [61]
Q3: Are there DMSO-free cryopreservation strategies for sensitive spheroids? Yes, research is advancing in DMSO-free or low-toxicity strategies. The MEDY cocktail is a prominent example, formulated with Methylcellulose, Ethylene glycol, DMSO, and the ROCK inhibitor Y27632. This combination has proven effective for complex structures like brain organoids. Furthermore, biomaterials like hyaluronic acid (HA) and trehalose-enriched hydrogels are being investigated for their intrinsic cryoprotective effects, which can reduce ice formation and improve post-thaw outcomes. [62] [63]
Q4: How does the cryopreservation method impact spheroid structure and function? Slow freezing can compromise the complex 3D architecture and cell-cell interactions that are essential for spheroid function. Advanced methods aim to preserve this structural integrity. For instance, the MEDY method successfully maintains the neural cytoarchitecture and functional activity of cortical organoids. The integration of PDMS-based 3D chambers with specialized hydrogels (e.g., VitroGel) and improved cryoprotectant formulations has also been shown to support the structural and functional recovery of human induced pluripotent stem cell (hiPSC) aggregates after thawing. [62] [64]
Q5: What are the emerging rewarming technologies to improve recovery? Conventional water bath rewarming can be slow and create thermal gradients. Novel volumetric rewarming methods are under development to ensure a rapid and uniform temperature increase. These include:
- Ultrasonic Rewarming: Uses ultrasound to rapidly rewarm samples; one study on liver spheroids showed a 36% faster rewarming rate with comparable viability to water baths. [65]
- Nanowarming: Utilizes magnetic nanoparticles activated by an alternating magnetic field to generate heat uniformly throughout the sample, showing promise for rewarming larger volumes like tissues and organs. [63] [65]
Troubleshooting Guides
Pre-Freezing Issues
| Problem | Possible Cause | Solution |
|---|---|---|
| Poor Spheroid Formation | Low cell-seeding density; suboptimal cell-cell adhesion. | Increase seeding density; use promoted surfaces like ultra-low attachment (ULA) plates [66] or superhydrophobic coatings [67]. |
| High Size Variability | Inconsistent cell aggregation. | Use microwell plates (e.g., AggreWell, Elplasia) to standardize size [61] [55]; optimize seeding density and centrifugation steps. |
| Unbalanced Cellular Composition | Incorrect co-culture ratios. | Determine optimal cell type ratios empirically; a common tri-culture ratio for cardiac spheroids is 2:1:1 (cardiomyocytes:fibroblasts:endothelial cells) [55]. |
Freezing and Thawing Issues
| Problem | Possible Cause | Solution |
|---|---|---|
| Low Post-Thaw Viability | Cryoprotectant (CPA) toxicity; slow CPA penetration; intracellular ice formation. | Use lower DMSO concentrations (e.g., 5%) combined with macromolecular CPAs like methylcellulose or hyaluronic acid [62] [63]; ensure controlled slow freezing rates (e.g., -1°C/min). |
| Necrotic Core in Large Spheroids | Diffusion limitation of CPAs and oxygen (>200 µm); hypoxic core pre-freezing. | Culture and cryopreserve spheroids below the critical diffusion limit (aim for <200 µm diameter) [61]; pre-condition spheroids in hypoxic conditions if relevant. |
| Structural Disintegration Post-Thaw | Ice crystal damage; cytoskeletal collapse during thawing. | Add a ROCK inhibitor (e.g., Y-27632) to the recovery medium to enhance cell survival and adhesion by inhibiting apoptosis [62] [64] [68]. |
| Inconsistent Recovery Between Batches | Variable freezing or thawing rates; operator-dependent steps. | Automate freezing using controlled-rate freezers; standardize thawing protocols (e.g., precise time in 37°C water bath) [68]. |
Post-Thaw Analysis Issues
| Problem | Possible Cause | Solution |
|---|---|---|
| Failure to Re-attach or Spread | Loss of key surface proteins; residual CPA toxicity. | Wash thoroughly to remove CPAs; use ROCK inhibitor in post-thaw culture medium; plate on ECM-coated surfaces (e.g., Matrigel, collagen). |
| Reduced Metabolic Activity | General cryo-injury; mitochondrial damage. | Allow longer recovery time (48-96 hours) post-thaw before assessment; use Alamar Blue or other metabolic assays to track recovery over time [61]. |
Experimental Protocols for Key Processes
- Objective: To produce uniform ovine fibroblast spheroids of defined sizes (140 µm and 220 µm) for cryopreservation studies.
- Materials:
- Primary ovine fibroblasts.
- Corning Elplasia 96-well microplates (400 microcavities/well).
- Complete growth medium (DMEM/F-12 supplemented with 10% FBS).
- Method:
- Pre-wetting: Add 50 µL of complete medium to each well of the Elplasia plate. Centrifuge at 500 × g for 1 minute at room temperature to remove air bubbles.
- Cell Seeding:
- For 140 µm spheroids: Seed ( 1 \times 10^5 ) cells per microplate.
- For 220 µm spheroids: Seed ( 1 \times 10^6 ) cells per microplate.
- Culture: Incubate cells for 6 days at 37°C with 5% CO₂, changing the medium every 48 hours.
- Harvesting: On day 7, harvest spheroids by gentle aspiration using wide-bore pipette tips to minimize shear stress.
- Objective: To cryopreserve and recover functional cardiac spheroids for biobanking and high-throughput screening.
- Materials:
- Pre-formed cardiac spheroids in 96-well U-bottom plates.
- Cryopreservation medium: Commercially available CryoStor CS10 or basal medium supplemented with 10% DMSO and 10% knockout serum replacement (KSR).
- Thawing medium: RPMI + B27 supplemented with 20% KSR and a cell survival supplement (e.g., RevitaCell).
- ROCK inhibitor (Y-27632).
- Freezing Method:
- CPA Addition: Gently add pre-cooled cryopreservation medium dropwise to the spheroid culture medium to achieve a final DMSO concentration of 10%.
- Packaging: Seal the plate or transfer spheroids in cryovials.
- Freezing: Use a controlled-rate freezer or place in an isopropanol freezing chamber at -80°C for 24 hours, then transfer to liquid nitrogen for long-term storage.
- Thawing and Recovery Method:
- Rapid Thaw: Quickly retrieve the vial/plate and thaw in a 37°C water bath for approximately 2 minutes, gently agitating until just ice-free.
- CPA Removal: Gently transfer the spheroid suspension to a centrifuge tube. Slowly add 5-10 volumes of pre-warmed thawing medium containing ROCK inhibitor (e.g., 2 µM).
- Washing: Let spheroids settle by gravity or gentle centrifugation. Carefully remove the supernatant.
- Re-culture: Resuspend the spheroids in fresh recovery medium with ROCK inhibitor and plate in a new U-bottom low-attachment plate.
- Post-Thaw Analysis: Allow 48-96 hours of recovery before functional assessment.
| Parameter | 140 µm Spheroids | 220 µm Spheroids |
|---|---|---|
| Viability & Metabolism | Rapidly regained normal metabolism | Significant cell death, especially in the core |
| Structural Integrity | Largely maintained | Loss of compactness and weight |
| Attachment & Spreading | Formed continuous cell layers within 24 hours | Formed stable layers in only 75% of samples |
| Necrotic Core | Minimal | Extensive |
| Gene Expression | Balanced stress and apoptotic gene expression | Upregulated HSPA1A, HSP90AB1; Downregulated BCL2 |
Table 2: Comparison of Cryopreservation and Rewarming Methods
| Method | Key Components/Mechanism | Advantages | Limitations/Considerations |
|---|---|---|---|
| Slow Freezing [61] | ~10% DMSO, controlled cooling | Well-established, suitable for many cell types | CPA toxicity, ice crystal damage, diffusion limits in large spheroids |
| MEDY Method [62] | Methylcellulose, Ethylene glycol, DMSO, Y27632 | Effective for complex organoids, preserves structure/function | Cocktail optimization may be needed for different spheroid types |
| DMSO-Free Biomaterials [63] | Hyaluronic Acid, Trehalose, PEG, PVA | Reduced cytotoxicity, intrinsic cryoprotective properties | Requires formulation and compatibility testing |
| Water Bath Rewarming | 37°C water bath | Simple, gold standard for small volumes | Slow, creates thermal gradients, risk of devitrification |
| Ultrasonic Rewarming [65] | Focused ultrasound energy | Rapid (e.g., 36-350% faster), volumetric heating | Requires specialized equipment, risk of acoustic damage at high power |
| Nanowarming [63] [65] | Magnetic nanoparticles in AMF | Ultra-rapid and uniform, good for large volumes | Requires nanoparticle perfusion, potential cytotoxicity |
Signaling Pathways in Spheroid Cryopreservation Stress
The following diagram illustrates the key cellular stress and apoptosis pathways activated in spheroids during cryopreservation, as identified in transcriptional studies. [61]
Cellular Stress Pathways Activated by Cryopreservation
Experimental Workflow for Spheroid Biobanking
The standard workflow for the generation, cryopreservation, and recovery of spheroids for biobanking is outlined below.
Standard Spheroid Biobanking Workflow
The Scientist's Toolkit: Essential Reagents and Materials
| Item | Function/Application in Spheroid Cryopreservation |
|---|---|
| Ultra-Low Attachment (ULA) Plates | Promotes scaffold-free spheroid formation by minimizing cell-surface adhesion, ensuring consistent 3D aggregation. [66] [55] |
| Dimethyl Sulfoxide (DMSO) | Penetrating cryoprotectant; reduces intracellular ice crystal formation by ~10% concentration in slow-freezing protocols. [61] |
| ROCK Inhibitor (Y-27632) | Significantly improves post-thaw cell viability and attachment by inhibiting Rho-associated kinase, preventing apoptosis. [62] [64] [68] |
| CryoStor CS10 | A commercially available, serum-free cryopreservation solution engineered to minimize freezing-induced cell damage. [64] |
| Methylcellulose | A viscosity-enhancing agent used in cryopreservation cocktails (e.g., MEDY) to improve solution properties and potentially reduce ice crystal growth. [62] |
| Hyaluronic Acid (HA) | A natural polymer used in biomaterial-based strategies; acts as a macromolecular cryoprotectant, can lower DMSO requirements, and modulates cell stress pathways. [63] |
| VitroGel Hydrogel | An animal-free, synthetic hydrogel used to create a supportive 3D microenvironment for culturing and cryopreserving sensitive structures like hiPSC aggregates. [64] |
Benchmarking Success: Techniques for Characterizing and Validating Spheroid Models
The quantitative assessment of three-dimensional (3D) spheroids is a cornerstone of reproducible cancer biology and drug discovery research. Multicellular tumor spheroids (MCTS) serve as crucial in vitro models that better mimic native tumor environments compared to traditional two-dimensional cultures, particularly due to their recapitulation of gradients of oxygen, nutrients, and the presence of both proliferative and dormant cell populations [69] [70]. Among the various morphological parameters, spheroid size, growth, and cross-sectional area are primary endpoints for evaluating spheroid development and treatment responses [69] [71]. The process of obtaining these measurements from spheroid images using ImageJ involves a critical step: converting a two-dimensional (2D) projection into quantitative data that accurately represents the 3D object. Standardizing this protocol is essential, as light microscopy is the most accessible visualization method, with over half of all reported spheroid experiments relying on it for analysis [71]. Establishing a robust, non-invasive, and semi-automated workflow in ImageJ helps overcome major limitations such as the loss of spheroids or risk of contamination associated with manual methods, thereby enhancing the reliability and efficiency of data collection for long-term studies [69] [70].
Experimental Protocols & Workflows
Standard Operating Procedure: Spheroid Size and Area Measurement
This protocol describes a semi-automated, non-invasive method for analyzing the size and area of complete MCTS populations, adapted for high reproducibility and low cost using regular office hardware and ImageJ software [69].
- Step 1: Image Acquisition. Capture digital images of spheroid sediments using a flatbed scanner or an inverted light microscope with a 4x to 10x objective. Ensure the culture container has a transparent, flat bottom. For consistent volume calculations, capture the image at the largest z-plane where the spheroid has a sharp boundary [70] [72].
- Step 2: Image Pre-processing in ImageJ.
- Step 3: Image Binarization (Thresholding).
- Apply a threshold to create a binary image that separates the spheroid from the background using
Image > Adjust > Threshold. Adjust the sliders until the entire spheroid area is selected (typically shown in red). Click "Apply." This creates a binary mask [73]. - Ensure the "Background" option is set to "Light background" if your spheroid is darker than the background.
- Apply a threshold to create a binary image that separates the spheroid from the background using
- Step 4: Binary Cleanup (Critical for Accuracy).
- Fill Holes: Spheroids may show internal holes due to segmentation errors or a necrotic core. Fill these holes using
Process > Binary > Fill Holes[73]. This step ensures that the measured area is not underestimated. - Remove Small Particles: To exclude debris or small outgrowths from the analysis, use
Analyze > Analyze Particles. Set a lower size limit (e.g., 200-infinity pixels²) to filter out irrelevant small particles [73]. Alternatively, after thresholding and filling holes, use a macro to "Keep Largest Particle" to automatically select only the main spheroid [73].
- Fill Holes: Spheroids may show internal holes due to segmentation errors or a necrotic core. Fill these holes using
- Step 5: Measurement and Data Extraction.
- Set the measurement scale via
Analyze > Set Scale. Enter the known distance and pixel length. - Select the area and other desired parameters (e.g., Mean Gray Value) via
Analyze > Set Measurements. Ensure "Area" is checked. - Measure the spheroid by either:
- Using the Wand Tool: If the spheroid is a single, clear object, click on it with the Wand Tool. The area will be displayed in the status bar.
- Using Analyze Particles: Run
Analyze > Analyze Particles. Ensure the "Display Results" and "Add to Manager" options are selected. This provides a table of measurements for all detected particles.
- Set the measurement scale via
- Step 6: Calculation of Spheroid Volume.
Workflow Diagram: Spheroid Image Analysis Pathway
The following diagram visualizes the standardized image analysis workflow for spheroid quantification in ImageJ, from image acquisition to final data output.
Troubleshooting Guides and FAQs
FAQ 1: My spheroid has an irregular boundary and low circularity. Are my measurements still valid? Irregular boundaries are common, especially in spheroids without fibroblasts or early in development. The key is to determine if the irregularities are biologically relevant (e.g., cell protrusions) or artefacts. For robust quantification, you can apply a morphological opening (a minimum filter followed by a maximum filter of the same radius) to remove details smaller than the features of interest (e.g., smaller than a cell). It is good practice to report both raw and processed data for transparency [73].
FAQ 2: The Analyze Particles function detects hundreds of small particles instead of my single spheroid. How can I fix this? This is a common issue caused by noise, debris, or a non-uniform background in the image.
- Solution 1: During the "Analyze Particles" step, set a size filter (e.g.,
200-Infinitypixels²) to exclude small, irrelevant particles [73]. - Solution 2: Improve your binary cleanup. After thresholding, always use
Process > Binary > Fill Holes. Then, use a macro or script to automatically select and keep only the largest particle in the image, which should be your spheroid [73].
FAQ 3: How can I ensure my measurements are reproducible across a large dataset? Manual processes are prone to variation. For reproducibility, especially with many images, automate your workflow.
- Use the Macro Recorder: In ImageJ, use
Plugins > Macros > Record...to record your analysis steps. You can then save this as a script and run it on a batch of images viaProcess > Batch > Macro...[73]. - Standardize Parameters: Use the same thresholding method, binary operations, and size filters for all images within one dataset [73].
FAQ 4: The contrast in my spheroid images is poor, making thresholding difficult. What can I do?
- During Acquisition: Optimize your microscope's light source and camera settings.
- In ImageJ: Use the
Brightness/Contrasttool (Image > Adjust > Brightness/Contrast) to enhance the image before thresholding. Use the "Auto" button as a starting point, but adjust manually for best results [72]. Judicious use of Lookup Tables (LUTs) viaImage > Lookup Tablescan also help visualize features, but note that this does not alter the underlying data used for measurement [74].
Quantitative Data Presentation
Comparison of Spheroid Measurement Methodologies
The table below summarizes key quantitative data and characteristics of different spheroid assessment methods, highlighting the advantages of the described ImageJ-based approach.
Table 1: Comparison of Spheroid Size and Growth Assessment Methodologies
| Method | Key Metric | Throughput | Key Advantage | Correlation with Biochemical Assay |
|---|---|---|---|---|
| Semiautomated ImageJ Analysis [69] [70] | Spheroid volume (from area) | Medium to High | Non-invasive, cost-effective, allows long-term tracking | Strong correlation (R² > 0.95) with PrestoBlue metabolic assay [70] |
| Manual Microscopy & Ocular Micrometer [69] | Spheroid diameter | Low | Low equipment cost | Not specified, but invasive and low-throughput |
| Metabolic Assay (PrestoBlue) [70] | Fluorescence (Metabolic activity) | High | Measures cell viability directly | Gold standard for viability, but requires assay optimization |
Key Morphometrical Parameters for a Diverse Cell Line Panel
Spheroids from different cell lines exhibit distinct and characteristic morphologies. The table below illustrates this diversity, which can be quantified using the described ImageJ protocol.
Table 2: Characteristic Morphometrical Features of Select Cell Line Spheroids [71]
| Cell Line | Origin | Characteristic Spheroid Morphotype | Notes on Compactness & Size |
|---|---|---|---|
| HCT116 | Colorectal Carcinoma | Large and compact | Forms well-defined, dense spheroids; used as a model for large/compact types [71] |
| MCF10A | Mammary Epithelium | Requires BME/Matrigel for 3D culture | Forms organized, growth-factor dependent structures in 384-well ULA plates [71] |
| SAR121 | Soft Tissue Sarcoma | Small and loose | Represents the opposite morphological extreme to HCT116 [71] |
| HT-29 | Colorectal Adenocarcinoma | Responds to kinase inhibitors | Used in size-based drug response studies (e.g., Trametinib) [70] |
The Scientist's Toolkit: Research Reagent Solutions
Table 3: Essential Materials and Reagents for Spheroid Formation and Analysis
| Item Name | Function/Application | Example Usage in Protocol |
|---|---|---|
| Ultra-Low Attachment (ULA) Plates | Prevents cell attachment, promoting 3D self-assembly. | Used for liquid overlay method for cell lines like HCT116, A549, and MCF7 [71]. |
| Aqueous Two-Phase System (ATPS) | Forms consistently sized spheroids in a biocompatible environment. | A nanodrop of dextran phase with cells is dispensed into a PEG immersion phase to form a single, viable spheroid per well [70]. |
| PrestoBlue / AlamarBlue Assay | Fluorescent metabolic assay to quantify cell viability. | Used to validate that growth measurements from spheroid size strongly correlate with metabolic activity [70]. |
| Kinase Inhibitors (e.g., Trametinib, Dactolisib) | Small-molecule tools for probing signaling pathways and drug response. | Used to treat spheroids (e.g., HT-29) and quantify efficacy and emergence of resistance via size-based analysis [70]. |
| ImageJ with FracLac Plugin | Open-source software for image analysis and fractal dimension calculation. | Used for automated size measurement and advanced morphological analysis, including colour-coding of fractal dimensions [75]. |
Advanced Analysis and Data Interpretation
Diagram: Integrating Size-Based Analysis in Drug Response Studies
The following diagram outlines how quantitative size-based analysis is integrated into a complete workflow for evaluating drug efficacy and resistance in spheroid models.
The application of this standardized ImageJ protocol enables researchers to reliably quantify drug responses. For instance, cyclical treatment of HT-29 spheroids with the MEK inhibitor Trametinib revealed the emergence of resistance, as indicated by a rebound in spheroid volume during the second treatment cycle. This size-based data was validated by molecular analysis, which showed feedback activation of the PI3K/AKT pathway. Consequently, the combination of Trametinib with the PI3K/AKT inhibitor Dactolisib was tested, and the size-based analysis successfully quantified the enhanced efficacy of this combination treatment in preventing resistance [70]. This demonstrates the power of a simple, non-invasive metric like spheroid size, when measured accurately, to guide complex biological discovery and therapeutic strategy.
Troubleshooting Guides
Flow Cytometry Analysis Troubleshooting
Problem: Weak or No Fluorescence Signal
| Possible Cause | Recommendation |
|---|---|
| Insufficient target induction | Optimize treatment conditions for successful and measurable induction of each target [76]. |
| Inadequate fixation/permeabilization | For intracellular targets, ensure use of appropriate fixation and permeabilization protocols. For methanol permeabilization, chill cells on ice prior to drop-wise addition of ice-cold methanol to prevent hypotonic shock [76]. |
| Dim fluorochrome for low-density target | Use the brightest fluorochrome (e.g., PE) to detect the lowest density target, and the dimmest (e.g., FITC) for high-density targets [76]. |
| Incompatible laser/PMT settings | Ensure the laser wavelength and PMT settings on the flow cytometer match the excitation and emission wavelengths of the fluorochromes being used [76]. |
| Clogged flow cell | Unclog the cytometer as per manufacturer's instructions, typically by running 10% bleach for 5-10 minutes, followed by dH2O for 5-10 minutes [76]. |
Problem: High Background Signal in Negative Controls
| Possible Cause | Recommendation |
|---|---|
| Non-specific Fc receptor binding | Block cells with Bovine Serum Albumin, Fc receptor blocking reagents, or normal serum from the same host as the primary/secondary antibody prior to staining [76]. |
| Presence of dead cells | When performing live cell surface staining, use a viability dye such as Propidium Iodide (PI) to gate out dead cells [76]. |
| Too much antibody | Use the recommended antibody dilution. The recommended dilutions are often optimized for 10^5 - 10^6 cells [76]. |
| Use of biotinylated antibodies | Avoid biotinylated antibodies for intracellular staining, as they can cause high background from endogenous biotin. Perform direct staining whenever possible [76]. |
Problem: Poor Resolution of Cell Cycle Phases in DNA Content Histogram
| Possible Cause | Recommendation |
|---|---|
| High flow rate | Ensure samples are run at the lowest flow rate setting on your cytometer, as high flow rates lead to high coefficients of variation (CVs) and loss of resolution [76]. |
| Insufficient PI staining | Resuspend the cell pellet directly in a PI/RNase staining solution and incubate for at least 10 minutes [76]. |
Assay-Specific Issues: Propidium Iodide & Live/Dead Staining
Problem: Inconsistent Viability Results with Propidium Iodide (PI)
| Possible Cause | Recommendation |
|---|---|
| PI added incorrectly | Add 5-10 µL of PI staining solution (10 µg/mL in PBS) to each sample just prior to analysis. Do not wash cells after the addition of PI [77]. |
| Membrane damage during processing | Ensure gentle handling, centrifugation, and vortexing of cells during harvesting and washing steps to maintain viability until the point of fixation or staining [77]. |
| Use of PI with intracellular staining | Note that PI cannot be used when labeling intracellular molecules. It is suitable for cell surface staining and subsequent viability assessment [77]. |
Problem: Live/Dead Kit Not Working for Flow Cytometry
| Possible Cause | Recommendation |
|---|---|
| Kit incompatibility | Note that some commercial Live/Dead kits, such as those based on Calcein AM and Ethidium Homodimer-1, are explicitly designed for fluorescence microscopy and should not be used for flow cytometry [78]. |
| Dye concentration not optimized | Use the highest dye concentration that gives minimal background, as optimal concentrations can vary by cell type [78]. |
| Attempting to fix cells | The stains in some Live/Dead kits do not survive fixation or permeabilization. The assay must be performed on live, unfixed cells [78]. |
Frequently Asked Questions (FAQs)
Q1: Why is it critical to exclude dead cells from my flow cytometry analysis? Dead cells can generate significant artifacts due to non-specific antibody staining or unintended uptake of fluorescent probes, which can compromise data interpretation. Using a viability dye like Propidium Iodide allows you to identify and gate out these cells, ensuring your analysis is performed on a viable cell population [77] [76].
Q2: What are the key advantages of using 3D spheroid models over 2D culture in cytotoxicity studies? 3D tumor spheroids better replicate the complex architecture and cellular interactions of solid tumors. They recapitulate key features difficult to study in 2D, such as hypoxia, fibrosis, and chemoresistance. Consequently, cells in spheroids often show therapy response profiles that more closely mirror in vivo observations, providing more physiologically relevant data for pre-clinical drug screening [52].
Q3: Can I use Propidium Iodide (PI) in combination with other fluorescent dyes? Yes, PI is excited at 488 nm and emits at a maximum of 617 nm, making it suitable for combination with other fluorochromes excited by the same laser, such as FITC and PE. However, detector configuration is important: use the FL-2 channel if staining only with PI, but collect PI fluorescence in the FL-3 channel if the cells have also been stained with FITC- or PE-conjugated antibodies [77].
Q4: My spheroids are loose and easily dissociated. How can I improve their structure? Spheroid compaction can be cell-line dependent. For loosely packed spheroids (e.g., PANC-1 co-cultures), supplementing the culture medium with extracellular matrix components like 2.5% Matrigel can promote the formation of denser, more uniform structures. For other cell lines (e.g., BxPC-3), Matrigel might cause irregular morphology, so a Matrigel-free approach is better. Collagen I can be an alternative but may induce invasiveness [52].
Q5: What is the most common mistake when interpreting flow cytometry data from a viability stain? A common mistake is not using the appropriate controls, such as unstained cells and single-color positive controls, to set up the cytometer properly and define positive and negative populations. This can lead to incorrect gating and misinterpretation of the live and dead cell populations [76] [79].
Viability Dye Properties
The following table summarizes the spectral characteristics of common dyes used in viability and cytotoxicity assays.
| Dye | Assay Type | Excitation (nm) | Emission (nm) | Compatible Filter Set | Key Application Notes |
|---|---|---|---|---|---|
| Propidium Iodide (PI) [77] | Membrane Integrity / DNA Content | 488 | 617 | FL-2 or FL-3 | Binds dsDNA. Membrane impermeant, excludes from viable cells. |
| Calcein AM [78] | Esterase Activity (Live Cell) | 494 | 517 | FITC or GFP | Cell-permeant. Converted to fluorescent calcein by intracellular esterases. |
| Ethidium Homodimer-1 [78] | Membrane Integrity (Dead Cell) | 528 | 617 | RFP | Membrane impermeant. Higher affinity for DNA than PI. |
Sample Preparation Parameters for Propidium Iodide Staining
This table outlines key procedural details for a standard PI staining protocol.
| Parameter | Specification | Technical Rationale |
|---|---|---|
| Cell Aliquot [77] | Up to 1 x 10^6 cells / 100 µL | Prevents overloading and ensures single-cell suspension for accurate flow analysis. |
| PI Staining Solution [77] | 10 µg/mL in PBS | Standard working concentration for optimal staining with minimal background. |
| PI Volume per Sample [77] | 5 - 10 µL | Provides the correct final dye-to-cell ratio for clear signal discrimination. |
| Incubation Time [77] | ~1 minute (in the dark) | PI staining is rapid. Protecting from light prevents fluorophore degradation. |
| Post-Staining Wash [77] | Do not wash | Washing after PI addition can remove the dye and lead to an underestimation of dead cells. |
Experimental Protocols
Detailed Protocol: Propidium Iodide Staining for Flow Cytometry
This protocol has been optimized for the quantification of cell viability by flow cytometry [77].
Reagents & Materials Required:
- PBS (1X) or Hank’s Balanced Salt Solution (HBSS; 1X)
- Flow Cytometry Staining Buffer (e.g., containing BSA and sodium azide)
- PI Staining Solution: 10 µg/mL in PBS (store at 4°C in the dark)
- FACS Tubes (5 mL round-bottom polystyrene tubes)
- Centrifuge, vortex, and appropriate pipettes
Procedure:
- Harvest and Wash Cells: Harvest cells and aliquot up to 1 x 10^6 cells per 100 µL into a FACS tube. Wash cells by adding 2 mL of PBS, centrifuge at 300 x g for 5 minutes, and decant the supernatant from the pelleted cells. Repeat this wash step a total of two times [77].
- (Optional) Surface Staining: Staining of cell surface antigens with antibodies may be performed at this point. Note that PI cannot be used when labeling intracellular molecules [77].
- Resuspend and Stain: Resuspend the cell pellet in 100 µL of Flow Cytometry Staining Buffer. Add 5-10 µL of PI staining solution to the tube just prior to analysis on the flow cytometer. Mix gently and incubate for approximately 1 minute in the dark. Do not wash cells after adding PI [77].
- Acquire Data: Analyze the sample on the flow cytometer immediately. Set the stop count on the viable cell population from a dot-plot of forward scatter versus PI [77].
This two-color fluorescence protocol is designed for microscopy-based viability assessment and is not recommended for flow cytometry [78].
Protocol Summary:
- Prepare Staining Solution: Add 5 µL of calcein AM (Component A) and 20 µL of ethidium homodimer-1 (Component B) to 10 mL of DPBS.
- Stain Cells: Remove the culture medium from cells and add 100-200 µL of the staining solution directly to them.
- Incubate and Image: Incubate the cells for 30 minutes at room temperature (20-25°C), then image using a fluorescence microscope with standard FITC/GFP and RFP filter sets [78].
The Scientist's Toolkit: Research Reagent Solutions
| Reagent / Material | Function in Viability/Cytotoxicity Assays |
|---|---|
| Propidium Iodide (PI) [77] | A membrane-impermeant DNA intercalating dye used to identify dead cells in a population via flow cytometry. |
| Calcein AM [78] | A cell-permeant substrate for intracellular esterases that produces green fluorescent calcein in live cells. |
| Ethidium Homodimer-1 [78] | A membrane-impermeant nucleic acid stain that enters dead cells and produces a red fluorescence upon binding DNA. |
| Flow Cytometry Staining Buffer [77] | A buffer (often with BSA) used to maintain cell stability and reduce non-specific antibody binding during staining procedures. |
| Ultra-Low Attachment Plates [80] [52] | Cultureware with a specially treated surface that inhibits cell attachment, promoting 3D spheroid formation through cell-cell adhesion. |
| Matrigel [52] | A basement membrane extract used to supplement culture media to enhance the compaction and structural integrity of certain spheroid models. |
| RNase Solution [76] | Used in conjunction with PI for cell cycle analysis to degrade RNA, preventing false positive signals from double-stranded RNA binding. |
| Fc Receptor Blocking Reagent [76] | Used to block non-specific binding of antibodies to Fc receptors on immune cells, thereby reducing background signal in flow cytometry. |
Experimental Workflow and Decision Diagrams
Viability Assay Selection Workflow
Spheroid Viability Analysis Pathway
Frequently Asked Questions (FAQs)
FAQ 1: Why do our glioblastoma spheroids show significantly higher resistance to Temozolomide (TMZ) compared to our 2D cultures? This is an expected and well-documented phenomenon. 3D spheroids replicate the complexity of in vivo tumors more accurately than 2D monolayers. Key factors contributing to increased resistance include:
- Gradient Formation: Spheroids develop nutrient, oxygen, and pH gradients, creating heterogeneous microenvironments with areas of quiescent and hypoxic cells that are less susceptible to chemotherapeutic agents [4] [81].
- Enhanced Cell-Cell and Cell-Matrix Interactions: These interactions activate survival signaling pathways and alter gene expression profiles, leading to a more treatment-resistant phenotype [4] [81].
- Reduced Drug Penetration: The compact 3D structure can physically impede the penetration of drugs into the spheroid's core [81].
- Upregulation of Drug Resistance Mechanisms: Studies have shown that 3D cultures can exhibit increased expression of drug efflux pumps and other resistance-related proteins compared to 2D cultures [82] [81].
FAQ 2: How can we prevent our spheroids from being aspirated or displaced during media exchanges for long-term drug assays? Manual pipetting is a common source of spheroid loss and experimental variability. For reliable long-term assays, automation is highly recommended.
- Automated Liquid Handling: Systems like the AMX Automated Media Exchange module are designed for this purpose. They allow for the optimization of aspiration and dispense rates, as well as the Z-axis position of the tubes, to gently remove and add media without disturbing unattached spheroids [83].
- Manual Technique: If using manual pipetting, utmost care must be taken to pipette slowly and avoid touching the bottom of the well where the spheroid is settled [83].
FAQ 3: Our longitudinal imaging data for spheroid growth and drug response is inconsistent. How can we improve data reliability? Spatial displacement of spheroids between imaging time points is a common technical artifact that can confound analysis.
- Use of Analytical Tools: Implement algorithms like TRACE-QC, which uses Procrustes analysis to detect and correct for spheroid mislabeling or displacement across different time points. This ensures that you are tracking the same spheroid throughout the experiment [84].
- Imaging Best Practices: Capture a montage of images in the X- and Y-axes to account for slight movements. When performing 3D analysis, combine this with Z-stacking to accurately assess the entire spheroid structure [83].
FAQ 4: Which initial cell seeding density is optimal for generating uniform glioblastoma spheroids for drug screening? The optimal seeding density is cell line-dependent, but general principles apply.
- Lower Densities for Better Growth: Research on ten glioma cell lines found that fewer cells (e.g., 250-500 cells/well) generally resulted in more reliable spheroid growth than higher seeding numbers [15].
- Linear Correlation: The final spheroid size has a linear correlation with the initial cell number. A pilot experiment to establish the size-density relationship for your specific cell line is crucial for standardization [15].
Troubleshooting Guides
Table 1: Troubleshooting Common Issues in Spheroid Drug Assays
| Problem | Potential Cause | Solution |
|---|---|---|
| High variability in spheroid size and shape | Inconsistent cell seeding number or aggregation. | Use a single-cell suspension and an automated cell counter to ensure accurate, consistent seeding densities across wells [15]. |
| Low viability in control (untreated) spheroids | • Infrequent media exchange.• Excessive initial seeding density. | • Replace 50% of the media every 3-4 days to maintain nutrient levels and remove waste [15].• Optimize and potentially reduce the cell seeding density [15]. |
| Poor drug penetration and efficacy | • Dense, compact spheroid structure.• Inadequate drug incubation time. | • Characterize spheroid compactness. For very dense spheroids, consider longer drug incubation times to allow for deeper penetration [81] [83]. |
| Inconsistent drug response data between replicates | • Spheroid aspiration during media changes.• Misidentification during longitudinal imaging. | • Automate media exchange to minimize disturbance [83].• Use software like TRACE-QC to validate and correct spheroid correspondence over time [84]. |
Quantitative Data for Experimental Design and Validation
Table 2: Example Drug Response Parameters in 2D vs. 3D Glioblastoma Models
This table summarizes key quantitative findings from recent studies to guide experimental design and expectation setting.
| Cell Line / Model | Treatment | Key Metric (IC₅₀, Viability, etc.) | Observation & Context |
|---|---|---|---|
| U-87MG (3D Spheroids) [82] | TMZ (250µM) + Chrysin (25µM) | Significantly reduced viability vs. single agent | Co-treatment promoted mitochondrial dysfunction, ER stress, and apoptosis; suppressed P-gp and NF-κB [82]. |
| U-87MG (2D vs 3D) [81] | Erlotinib & Imatinib | Higher IC₅₀ in 3D cultures | 3D cultures showed marked reduced sensitivity to kinase inhibitors compared to 2D monolayers [81]. |
| Glioma Cell Lines (3D Spheroids) [15] | TMZ (200µM) & Radiation | Variable effect on viability | Spheroids were more affected by radiation than 2D cultures, especially at higher cell densities; TMZ effect was cell line-dependent [15]. |
| General GBM Models [81] | Temozolomide (TMZ) | Several-fold higher IC₅₀ in 3D | The IC₅₀ of TMZ in 3D GBM spheroids is consistently several-fold higher than in 2D monolayers [81]. |
Standardized Experimental Protocols
Protocol 1: Generating Glioblastoma Spheroids for Drug Testing
Application: High-throughput drug screening using established cell lines [15]. Materials:
- Culture Vessel: 96-well, U-bottom, Ultra-Low Attachment (ULA) plates.
- Cell Line: e.g., U-87MG, U-251MG, T98G [15].
- Centrifuge with plate adapters.
Step-by-Step Workflow:
- Preparation: Harvest cells in the exponential growth phase using Accutase to create a single-cell suspension.
- Counting: Determine cell concentration accurately with an automated cell counter.
- Seeding: Pipette a precise number of cells (e.g., 250-1000 cells/well in 150 µL of culture medium) into each well of the ULA plate.
- Centrifugation: Centrifuge the plate at 241 × g for 5 minutes to promote initial cell contact at the well bottom.
- Incubation: Transfer the plate to a cell incubator (37°C, 5% CO₂).
- Maintenance: Every 3-4 days, perform a 50% media exchange by carefully removing 75 µL of old media and adding 75 µL of fresh, pre-warmed media [15].
Protocol 2: Drug Treatment and Viability Assessment
Application: Evaluating the response of established spheroids to chemotherapeutic agents. Materials:
- Drug Stock: e.g., Temozolomide dissolved in DMSO.
- Viability Probe: e.g., Propidium Iodide (PI) at a low concentration (0.1 µg/mL) for continuous necrosis monitoring [15].
- Imaging System: Fluorescence microscope capable of automated imaging and Z-stacking.
Step-by-Step Workflow:
- Baseline Imaging: Image spheroids (phase contrast and fluorescence) before drug addition to establish baseline size and viability.
- Drug Administration: Add concentrated drug stock directly to the well. Include vehicle control (e.g., DMSO at the same final concentration).
- Incubation & Monitoring: Return the plate to the incubator. Image the spheroids at regular intervals (e.g., every 24-72 hours).
- Image Analysis:
- Use microscopy software to measure spheroid diameters and calculate volumes (V = 4/3πr³) [15].
- Quantify the area of the PI-positive (necrotic) core and the outer viable cell rim.
- Data Normalization: Normalize all treatment group data to the vehicle control group at each time point.
Signaling Pathways and Experimental Workflows
The Scientist's Toolkit: Essential Research Reagents and Materials
Table 3: Key Reagents and Materials for Spheroid Drug Testing
| Item | Function / Application in Spheroid Research |
|---|---|
| Ultra-Low Attachment (ULA) Plates | Prevents cell attachment to the plastic surface, forcing cells to aggregate and form spheroids. Essential for matrix-independent spheroid formation [4] [15]. |
| Temozolomide (TMZ) | The primary chemotherapeutic agent for glioblastoma research. Used as a standard-of-care control and to study resistance mechanisms [82] [15]. |
| Chrysin | A natural flavonoid investigated as a potential adjuvant therapy. Shown to sensitize glioblastoma cells to TMZ by inhibiting P-gp and NF-κB [82]. |
| Propidium Iodide (PI) | A fluorescent viability dye that is excluded by live cells. Used to label and quantify the necrotic core within spheroids over time [15]. |
| Automated Media Exchange System (e.g., AMX) | Enables gentle, high-throughput media changes and drug dosing for long-term assays without disturbing or aspirating unattached spheroids [83]. |
Frequently Asked Questions (FAQs)
General Techniques and Applications
Q1: What are the key advantages of using confocal microscopy over widefield microscopy for imaging spheroids? Confocal microscopy provides superior image quality for 3D samples like spheroids by using a pinhole to reject out-of-focus light, which increases optical resolution and creates a sharper image. This is crucial for examining the interior structure of thick specimens and for performing 3D reconstructions. In contrast, widefield microscopy carries a risk of higher background noise and image blurring from out-of-focus light, making it less ideal for detailed spatial analysis within spheroids [85].
Q2: When is it more appropriate to use a widefield microscope? A widefield fluorescence microscope is sufficient and often preferable for initial protocol screens and for live-cell imaging applications where speed of acquisition is critical. It also offers advantages in terms of lower maintenance cost and ease of use, allowing for direct observation of samples through the ocular lens [85].
Q3: How does imaging flow cytometry combine the strengths of flow cytometry and microscopy? Imaging flow cytometry is a technique that allows for the visualization of individual cells in suspension while providing quantitative, high-throughput data. It adds morphological detail to the quantitative power of conventional flow cytometry, enabling the analysis of viral entry mechanisms and host-pathogen interactions by capturing images of each cell as it passes the detector [86].
Sample Preparation and Experimental Design
Q4: What are the critical controls required for a rigorous immunofluorescence experiment? A proper IF experiment should include the following controls to ensure specificity and interpretability:
- Knock-out cells or positive/negative cell line controls: To verify the specificity of the antibody signal.
- Sample stained only with the secondary antibody: To identify any background signal or non-specific binding from the secondary antibody.
- Individual antibody controls for multiple staining: When using multiple antibodies, each should be tested individually to check for channel bleed-through and spectral overlap [85].
Q5: Why is proper fixation and permeabilization critical for intracellular staining? Fixation preserves cellular morphology and inhibits enzyme activity that could degrade the sample. Permeabilization is then required to open intracellular compartments, allowing antibodies to access their internal targets. Inadequate fixation or permeabilization is a common cause of weak or absent fluorescence signal in both flow cytometry and immunofluorescence [87] [88].
Q6: How can I reduce high background in my flow cytometry experiments? High background can be addressed by:
- Blocking: Using Bovine Serum Albumin or Fc receptor blocking reagents to prevent non-specific antibody binding [87] [89].
- Titrating antibodies: Using the optimal concentration to avoid excess reagent [89].
- Removing dead cells: Using a viability dye to gate out dead cells, which often exhibit non-specific staining and autofluorescence [87] [89].
- Increasing wash steps: Ensuring unbound antibodies are thoroughly removed [89].
Troubleshooting Guides
Flow Cytometry Troubleshooting
The following table outlines common issues encountered in flow cytometry, their potential causes, and recommended solutions.
| Problem | Possible Causes | Recommendations |
|---|---|---|
| Weak or No Signal [87] | - Inadequate fixation/permeabilization.- Low antigen expression paired with a dim fluorochrome.- Incorrect laser/PMT settings. | - Optimize fixation/permeabilization protocol (e.g., ice-cold methanol).- Use brightest fluorochrome (e.g., PE) for low-density targets.- Ensure instrument settings match fluorochrome specifications. |
| High Background [87] [89] | - Non-specific Fc receptor binding.- Presence of dead cells.- Too much antibody.- Cell autofluorescence. | - Include an Fc receptor blocking step.- Use a viability dye to exclude dead cells.- Titrate antibodies to find optimal concentration.- Use fluorochromes that emit in red-shifted channels (e.g., APC). |
| High Fluorescence Intensity [89] | - Inappropriate instrument settings.- Inadequate washing or blocking. | - Decrease laser power or reduce PMT voltage/gain.- Increase number of wash steps; optimize blocking step. |
| Unusual Scatter Properties [89] | - Poor sample quality (cellular damage, contamination). | - Handle samples with care; avoid harsh vortexing.- Use proper aseptic technique. |
| Clogged Flow Cell [87] | - Debris in the sample. | - Run 10% bleach followed by dH₂O through the system to unclog. |
Immunofluorescence & Confocal Microscopy Troubleshooting
| Problem | Possible Causes | Recommendations |
|---|---|---|
| High Background / Low Signal-to-Noise [85] | - Out-of-focus light (widefield).- Non-specific antibody binding.- Antibody concentration too high. | - Use confocal microscopy to reject out-of-focus light.- Include proper controls (secondary-only, KO control).- Titrate primary and secondary antibodies. |
| Channel Bleed-Through [85] | - Overlapping emission spectra of fluorophores. | - Choose fluorophores with narrow, well-separated emission profiles.- Use sequential scanning on the confocal microscope. |
| Photobleaching [88] | - Fluorophores losing fluorescence due to light exposure. | - Use antifade mounting media.- Minimize light exposure during imaging. |
| Autofluorescence [88] [89] | - Natural emission from cells or tissue components. | - Use fluorophores that emit in the far-red spectrum.- Ensure cells are not over-fixed. |
Quantitative Data for Spheroid Research
Spheroid Size and Viability Parameters
The table below summarizes key quantitative findings from spheroid research using glioma cell lines, which can serve as a reference for experimental design and troubleshooting.
| Parameter | Quantitative Findings | Experimental Context |
|---|---|---|
| Initial Cell Number [18] | 250–500 cells/well resulted in better spheroid growth than higher numbers. Spheroid size correlated linearly with the initial cell number. | Spheroid formation in 96-well ULA plates using 10 glioma cell lines. |
| Viability Staining [18] | Propidium Iodide (PI) used at 0.1 μg/mL to continuously monitor necrosis without toxicity artifacts. (Commonly used concentrations can be 0.5-10 μg/mL). | Viability analysis of glioma spheroids. |
| Medium Exchange [18] | 50% of the medium was removed and replaced with fresh medium every 3–4 days. | Standard protocol for maintaining glioma spheroids in culture. |
| Viability Structure [18] | Spheroids consistently displayed an outer layer of living cells and an inner core of dead cells. The size of the necrotic core varied between cell lines. | Core finding from imaging and PI staining of spheroids. |
Color Contrast Requirements for Accessibility
This table summarizes the minimum color contrast ratios required for accessibility standards, which is a critical consideration when creating figures for publications and presentations [90] [91].
| Text Type | Definition | Minimum Contrast Ratio |
|---|---|---|
| Small Text | Text smaller than 18pt or 14pt bold. | 4.5:1 |
| Large Text | Text that is at least 18pt (24px) or 14pt bold (19px). | 3:1 |
Experimental Workflows and Diagrams
Workflow for Spheroid Generation and Phenotyping
The following diagram outlines a standardized protocol for generating and analyzing spheroids, integrating key steps from sample preparation to advanced imaging and data analysis.
Decision Guide: Widefield vs. Confocal Microscopy
This diagram provides a logical framework for selecting the most appropriate microscopy technique based on the specific goals of the imaging experiment.
Research Reagent Solutions
This table details essential materials and reagents used in spheroid research, flow cytometry, and immunofluorescence, as derived from the protocols cited.
| Item | Function/Application | Example/Note |
|---|---|---|
| Ultra-Low Attachment (ULA) Plates [18] | Prevents cell attachment, forcing cells to aggregate and form spheroids. | Corning 96-well Round Bottom ULA plates. |
| Propidium Iodide (PI) [18] | Fluorescent viability dye that stains DNA in dead cells with compromised membranes. | Used at low concentration (0.1 μg/mL) for live monitoring of spheroid necrosis. |
| Fixatives (e.g., Formaldehyde) [87] | Preserves cellular structure and cross-links proteins, inactivating enzymes. | Use methanol-free, 4% formaldehyde for optimal cross-linking [87]. |
| Permeabilization Agents [87] [88] | Opens cell membranes to allow antibodies to access intracellular targets. | Saponin, Triton X-100, or ice-cold methanol (90%). Choice depends on target antigen [87]. |
| Fc Receptor Blocking Reagent [87] [89] | Reduces non-specific antibody binding, lowering background. | Bovine Serum Albumin (BSA) or commercial Fc blocking buffers. |
| Viability Dyes (Fixable) [87] | Distinguishes live from dead cells in fixed samples for flow cytometry. | eFluor dyes, which withstand fixation and permeabilization steps. |
| Fluorophore-Conjugated Antibodies [86] [89] | Directly or indirectly labels target proteins for detection. | For low-abundance targets, use bright fluorophores like PE or Alexa Fluor dyes [89]. |
| Antifade Mounting Media [88] | Preserves fluorescence and reduces photobleaching during microscopy. | Products like ProLong Gold or Vectashield. |
Glioblastoma (GBM) is the most common and aggressive form of primary brain cancer, characterized by its highly invasive nature, which complicates surgical resection and promotes recurrence [92]. Traditional two-dimensional (2D) cell cultures fail to mimic the in vivo tumor environment as they alter cell growth, modify drug availability, and trigger cell differentiation on non-physiological plastic surfaces [93]. Three-dimensional (3D) spheroid models have emerged as physiologically relevant platforms that recapitulate the multicellular architecture, heterogeneity, and cell-cell interactions of solid tumors [4] [93]. These models exhibit critical tumor features such as nutrient and oxygen gradients, hypoxic regions, and necrotic cores that develop when spheroid size exceeds 300μm, providing a more accurate representation of GBM biology for investigating invasion mechanisms and therapeutic responses [93] [94].
Key Methodologies for Glioblastoma Spheroid Invasion Assays
Establishing Reproducible Spheroid Cultures
The foundation of reliable invasion assays begins with consistent spheroid formation. Patient-derived glioblastoma stem-like cells (GSCs) spontaneously form spheroids when cultured in neurobasal medium supplemented with B27, heparin, and FGF-2 [93]. For standardized assays, researchers can generate uniformly-sized spheroids using ultra-low attachment (ULA), U-bottom 96-well plates, which promote cell aggregation into single spheroids per well [93] [94]. A typical protocol involves:
- Cell Preparation: Wash tumor cells with PBS and dissociate with enzymatic reagent for 5 minutes at 37°C [93].
- Cell Counting: Use automated counting with trypan blue and cell counting chamber slides [93].
- Spheroid Formation: For 100 spheroids with 10^4 cells each, mix 10^6 cells in 8mL of neurobasal medium with 2mL of 2% methylcellulose. Dispense 100μL/well into a 96-well round bottom plate [93].
- Incubation: Incubate at 37°C, 5% CO₂, and 95% humidity for 3-4 days until equal-sized spheroids form [93].
The quality of ULA plates significantly impacts spheroid consistency. Premium plates like VitroPrime form single, round spheroids without residual cells on well edges, whereas standard plates often yield irregular aggregates that compromise experimental reproducibility [94].
Three-Dimensional Invasion Assay Setup
For invasion studies, spheroids are embedded in extracellular matrix (ECM) substitutes to monitor radial cell invasion:
Collagen-Based Matrix Protocol [93]:
- Prepare collagen matrix on ice with type I collagen (1mg/mL final concentration), PBS, sodium hydroxide, and sterile H₂O.
- Incubate the solution on ice for 30 minutes.
- Collect spherods from round-bottom plates and wash twice with PBS.
- Pipette spheroids carefully into 100μL of collagen matrix and place in center of well.
- Incubate collagen gel for 30 minutes at 37°C, then add complete medium on top.
Synthetic Hydrogel Protocol [94]:
- Equilibrate VitroGel Hydrogel Matrix, FBS, and culture medium to room temperature.
- Create 1:1 hydrogel-FBS mixture and gently homogenize.
- Add hydrogel to wells containing spheroids in 2:1 hydrogel-to-medium ratio (e.g., 40μL hydrogel to 20μL medium).
- Dispense hydrogel against well wall while tilting plate to preserve spheroid integrity.
- Incubate 15 minutes at room temperature to stabilize hydrogel.
- Gently add 100μL complete medium on top of hydrogel.
Image Acquisition and Quantification Analysis
Invasion is monitored daily using brightfield microscopy and quantified with Fiji software [93] [94]. Two analytical approaches are available:
Manual Analysis [93]:
- Draw around the core and total area of spheroid with freehand selection tool.
- Measure invasive area by subtracting core area from total area.
Semi-Automated Analysis [93]:
- Open macro window: Plugins > Macros > Interactive Interpreter.
- Copy and paste customized macro (available in supplementary materials of cited protocols).
- Adjust parameters for specific quantification needs.
- Run macro using Macros > Run Macro or Ctrl+R.
- Manually adapt regions of interest if necessary.
Figure 1: Experimental workflow for glioblastoma spheroid invasion assays
Troubleshooting Common Experimental Challenges
Inconsistent Spheroid Formation
Problem: Irregular spheroid shapes or multiple aggregates per well.
- Solution: Use premium quality ultra-low attachment plates with uniform U-bottom geometry. VitroPrime plates demonstrate superior performance for consistent, round spheroid formation compared to standard commercial plates [94].
- Prevention: Optimize cell seeding density (typically 1×10^6 cells/mL) and include methylcellulose in the medium to promote aggregation [93].
Poor Invasion Capacity
Problem: Limited cell migration from spheroid core into surrounding matrix.
- Solution: Incorporate macrophage-conditioned media. M2-polarized macrophage-secreted factors significantly stimulate GSC invasion, closely modeling the aggressive mesenchymal subtype [92]. Validate matrix composition and concentration to ensure proper biomechanical properties that support migration.
- Prevention: Use functionally characterized synthetic hydrogels like VitroGel that mimic natural ECM and promote cell-matrix interactions [94].
Matrix Polymerization Issues
Problem: Inconsistent gel formation affecting spheroid integrity.
- Solution: For collagen matrices, maintain components on ice to prevent premature polymerization and avoid acidic additives that alter pH and gel compactness [93]. For synthetic hydrogels, ensure proper room temperature equilibration before use [94].
- Prevention: Pipette cells rapidly into collagen to prevent cell death and gel degradation. When adding hydrogel to spheroids, dispense against well wall while tilting plate to preserve spheroid structure [94].
Variability in Invasion Metrics
Problem: High well-to-well variability in quantified invasion areas.
- Solution: Standardize image analysis using Fiji macros rather than manual measurements to reduce operator bias [93]. Establish consistent threshold parameters for core and invasive areas across all samples.
- Prevention: Implement rigorous quality control at spheroid formation stage, excluding non-spherical or irregular aggregates from experiments.
Impact of Experimental Variables on Spheroid Attributes
Large-scale analyses of spheroid systems have identified critical parameters influencing model reliability and reproducibility. Systematic analysis of 32,000 spheroid images revealed that oxygen levels, media composition, and serum concentrations significantly regulate spheroid morphology, viability, and invasion capacity [10].
Table 1: Impact of Culture Conditions on Spheroid Attributes
| Experimental Variable | Impact on Spheroid Characteristics | Optimization Recommendation |
|---|---|---|
| Oxygen Level [10] | 3% O₂: Reduced dimensions, increased necrosis, decreased cell viability and ATP content | Physiological oxygen (3%) enhances physiological relevance but increases necrosis |
| Serum Concentration [10] | 0% FBS: ~3-fold size reduction, decreased density, increased cell detachment10-20% FBS: Dense spheroids with distinct necrotic, quiescent, and proliferative zones | 10% FBS optimal for balanced growth and structure; higher concentrations do not provide additional benefits |
| Media Composition [10] | RPMI 1640: Elevated death signals in necrotic areasDMEM/F12: Lowest spheroid viabilityDMEM variants: Parameter correlation differences | Systematically test media formulations for specific cell lines; glucose and calcium levels critically affect viability |
| Seeding Density [10] | 2000-6000 cells: Density-dependent size variations6000+ cells: Potential structural instability, rupture | 2000-4000 cells optimal for most applications; higher densities risk structural failure |
| Macrophage Coculture [92] | M2-polarized macrophages: Stimulate transcriptional and phenotypic changes associated with aggressive mesenchymal subtype | Incorporate macrophage-conditioned media or direct coculture to model immune microenvironment |
Essential Research Reagent Solutions
Table 2: Key Reagents for Glioblastoma Spheroid Invasion Assays
| Reagent Category | Specific Products | Function and Application |
|---|---|---|
| Culture Vessels [93] [94] | VitroPrime Ultra-Low Attachment U-bottom 96-well plates | Promote consistent spheroid formation through optimized ultra-low binding surface and geometry |
| Extracellular Matrices [93] [94] | Collagen Type I (1mg/mL), VitroGel Hydrogel Matrix, Matrigel | Provide 3D environment for invasion; collagen offers structural elements, synthetic hydrogels offer defined composition |
| Culture Media [92] [93] | Neurobasal Medium + B27 supplement, M2 Macrophage-Conditioned Media | Support stem-like cell phenotype; macrophage factors stimulate invasion mimicking tumor microenvironment |
| Analysis Tools [93] | Fiji Software with Custom Macros | Enable standardized quantification of invasion metrics (core area, total area, invasive area) |
Signaling Pathways in Glioblastoma Invasion
Macrophage-GBM interactions play a pivotal role in regulating invasion dynamics. Using engineered 3D hydrogel models coupled with multi-omics analyses, researchers have identified key molecular mechanisms driving GBM invasion [92].
Figure 2: Signaling pathways in macrophage-mediated glioblastoma invasion
Proteomic and single-cell RNA sequencing analyses have identified TGFBI (also known as BIGH3) and S100A9 as targetable TAM-secreted tumorigenic factors that stimulate GBM invasion [92]. Targeting BIGH3 and downstream mTOR signaling reduces invasion, highlighting potential therapeutic avenues [92].
Frequently Asked Questions (FAQs)
Q1: Why do 3D spheroid models better mimic glioblastoma physiology compared to 2D cultures? A: 3D spheroids recapitulate critical in vivo features including spatial architecture, nutrient and oxygen gradients, cell-ECM interactions, and distinct zonation with proliferative peripheries and necrotic cores that develop when spheroids exceed 300μm in diameter [93]. These models demonstrate superior predictive power for drug response, exemplified by their ability to replicate patient-derived temozolomide resistance mechanisms in GBM [10].
Q2: How can I improve reproducibility in spheroid invasion assays? A: Key factors include: (1) Using premium quality ULA plates with consistent U-bottom geometry; (2) Standardizing initial cell seeding density; (3) Controlling oxygen tension (3% O₂ enhances physiological relevance); (4) Maintaining consistent serum concentrations (10% FBS recommended); (5) Implementing automated image analysis with Fiji macros rather than manual measurements [10] [93] [94].
Q3: What is the role of macrophages in glioblastoma invasion and how can I model this? A: Tumor-associated macrophages (TAMs), particularly M2-polarized subtypes, stimulate transcriptional and phenotypic changes in GBM stem cells associated with the aggressive mesenchymal subtype [92]. They secrete pro-invasive factors including TGFBI/BIGH3 and S100A9. This can be modeled by incorporating M2-polarized macrophage-conditioned media or direct coculture in 3D hydrogel systems [92].
Q4: How long should invasion assays be run to obtain meaningful data? A: Invasion timecourses vary by cell line and experimental conditions. In U87-MG models, initial protrusions may appear by days 3-6, with pronounced invasion observable by days 11-22, and extensive matrix penetration by days 30-41 [94]. Regular monitoring (every 2-3 days) with image documentation is recommended to capture invasion kinetics.
Q5: What are the advantages of synthetic hydrogels like VitroGel over animal-derived matrices? A: Synthetic hydrogels offer defined composition, lot-to-lot consistency, and room temperature handling without premature polymerization. They are functionalized to mimic natural ECM for cell-matrix interactions while eliminating the variability and undefined components of animal-derived matrices like Matrigel [94].
Conclusion
The establishment of standardized and reproducible spheroid protocols marks a significant advancement in pre-clinical research, effectively bridging the gap between simplistic 2D cultures and complex, low-throughput in vivo models. By systematically addressing foundational principles, methodological details, troubleshooting, and validation, researchers can now reliably generate 3D models that faithfully recapitulate critical tumor characteristics, including physiological gradients, cell-cell interactions, and drug resistance mechanisms. The future of this field lies in the continued refinement of these protocols to encompass even greater complexity, such as incorporating immune components and vascularization, and their broader integration into high-throughput drug discovery pipelines. Ultimately, the widespread adoption of these robust spheroid models will accelerate the development of more effective therapeutics and enhance the predictive power of pre-clinical studies for clinical translation.
References
- 1. 3D vs 2D Cell Culture: Which Model Suits Your Lab in 2025? [https://www.pharmanow.live/knowledge-hub/research/3d-vs-2d-cell-culture-comparison]
- 2. 2D versus 3D tumor-on-chip models to study the impact of ... [https://www.nature.com/articles/s41598-025-03504-8]
- 3. Unlocking the Potential of Spheroids in Personalized Medicine [https://pmc.ncbi.nlm.nih.gov/articles/PMC12250032/]
- 4. Mimicking the Complexity of Solid Tumors: How Spheroids ... [https://pmc.ncbi.nlm.nih.gov/articles/PMC11987746/]
- 5. Spheroid Cell Culture – Practical solutions for frequently ... [https://cellculturedish.com/spheroid-cell-culture-practical-solutions-for-frequently-asked-questions/]
- 6. Standard Protocol for Spheroid Formation in the 96-Well ... [https://www.protocols.io/view/standard-protocol-for-spheroid-formation-in-the-96-d7dn9i5e.html]
- 7. Organoids vs 2D 3 Lines in D Discovery & Disease Cell Drug Modeling [https://www.moleculardevices.com/lab-notes/3d-biology/3d-organoids-vs-2d-cell-lines-drug-discovery]
- 8. culture: 3 and applications | Abcam D cell Models [https://www.abcam.com/en-us/knowledge-center/cell-culture/3d-cell-culture]
- 9. Frontiers | Harnessing 3 and high-resolution imaging to... D cell models [https://www.frontiersin.org/journals/bioengineering-and-biotechnology/articles/10.3389/fbioe.2025.1606573/full]
- 10. Influence of experimental variables on spheroid attributes [https://www.nature.com/articles/s41598-025-92037-1]
- 11. NIH Invests $87M in Organoid Standardization [https://www.4dcell.com/post/nih-invests-87m-in-organoid-standardization-what-it-means-for-biomedical-research]
- 12. Troubleshooting Guide: 3D Bioprinted Culture Viability - Allevi [https://www.allevi3d.com/troubleshooting-issues-with-3d-viability/]
- 13. A Beginner's Guide to Cell Culture: Practical Advice for ... [https://pmc.ncbi.nlm.nih.gov/articles/PMC10000895/]
- 14. Rapid and reproducible generation of glioblastoma ... [https://pubmed.ncbi.nlm.nih.gov/39744592/]
- 15. Rapid and reproducible generation of glioblastoma ... [https://www.frontiersin.org/journals/bioengineering-and-biotechnology/articles/10.3389/fbioe.2024.1471012/full]
- 16. Advanced Research Using Spheroid Culture [https://www.thermofisher.com/us/en/home/life-science/cell-culture/cell-culture-learning-center/cell-culture-resource-library/cell-culture-transfection-application-notes/harnessing-new-dimensions-research-coming-round-spheroid-culture.html]
- 17. Tips for Staining 3D Organoids and Spheroids [https://www.atlantisbioscience.com/blog/tips-for-staining-3d-organoids-and-spheroids/?srsltid=AfmBOoosMa9SFdXeVeSuGxzajo12ve_LADdMeJd2MF7VTkYvflcKw8UZ]
- 18. Rapid and reproducible generation of glioblastoma spheroids ... [https://pmc.ncbi.nlm.nih.gov/articles/PMC11688379/]
- 19. Unlocking the Potential of Spheroids in Personalized ... [https://pubmed.ncbi.nlm.nih.gov/40650254/]
- 20. A Practical Guide to Developing and Troubleshooting Patient ... [https://pmc.ncbi.nlm.nih.gov/articles/PMC12566426/]
- 21. Reproducibility of Uniform Spheroid Formation in 384-Well ... [https://www.sciencedirect.com/science/article/pii/S2472555222071507]
- 22. Cell Culture Protocol: Best Practice in Spheroid and ... [https://www.corning.com/worldwide/en/products/life-sciences/resources/stories/at-the-bench/cell-culture-protocol-best-practices-in-spheroid-and-organoid-cultures.html]
- 23. Standardized Methodology of Scaffold-Free ... - PubMed Central [https://pmc.ncbi.nlm.nih.gov/articles/PMC12566299/]
- 24. Spheroid preparation and immunofluorescence protocol. [https://www.abcam.com/en-us/technical-resources/protocols/spheroid-preparation-and-immunofluorescence-protocol]
- 25. Opportunities and Challenges for use of Tumor Spheroids as ... [https://pmc.ncbi.nlm.nih.gov/articles/PMC3436947/]
- 26. Spheroid Culture System Methods and Applications for ... [https://pmc.ncbi.nlm.nih.gov/articles/PMC6953111/]
- 27. Adult Multipotent Cardiac Progenitor-Derived Spheroids [https://pmc.ncbi.nlm.nih.gov/articles/PMC10341123/]
- 28. Advancement in Scaffold-Based 3D Cell Culture Models for ... [https://pmc.ncbi.nlm.nih.gov/articles/PMC12606569/]
- 29. What 32000 3D Spheroids Revealed About Culture ... [https://www.promegaconnections.com/what-32000-3d-spheroids-revealed-about-culture-conditions/]
- 30. Adherent Cell Culture Protocol [https://www.thermofisher.com/us/en/home/references/gibco-cell-culture-basics/cell-culture-protocols/subculturing-adherent-cells.html]
- 31. How to run an assay [https://www.agilent.com/en/product/cell-analysis/how-to-run-an-assay?srsltid=AfmBOoos9yCjy_YvTpC0QLGJiutCkmrKKpDNL5N9vX1Aqh2XEtInC38R]
- 32. Optimized zymogram protocol from 3D spheroid cultures to ... [https://pmc.ncbi.nlm.nih.gov/articles/PMC11987344/]
- 33. Digitalized organoids: integrated pipeline for high-speed ... [https://www.nature.com/articles/s41592-025-02685-4]
- 34. Physiologic Patient Derived 3D Spheroids for Anti ... [https://pmc.ncbi.nlm.nih.gov/articles/PMC9894675/]
- 35. Flipped Well-Plate Hanging-Drop Technique for Growing ... [https://www.frontiersin.org/journals/bioengineering-and-biotechnology/articles/10.3389/fbioe.2022.898699/full]
- 36. Application of Single Cell Type-Derived Spheroids ... [https://www.mdpi.com/2073-4409/13/18/1549]
- 37. Transfer, Imaging, and Analysis Plate for Facile Handling of ... [https://pmc.ncbi.nlm.nih.gov/articles/PMC4141680/]
- 38. 3D tumor spheroid models for in vitro therapeutic screening [https://www.nature.com/articles/srep19103]
- 39. Millicell® Ultra-Low Attachment (ULA) Plate FAQs [https://www.sigmaaldrich.com/US/en/technical-documents/technical-article/cell-culture-and-cell-culture-analysis/3d-cell-culture/millicell-ultra-low-attachment-plate-faqs?srsltid=AfmBOorNHBMcdF_65JDHLOkTt9X7F1VhAbnmG66292lHGxA5syDT95Up]
- 40. A Robust Method for the Large-Scale Production of ... [https://www.jove.com/t/63436/a-robust-method-for-large-scale-production-spheroids-for-high-content]
- 41. Akura™ 96 Spheroid Microplate [https://insphero.com/3d-cell-culture-tools/akura-96-spheroid-microplate/]
- 42. Production of Large Numbers of Size-controlled Tumor ... [https://pmc.ncbi.nlm.nih.gov/articles/PMC3991351/]
- 43. Generate Size-Controlled Spheroids and Embryoid Bodies ... [https://www.stemcell.com/control-eb-size-for-differentiation-experiments-with-aggrewell.html]
- 44. Robust production of uniform human cerebral organoids ... [https://www.life-science-alliance.org/content/3/5/e202000707]
- 45. AggreWell™ Microwell Plates - Spheroids and Embryoid ... [https://www.stemcell.com/products/brands/aggrewell-microwell-plates.html]
- 46. ECM Gel Matrix: Protocols Using EHS Basement Membrane Extracts [https://www.sigmaaldrich.com/JM/en/technical-documents/technical-article/cell-culture-and-cell-culture-analysis/3d-cell-culture/ecm-gel-product-protocols]
- 47. in the Real World: 5 Uses You'll... Basement Membrane Extract [https://www.linkedin.com/pulse/basement-membrane-extract-real-world-5-uses-youll-actually-d7xge/]
- 48. A 3D tumor spheroid model with robust T cell infiltration for ... [https://pmc.ncbi.nlm.nih.gov/articles/PMC12283745/]
- 49. BME-free primary patient-specific organoids obtained with ... [https://pmc.ncbi.nlm.nih.gov/articles/PMC10757363/]
- 50. Protocol to develop a 3D mouse autologous lung tumor ... [https://pmc.ncbi.nlm.nih.gov/articles/PMC12361748/]
- 51. Negative Effects of Dead Cells in a Sample [https://www.akadeum.com/blog/negative-effects-of-dead-cells/?srsltid=AfmBOooXE1-rY7uSs1Jl4gwsA7fyEHxSb-Wafp-C7uejjV8VctqULocJ]
- 52. A 3D spheroid model for assessing nanocarrier-based ... [https://www.nature.com/articles/s44385-025-00041-x]
- 53. Air bubbles and microfluidics, how to deal with it [https://elveflow.com/microfluidic-reviews/air-bubbles-and-microfluidics/]
- 54. Systematic Prevention of Bubble Formation and ... [https://pmc.ncbi.nlm.nih.gov/articles/PMC3303988/]
- 55. Generation and applications of cardiac spheroids [https://www.nature.com/articles/s44385-025-00024-y]
- 56. Fluid and Bubble Flow Detach Adherent Cancer Cells to ... [https://pmc.ncbi.nlm.nih.gov/articles/PMC10670461/]
- 57. Protocol for generation of multicellular spheroids through ... [https://pmc.ncbi.nlm.nih.gov/articles/PMC10323117/]
- 58. SpheroidSync as edge cutting transfer strategy for uniform and ... [https://pmc.ncbi.nlm.nih.gov/articles/PMC12638756/]
- 59. Standardized Methodology of Scaffold-Free and ... [https://www.mdpi.com/2409-9279/8/5/123]
- 60. Organoid Culture Frequently Asked Questions [https://www.sigmaaldrich.com/US/en/technical-documents/technical-article/cell-culture-and-cell-culture-analysis/3d-cell-culture/organoid-culture-faqs?srsltid=AfmBOooZb5Ym9w9HCd3eP_lC93Np1uS36GN2pYcxwjZXmvr1XjzMk2zp]
- 61. Evaluating the Response to Cryopreservation of Ovine ... [https://pmc.ncbi.nlm.nih.gov/articles/PMC12561703/]
- 62. New Cryopreservation Method Revolutionizes Brain ... [https://www.biobanking.com/new-cryopreservation-method-revolutionizes-brain-tissue-and-organoids-storage/]
- 63. Advances in Cryopreservation Strategies for 3D ... [https://www.mdpi.com/1422-0067/26/14/6908]
- 64. 3D culture and cryopreservation/thawing strategy of human ... [https://www.sciencedirect.com/science/article/abs/pii/S2214552425000951]
- 65. Ultrasonic rewarming of cryopreserved alginate ... [https://www.nature.com/articles/s41598-025-21464-x]
- 66. Three-dimensional spheroid models for cardiovascular ... [https://pmc.ncbi.nlm.nih.gov/articles/PMC12270648/]
- 67. Superhydrophobicity Effects on Spheroid Formation, ... [https://www.mdpi.com/1424-8247/18/7/953]
- 68. Generation, High-Throughput Screening, and Biobanking ... [https://www.jove.com/t/64365/generation-high-throughput-screening-biobanking-human-induced]
- 69. Semiautomatic Growth Analysis of Multicellular Tumor ... [https://www.sciencedirect.com/science/article/pii/S2472555222078509]
- 70. Quantitative Size-Based Analysis of Tumor Spheroids and ... [https://pmc.ncbi.nlm.nih.gov/articles/PMC6599382/]
- 71. The Spheroid Light Microscopy Image Atlas for ... [https://www.nature.com/articles/s41597-025-04441-x]
- 72. Morphological analysis of spheroids [https://bio-protocol.org/exchange/minidetail?id=16076868&type=30]
- 73. How to assess the circularity of my cell spheroids? [https://forum.image.sc/t/how-to-assess-the-circularity-of-my-cell-spheroids/76845]
- 74. Color Image Processing [https://imagej.net/imaging/color-image-processing]
- 75. "Colour Graphics Options" [https://imagej.net/ij/plugins/fraclac/FLHelp/Colour_Selection_Tree.htm]
- 76. Flow Cytometry Troubleshooting Guide [https://www.cellsignal.com/learn-and-support/troubleshooting/flow-cytometry-troubleshooting-guide?srsltid=AfmBOor-A14wavgPGrs89r955a-YZcdSsloNxRADSTvwH55VHKMV3-n6]
- 77. Propidium Iodide Cell Viability Flow Cytometry Protocol [https://www.rndsystems.com/resources/protocols/flow-cytometry-protocol-analysis-cell-viability-using-propidium-iodide]
- 78. LIVE/DEAD Viability/Cytotoxicity Kit for mammalian cells [https://www.thermofisher.com/us/en/home/references/protocols/cell-and-tissue-analysis/protocols/live-dead-viability-cytotoxicity-kit-for-mammalian-cells.html]
- 79. How to Interpret Flow Cytometry Data [https://www.fortislife.com/resources/antibody-resources/how-to-interpret-flow-cytometry-data]
- 80. Protocol for 3D tumor spheroid generation, immunostaining ... [https://pmc.ncbi.nlm.nih.gov/articles/PMC12615730/]
- 81. A comparative study of 3D and 2D cultures in response to ... [https://www.sciencedirect.com/science/article/abs/pii/S0006899325003440]
- 82. Chrysin sensitizes glioblastoma cells and spheroids to ... [https://pmc.ncbi.nlm.nih.gov/articles/PMC12436294/]
- 83. Master media exchange for long-term spheroid assays [https://www.selectscience.net/article/master-media-exchange-for-long-term-spheroid-assays-solutions-and-troubleshooting-top-tips]
- 84. Temporal reassignment and correspondence evaluation ... [https://www.sciencedirect.com/science/article/pii/S2667237525002735]
- 85. IF imaging: Widefield versus confocal microscopy [https://www.ptglab.com/news/blog/if-imaging-widefield-versus-confocal-microscopy/?srsltid=AfmBOoplxGttFWBh_6lxI8h6zYGczN_sBQEQTFNQpnXsw5PohqyuZBKD]
- 86. Imaging Flow Cytometry and Confocal Immunofluorescence ... [https://pmc.ncbi.nlm.nih.gov/articles/PMC8546218/]
- 87. Flow Cytometry Troubleshooting Guide [https://www.cellsignal.com/learn-and-support/troubleshooting/flow-cytometry-troubleshooting-guide?srsltid=AfmBOorbKGt6YEWfyrq0lvgRgpj0zi5IGBN8ho19PTo2g2vZgUBy1Pfo]
- 88. Immunofluorescence Information [https://www.thermofisher.com/us/en/home/life-science/cell-analysis/cell-analysis-learning-center/cell-analysis-antibodies-information/immunofluorescence-information.html]
- 89. Flow Cytometry Troubleshooting Guide [https://fluorofinder.com/flow-cytometry-troubleshooting/]
- 90. Text has enhanced contrast | ACT Rule | WAI [https://www.w3.org/WAI/standards-guidelines/act/rules/09o5cg/]
- 91. Elements must meet minimum color contrast ratio thresholds [https://dequeuniversity.com/rules/axe/4.8/color-contrast]
- 92. An engineered glioblastoma model yields macrophage ... [https://pmc.ncbi.nlm.nih.gov/articles/PMC12406725/]
- 93. A 3D Spheroid Model for Glioblastoma [https://www.jove.com/t/60998/a-3d-spheroid-model-for-glioblastoma]
- 94. Evaluating Spheroid Invasion with VitroGel® Hydrogel Matrix [https://www.thewellbio.com/application-notes/evaluating-spheroid-invasion-with-vitrogel-in-vitroprime-ultra-low-attachment-plate/]