The Complete Guide to Biosafety Cabinet Procedures: Ensuring Safety and Compliance in Biomedical Research
This comprehensive guide details the proper working procedures for biological safety cabinets (BSCs) for researchers, scientists, and drug development professionals.
The Complete Guide to Biosafety Cabinet Procedures: Ensuring Safety and Compliance in Biomedical Research
Abstract
This comprehensive guide details the proper working procedures for biological safety cabinets (BSCs) for researchers, scientists, and drug development professionals. It covers the foundational principles of BSC operation and protection mechanisms, provides step-by-step methodological guidance for daily use, addresses common troubleshooting and optimization challenges, and outlines validation requirements and equipment comparisons. By integrating current standards from leading health and safety organizations, this article serves as an essential resource for maintaining containment, protecting both personnel and research materials, and ensuring regulatory compliance in biomedical and clinical research environments.
Understanding Biosafety Cabinets: Core Principles and Protection Mechanisms
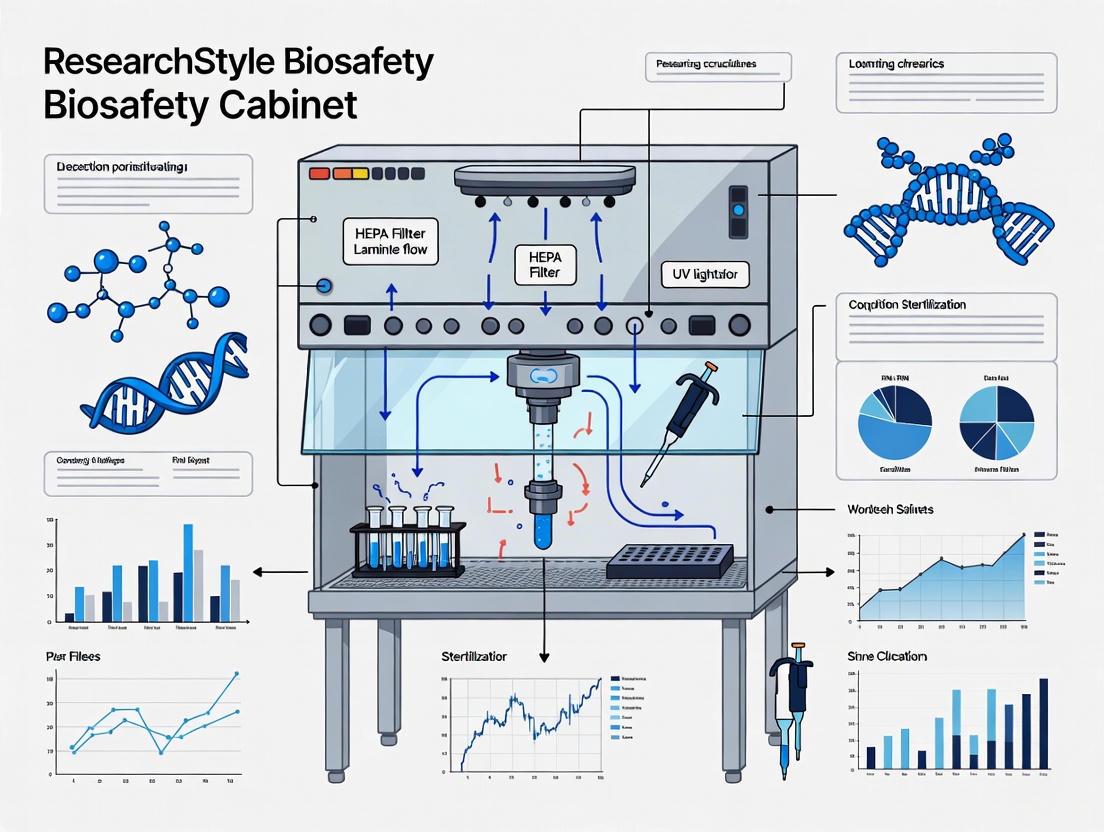
Biological Safety Cabinets (BSCs) serve as primary containment barriers in laboratories handling infectious agents, protecting personnel, the environment, and research materials. Their core safety function is achieved through a sophisticated interplay of directed airflow barriers and High-Efficiency Particulate Air (HEPA) filtration. This application note details the operational principles of BSCs, provides validated protocols for their use and certification, and contextualizes their role within a comprehensive laboratory biosafety program. The guidance is tailored for researchers, scientists, and drug development professionals to ensure the integrity of their work and the safety of the laboratory environment.
In biological research and diagnostics, laboratory techniques frequently generate invisible aerosols that can contain hazardous materials [1]. Inhalation of or exposure to these aerosols presents a significant risk of infection to laboratory personnel and can contaminate the wider environment [2]. Biological Safety Cabinets are engineered primary containment devices designed to mitigate these risks [3]. They provide a critical barrier by containing potentially infectious materials through a combination of air barriers, physical barriers, and advanced filtration systems [1]. For laboratories handling novel or highly pathogenic agents, such as novel Influenza A viruses, the use of a certified BSC is a mandated biosafety requirement for procedures with a high likelihood of generating aerosols [4].
The Science of Containment: Principles and Components
The safety afforded by BSCs rests on two main engineering principles: the creation of air barriers to control the movement of aerosols and the use of HEPA filters to physically capture hazardous particles.
Airflow Barriers: The First Line of Defense
Air barriers provide containment by establishing directional airflow patterns that prevent the escape of aerosols from the cabinet's work area [1].
- Inflow: A consistent, inward flow of air is drawn through the front work opening of the cabinet. This air current acts as a barrier, sweeping any airborne particulates away from the operator and into the cabinet's filtration system. Class I and Class II BSCs maintain a minimum average face velocity to ensure this protection, typically 75 to 100 feet per minute (fpm), or 0.38 to 0.53 meters per second (m/s) [1] [5].
- Downflow: In Class II BSCs, laminar (unidirectional) downflow of HEPA-filtered air moves from the top of the cabinet, over the work surface, and splits to exit through front and rear grilles. This downward flow immediately captures contaminants generated during procedures and carries them away from the work area, thereby also protecting the research sample from external contamination [1] [6].
HEPA Filtration: Capturing Hazardous Particulates
HEPA filters are the cornerstone of BSC filtration efficiency, capable of capturing 99.97% of particles that are 0.3 micrometers (µm) in diameter [1] [7]. This size is most penetrating particle size (MPPS), meaning particles both larger and smaller are captured with even higher efficiency. This makes HEPA filters exceptionally effective at retaining microbiological agents [7].
The mechanisms of particle capture in a HEPA filter include:
- Sieving: When a particle is too large to pass between the fiber spaces.
- Impaction: Larger, heavier particles cannot follow the airstream around fibers and collide with them.
- Diffusion: Very small particles (below 0.1 µm) move erratically (Brownian motion), increasing the probability of collision with fiber surfaces [7].
Table 1: BSC Classification, Characteristics, and Applications
| BSC Class & Type | Face Velocity (fpm / m/s) | Airflow Pattern & Filtration | Personnel Protection | Product Protection | Environmental Protection | Common Applications |
|---|---|---|---|---|---|---|
| Class I | 75 fpm / 0.38 m/s [1] | Inward airflow; exhaust air is HEPA-filtered [1]. | Yes | No | Yes | Enclosing equipment (e.g., centrifuges); handling low-moderate risk agents where sterility is not required [1] [2]. |
| Class II, Type A2 | 100 fpm / 0.53 m/s [1] | Inward airflow, HEPA-filtered downflow; ~70% air recirculated, ~30% exhausted [1]. | Yes | Yes | Yes | Work with low-moderate risk agents; minute quantities of volatiles only if canopy-exhausted [1]. |
| Class II, Type B2 | 100 fpm / 0.53 m/s [1] | Inward airflow, HEPA-filtered downflow; 100% of air is exhausted [1]. | Yes | Yes | Yes | Work with low-moderate risk agents, toxic chemicals, and radionuclides [1]. |
| Class III | N/A (Glove box) | No open front; air enters and exits through HEPA filters; physical barrier [1]. | Yes (Maximum) | Yes | Yes | High-risk biological agents; absolute containment of highly infectious materials [1] [3]. |
Diagram: Airflow and Containment in a Class II BSC
The following diagram visualizes the protective airflow principles within a Class II Biological Safety Cabinet, illustrating how personnel, product, and environmental protection are simultaneously achieved.
Application Notes: Selection and Operational Efficiency
Selecting the Appropriate BSC
Choosing the correct BSC is a critical risk assessment activity. The selection must be based on the biological agents, chemicals, or radionuclides used in the procedures [1] [4]. For instance, Type B2 cabinets, which exhaust 100% of the air, are necessary for work involving significant quantities of toxic chemicals, while Type A2 cabinets recirculating most air back into the lab are suitable for work with low to moderate risk biological agents only [1].
Advancements in Energy Efficiency and Ergonomics
Modern BSCs incorporate design improvements that reduce operational costs and enhance user comfort and safety.
- Motor Systems: Newer BSCs use Direct Current (DC) Electronically Commutated Motors (ECM). Unlike traditional AC motors, DC ECMs can adjust their speed, consuming 30-70% less energy and generating less heat, especially when the sash is closed or during idle modes [5] [6].
- Programmable Functions: Features like programmable UV lamp sterilization schedules prevent unnecessary energy use and lamp degradation [6].
- Ergonomic Designs: An 8-10° sash angle improves visibility and reduces neck strain, while noise levels below 60 decibels (dB) minimize operator fatigue [5].
Table 2: Key Reagents and Materials for BSC Decontamination and Maintenance
| Item | Function / Purpose | Example / Note |
|---|---|---|
| Chemical Disinfectants | Surface decontamination before and after work. | EPA-registered disinfectants effective against target agents (e.g., List M for Influenza) [4]. |
| 70% Ethanol | Surface wiping; effective against many pathogens; evaporates quickly. | Often used, but requires a second wipe with sterile water if following bleach to prevent corrosion [8]. |
| Bleach (Sodium Hypochlorite) | Broad-spectrum disinfectant for surface decontamination. | Corrosive; surfaces should be wiped with 70% ethanol or sterile water after use [8]. |
| HEPA Filters | Primary filtration for inflow, downflow, and exhaust air. | 99.97% efficiency on 0.3 µm particles [1] [7]. Must be replaced after decontamination by a certified technician [8]. |
| ULPA Filters | Ultra-low penetration air filtration for enhanced product protection. | Optional; captures 99.999% of particles ≥ 0.12 µm, creating an ISO 3 clean zone [5]. |
| Heavy-duty Wipes / Towels | Applying disinfectants; cleaning cabinet interiors. | Pre-soaking prevents lightweight wipes from being drawn into exhaust risers [8]. |
| Personal Protective Equipment (PPE) | Protects the operator during cabinet setup and decontamination. | Buttoned-down lab coat, gloves, and safety glasses/goggles are minimum requirements [3] [4]. |
Experimental Protocols for BSC Use and Certification
Protocol 1: Routine Operation of a Class II BSC
This protocol outlines the steps for the proper use of a Class II BSC to ensure containment efficacy [1] [3] [8].
Preparation and Purge:
- Decontaminate all materials and equipment with an appropriate disinfectant before placing them in the cabinet.
- Arrange all necessary items within the BSC before beginning work, placing them at least 4 inches inside the cabinet window. Avoid blocking the front and rear grilles.
- Turn on the BSC and allow it to run for at least 5 minutes with no activity to purge airborne contaminants from the work area.
Personal Preparation:
Work Execution:
- Work from "clean to dirty," arranging materials so that contaminated items are not passed over clean ones.
- Move arms and hands slowly and deliberately in and out of the cabinet to minimize airflow disruption.
- Keep the number of items in the cabinet to a minimum to avoid overcrowding and airflow impedance.
- Do not use open flames, as they create turbulence and can damage the HEPA filters. Use disposable loops or electric incinerators instead [8].
Completion and Shutdown:
- Upon work completion, enclose all contaminated materials in sealed, decontaminated containers (e.g., biohazard bags) before removal.
- Decontaminate all interior surfaces of the BSC with an appropriate disinfectant.
- Allow the BSC to run for 2-3 minutes with no activity to purge any remaining contaminants.
- Turn off the fan and lights.
Protocol 2: BSC Certification and Maintenance
Annual certification is imperative to ensure BSCs operate at their design specifications [3] [8]. This must be performed by a qualified technician.
Pre-Certification Decontamination:
- The laboratory user is responsible for decontaminating all interior surfaces of the cabinet using an approved method and disinfectant specific to the agents used in the cabinet [3].
Certification Tests (Performed by Technician):
- Inflow Velocity Test: Verifies the inward face velocity meets the minimum requirement for the cabinet class (e.g., 100 fpm for Type A2/B2) [1].
- HEPA Filter Integrity Test: Ensures the HEPA filters and their seals have no leaks that would allow particles to bypass filtration. This often uses thermally generated monodisperse dioctylphthalate (DOP) or equivalent polyalphaolefin (PAO) particles [1].
- Downflow Velocity Profile: Checks for uniform laminar airflow in Class II BSCs.
- Smoke Pattern Test: Visually demonstrates the integrity of the inflow barrier and the unidirectional nature of the downflow.
Routine Monitoring:
- At least daily, the operator should observe the magnahelic gauge (which measures pressure drop across the exhaust HEPA filter) or digital airflow monitor and note its relative position. A significant change in reading may indicate a clogged or leaking filter, and the cabinet should not be used until inspected [3].
The Scientist's Toolkit: Essential Materials
The following table details key reagents and materials essential for the safe and effective operation of a BSC.
Table 3: Performance Specifications of Modern BSC Models (2025)
| Model | Inflow / Downflow Velocity (m/s) | Filtration | Noise Level (dB) | Energy Efficiency Features | Best Application Context |
|---|---|---|---|---|---|
| Thermo Scientific Herasafe 2030i | 0.53 / 0.35 [5] | Dual HEPA H14 (99.999%) [5] | 48 [5] | DC ECM motor, idle mode [5] | High-throughput research; labs needing remote monitoring [5]. |
| Telstar BioVanguard B | 0.53 / 0.45 [5] | Triple HEPA (Pre + Dual H14) [5] | Not specified | Green Line EC fans, 300 W [5] | Cytotoxic drug compounding & BSL-3 work [5]. |
| Faster SafeFAST Premium | 0.53 / 0.35 [5] | Dual HEPA H14 [5] | 54 [5] | ECM motor, automatic standby [5] | Mid-sized labs seeking reliable performance on a budget [5]. |
| NuAire LabGard ES NU-540 | 0.53 / 0.33 [5] | Dual HEPA H14 [5] | Not specified | DC ECM motor, LED work light [5] | Industrial & routine cell culture processing [5]. |
| Esco Airstream Gen 3 | 0.53 / 0.32 [5] | Single HEPA H14 (ULPA opt.) [5] | 58 [5] | AC fans, 450 W [5] | Facilities with limited budgets or space constraints [5]. |
Biological Safety Cabinets are indispensable for maintaining a safe and sterile workspace in modern research and clinical laboratories. Their ability to protect personnel, products, and the environment hinges on the precise engineering of airflow barriers and the near-absolute filtration efficiency of HEPA filters. Adherence to strict operational protocols, coupled with a rigorous program of annual certification and preventative maintenance, is non-negotiable for ensuring continuous containment performance. As BSC technology evolves, incorporating greater energy efficiency, connectivity, and ergonomic design, these primary containment devices will continue to be a cornerstone of responsible scientific practice, enabling groundbreaking research while upholding the highest standards of biosafety.
Class II Biological Safety Cabinets (BSCs) represent the cornerstone of containment technology for laboratories working with infectious or biohazardous materials. These engineered safety controls provide a critical triple-protection barrier: safeguarding laboratory personnel from exposure to harmful agents, protecting the product or sample from environmental contamination, and ensuring environmental safety by filtering exhaust air [9] [10]. Unlike laminar flow hoods which only protect the product, or fume hoods which only protect the user, Class II BSCs are uniquely designed to provide this simultaneous protection [10]. Their functionality hinges on precise airflow dynamics and High-Efficiency Particulate Air (HEPA) filtration, creating an enclosed, ventilated workspace essential for modern microbiological, clinical, and pharmaceutical research [11]. This application note details the operational principles, standardized protocols, and validation methodologies for deploying Class II BSCs within a rigorous biosafety framework, providing researchers and drug development professionals with the comprehensive guidelines necessary for safe and compliant operations.
Fundamental Principles and Protection Mechanisms
The simultaneous personnel, product, and environmental protection offered by Class II BSCs is achieved through a sophisticated integration of directional airflow and HEPA filtration.
Airflow Dynamics
A Class II BSC operates by drawing room air (inflow) through the front opening at a minimum velocity, creating an air curtain that prevents the escape of aerosols from the cabinet's work area [12]. This inflow air, along with a portion of the downflow air, is drawn beneath the work surface and then divided. The majority (approximately 70% in a Type A2 cabinet) is recirculated through a supply HEPA filter back into the work zone as sterile, laminar downflow air, which protects the product from contamination. The remaining air (approximately 30%) is exhausted through an exhaust HEPA filter, which traps hazardous particles before the air is either released back into the laboratory or ducted outside, thereby protecting the environment [10] [12].
HEPA Filtration
HEPA filters are the critical components that enable the cabinet's protective functions. These filters are designed to trap 99.99% of particles that are 0.3 microns in diameter, effectively containing biological agents and ensuring that both the air recirculating over the product and the air being exhausted are free of contaminants [12]. The integrity of these filters is paramount and must be regularly validated through leak testing, with certification requiring that aerosol penetration does not exceed 0.01% [9] [13].
The following diagram illustrates the synergistic relationship of these components and the logical workflow that ensures comprehensive protection.
Operational Protocols and Best Practices
Proper operational technique is fundamental to maintaining the integrity of the protective airflow and ensuring sterility. The following protocols must be rigorously followed.
Pre-Use Procedures
- Planning and Preparation: Plan the entire procedure and gather all necessary materials before beginning. This minimizes the number of times arms are moved in and out of the cabinet, which disrupts the air barrier [10] [8].
- Purge Time: Turn on the BSC and allow the blower to run for at least 5 minutes with no activity before starting work. This purges airborne contaminants from the work area [8].
- Personal Protective Equipment (PPE): Wear a long-sleeved lab coat and gloves, ensuring gloves are pulled over the cuffs [10] [8]. Wash hands and arms with a germicidal soap before and after work [8].
- Surface Decontamination: Thoroughly disinfect all interior surfaces of the BSC—including the walls and the interior of the glass sash—with an appropriate disinfectant (e.g., 70% ethanol). When using bleach, a second wipe with 70% ethanol or sterile water is required to prevent corrosion of stainless steel surfaces [10] [8].
Work Practices During Operation
- Workflow Management: Adopt a "clean to dirty" workflow. Stage clean supplies on one side (e.g., left for right-handed users), perform the procedure in the center, and place used materials and waste on the opposite side [14] [11]. This prevents cross-contamination.
- Sash Height and Ergonomics: Ensure the sash is at the correct height as indicated by the manufacturer. Work at least 6 inches inside the cabinet to maintain containment and product protection [10] [8].
- Movement and Positioning: Use slow, deliberate, and perpendicular movements when placing arms into or removing them from the cabinet. Avoid rapid movements side-to-side within the cabinet, and do not allow other personnel to walk rapidly past the BSC, as this can disrupt the critical air barrier [14] [8].
- Material Management: Do not place materials over the front intake or rear exhaust grilles, as this will inhibit airflow [10]. Keep the work area uncluttered to avoid impeding laminar airflow [8].
- Avoiding Open Flames: Do not use Bunsen burners inside a BSC. The flame creates turbulence, disrupts the unidirectional airflow, and the heat can damage the HEPA filters. Use disposable inoculating loops or electric incinerators as alternatives [8].
Post-Use Procedures
- Containment of Waste: All biohazardous waste (e.g., pipette tips, gloves) must be enclosed in a biohazard bag and its surface decontaminated before removal from the BSC [14] [8].
- Final Decontamination: After all materials are removed and the cabinet has run for an additional 2-3 minutes to purge contaminants, decontaminate all interior surfaces once more with an appropriate disinfectant [8].
- Deep Cleaning: Periodically, a deeper cleaning is required. This involves lifting or removing the work surface to clean the spill tray underneath, where spills and debris can accumulate and lead to contamination [10].
Classification and Performance Specifications
Class II BSCs are subdivided into types based on their construction, airflow velocities, and exhaust methods. The appropriate type is selected according to the specific applications and biosafety levels required. The following table summarizes the key quantitative performance data for the different types of Class II BSCs as defined by standards such as NSF/ANSI 49 [15].
Table 1: Classification and Performance Specifications of Class II Biological Safety Cabinets
| Cabinet Type | Minimum Inflow Velocity (m/s) | Downflow Velocity (m/s) | Exhaust System | Recirculation | Key Applications |
|---|---|---|---|---|---|
| Type A1 | 0.38 [15] | Not Specified in NSF/ANSI 49 | Recirculates into lab or through canopy [15] | High (70%) | Basic microbiological work, BSL 1-2 [14] [15] |
| Type A2 | 0.51 [15] | Not Specified in NSF/ANSI 49 | Recirculates into lab or through canopy [15] | High (70%) [12] | General microbiology, clinical labs, BSL 1-2 [15] [12] |
| Type B1 | 0.51 [15] | Not Specified in NSF/ANSI 49 | Hard-ducted, must be exhausted to atmosphere [15] | Partial [14] [15] | Low-level volatile toxic chemicals, BSL 1-3 [14] [15] |
| Type B2 | 0.51 [15] | Not Specified in NSF/ANSI 49 | Hard-ducted, must be exhausted to atmosphere; 100% exhaust [15] | None (Total Exhaust) [14] | Work with volatile radionuclides/toxic chemicals, BSL 1-3 [14] [15] |
| Type C1 | 0.51 [15] | Not Specified in NSF/ANSI 49 | Can be recirculated or hard-ducted via a dedicated exhaust plenum [15] | Variable (convertible) | Versatile applications requiring flexibility, BSL 1-3 [15] |
It is critical to note that other national standards, such as the Australian AS 2252.2:2025, may specify different parameters. For instance, AS 2252.2:2025 defines a fixed downflow velocity range of 0.40-0.45 m/s ± 20% [9].
Certification, Maintenance, and Validation
Regular testing and certification are legal and safety imperatives to ensure BSCs do not lose their effectiveness. BSCs must be certified at the time of installation, annually thereafter, after any relocation, and following filter changes or internal service [13] [8].
Key Validation Tests and Methodologies
The following experimental protocols are essential for field certification and performance validation.
Table 2: Experimental Protocols for BSC Validation and Certification
| Test Parameter | Standard Method | Performance Acceptance Criteria |
|---|---|---|
| Inflow Velocity | Measure average air speed entering the front grille [13]. | Meets minimum requirement for type (e.g., 0.51 m/s for A2, B1, B2) [15]. |
| Downflow Velocity | Measure average air descent speed in the work area to verify laminar flow [13]. | Meets manufacturer and local standard specifications (e.g., 0.40-0.45 m/s ±20% per AS 2252.2) [9]. |
| HEPA Filter Integrity Leak Test | Introduce an aerosol (e.g., polyalpha olefin) upstream of the filter; measure penetration downstream with a photometer [13]. | Aerosol penetration must not exceed 0.01% at any point on the filter, its seal, or mounting frame [9] [13]. |
| Airflow Smoke Pattern Visualization | Use a chemical or ultrasound nebulised water smoke generator to trace airflow patterns in the work area [13]. | No smoke escapes the cabinet; downflow is smooth and unidirectional without dead spots; inflow barrier is maintained [13]. |
| Non-Viable Particle Count | Use a particle counter to measure particulate levels in the work zone [13]. | Complies with ISO Class 5 (Grade A) air cleanliness requirements per ISO-14644-1 [13]. |
The workflow for the complete validation process is methodical and sequential, as depicted in the following diagram.
The Scientist's Toolkit: Essential Reagents and Materials for BSC Operation and Validation
Table 3: Key Research Reagent Solutions for BSC Operation and Testing
| Item | Function / Application |
|---|---|
| 70% Ethanol | Primary disinfectant for surface decontamination before and after work sessions; effective and evaporates without residue [10] [8]. |
| Sodium Hypochlorite (Bleach) | Chemical disinfectant for broader microbial inactivation. Note: Requires a secondary wipe with ethanol or water to prevent corrosion [8]. |
| HEPA Filter Test Aerosol | Aerosol challenge agent (e.g., Polyalpha Olefin, Di(2-ethylhexyl) Sebecate) for filter integrity leak testing [13]. |
| Airflow Visualization Smoke | Non-toxic smoke (e.g., generated from ultrasonically nebulised water) for visualizing and documenting airflow patterns within the work zone [13]. |
| Photometer | Instrument used in conjunction with the test aerosol to measure particulate penetration during the HEPA filter integrity test [13]. |
Class II Biological Safety Cabinets are indispensable in providing a safe and sterile environment for research and production involving biohazardous materials. Their ability to simultaneously protect personnel, the product, and the environment is a function of their precise engineering, which is entirely dependent on consistent and correct operator technique, alongside a rigorous program of maintenance and validation. Adherence to the application notes and detailed protocols outlined herein—from daily aseptic practices to comprehensive annual certification—is fundamental to upholding the integrity of the biosafety barrier. For laboratories operating under Good Manufacturing Practice (GMP) or other stringent regulatory frameworks, this disciplined approach is not merely best practice but a mandatory component of quality assurance, ensuring the safety of both the scientific workforce and the integrity of critical research and drug development outcomes.
Biosafety Cabinets (BSCs) are fundamental engineering controls in laboratories handling infectious or biological materials, providing critical protection for personnel, the product, and the environment [10] [3]. Their operation relies on precise directional airflow and High-Efficiency Particulate Air (HEPA) filtration to contain and remove hazardous aerosols. Validation and certification are processes that verify a BSC is operating according to its design specifications and performance standards, ensuring this vital primary barrier remains effective [16] [17]. This document outlines the critical certification requirements—initial, annual, and post-movement—within the broader context of ensuring rigorous biosafety cabinet working procedures. Adherence to these protocols is non-negotiable for research integrity, regulatory compliance, and the safety of researchers and the community [17].
Regulatory and Standards Framework
BSC certification is governed by a robust framework of international standards and guidelines. The primary standard in North America is the NSF/ANSI 49: Biosafety Cabinetry, which sets the benchmark for design, construction, performance, and field certification [18] [19]. Compliance with this standard is imperative. Furthermore, authoritative publications such as the CDC/NIH's Biosafety in Microbiological and Biomedical Laboratories (BMBL) mandate that a BSC's "operational integrity must be validated before it is placed into service and after it has been repaired or relocated" and that each cabinet should be tested annually [19] [8]. For specific applications, standards like USP 797/800 for pharmaceutical compounding enforce stricter schedules, requiring certification at least every six months [18]. The following table summarizes the core certification triggers as defined by these standards.
Table 1: Summary of Critical Certification Requirements for Biosafety Cabinets
| Certification Trigger | Mandatory Requirement | Governing Standard/Guideline | Key Objective |
|---|---|---|---|
| Initial Certification | Before first use after installation | NSF/ANSI 49, BMBL [19] [8] | Verify proper installation, function, and that the cabinet meets all performance specs in its new location. |
| Annual Certification | At minimum, once every 12 months [18] [3] [20] | NSF/ANSI 49, BMBL [18] [8] | Ensure ongoing operational integrity and detect performance degradation from normal "wear and tear." |
| Post-Movement Certification | After any relocation [18] [19] [20] | NSF/ANSI 49, BMBL [19] [8] | Confirm that moving vibrations have not damaged HEPA filter seals or internal components. |
| Post-Repair/Filter Change | After any maintenance affecting containment or airflow [18] [8] | NSF/ANSI 49 [18] | Validate that repairs or new HEPA filters restore the cabinet to its original performance standards. |
The diagram below illustrates the logical relationship and workflow between these critical certification requirements.
Detailed Certification Protocols and Methodologies
The certification of a BSC involves a series of rigorous, standardized tests performed by qualified, NSF-certified technicians [20]. Prior to any certification event, the cabinet must be decontaminated to inactivate any biological agents [3] [8]. The following protocols detail the key tests that constitute a complete validation.
Inflow Velocity Measurement
- Objective: To verify that the inward flow of air at the cabinet face is sufficient to prevent the escape of biohazardous materials, typically measured in meters per second (m/s) or feet per minute (fpm) [16].
- Protocol:
- Apparatus: A thermal anemometer or similar calibrated airflow meter.
- Setup: The BSC blower is operated for at least 10 minutes to stabilize airflow.
- Measurement Grid: An imaginary grid is established over the entire open front face of the cabinet, with measurement points spaced approximately 10-15 cm (4-6 inches) apart.
- Procedure: The anemometer probe is placed at each point on the grid, ensuring it is parallel to the plane of the sash and that the sensing element is oriented to measure horizontal inflow. The velocity at each point is recorded.
- Acceptance Criteria: For most Class II BSCs, the average inflow velocity must be within the manufacturer's specified range, often 0.38 to 0.51 m/s (75 to 100 fpm) [21] [17]. The readings must not deviate more than ±20% from the nominal value.
Downflow Velocity Measurement
- Objective: To ensure the vertical laminar airflow within the work area is uniform and adequate to prevent cross-contamination of samples [16].
- Protocol:
- Apparatus: A thermal anemometer.
- Setup: The work surface is divided into a measurement grid with points spaced approximately 15 cm (6 inches) apart.
- Procedure: The anemometer probe is held vertically at each grid point, approximately one-third of the way up from the work surface. The downflow velocity at each point is recorded.
- Acceptance Criteria: The average velocity must meet the manufacturer's specifications (e.g., ~0.3 m/s or 60 fpm for Type A2 cabinets). The velocity variation across the grid should be within ±20% of the average [17].
HEPA Filter Integrity Test
- Objective: To confirm the HEPA filter is properly installed and has no leaks, pinholes, or sealant defects that could allow unfiltered air to pass through [16].
- Protocol:
- Apparatus: A aerosol generator (producing thermally or pneumatically generated polyalphaolefin [PAO] or similar aerosol), a photometer (aerosol detector), and a sampling probe.
- Setup: The aerosol is introduced upstream of the HEPA filter in a uniform concentration.
- Procedure: The sampling probe is methodically passed over the entire surface of the filter face, the filter frame, and the gasketed seal between the filter and the cabinet housing. The photometer measures any downstream aerosol penetration.
- Acceptance Criteria: The filter is considered integral if the penetration at any point does not exceed 0.01% of the upstream challenge aerosol concentration [17].
Smoke Pattern Testing
- Objective: To visually demonstrate the airflow patterns within the cabinet, confirming that inflow and downflow are laminar and that no turbulence or dead spots exist at the critical front aperture [16].
- Protocol:
- Apparatus: A smoke generator or a chemical smoke stick.
- Procedure: A small, controlled release of visible smoke is produced at various key locations:
- In front of the grille at the cabinet's face opening to visualize the inflow.
- Just inside the cabinet at the sash opening to observe the air curtain.
- At the boundary between the downflow and inflow zones.
- Observation: The smoke must be smoothly drawn into the front grille without escaping into the room, and the downflow must be smooth and uniform without vortexes or escape over the front opening.
- Acceptance Criteria: Smoke must not escape the cabinet and must show a clear, unidirectional flow from the supply HEPA filter to the exhaust grilles [16].
The Scientist's Toolkit: Essential Materials for BSC Testing and Maintenance
Successful BSC operation relies on both professional certification and proper daily use. The following table details key reagents and materials used in the maintenance and testing of BSCs.
Table 2: Essential Research Reagent Solutions and Materials for BSC Operation
| Item | Function / Purpose | Application Notes |
|---|---|---|
| HEPA Filters | Primary physical barrier that captures at least 99.99% of particles ≥0.3 microns [10]. | Integral component of the BSC; must be replaced by a certified technician after decontamination if clogged or damaged [8]. |
| Chemical Disinfectants (e.g., Bleach, 70% Ethanol) | Used for surface decontamination before and after work, and before certification [10] [3]. | Must be agent-appropriate. If bleach is used, a second wipe with ethanol or sterile water is required to prevent stainless steel corrosion [10] [8]. |
| PAO (Polyalphaolefin) Aerosol | A chemically inert, non-toxic liquid used to challenge HEPA filters during integrity testing [17]. | Generated upstream of the filter and scanned downstream with a photometer to detect leaks. The industry standard for quantitative testing. |
| Thermal Anemometer | A calibrated instrument for measuring air velocity (inflow and downflow) during certification [16]. | Provides digital readouts of airflow speed; must be calibrated regularly to ensure measurement accuracy. |
| Magnahelic Gauge or Airflow Monitor | A pressure gauge that indicates the pressure drop across the HEPA filter, serving as a daily performance indicator [3]. | Users should note its normal position daily; a significant change may indicate filter clogging or other issues requiring service. |
| Nitrile or Latex Gloves & Lab Coat | Minimum required Personal Protective Equipment (PPE) for working within a BSC [10] [3]. | Protects the operator from splashes and contamination; gloves should be pulled over the cuffs of the lab coat. |
Within a biosafety cabinet (BSC), engineering controls provide the primary barrier against biohazards. However, Personal Protective Equipment (PPE) remains a critical last line of defense, protecting researchers from splashes, spills, and aerosol exposures during life science research and drug development activities. Proper PPE use is an indispensable component of a comprehensive risk management strategy, integrating with aseptic technique and BSC protocols to ensure personnel safety and product integrity. This document outlines the essential PPE requirements and their specific application within the BSC work environment.
Essential PPE Components and Specifications
The minimum required PPE for working within a BSC is designed to create a barrier between the researcher and hazardous materials. The following table summarizes the core components, their specifications, and primary functions.
Table 1: Essential PPE for Biosafety Cabinet Work
| PPE Component | Key Specifications | Primary Function | Protocol Integration |
|---|---|---|---|
| Lab Coat | Long-sleeved, buttoned front, knit cuffs [8]; Constructed of appropriate material for the biological agents used [22]. | Minimizes shedding of skin flora into the work area; protects skin and personal clothing from splashes and contamination [8]. | Must be worn over street clothes; gloves should be pulled over the lab coat's cuffs [10] [8]. |
| Gloves | Appropriate for the biological and chemical agents in use [22]. | Protects hands and arms from direct contamination by biological agents [8]. | Washed with germicidal soap before donning; worn over lab coat cuffs; disinfected during work if necessary [8]. |
| Eye/Face Protection | Safety glasses or face shield [10]. | Protects mucous membranes of the eyes from splashes and droplets [10]. | Worn based on risk assessment of the biological agents used inside the BSC [10] [22]. |
Integrated Protocol: PPE and BSC Operation
The following workflow details the correct procedures for donning PPE and integrating its use with standard BSC work protocols to ensure maximum safety and aseptic conditions. This protocol assumes all necessary materials have been gathered and the BSC has been turned on to purge stagnant air [10] [22].
Diagram 1: Integrated PPE and BSC Workflow
Pre-Work Procedures
- Hand Hygiene: Wash hands and arms thoroughly with a germicidal soap before donning PPE to reduce microbial load [8].
- Donning Base PPE: Put on a long-sleeved lab coat, ensuring it is fully buttoned. Don gloves, pulling the cuffs over the knit wrists of the lab coat to create a continuous barrier [10] [8].
- Risk Assessment for Eye Protection: Based on the specific biological agents and procedures, don safety glasses or a face shield if splashes are possible [10].
- BSC Preparation: Disinfect all interior surfaces of the BSC with an appropriate disinfectant, ensuring contact time is met. Allow the BSC to operate with no activity for at least 5 minutes to purge airborne contaminants from the work area [10] [8] [22].
Work Execution within the BSC
- Ergonomics and Sash Height: Adjust the stool height so your face is above the front opening. Ensure the BSC sash is at the certified height, typically 8-10 inches, for optimal airflow and ergonomics [10] [22].
- Workflow Management: Arrange materials to move from "clean to dirty" across the work surface. Perform all work at least 4-6 inches inside the cabinet to remain within the protective downflow air stream [10] [8] [22].
- Technique: Use slow, deliberate, and perpendicular motions when moving hands in and out of the cabinet to avoid disrupting the protective air curtain [10].
Post-Work Procedures
- Containment and Waste Handling: Decontaminate the surfaces of all items before removal from the BSC. Seal biohazard waste and pipette trays within the cabinet before removal [8].
- Final BSC Decontamination: With the BSC still running, disinfect all interior surfaces again. After removing all materials, allow the BSC to run for an additional 2-3 minutes to purge any generated aerosols [10] [8].
- PPE Removal and Hand Hygiene: Remove gloves and lab coat in a manner that prevents contaminating unprotected skin. Wash hands thoroughly with germicidal soap upon completion [8] [22].
The Scientist's Toolkit: Essential Research Reagent Solutions
The following reagents and materials are essential for maintaining safety and asepsis in conjunction with PPE and BSC protocols.
Table 2: Essential Reagents and Materials for BSC Work
| Item | Function | Application Notes |
|---|---|---|
| 70% Ethanol | A broad-spectrum disinfectant and cleaning agent for surfaces. | Effective for general disinfection; used after bleach to prevent corrosion of stainless steel [10] [8]. |
| Germicidal Soap | Reduces transient and resident microbial flora on hands and arms. | Used for hand hygiene before donning and after removing PPE [8]. |
| Approved Disinfectant | Agent-specific decontamination of BSC surfaces (e.g., diluted bleach, hydrogen peroxide-based). | Selected to be effective against the biological agents in use; must be applied with a squirt bottle or wipes, not sprayed, to avoid damaging HEPA filters [10]. |
| HEPA Filter | A high-efficiency particulate air filter that traps aerosols and microorganisms. | Integral part of the BSC that provides product and environmental protection; requires annual certification [10] [15]. |
| Biohazard Bags/Containers | Safe containment and disposal of contaminated solid waste. | Must be sealed inside the BSC before removal to prevent environmental release [8]. |
The Step-by-Step BSC Protocol: From Startup to Shutdown
Within the broader context of establishing robust biosafety cabinet (BSC) working procedures, pre-work preparation represents the most critical foundational element. Proper preparation directly protects the safety of personnel, the integrity of research products, and the sterility of the laboratory environment [10] [8]. This protocol outlines the detailed steps for planning, gathering materials, and donning personal protective equipment (PPE) necessary for safe and effective work within a Class II BSC, the most common type in laboratories handling low to moderate-risk biological agents [23]. The procedures herein are designed to minimize the introduction of contaminants, thereby supporting the aseptic processing of cell products and other sensitive materials.
Planning and Material Gathering Protocol
A meticulously planned workflow, executed before approaching the BSC, is essential for minimizing movement and air disturbance during critical operations.
Experimental Workflow for Pre-Work Preparation
The following diagram illustrates the logical sequence of pre-work preparation activities, from initial planning to the final step before beginning work inside the cabinet.
Material Management and Disinfection Procedures
Effective planning requires assembling all necessary items before work begins to prevent repeated entries and exits from the cabinet, which disrupt the protective air barrier [8] [24]. The following protocol must be completed at a bench away from the BSC.
- Comprehensive Checklist Creation: Draft a detailed list of every item required for the entire experimental procedure. This includes culture vessels, media, pipettes, tips, waste containers, and any specialized equipment.
- Material Staging and Surface Decontamination: Gather all listed materials and place them in a designated clean staging area. Disinfect the exterior surfaces of every item with an appropriate agent, such as 70% ethanol or a diluted bleach solution, before introducing them into the BSC [10] [8]. If bleach is used, a second wipe with 70% ethanol or sterile water is recommended to prevent corrosion of the BSC's stainless steel surfaces [8].
- Workflow Organization: Arrange the disinfected materials in a logical sequence that supports a "clean to dirty" workflow within the BSC. This practice prevents contaminated items from being passed over clean ones, thereby minimizing cross-contamination [8].
Donning Personal Protective Equipment (PPE)
The correct PPE is a primary defense against personal contamination and a significant source control to minimize particle shedding from the operator into the BSC environment.
Quantitative Analysis of PPE Efficacy
Recent research underscores the importance of appropriate attire. An accelerated test simulating worst-case conditions compared the shedding of particles and falling bacteria from operators wearing different types of clothing.
Table 1: Comparison of Operator-Generated Particles and Falling Bacteria
| Parameter | Textile Clothing (e.g., Lab Coat) | Non-Woven Dustless Clothing |
|---|---|---|
| Particle Generation | Detected, correlating with colony-forming units (CFUs) | No particles detected [25] |
| Falling Bacteria (CFUs) | Detected, highest directly under tapping area | No falling bacteria detected [25] |
| Ratio of Falling Bacteria to Total Particles | 0.8 ± 0.5 % | 0.04 ± 0.2 % [25] |
| Correlation noted between 5 μm particles and CFUs | Noted for textile clothing [25] | Not applicable |
The data demonstrates that clothing choice has a direct and quantifiable impact on the introduction of microbial contaminants. Non-woven dustless attire significantly reduces the risk of product contamination compared to standard textile lab coats [25].
PPE Donning Protocol and Workflow
The procedure for donning PPE should be methodical to ensure no step is missed.
Table 2: The Scientist's Toolkit: Essential PPE and Attire
| Item | Function and Specification |
|---|---|
| Non-Woven Dustless Gown/Lab Coat | Minimizes shedding of skin flora and particles into the work area; shown to drastically reduce falling bacteria compared to textile clothing [25] [8]. |
| Gloves | Provide a barrier against biological agents; should be pulled over the cuff of the lab coat sleeve to cover the wrist [10] [8]. |
| Safety Glasses | Protect eyes from potential splashes or aerosols during the disinfection process or while working [10]. |
Integration with Broader Biosafety Cabinet Procedures
Pre-work preparation is the first phase of a comprehensive biosafety cabinet protocol. Once planning, gathering, and PPE donning are complete, the operator can proceed to the subsequent stages:
- BSC Start-Up: Turn on the BSC and allow it to run for at least 5-15 minutes to purge the system of airborne contaminants [23] [8] [24].
- Interior Surface Decontamination: After the purge period, and with the cabinet running, disinfect all readily accessible interior surfaces—including the work surface, walls, and interior of the glass—with an appropriate disinfectant [10] [24].
- Material Loading: Introduce the pre-staged and disinfected materials into the BSC, arranging them to maintain a clear and organized workspace that does not obstruct the front or rear grilles [8] [24].
By rigorously applying these pre-work preparation protocols, researchers and drug development professionals can significantly mitigate the primary risks of contamination, laying the groundwork for successful and reproducible aseptic operations.
Within the framework of proper biosafety cabinet (BSC) working procedure research, the initial startup and purge phase is a critical engineering control that is often overlooked. This operational warm-up is not merely a recommendation but a fundamental prerequisite for establishing the validated airflow patterns that provide protection for personnel, products, and the environment. This application note details the experimental protocols and provides quantitative data to underscore the necessity of allowing a BSC to purge its internal atmosphere for a minimum of five minutes before commencing work. The contained environment of a BSC relies on a precise balance of inward and downward HEPA-filtered airflow to create an air curtain that prevents the escape of biohazards [10]. Failure to respect this purge period can compromise this air curtain, leading to potential contamination events. The following sections provide a detailed methodology for validating this warm-up procedure, complete with data presentation and workflow visualizations, tailored for researchers, scientists, and drug development professionals.
Experimental Protocol & Data Analysis
Detailed Methodology for Purging a Biosafety Cabinet
The following step-by-step protocol must be performed at the beginning of each work session or after any interruption in cabinet operation.
- Step 1: Initial Startup. Turn on the BSC's blower and interior lights. Do not place any materials inside the cabinet at this stage [10].
- Step 2: Unobstructed Airflow. Ensure the front intake and rear exhaust grills are completely clear. Do not place any equipment or materials over these grills, as this will inhibit airflow [10] [8].
- Step 3: Purge Timing. Initiate a timer for a minimum of 5 minutes to allow the cabinet's airflow to stabilize and purge the work area of airborne contaminants [8].
- Step 4: Personal Protective Equipment (PPE). During the purge period, don appropriate PPE, including a lab coat and gloves, with the gloves pulled over the cuffs of the lab coat [10].
- Step 5: Material Gathering and Disinfection. Gather all necessary materials for the planned procedure. After the 5-minute purge is complete, disinfect the surfaces of all items before introducing them into the BSC [10].
- Step 6: Work Commencement. Place the disinfected materials into the BSC, ensuring they do not obstruct the front or rear grills. Work can now begin, performing all manipulations at least 4-6 inches inside the cabinet to maintain the integrity of the air curtain [10] [8].
Quantitative Data on Operational Parameters
The table below summarizes the key quantitative parameters associated with the startup and operation of a standard Class II BSC.
Table 1: Key Operational Parameters for Biosafety Cabinet Startup and Use
| Parameter | Specification | Technical/Rationale |
|---|---|---|
| Purge Time | 5 minutes [8] | Allows sufficient time for cabinet air flow to purge airborne contamination from the work area. |
| Post-Work Run Time | 2-3 minutes [8] | Allows airborne contaminants generated during work to be purged from the work area before shutdown. |
| Minimum Working Distance | 4-6 inches from the front grill [10] [8] | Ensures work is performed deep enough to be contained within the protective air curtain. |
| Sash Height | As per manufacturer's indicator [10] | Maintains the designed face velocity for optimal containment and proper ergonomics for the user. |
| Annual Recertification | Mandatory [10] [8] | Ensures the BSC remains in good working condition and provides adequate containment. |
Workflow Visualization
The following diagram illustrates the logical sequence and critical decision points in the biosafety cabinet startup and warm-up procedure.
Diagram 1: BSC startup and purge workflow.
The Scientist's Toolkit: Essential Research Reagents & Materials
The following table details key materials and reagents required for safe and effective work within a biosafety cabinet.
Table 2: Essential Materials for Biosafety Cabinet Work
| Item | Function & Application |
|---|---|
| 70% Ethanol | A common disinfectant used for decontaminating the BSC's interior surfaces (walls, work surface, glass) and the surfaces of items introduced into the cabinet. Using water or ethanol after bleach-based disinfectants prevents corrosion of stainless steel surfaces [10] [8]. |
| Appropriate Chemical Disinfectant | Selected based on the biological agents in use. It is crucial for effective decontamination before and after work sessions. Must be used according to the manufacturer's instructions for required contact time [10]. |
| Lab Coat with Knit Cuffs | A long-sleeved gown minimizes the shedding of skin flora into the work area and protects the user's arms from contamination. Gloves should be pulled over the cuffs [10] [8]. |
| Nitrile or Latex Gloves | Essential for protecting the user from biological agents and preventing contamination of samples and the work environment [10]. |
| Biohazard Bags/Containers | Used for the safe containment and removal of contaminated waste materials (e.g., pipette tips, gloves) from the BSC. Bags must be sealed, and container surfaces must be decontaminated before removal from the cabinet [8]. |
| Extendable Wet Mop or Reach Tool | A tool for safely and effectively reaching and disinfecting all interior surfaces of the BSC, including the back and upper walls, without the user having to place their head and torso inside the cabinet, which would disrupt airflow [10]. |
| Squirt Bottle or Wet Wipes | Preferable to spray bottles for applying disinfectant, as spraying can create aerosols that lead to corrosion or damage the HEPA filters and other mechanical components of the BSC [10]. |
Within a biosafety cabinet (BSC), maintaining sterile interior surfaces is a critical component of a comprehensive thesis on proper biosafety cabinet working procedures. The BSC is an enclosed, ventilated workspace that protects personnel, products, and the environment through HEPA-filtration and an air curtain [10]. However, this controlled environment can be compromised by contaminated work surfaces, turning them into fomites—objects that can transfer pathogens between hosts [26]. Effective decontamination protocols are therefore essential to break this chain of transmission and ensure the integrity of both research and researcher safety. This document provides detailed application notes and protocols for the selection and application of effective disinfectants within a BSC, framed within the broader context of proper biosafety cabinet operation.
The Science of Disinfection
Factors Influencing Disinfectant Efficacy
The successful inactivation of microorganisms on surfaces is not a simple process; its efficacy is governed by a complex interplay of chemical, physical, and biological factors. Awareness of these factors is paramount for developing robust decontamination strategies [27].
- Number and Location of Microorganisms: The initial microbial load directly impacts the time required for complete inactivation. A higher number of microbes requires a longer exposure time to the germicide [27]. Furthermore, microorganisms protected in crevices, joints, or biofilms are more difficult to kill than those on accessible, flat surfaces, necessitating meticulous physical cleaning before disinfection [27].
- Innate Resistance of Microorganisms: Microorganisms exhibit a hierarchy of innate resistance to chemical germicides. Bacterial spores possess the highest resistance, followed by mycobacteria, non-lipid viruses, fungi, vegetative bacteria, and lipid viruses [27]. Disinfection strategies must be tailored to target the most resistant microbial subpopulation anticipated in the work.
- Concentration and Potency: Generally, a higher concentration of a disinfectant leads to greater efficacy and a shorter contact time. However, this relationship varies significantly between disinfectant classes, a factor quantified by its concentration exponent [27].
- Physical and Chemical Factors: Environmental conditions such as temperature, pH, and water hardness can profoundly influence antimicrobial activity. For instance, the efficacy of most disinfectants increases with temperature, while pH can either enhance or degrade the activity of different disinfectants [27].
- Organic and Inorganic Matter: The presence of organic matter (e.g., serum, blood, pus) can severely compromise disinfection by inactivating the germicide or acting as a physical barrier for microorganisms [27]. This underscores the non-negotiable requirement for scrupulous cleaning before the application of a disinfectant.
- Duration of Exposure: Surfaces must remain wet for the full contact time specified by the disinfectant manufacturer to achieve the stated level of microbial kill. Inadequate contact time is a common point of failure in decontamination protocols [10] [27].
Understanding the Microbial Enemy
A risk-based approach to disinfection begins with understanding the organisms one aims to inactivate.
- Bacteria: Single-celled organisms whose resistance is influenced by their cell wall structure (Gram-positive vs. Gram-negative). Some, like Bacillus and Clostridium, can form highly resistant endospores, while others can form protective biofilms on surfaces, making them up to 1,000 times more resistant to antimicrobials [27] [26].
- Viruses: Submicroscopic obligate parasites, categorized by the presence or absence of a lipid envelope. Enveloped viruses (e.g., HIV, herpes) are generally more susceptible to disinfectants than non-enveloped viruses (e.g., poliovirus, coxsackievirus) [27] [26].
- Fungi: Eukaryotic organisms, including yeasts and molds, with cell walls rich in chitin, which can confer resistance [26].
The following diagram illustrates the logical decision-making process for selecting an appropriate disinfectant based on these scientific principles.
Diagram 1: Logical workflow for selecting an appropriate disinfectant, based on microorganism resistance and operational factors.
Selecting the Right Disinfectant
No single disinfectant is ideal for all situations. Selection must balance efficacy, material compatibility, safety, and practicality. The table below summarizes key disinfectant classes and their properties.
Table 1: Comparison of Common Disinfectant Classes for Use in Biosafety Cabinets
| Disinfectant Class | Common Examples | Spectrum of Activity | Recommended Contact Time | Material Corrosivity | Key Considerations |
|---|---|---|---|---|---|
| Improved Hydrogen Peroxide | 0.5% - 7.5% H₂O₂ solutions | Broad-spectrum; bactericidal, virucidal, fungicidal, tuberculocidal, and sporicidal at higher concentrations [28] | 1-10 minutes (varies by formulation) [28] | Low | Fast-acting, leaves no residue, safe for most surfaces [28]. EPA category IV rating requires minimal PPE [28]. |
| Sodium Hypochlorite (Bleach) | 1:10 dilution of household bleach (~0.5-0.6%) | Broad-spectrum; sporicidal [26] | 5-10 minutes | High; corrosive to metals | Inactivated by organic matter [27]. Requires a second wipe-down with 70% ethanol or sterile water to prevent BSC surface corrosion [10] [8]. |
| Quaternary Ammonium Compounds (Quats) | Benzalkonium chloride | Bactericidal, fungicidal, virucidal (enveloped viruses) [27] [26] | 10 minutes | Low | Not sporicidal and ineffective against non-enveloped viruses [27]. Can be neutralized by cellulose in wipes [28]. |
| Ethanol / Isopropanol | 70-80% solutions | Bactericidal, fungicidal, virucidal (including enveloped) [27] | 30 seconds - 5 minutes [27] | Low | Fast-evaporating, no residue. Not sporicidal. Efficiency depends on concentration; 70% is more effective than 95% [27]. |
| Peracetic Acid/Hydrogen Peroxide | Blended products | Broad-spectrum; sporicidal [28] | 1-5 minutes | Moderate | Effective alternative to bleach for sporicidal duties; has a vinegar-like odor [28]. |
Experimental Protocols for Validating Disinfection
Protocol: Evaluating Disinfectant Efficacy on Contaminated Surfaces
This protocol outlines a standardized method, adapted from a published study on UV disinfection, to quantitatively assess the efficacy of a liquid disinfectant against a specific microbial challenge on relevant surface materials [29].
1. Objective: To determine the log reduction of a test microorganism achieved by a specific disinfectant and contact time on a specified surface material.
2. Materials: Table 2: Research Reagent Solutions and Key Materials for Disinfection Efficacy Testing
| Item | Function/Description |
|---|---|
| Test Microorganism | A suitable surrogate (e.g., Escherichia coli BL21) prepared to a 0.5 McFarland standard in sterile PBS [29]. |
| Test Disinfectant | The disinfectant solution under evaluation, prepared according to manufacturer instructions. |
| Neutralizing Broth | e.g., Dey-Engley broth; used to halt the action of the disinfectant at the end of the contact time for accurate microbial counting. |
| Surface Coupons | Small, sterile samples (e.g., 2cm x 2cm) of the material to be tested (e.g., stainless steel, plastic representative of BSC interiors). |
| Sterile Phosphate Buffered Saline (PBS) | Used for serial dilutions of microbial suspensions [29]. |
| Mueller Hinton Agar Plates | Growth medium for the culture and enumeration of viable bacteria after disinfection [29]. |
3. Methodology:
- Contamination: Aseptically place each surface coupon into a sterile container. Inoculate the surface of each coupon with a standardized volume (e.g., 100 µL) of the microbial inoculum. Allow the inoculum to dry under incubation (e.g., 37°C for 2 minutes) [29].
- Disinfection Application: Randomly assign coupons to test groups (e.g., test disinfectant, positive control, negative control). For the test group, apply the disinfectant to the contaminated surface as per the intended method (spray, wipe), ensuring complete coverage. Note the start time.
- Neutralization: After the predetermined contact time, immediately flood the coupon with a known volume of neutralizing broth to stop the disinfectant's action. Agitate vigorously to resuspend any viable microorganisms.
- Viable Count Assay: Perform serial dilutions of the neutralization broth and plate onto Mueller Hinton agar using the pour plate method. Incubate plates at 37°C for 24-48 hours [29].
- Control Groups:
- Negative Control: Contaminated coupons with no disinfection treatment to determine the initial microbial load.
- Positive Control: Contaminated coupons treated with a known effective disinfectant (e.g., 1:10 bleach for 10 minutes).
4. Data Analysis: Count the Colony Forming Units (CFU) for each test and control group. Calculate the log reduction using the formula: Log Reduction = log₁₀(CFU Negative Control) - log₁₀(CFU Test Disinfectant) A successful disinfection is typically indicated by a ≥4-5 log reduction, equivalent to a 99.99 - 99.999% kill rate.
Application Notes for Biosafety Cabinet Decontamination
Pre-Decontamination Procedures
- Personal Protective Equipment (PPE): Don a lab coat and gloves (with gloves pulled over the cuffs) before beginning the decontamination process. Eye protection may be warranted based on the biological agents used [10].
- BSC Preparation: Turn on the BSC and allow it to run for several minutes to purge stagnant air and establish the air curtain [10]. Gather all necessary materials to minimize in-and-out movement during the procedure [10] [8].
Standard Operating Procedure for Interior Surface Decontamination
The following workflow details the step-by-step process for effective decontamination of a BSC's interior surfaces.
Diagram 2: Sequential steps for proper decontamination of biosafety cabinet interior surfaces.
- Pre-Cleaning: If visible soil or organic matter is present, clean the surface with a detergent or disinfectant to remove the bulk of the material. This is critical for ensuring the subsequent disinfectant can act effectively [27].
- Application: Apply the selected disinfectant using a squirt bottle or pre-moistened wipes. Do not spray disinfectants inside the BSC, as aerosolized chemicals can damage HEPA filters and mechanical components, and pose an inhalation hazard [10].
- Coverage and Contact Time: Thoroughly wipe all interior surfaces, including the walls, the interior of the glass view screen, the work surface, and the front and rear grilles. Use an extendable tool if needed to reach all areas, but do not place your head inside the BSC [10]. The surface must remain wet for the full manufacturer-recommended contact time to achieve the stated level of kill [10] [27].
- Final Wipe and Dry: If a corrosive disinfectant like bleach was used, a second wiping with 70% ethanol or sterile water is necessary to remove residual chlorine and prevent corrosion of the stainless steel [10] [8]. Allow all surfaces to air dry completely.
Special Considerations
- Ultraviolet (UV) Lights: UV lamps in BSCs are not recommended nor necessary for primary disinfection [8]. If present, they should only be considered an optional method for maintaining disinfection between uses and must never be on while an operator is working in the cabinet due to serious skin and eye injury risks [8].
- Decontamination vs. Disinfection: For major events such as BSC servicing, relocation, or surplus, a more rigorous gaseous decontamination (e.g., with formaldehyde) performed by qualified Environmental Health & Safety (EH&S) personnel is required, which goes beyond routine surface disinfection [10].
Integrating a rigorous and scientifically-grounded protocol for interior surface decontamination is a non-negotiable pillar of proper biosafety cabinet procedure. The selection of an appropriate disinfectant must be a deliberate decision, informed by the biological agents in use, the manufacturer's data on efficacy, and material compatibility. The application of that disinfectant must be performed with precision, adhering to correct techniques and mandated contact times. By treating surface decontamination not as a mundane chore but as a critical, validated scientific process, researchers and drug development professionals can uphold the highest standards of biosafety, ensuring the protection of personnel, the environment, and the integrity of their scientific work.
Within the context of a broader thesis on proper biosafety cabinet (BSC) working procedure research, this document details two foundational principles for ensuring safety and containment: the organization of materials along a clean-to-dirty workflow and the strict maintenance of a 4-6 inch physical barrier within the cabinet. These protocols are essential for researchers, scientists, and drug development professionals to protect both personnel and experimental materials from biological contamination. Adherence to these methodologies preserves the sterile work zone and prevents turbulent airflow that could compromise the cabinet's containment integrity [8].
Core Principles and Rationale
The Clean-to-Dirty Workflow
The clean-to-dirty workflow mandates a unidirectional organization of materials and procedures within the BSC. This systematic approach minimizes the risk of cross-contamination between sterile supplies and biohazardous waste. The principle requires that all clean or sterile materials are placed in a designated "clean zone" on one side of the cabinet, while all used, contaminated materials are moved to a distinct "dirty zone" on the opposite side. All work motions should flow from the clean area toward the dirty area, ensuring that contaminated items are never passed over clean ones [8]. This logical progression is a critical component of aseptic technique and is vital for maintaining product protection.
The 4-6 Inch Barrier
The 4-6 inch barrier is a spatial control measure critical to personnel safety. The downward HEPA-filtered airflow within a Class II BSC creates a protective curtain that contains aerosols and particulate matter. Placing materials or performing procedures within this 4 to 6-inch inner zone ensures that work is performed within the most stable area of laminar airflow, preventing the disruption of the air barrier at the front opening of the cabinet [10]. This prevents the escape of contaminated air into the laboratory environment. Furthermore, no items should block the front intake grill or the rear exhaust grill, as this will inhibit the crucial unidirectional airflow and compromise the cabinet's ability to contain pathogens [8] [10].
Application Notes: Quantitative Data and Specifications
The following table summarizes the key spatial and operational parameters for the strategic workflow.
Table 1: Key Operational Parameters for BSC Workflow
| Parameter | Specification | Rationale & Reference |
|---|---|---|
| Work Depth | At least 4-6 inches inside the cabinet [8] [10] | Work within the zone of stable, laminar downflow to maintain containment. |
| Front Grill Clearance | No obstruction | Unobstructed airflow is essential for cabinet performance and safety [10]. |
| Rear Grill Clearance | No obstruction | Prevents disruption of air curtain and exhaust pathways [8]. |
| Equipment Spacing | At least 4 inches inside the cabinet window [8] | Prevents disruption of air barrier and maintains sterile work zone integrity. |
| Post-Work Purge | 2-3 minutes with no activity [8] | Allows cabinet airflow to purge airborne contaminants from the work area. |
| Pre-Work Purge | 5 minutes after loading materials [8] | Allows the cabinet to stabilize and remove airborne contamination before work begins. |
Experimental Protocols
Protocol 1: Implementing the Clean-to-Dirty Workflow
Title: Standardized Material Placement and Workflow for Aseptic Processing in a Class II BSC
Principle: To establish a unidirectional workflow that prevents cross-contamination by segregating clean and contaminated materials.
Materials:
- Biological Safety Cabinet (Class II, certified)
- Personal Protective Equipment (lab coat, gloves)
- Disinfectant (e.g., 70% ethanol)
- Clean, sterile supplies (pipettes, tips, culture plates, media flasks)
- Biohazard bags and sharps containers
- Contaminated waste materials
Procedure:
- Disinfect and Load: After disinfecting the interior of the BSC, place all clean, sterile supplies needed for the complete procedure into the "clean zone," typically on one side (e.g., the right side for right-handed users) [8].
- Establish a Dirty Zone: Designate the opposite side of the cabinet as the "dirty zone" for waste collection. Place an open biohazard bag or waste container in this area.
- Execute Unidirectional Work: Perform all manipulations so that your hands and materials move from the clean zone, through the central work area, and finally to the dirty zone. For example, use a sterile pipette from the clean zone, perform an inoculation in the center, and then discard the used pipette directly into the waste container in the dirty zone without passing it back over the clean area [8].
- Manage Waste: Once procedures are complete, contaminated waste must be sealed (e.g., biohazard bags sealed) and its surface decontaminated before removal from the BSC [8].
Protocol 2: Establishing and Maintaining the 4-6 Inch Barrier
Title: Spatial Management Protocol for Optimal Airflow and Containment in a BSC
Principle: To ensure all work is performed at a safe depth within the cabinet to preserve the integrity of the protective air curtain.
Materials:
- Biological Safety Cabinet (Class II)
- Ruler or pre-measured guide (for initial training)
- All laboratory materials for the intended procedure
Procedure:
- Visualize the Zone: Before beginning work, mentally mark a line 4-6 inches from the front interior of the cabinet glass or sash.
- Position Equipment: Place all equipment, including instruments, culture plates, and media, at least 4-6 inches inside the cabinet [8] [10]. Ensure no items are placed on or over the front intake grill or the rear exhaust grill.
- Perform Transfers: Conduct all transfers of viable materials as deeply into the BSC as practicable, maintaining the 4-6 inch barrier during active manipulation [8].
- Minimize Disruption: Use slow, deliberate, and perpendicular movements when introducing or removing arms and materials to avoid punching holes in the air barrier and creating turbulent currents that can allow contaminants to escape [10].
Workflow Visualization
The following diagram illustrates the logical relationship and integration of the two core principles into a single, cohesive strategic workflow for biosafety cabinet operation.
Strategic BSC Workflow Integrating Core Principles
The Scientist's Toolkit: Research Reagent Solutions
The following table details essential materials and their functions for implementing the protocols described in this application note.
Table 2: Essential Materials for BSC Workflow Implementation
| Item | Function/Application | Protocol Reference |
|---|---|---|
| 70% Ethanol | Primary disinfectant for surface decontamination before and after work; also used to remove corrosive residue from bleach. [8] [10] | Protocol 1, Step 1; Protocol 2, Cleanup |
| Appropriate Disinfectant (e.g., diluted bleach) | Agent-specific decontamination of the BSC interior; requires a second wipe with ethanol/water to prevent corrosion. [8] | Protocol 1, Step 1 & 4 |
| Biohazard Bags | Safe containment and removal of contaminated solid waste from the "dirty zone." [8] | Protocol 1, Step 2 & 4 |
| Long-sleeve Gown with Knit Cuffs | Minimizes shedding of skin flora into the work area and protects the user's arms from contamination. [8] | General Practice |
| Nitrile or Latex Gloves | Standard personal protective equipment to protect the user and prevent contamination of materials. | General Practice |
| Magnetic Alkyne Agarose (MAA) Beads | High-capacity beads for automated enrichment of newly synthesized proteins in proteomics research. [30] | Specialized Research Application |
Within the framework of proper biosafety cabinet (BSC) working procedure research, the mastery of physical movement techniques is paramount. The primary engineering controls provided by a BSC—the inward airflow to protect personnel and the downward HEPA-filtered airflow to protect products—are dependent on the stability of an invisible, fragile air curtain [10] [31]. Rapid or parallel movements within this controlled environment generate turbulence, disrupting containment barriers and compromising both experimental integrity and personal safety [8] [32]. This application note details the critical protocols for implementing slow, perpendicular arm motions, a fundamental technique for minimizing aerosol release and ensuring procedural fidelity in biomedical research and drug development.
The Scientific Rationale for Controlled Movement
Biosafety Cabinets, particularly the common Class II types, create a delicate balance of airflows to achieve containment. The inward flow of air at the front opening protects the user, while the downward HEPA-filtered flow protects the sample [33]. These air streams converge and are drawn away through grilles, preventing the escape of aerosols [10]. The boundary between the contaminated interior and the clean laboratory is maintained by a laminar air curtain, which is highly susceptible to disruption.
Turbulence and Its Consequences: The consequences of improper movement are direct and significant. Side-to-side movements, quick motions, and frequently moving arms in and out of the cabinet create eddies and turbulence [8] [14]. This turbulent energy is sufficient to destabilize the air curtain, allowing potentially contaminated air from inside the cabinet to spill out over the user's breathing zone and into the laboratory environment [33] [32]. Furthermore, disruptions to the downward laminar flow can compromise product protection by introducing cross-contamination across items on the work surface [34]. Research has shown that simply walking rapidly past an individual working in a BSC can be enough to interfere with its containment protection [14].
Protocol for Proper Arm Movement Techniques
Adherence to the following step-by-step protocol will institutionalize the correct movement techniques, embedding them as a core component of safe BSC practice.
Pre-Procedural Planning and Preparation
- Gather All Materials: Assemble every item required for the complete procedure before approaching the BSC [8]. This prevents the need for reaching in and out during critical phases of work, which is a primary cause of airflow disruption.
- Surface Decontamination: Thoroughly disinfect all materials, including instruments, containers, and media, with an appropriate agent such as 70% ethanol before placing them inside the cabinet [32] [34].
- Logical Work Zone Setup: Arrange materials in a logical workflow from "clean to dirty" [10] [32] [14]. For a right-handed user, this typically means clean supplies (e.g., sterile tips, culture plates) on the left, the active work area in the center, and waste containers (e.g., biohazard bag, sharps disposal) on the right. This setup minimizes the need for crisscrossing movements across the work zone.
Executing Slow, Perpendicular Motions
- Initial Entry and Stabilization: To begin work, move your arms and hands into the cabinet in a direct, perpendicular path. Do not sweep them sideways through the front opening. Once inside, wait for approximately one minute with your hands held still to allow the air streams to stabilize and purge any surface contaminants introduced from the laboratory [33].
- Principle of Slow, Deliberate Motion: All manual operations within the cabinet must be performed using slow and deliberate motions [10] [14]. Rapid movements create turbulent wake, directly challenging the cabinet's ability to contain aerosols.
- Minimizing Lateral Movement: Consciously minimize side-to-side movements of hands and arms [33] [34]. When moving an object from one side of the cabinet to the other, lift it vertically, move it across, and then lower it, rather than sliding it horizontally along the work surface.
- Maintaining a Deep Work Position: Perform all manipulations at least 6 inches (approximately 15 cm) inside the cabinet [10] [8]. This ensures that work occurs within the zone of established downflow and away from the turbulent interface at the front opening.
- Exiting the Cabinet: When removing arms or materials, repeat the slow, perpendicular motion. Decontaminate the outer surface of any item, such as a sealed biohazard bag or sample container, before it is withdrawn through the air curtain [33] [8].
Complementary Best Practices for Movement
- Minimize Frequency: Reduce the number of times arms and hands are moved into and out of the cabinet during a single work session [8].
- Avoid Blocking Airflow: Never rest arms or place materials on the front or rear grilles of the cabinet, as this inhibits critical airflow [10] [32].
- Ergonomics and Posture: Position yourself comfortably to avoid leaning on the cabinet and to allow for relaxed, controlled movements. Confine manual operations to the middle third of the work surface to prevent overreaching [34].
The following workflow diagram synthesizes the core principles of this protocol into a standardized operational procedure.
BSC Arm Movement Protocol
Experimental Validation and Monitoring Protocols
The efficacy of movement techniques can be validated and monitored through direct and indirect experimental methods.
Airflow Visualization Testing (Qualitative)
This non-quantitative method provides a visual demonstration of airflow patterns under different movement conditions.
- Objective: To make the invisible airflow patterns within a BSC visible, demonstrating the disruptive effect of poor technique.
- Materials: Commercial smoke sticks or tissue paper strips.
- Methodology:
- With the BSC operational, gently release a small amount of smoke near the front opening or observe the movement of a tissue paper strip held at the sash.
- Note the smooth, inward, and downward flow pattern.
- Introduce a rapid, sweeping arm movement parallel to the cabinet opening.
- Observe the immediate disruption and turbulence in the smoke pattern or tissue movement, visualizing the potential escape path for aerosols.
- Repeat the process using a slow, perpendicular arm movement and note the minimal disruption to the established airflow.
Aerosol Challenge Test (Quantitative)
This method, typically performed during annual certification, provides quantitative data on containment performance.
- Objective: To quantitatively measure the BSC's containment capability in the context of user activity.
- Materials: Aerosol generator (e.g., for producing Di-Ethyl-Hexyl-Sebacate or similar particles), particle counter, and a mechanical device to simulate arm movement.
- Methodology:
- A known concentration of aerosol particles is generated inside the BSC.
- A particle counter samples the air at critical locations, including the user's breathing zone, just outside the front opening.
- The test is conducted under static conditions (no movement) to establish a baseline.
- The test is then repeated while a simulated arm performs a standardized set of movements, first using rapid, parallel motions and then using the prescribed slow, perpendicular motions.
- The particle counts outside the cabinet for each test condition are compared. A properly functioning BSC used with correct technique will show a significantly lower particle count during the "slow, perpendicular" test compared to the "rapid, parallel" test, confirming the technique's role in maintaining containment.
The Scientist's Toolkit: Essential Reagents and Materials
The following table details key materials required for implementing and validating proper BSC movement techniques.
Table 1: Research Reagent Solutions for BSC Technique Validation
| Item | Function/Application in Protocol |
|---|---|
| 70% Ethanol Solution | Primary disinfectant for decontaminating all surfaces, items, and gloves before they are introduced into or removed from the BSC work zone [10] [34]. |
| Appropriate Chemical Disinfectant (e.g., diluted bleach) | Used for disinfecting surfaces when working with specific infectious agents, followed by a rinse with sterile water or 70% ethanol to prevent corrosion of stainless steel surfaces [10] [8]. |
| Anti-Static, Lint-Free Wipes | Used for applying disinfectants without leaving particulate residue that can clog HEPA filters or introduce contamination [34]. |
| Smoke Stick or Tracer Gas Kit | Essential for the qualitative Airflow Visualization Test to make airflow patterns visible and demonstrate the disruptive effects of turbulent movement [8]. |
| Aerosol Generator & Particle Counter | Critical equipment for the quantitative Aerosol Challenge Test to empirically measure containment integrity under different movement conditions [8]. |
| Biohazard Bags and Sharps Containers | Placed within the BSC to contain waste without requiring the user to break the air curtain to reach an external receptacle [8] [14]. |
| Absorbent Towels | Soaked with disinfectant and used to line the work surface to capture liquid splashes and minimize aerosol generation from spills [33] [34]. |
| Extendable Reach Tool or Cleaning Wand | Allows for thorough decontamination of all interior surfaces, including hard-to-reach corners, without the user having to place their head inside the cabinet and disrupt airflow [10] [34]. |
In conclusion, the technique of employing slow, perpendicular arm motions is not a mere recommendation but a foundational component of validated biosafety cabinet protocols. By understanding the vulnerability of the BSC's air curtain and rigorously applying the detailed methodologies, experimental validations, and material controls outlined in this document, researchers and drug development professionals can achieve the highest standards of safety and scientific reproducibility. Mastery of this physical technique is as critical as any biochemical protocol in the modern biomedical laboratory.
Within the comprehensive framework of proper biosafety cabinet (BSC) working procedures, the final stages of shutdown are critical for ensuring sustained safety and operational integrity. These concluding steps are not merely routine cleaning; they are a defined engineering control process designed to contain biohazards and prevent contamination. The post-work purge utilizes the cabinet's own airflow to evacuate airborne contaminants from the work area, while the final decontamination eliminates residual pathogens from all accessible surfaces [8] [10]. Adherence to a rigorous shutdown protocol is fundamental to a lab's primary containment strategy, safeguarding personnel, the environment, and the integrity of subsequent research, particularly in drug development where cross-contamination can compromise years of investment [35] [36].
The following table consolidates key quantitative data from established guidelines to inform evidence-based shutdown protocols.
Table 1: Summary of Quantitative Parameters for BSC Shutdown Procedures
| Parameter | Recommended Value | Purpose & Context | Primary Source |
|---|---|---|---|
| Post-Work Purge Duration | 2 - 5 minutes | Allows cabinet airflow to purge airborne contaminants from the work area before the blower is turned off. | [8] [10] [24] |
| Disinfectant Contact Time | As per manufacturer's instructions (e.g., 5-15 minutes) | Surface must remain wet for the full contact time to ensure effective inactivation of biological agents. | [10] |
| Work Depth from Front Grille | 4 - 6 inches | The minimum distance from the front intake grille where work and decontamination should be performed to protect the air barrier. | [8] [10] [24] |
| Decontamination Frequency (General) | Before and after every use | Standard practice to decontamate readily accessible interior surfaces. | [24] [37] |
| Decontamination Frequency (Gas) | Prior to maintenance, relocation, or disposal | Required for decontaminating internal components and plenums, including HEPA filters. | [8] [37] |
| UV Lamp Cleaning Frequency | Weekly to bi-weekly | Wiping with 70% ethanol to remove dust and dirt that blocks germicidal effectiveness. | [8] [24] |
Experimental Protocols and Methodologies
This section details the standard methodologies for executing an effective BSC shutdown, framed as actionable laboratory protocols.
Protocol 1: Standard Operational Shutdown and Surface Decontamination
This protocol applies at the conclusion of any biohazardous work session [8] [24].
- Initiate Post-Work Purge: Upon completion of all work, allow the BSC to operate with no activity for 2-5 minutes. This critical step enables the laminar airflow to evacuate any lingering airborne contaminants from the work zone [8] [10].
- Seal and Decontaminate External Surfaces: Enclose all biohazard bags, containers, and waste materials within the cabinet. Wipe the exterior surfaces of these containers with an appropriate disinfectant before removing them from the BSC [8].
- Apply Liquid Disinfectant: Using a squirt bottle or pre-wetted wipes (avoid spraying to prevent aerosolization), apply an agent-appropriate disinfectant to all readily accessible interior surfaces. This includes the work surface, side walls, back wall, and the interior of the glass view screen [10] [24].
- Methodology Note: Heavier wipes or towels are recommended, as lightweight wipes can be drawn into the rear exhaust grille, potentially requiring complex decontamination to retrieve [8].
- Ensure Sufficient Contact Time: The disinfectant must remain on all surfaces for the full duration specified by the manufacturer to achieve effective microbial kill [10].
- Rinse Corrosive Disinfectants (if used): If a corrosive agent like bleach was used, a second wiping with sterile water or 70% ethanol is necessary to remove residual chlorine and prevent corrosion of the stainless steel [8] [10].
- Final Shutdown: After decontamination is complete and contact time has been achieved, turn off the cabinet's blower and illumination lights [8].
Protocol 2: Comprehensive Decontamination for Maintenance or Relocation
This protocol is required before any servicing, internal filter replacement, or moving of the BSC, and involves gas decontamination to sterilize internal plenums and components that surface wiping cannot reach [8] [37].
- Risk Assessment and Authorization: Contact your institutional Environmental Health and Safety (EHS) or Biological Safety office. A risk assessment will determine if gas decontamination is required [37].
- Engage Qualified Personnel: This procedure must not be attempted by laboratory staff. Due to the high hazards associated with gases like paraformaldehyde, hydrogen peroxide vapor, or chlorine dioxide, only approved, qualified vendors should perform this task [37].
- Vendor Execution: The certified vendor will perform the gas decontamination in accordance with standards such as NSF/ANSI 49, ensuring a 6-log reduction of biological indicators to validate sterility [8] [38].
- Verification and Clearance: Following successful decontamination, the vendor will typically place a certification sticker on the cabinet. EHS will then provide a safety clearance form, indicating the unit is safe for movers or service technicians to handle [37].
- Post-Move Recertification: After the BSC is relocated, it must be recertified by a qualified professional before it can be placed back into service [8] [36].
Workflow and Logical Relationships
The diagram below illustrates the logical sequence and decision points in the BSC shutdown and decontamination process.
The Scientist's Toolkit: Essential Reagents and Materials
The following table details key reagents and materials required for effective BSC shutdown and decontamination.
Table 2: Research Reagent Solutions for BSC Decontamination
| Item | Function & Application | Key Considerations |
|---|---|---|
| Disinfectants(e.g., Bleach, 70% Ethanol) | To inactivate biological agents on interior surfaces. | Must be appropriate for the biological agents in use. Bleach requires a water/ethanol rinse to prevent corrosion [8] [10]. |
| Heavy-Duty Wipes / Towels | For applying disinfectant to all interior surfaces. | Pre-soak to prevent lightweight wipes from being drawn into rear exhaust grilles, which can compromise cabinet integrity [8]. |
| Squirt Bottle | For controlled application of liquid disinfectants. | Preferred over spray bottles to avoid aerosolizing disinfectants, which can damage HEPA filters and mechanical components [10]. |
| Personal Protective Equipment (PPE)(Lab Coat, Gloves, Eye Protection) | To protect the researcher during the decontamination process. | Gloves should be pulled over knitted cuffs of the lab coat. Eye protection is warranted based on the agents used [8] [10]. |
| Gas Decontamination Systems(e.g., HVP, Chlorine Dioxide) | To sterilize internal components and HEPA filters prior to service or relocation. | Must be handled by qualified vendors only. Provides the highest level of assurance against contamination [35] [37]. |
| UV Meter / Monitoring Strips | For verifying the germicidal output of UV lamps (if present). | Required for periodic efficiency checks. UV intensity decreases over time and is affected by dust accumulation [24]. |
Integrating these detailed shutdown procedures into a laboratory's standard operating procedures is non-negotiable for a robust biosafety program. The post-work purge and systematic decontamination are the final, critical links in the chain of containment, ensuring that the primary barrier equipment remains reliable and safe. For researchers and drug development professionals, this rigorous approach mitigates risk, protects valuable experiments from cross-contamination, and upholds the highest standards of occupational health and safety.
Biosafety Cabinet Best Practices and Common Pitfalls to Avoid
The prohibition of open flames in Biological Safety Cabinets (BSCs) represents a critical evolution in laboratory safety protocols, driven by both empirical evidence and theoretical understanding of aerodynamics within containment devices. This ban, now widely adopted by major research institutions and endorsed by leading biosafety authorities, addresses fundamental incompatibilities between combustion-based sterilization methods and the engineered protection systems of modern BSCs. The near microbe-free environment created within a properly functioning BSC renders open flames unnecessary for maintaining sterility, while their introduction actively undermines the cabinet's core protective functions [39] [40].
National and international biosafety authorities, including the National Institutes of Health (NIH) and Centers for Disease Control (CDC), explicitly state that "open flames are not required in the near microbe-free environment of a biological safety cabinet" [39] [40]. The World Health Organization's Laboratory Biosafety Manual further reinforces this position, recommending against open flames due to their disruptive effects on airflow patterns and the potential dangers when volatile, flammable substances are present [39] [40]. This consensus among leading authorities underscores the technical rationale supporting the open flame prohibition, which extends beyond institutional policy to fundamental principles of biosafety engineering.
The Multifaceted Hazards of Open Flames in BSCs
Airflow Turbulence and Compromised Protection
The primary protective mechanism of Class II BSCs relies on maintaining laminar airflow—air volumes traveling in a single direction at a constant speed without turbulence [40]. This predictable airflow pattern creates a protective barrier that safeguards both the product and the researcher. The introduction of an open flame fundamentally disrupts this critical system through several interconnected mechanisms:
- Thermal Disturbance: The heating of air from the Bunsen burner creates upward convection currents that directly oppose and mix with the HEPA-filtered downflow air, producing turbulence and recirculation within the work area [40].
- Barrier Compromise: This turbulence destroys the laminar flow pattern, allowing aerosols generated beneath the burner to be carried to other parts of the cabinet and potentially escape into the laboratory environment [40].
- Protection Failure: The disruption jeopardizes all three protective functions of the BSC: personnel protection, product protection, and environmental protection [41].
The NSF/ANSI Standard 49 acknowledges these risks, noting that "open flames in a Class II BSC disrupt the airflow, and there is the possibility of a buildup of flammable gas in BSCs that recirculate their air" [39]. This standardized recognition highlights the universal nature of the hazard across different BSC models and manufacturers.
HEPA Filter Damage and Cabinet Integrity
The heat generated by continuous open flames poses a significant threat to the structural and functional integrity of HEPA filtration systems:
- Adhesive Failure: Open flames have the capacity to melt the bonding agent that holds the HEPA filter media to its frame, destroying the filter's effectiveness and leading to loss of containment in positive pressure plenums [40].
- Material Degradation: Excessive heat buildup can damage the HEPA filter itself or compromise the materials used in the cabinet's construction [41].
- Financial Impact: Filter replacement costs are substantial, with documented expenses including "$250 for decontamination of the cabinet, $250‐$1000 for the filter, and $145 for recertification" each time the HEPA filter needs replacement [40].
Manufacturers including The Baker Company and NuAire explicitly oppose the practice of using open flames in their cabinets, with NuAire stating they "assume no liability for its use" [39]. This manufacturer stance reinforces the technical concerns with legal and warranty implications.
Fire and Explosion Risks
Perhaps the most immediate danger involves the potential for catastrophic fires or explosions within BSCs:
- Flammable Gas Accumulation: In Class II A2 BSCs, where 70% of air is recirculated, a extinguished flame or gas leak could allow flammable gas concentrations to reach explosive levels [40].
- Ignition Sources: Electrical components like fan motors, lights, or outlets could provide ignition sources through sparks in this volatile environment [40].
- Combustion Hazards: All flames must be turned off before using disinfectants, particularly 70% ethanol/isopropanol, due to extreme fire risk [41].
These cabinets are not constructed to be explosion-proof, making any introduction of flammable gases a significant safety violation that potentially endangers not only the user but the entire laboratory [40].
Quantitative Analysis of Hazards and Alternatives
Table 1: Hazard Analysis of Open Flames in Biological Safety Cabinets
| Hazard Category | Specific Risk | Impact Level | Probability | Key Evidence |
|---|---|---|---|---|
| Airflow Disruption | Turbulence disrupting laminar flow | High - Compromises all protection | Certain with continuous flame | NIH/CDC documented airflow pattern disruption [39] |
| Heat Damage | HEPA filter degradation | Medium-High - Requires costly replacement | Likely with prolonged use | Manufacturer warnings about adhesive melting [40] |
| Fire/Explosion | Gas buildup in recirculated air | High - Potential for injury/catastrophe | Low but severe consequences | Documented recirculation rates (70% in A2) creating explosive potential [40] |
| Warranty Voidance | Manufacturer liability limitation | Medium - Financial impact | Certain if discovered | Multiple manufacturer disclaimers of liability [39] |
Table 2: Performance Comparison of Sterilization Alternatives
| Alternative Method | Sterilization Mechanism | Time Effectiveness | Heat Generation | Airflow Impact | Best Application |
|---|---|---|---|---|---|
| Bacti-Cinerator | Infrared heat | 5-7 seconds for incineration | Localized high heat | Minimal disruption | Inoculating loops and needles [39] |
| Glass Bead Sterilizer | Thermal conduction at 250°C | Seconds for destruction of microorganisms and spores | Contained medium heat | No measurable disruption | Small instruments; loops [39] |
| Electric Bunsen Burner | Radiant heat | Comparable to flame | Directed electric heat | Low turbulence | General heating where flame shape needed [39] |
| Disposable Sterile Loops | Pre-sterilized single-use | Immediate | None | None | Routine plating and inoculation [40] |
Experimental Protocols for Validating Sterilization Alternatives
Protocol: Efficacy Testing of Electric Incinerators
Purpose: To validate the microbial destruction capability of electric incinerators as alternatives to open flames.
Materials:
- Bacti-Cinerator or equivalent electric incinerator
- Sterile inoculating loops
- Culture of Bacillus subtilis (non-pathogenic spore-former)
- Tryptic Soy Agar plates
- Sterile phosphate-buffered saline
- Biological indicator strips (Geobacillus stearothermophilus)
Methodology:
- Activate the electric incinerator and allow to reach operating temperature (typically 5-10 minutes).
- Aseptically dip sterile loops into Bacillus subtilis suspension (approximately 10^8 CFU/mL).
- Insert contaminated loops into the incinerator chamber for varying time intervals (3, 5, 7 seconds).
- Streak treated loops onto TSA plates in a standardized pattern.
- Repeat with biological indicator strips following manufacturer instructions.
- Incubate TSA plates at 37°C for 24-48 hours and biological indicators at 56-60°C for 24 hours.
- Compare growth to positive (non-treated) and negative (sterile) controls.
Validation Criteria: Complete absence of growth on TSA plates and biological indicator failure to grow demonstrates effective sterilization.
Protocol: Airflow Integrity Testing with Thermal Challenges
Purpose: To quantitatively measure the disruption caused by open flames versus electric alternatives to BSC airflow patterns.
Materials:
- Certified Class II Type A2 BSC
- Thermal anemometer or equivalent airflow measurement device
- Bunsen burner with gas supply
- Electric Bunsen burner or glass bead sterilizer
- Smoke generator for visualization
- Temperature data logger
Methodology:
- Establish baseline airflow measurements at 6-inch intervals across the work surface using thermal anemometer.
- Document airflow patterns using smoke generator and photographic documentation.
- Activate Bunsen burner and position at rear of work surface as recommended by manufacturers.
- Repeat airflow measurements at identical points after 1, 5, and 10 minutes of continuous operation.
- Document altered airflow patterns with smoke visualization.
- Deactivate Bunsen burner, allow cabinet to stabilize for 15 minutes.
- Repeat measurement protocol with electric alternatives.
- Monitor temperature fluctuations at critical points including near HEPA filters.
Analysis: Compare percentage deviation from baseline measurements between flame and electric methods. Turbulence is indicated by >10% variation in airflow velocity or directional changes visible in smoke patterns.
Implementation Framework for Alternative Techniques
The Scientist's Toolkit: Research Reagent Solutions
Table 3: Essential Materials for Flame-Free BSC Work
| Item | Function | Application Specifics | Technical Considerations |
|---|---|---|---|
| Bacti-Cinerator | Sterilizes inoculating tools using infrared heat | Destruction of organic material on loops/needles | Ceramic funnel design contains spatter; 5-7 second effectiveness [39] |
| Glass Bead Sterilizer | Small instrument sterilization through thermal conduction | Loops, forceps, dental tools | Maintains 250°C for microorganism and spore destruction [39] |
| Electric Bunsen Burner | Provides directional heating without flame | Applications requiring focused heat for flask necks, etc. | Radiant heat without airflow disruption; shape versatility [39] |
| Pre-sterilized Disposables | Single-use sterile tools eliminate need for sterilization | Routine plating, inoculation, sampling | Eliminates cross-contamination risk; time-efficient [40] |
| Touch-O-Matic Microburner | Pilotless burner with flame-on-demand | When flame is absolutely necessary | Minimal disruption compared to continuous flame; rear placement critical [40] |
Procedural Integration Protocol
Transition Planning:
- Assessment Phase: Inventory all procedures currently using open flames; categorize by flame necessity level.
- Equipment Acquisition: Prioritize alternatives based on procedure volume and technical requirements.
- Validation Phase: Conduct parallel testing comparing traditional and new methods using the experimental protocols above.
- Training Implementation: Develop competency-based training for alternative techniques with verification assessments.
- Policy Update: Revise laboratory Standard Operating Procedures (SOPs) to incorporate new methods and prohibit open flames.
Technique Modification:
- For culture vessel flaming: Substitute with sterile sleeve technology or electric neck heating.
- For loop sterilization: Implement graded approach based on application criticality (disposables for routine work, electric incineration for critical applications).
- For instrument sterilization: Utilize pre-sterilized sets in autoclavable containers or glass bead sterilizers.
Visualizing the Impact and Alternatives
Diagram 1: Systemic Impact Comparison of BSC Operations (Normal vs. With Open Flame)
Diagram 2: Decision Pathway for Sterilization Method Selection in BSCs
Exception Management and Compliance Framework
Strict Exception Protocol
While the open flame prohibition is nearly universal, highly specialized procedures may warrant exception considerations under controlled circumstances:
- Exception Criteria: Applications where non-flame alternatives are technically impossible and flame is absolutely necessary for procedure validity [41].
- Approval Requirements: Multi-level authorization requiring submission of formal exception documentation to Environmental Health & Safety (EH&S), the Campus Fire Marshal, and the Institutional Biosafety Committee (IBC) [39].
- Usage Limitations: Even when approved, strict requirements including use of pilotless burners with flame-on-demand capability, placement in the rear third of the work surface, and turning off when not actively in use [40].
Routine "flaming" of culture vessels is explicitly not considered adequate justification for exceptions, as this practice has been rendered obsolete by the controlled environment within BSCs [41].
Compliance Verification and Documentation
Implementation of the open flame ban requires systematic verification and documentation:
- Policy Integration: Incorporate the flame prohibition into laboratory-specific Standard Operating Procedures and biosafety manuals.
- Training Competency: Develop verification assessments for alternative technique proficiency.
- Audit Protocol: Regular inspection of BSCs for compliance, including checking for unauthorized gas connections.
- Documentation: Maintain records of alternative equipment validation, personnel training, and any exception approvals.
This comprehensive approach ensures that the transition from open flames to safer alternatives is complete, verified, and sustainable within the research environment.
Within the context of a comprehensive thesis on proper biosafety cabinet (BSC) working procedures, managing airflow disruptions represents a critical pillar for ensuring primary containment. The integrity of the directional airflow in a BSC is fragile and can be easily compromised by two primary factors: the physical blockage of intake and exhaust grills and turbulent air currents generated by room activity [42] [43]. Proper management of these factors is non-negotiable for protecting personnel from biohazards and preventing cross-contamination of research materials, particularly in drug development where product protection is paramount [44]. This application note provides detailed protocols and quantitative data to help researchers and scientists systematically mitigate these risks, thereby supporting the broader thesis that procedural rigor is the foundation of laboratory biosafety.
Principles of BSC Airflow and Disruption
Biological Safety Cabinets, primarily Class II models, rely on a precise balance of inward (inflow) and downward (downflow) laminar airflow to create a protective barrier [44]. The curtain of room air that enters the front grill acts as the primary defense, containing hazardous particulates within the cabinet where they are captured by HEPA filtration [24]. The performance of this system is highly sensitive to both internal obstructions and external air currents.
- Consequences of Disrupted Airflow: Suboptimal airflow management can lead to catastrophic failures, including aerosol leaks, cross-contamination between experiments, and increased risk of personnel exposure to infectious organisms [42] [24]. Furthermore, disruptive events can cause pressure imbalances in the laboratory, potentially drawing contaminated air into other areas or processes [42].
- Quantitative Performance Metrics: The minimum face velocity, a key performance indicator, is standardized for different cabinet types. Adherence to these specifications is fundamental to maintaining containment. The table below summarizes the critical airflow parameters for common Class II BSCs.
Table 1: Standard Airflow Parameters for Class II Biological Safety Cabinets
| BSC Class/Type | Minimum Face Velocity (fpm) | Air Recirculation | Volatile Chemicals Allowed? |
|---|---|---|---|
| Class II, Type A1 | 75 [45] | 70% [44] | No [45] |
| Class II, Type A2 | 100 [45] | 70% [44] | No, unless thimble-connected [45] |
| Class II, Type B1 | 100 [45] | 30% [44] | Yes, low levels [45] |
| Class II, Type B2 | 100 [45] | 0% (Total Exhaust) [44] | Yes [45] |
Airflow Disruption Pathways and Impacts
The diagram below visualizes the primary causes of airflow disruptions and their direct consequences on biosafety objectives. This logical relationship underscores the critical need for the protocols detailed in subsequent sections.
Protocol for Preventing Grill Obstructions
The physical blockage of intake (front grill) or exhaust (rear grill) vents is a common operator error that creates recirculating air zones and compromises the entire filtration system [42]. The following protocol provides a methodology for establishing and maintaining an obstruction-free work zone.
Work Zone Setup and Material Placement
- Objective: To configure the BSC work surface in a manner that ensures unimpeded airflow across all vents while promoting a clean-to-dirty workflow.
- Materials: Disinfectant (e.g., 10% bleach, 70% ethanol), absorbent towels, biohazard waste container, necessary lab equipment (pipettes, microcentrifuge tubes, etc.).
- Procedure:
- Clear the Work Surface: Before introducing any materials, decontaminate all readily accessible interior surfaces with an appropriate disinfectant [24].
- Place Absorbent Towels: Arrange disinfectant-soaked absorbent towels on the work surface to capture splatters and splashes. Ensure the towels do not cover or drape over the front or rear grills [43].
- Strategic Material Layout:
- Place all clean materials (e.g., sterile pipettes, media) on one side of the cabinet, typically the left for right-handed users [43].
- Position the active work zone in the center of the cabinet, at least 4 inches (approx. 10 cm) from the front grill [24].
- Place waste containers (e.g., for contaminated pipettes) on the opposite side of the clean materials [43].
- Place aerosol-generating equipment (e.g., vortex mixers) and bulky items (e.g., biohazard bags) toward the rear of the cabinet without blocking the rear exhaust grill [43].
- Verification: Visually confirm that no materials, including paperwork, are obstructing the front intake grill or rear exhaust vents [42] [43].
Reagent and Equipment Solutions for Optimal Airflow
The correct selection and placement of materials within the BSC is a critical control point. The following table details key reagent solutions and their specific functions in maintaining an unobstructed and safe work environment.
Table 2: Research Reagent Solutions for BSC Workflow Management
| Item | Function in Airflow Management | Application Notes |
|---|---|---|
| Disinfectant-soaked Absorbent Towels | Contains spills and splashes; prevents liquid from flowing into grills. | Arrange to cover the work surface without covering grill openings [43]. |
| Micro-incinerator / Electric "Furnace" | Provides sterile loop ignition without disruptive heat plumes from open flames. | Prevents disruption of laminar airflow patterns; eliminates fire hazard [24] [43]. |
| Secondary Containment Trays (e.g., dishpans) | Contains spills from breakage; prevents liquids from spreading and blocking vents. | Place large or liquid-containing equipment and glassware inside [46]. |
| Equipment Raisers (~2-inch blocks) | Allows air to pass beneath large equipment, preventing turbulence and airflow dead zones. | Use for bulky items like centrifuges or shakers placed in the BSC [46]. |
Protocol for Minimizing Room Activity Disruption
The directional air inflow of a BSC is vulnerable to cross-drafts generated by room activity, open doors, windows, and HVAC vents [42] [43]. The following protocol outlines steps to identify, mitigate, and monitor these external disruptive factors.
Site Risk Assessment and Mitigation
- Objective: To characterize the laboratory environment for sources of air turbulence and implement controls to minimize their impact on BSC performance.
- Materials: Anemometer (optional), smoke pencil or tissue streamer, laboratory layout diagram.
- Procedure:
- Pre-Use Room Assessment:
- Cabinet Siting Evaluation:
- Ensure the BSC is situated in a low-traffic area, away from main walkways and doors [42] [43].
- Confirm a clearance of at least 30 cm is provided behind and on each side of the cabinet for maintenance and air circulation [43].
- Ensure the BSC is not placed directly under or adjacent to supply air vents [42].
- Operator-Induced Turbulence Mitigation:
BSC Placement and Activity Management Matrix
Effective management of room activity requires both strategic cabinet placement and controlled user behavior. The following table consolidates quantitative and qualitative data to guide laboratory setup and practice.
Table 3: BSC Placement and Activity Management Guidelines
| Parameter | Recommended Guideline | Rationale & Consequence of Deviation |
|---|---|---|
| Clearance from Walls | Minimum 30 cm on sides and rear [43] | Allows for maintenance access and prevents airflow recirculation. |
| Clearance from Traffic | Away from doors and high-traffic areas [42] | Reduces drafts from people moving past the cabinet [42]. |
| Distance from Air Vents | Avoid placement near HVAC supply/exhaust [42] | Prevents fluctuating room pressure and drafts from disturbing containment [42]. |
| Arm Movement | Slow, perpendicular entry; 2-minute wait [43] | Allows air barrier to stabilize, sweeping contaminants from limbs. |
| Cross-Draft Verification | Tissue streamer should not flutter excessively at face of hood [46] | Indicates room turbulence is sufficiently controlled. |
Integrated Experimental Workflow for Airflow Integrity
The following diagram synthesizes the protocols from Sections 3 and 4 into a single, actionable experimental workflow for maintaining airflow integrity during BSC operation.
Adherence to the detailed application notes and protocols outlined herein is fundamental to the broader thesis on proper biosafety cabinet procedure. The quantitative data on clearances and velocities, combined with the standardized methodologies for preventing grill blockages and minimizing room activity, provide a scientifically-grounded framework for risk mitigation. For researchers and drug development professionals, the rigorous application of these practices is not merely a recommendation but an essential component of their professional responsibility, ensuring that the primary engineering control—the biosafety cabinet—functions as designed to safeguard human health and the integrity of scientific research.
Ultraviolet (UV) radiation serves as a potent tool for disinfection in laboratory environments, particularly within biosafety cabinets (BSCs), but its misuse poses significant health risks to researchers. Understanding the distinct UV bands is crucial for implementing appropriate safety protocols. The ultraviolet spectrum is divided into three primary regions: UV-A (315-400 nm), which can cause cataracts and skin cancer; UV-B (280-315 nm), responsible for corneal injuries, photokeratitis, erythema, and skin cancer; and UV-C (100-280 nm), which presents primary hazards of corneal injuries and photokeratitis, along with secondary risks of erythema and skin cancer [47]. Unfortunately, overexposure symptoms often manifest hours after exposure occurs, providing no immediate warning signs [47] [48].
Within laboratory settings, germicidal lamps predominantly emit UV-C radiation at 254 nm, which is exceptionally effective for microbial inactivation but equally hazardous to human tissue [47]. These lamps are implemented in various configurations, including biosafety cabinet interior disinfection, ceiling-mounted air disinfection systems, and specific laboratory equipment like transilluminators for nucleic acid visualization [47] [48]. The American Conference of Governmental Industrial Hygienists (ACGIH) has established Threshold Limit Values (TLVs) for occupational exposure to ultraviolet radiation between 180-400 nm, representing conditions under which nearly all workers may be repeatedly exposed without adverse health effects [47]. Adherence to these guidelines requires comprehensive safety protocols encompassing engineering controls, administrative measures, and personal protective equipment (PPE).
UV Radiation Hazards and Quantitative Risk Assessment
Biological Effects of UV Exposure
The mechanisms of UV-induced damage operate at both cellular and tissue levels, with varying effects across the UV spectrum. UV-C radiation (100-280 nm) possesses significant energy that is primarily absorbed by the corneal epithelium and the outermost layers of the skin, leading to acute effects such as photokeratitis (often referred to as 'welder's flash' or 'arc eye') and erythema (skin reddening similar to sunburn) [47] [48]. Chronic exposure to specific UV wavelengths, particularly UV-A and UV-B, increases the risk of more serious conditions including cataract formation and various forms of skin cancer [48].
At the cellular level, UV radiation induces several types of damage. Multiple in vitro experiments have confirmed that UV emissions cause DNA damage including cytotoxicity, mutagenesis, and oxidative stress in diverse human and murine cell cultures [49]. A recent study on human keratinocytes (HaCaT cell line) exposed to UV nail lamps (365-405 nm) demonstrated that 20-minute exposure reduced cell viability by 35% compared to controls, while a more typical 4-minute exposure resulted in an insignificant 8% decrease [50]. This research further revealed that sunscreen application (SPF50) significantly increased cell viability during UV exposure, highlighting the protective value of appropriate barriers [50].
Emerging Research on Far-UVC Safety
Recent investigations into 222 nm Far-UVC technology have revealed promising safety profiles for continuous decontamination in occupied spaces. A landmark 36-month clinical study conducted in an ophthalmology examination room demonstrated that prolonged exposure to 222 nm Far-UVC within established safety limits produced no adverse ocular effects [51]. Participants showed no changes in visual acuity, refractive error, corneal health, or other ocular parameters throughout the study period [51].
The enhanced safety profile of 222 nm Far-UVC stems from its limited penetration depth. Unlike traditional 254 nm UVC wavelengths, which can reach deeper ocular structures, 222 nm light interacts primarily with the outermost cell layers of the cornea and skin, which naturally renew within 24-48 hours, preventing cumulative damage [51]. This physical characteristic makes Far-UVC a promising technology for implementation in environments requiring continuous disinfection while occupied, though current applications in standard biosafety cabinets remain limited.
Table 1: UV Radiation Bands and Associated Health Hazards
| UV Band | Wavelength Range | Primary Visual Hazards | Other Health Hazards |
|---|---|---|---|
| UV-A | 315-400 nm | Cataracts of lens | Skin cancer, retinal burns |
| UV-B | 280-315 nm | Corneal injuries | Cataracts of lens, photokeratitis, erythema, skin cancer |
| UV-C | 100-280 nm | Corneal injuries | Photokeratitis, erythema, skin cancer |
Safety Protocols and Experimental Controls
Engineering and Administrative Controls
Effective UV safety protocols prioritize engineering controls as the first line of defense against accidental exposure. The most reliable approach involves designing UV sources with integrated shields or interlocks that automatically deactivate the lamps when access doors or ports are opened [48]. For biosafety cabinets, this may include sash-activated switches that prevent UV lamp operation when the sash is raised, or door-interlocked systems for room-mounted UV fixtures that ensure lights deactivate upon entry [47]. Baffled ceiling-mounted germicidal lamps designed for air disinfection represent another engineering solution, protecting room occupants while maintaining continuous operation [47].
When engineering controls cannot fully eliminate exposure potential, robust administrative controls must be implemented. All UV sources should feature conspicuous warning labels at access points, clearly indicating the presence of UV radiation and the necessity for skin and eye protection [48]. Laboratories utilizing UV equipment must establish comprehensive training programs for all personnel who may encounter these hazards, with specific protocols for each device type [47] [48]. Access to rooms containing operational UV sources should be strictly controlled, either through physical barriers (locked doors) or detailed signage procedures that alert personnel to active UV hazards [47].
Personal Protective Equipment (PPE)
When engineering and administrative controls cannot completely prevent UV exposure, appropriate personal protective equipment (PPE) becomes essential. Effective UV PPE must create a comprehensive barrier against radiation penetration to all exposed tissues. The following components constitute a complete UV protection ensemble:
- Eye Protection: Polycarbonate face shields stamped with ANSI Z87.1-1989 UV certification provide optimal protection, covering the entire face and eyes. Standard prescription eyeglasses offer insufficient UV blocking capacity [47] [48].
- Skin Protection: Lab coats with tight-weave fabric and gloves that create no gap between the cuff and the glove are essential. All skin surfaces must be covered, including wrists, neck, and ankles (closed-toe shoes) [47] [48].
- Additional Considerations: For specific applications like transilluminator use, ensuring that UV shields are properly engaged and undamaged provides an additional layer of protection [48].
Table 2: UV Safety Protocols by Equipment Type
| Equipment Type | Primary Hazards | Engineering Controls | Administrative Controls | PPE Requirements |
|---|---|---|---|---|
| Biosafety Cabinet Germicidal Lamps | Eye damage, skin burns | Sash interlocks, shielded fixtures | Access restrictions, warning signs | UV-face shield, gloves, lab coat |
| Ceiling-mounted Germicidal Lamps | Eye damage, skin burns | Baffled fixtures, door interlocks | Room posting, access control | Face shield, skin coverage when baffle removed |
| Transilluminators | Severe eye damage, facial burns | UV shields with interlocks | Designated low-traffic areas, operator training | Face shield, gloves, lab coat |
| Hand-held UV Units | Accidental eye exposure | Directional control | Standard operating procedures | Face shield, gloves, lab coat |
UV Lamp Maintenance Protocols
Cleaning Procedures and Schedules
Proper maintenance is essential for ensuring both the efficacy and safety of UV germicidal lamps. Regular cleaning prevents the accumulation of dust, dirt, and microbial contaminants that can significantly reduce UV output by absorbing or scattering radiation before it reaches target surfaces. The following standardized cleaning protocol should be implemented:
- Power Disconnection: Always deactivate and completely disconnect power to the UV lamp before initiating cleaning procedures. For biosafety cabinets, this may require unplugging the entire unit or switching off dedicated circuit breakers [52] [53].
- Cooling Period: Allow lamps to cool completely to ambient temperature before handling to prevent thermal burns and ensure safe manipulation [53].
- Surface Cleaning: Using soft, lint-free cloths or tissues lightly moistened with isopropyl alcohol, gently wipe the entire exterior surface of the quartz glass sleeve. Avoid abrasive materials or harsh chemicals that could damage the quartz surface [47] [53].
- Fixture Cleaning: Wipe down reflector surfaces and fixture interiors to remove accumulated dust that can reduce overall system efficiency [53].
- Visual Inspection: After cleaning, carefully inspect each lamp for signs of damage including cracks, darkening (indicating bulb aging), or electrode deterioration. Compromised lamps should be replaced immediately [53].
For biosafety cabinet UV lamps, the University of Rochester's Environmental Health & Safety guidelines recommend monthly cleaning using soft cloths dampened with ethanol, ensuring the bulb is completely cool to the touch before wiping [47]. Similar schedules apply to ceiling-mounted germicidal lamps in clinical and laboratory settings [47].
Replacement Schedules and Performance Verification
UV lamps experience gradual output depreciation throughout their operational life, necessitating proactive replacement before complete failure diminishes disinfection efficacy. While manufacturer specifications should always take precedence, general replacement guidelines include:
- Lifespan Tracking: Maintain accurate records of cumulative operational hours for each UV lamp. Many modern UV systems incorporate hour meters for this purpose; alternatively, manual logging systems should be implemented [53].
- Annual Replacement: Most germicidal lamps in periodic-use applications (such as biosafety cabinets) require annual replacement to maintain effective germicidal output, even if the visual appearance suggests continued functionality [47].
- Output Monitoring: While routine radiometric measurement of UV intensity may be impractical for many facilities, periodic verification using appropriate UV meters can confirm adequate output levels, particularly in critical applications [47].
Table 3: UV Lamp Maintenance Protocol Summary
| Maintenance Activity | Frequency | Procedure Details | Safety Precautions |
|---|---|---|---|
| Surface Cleaning | Monthly | Wipe with soft cloth and isopropyl alcohol | Power off, cool completely, wear gloves |
| Fixture Inspection | Quarterly | Check for corrosion, wiring damage | Disconnect power source |
| Output Verification | Annually | Measure with calibrated UV meter | Follow meter manufacturer instructions |
| Lamp Replacement | Annually or per manufacturer | Replace regardless of appearance | Power off, handle carefully to avoid breakage |
Experimental Protocols and Research Applications
Keratinocyte Viability Assay Under UV Exposure
A 2023 study published in Scientific Reports established a methodology for evaluating UV nail lamp effects on human keratinocyte viability, providing a transferable model for assessing UV cytotoxicity [50]. This protocol offers valuable insights into quantitative UV risk assessment:
Materials and Methods:
- Cell Line: Human keratinocyte HaCaT cell line (American Type Culture Collection)
- Culture Conditions: Dulbecco's Modified Eagle Medium supplemented with 10% fetal bovine serum and 1% penicillin/streptomycin at 37°C in 5% CO₂
- UV Source: 24/48 W UV nail drying machine emitting 365-405 nm range light with calculated intensity of 10 mW/cm²
- Experimental Groups: Cells exposed for 4 minutes (typical exposure) and 20 minutes (extended exposure), with and without SPF50 sunscreen protection
- Viability Assay: MTT assay measuring mitochondrial activity via formazan crystal formation after 2-hour incubation
Key Findings:
- 4-minute exposure (simulating typical use): insignificant 8% decrease in cell viability (p < 0.1)
- 20-minute exposure (extended use): significant 35% decrease in cell viability (p < 0.0001)
- SPF50 protection: significantly increased viability during UV exposure regardless of duration (p < 0.0001) [50]
This experimental model demonstrates the relationship between exposure duration and cellular damage, reinforcing the importance of limiting UV exposure times in laboratory protocols.
Research Reagent Solutions for UV Safety Studies
Table 4: Essential Research Reagents for UV Safety Assessment
| Reagent/Equipment | Function/Application | Specifications |
|---|---|---|
| HaCaT Keratinocyte Cell Line | In vitro model for assessing UV-induced cytotoxicity and DNA damage | Human keratinocyte line, suitable for MTT and comet assays |
| MTT Assay Kit | Quantitative measurement of cell viability and proliferation | 3-[4,5-dimethylthiazol-2-yl]-2,5-diphenyltetrazolium bromide |
| SPF50 Sunscreen | Evaluation of topical protective agents against UV exposure | Broad-spectrum UVA/UVB protection, standardized protection factor |
| Polycarbonate Face Shield | Personal protective equipment against UV radiation | ANSI Z87.1-1989 UV certification, full-face coverage |
| UV Radiometer | Quantitative measurement of UV intensity and dose | Calibrated for specific wavelength ranges (e.g., 254 nm, 222 nm) |
UV Lamp Applications in Biosafety Cabinets
Proper Implementation and Limitations
Within biosafety cabinets, UV germicidal lamps serve as supplementary disinfection method for interior surfaces, but must never be relied upon as the sole sterilization method [47]. Their proper implementation requires understanding of both capabilities and limitations:
- Supplementary Role: UV lamps provide additional decontamination between uses but must be combined with routine chemical disinfection protocols for comprehensive surface treatment [47].
- Surface Limitations: UV radiation functions as a line-of-sight disinfectant, meaning shadows, crevices, and undersurfaces may receive insufficient exposure for microbial inactivation [47].
- Safety Interlocks: Contemporary biosafety cabinets like the Thermo Scientific Herasafe 2025 BSC often include UV lamp options with safety interlocks that prevent operation during cabinet use [54].
- Ozone Production: Some UV devices emitting below 250 nm wavelengths may generate appreciable ozone levels in air, requiring additional ventilation considerations [47].
Modern biosafety cabinet designs increasingly emphasize alternative safety features over UV lamps, including advanced airflow systems, automated decontamination cycles, and ergonomic designs that facilitate more effective manual cleaning [54] [48]. When UV lamps are present in BSCs, their use should be guided by manufacturer specifications and institutional biosafety committee approvals.
Safety Workflow and Emergency Procedures
The following diagram illustrates the decision process for UV lamp safety protocols in laboratory settings:
Diagram 1: UV Safety Protocol Workflow. This flowchart outlines the decision process for safe UV lamp operation in laboratory settings.
All personnel must be trained to recognize symptoms of UV overexposure, which may include erythema (skin reddening), photokeratitis (eye pain, redness, sensitivity to light, or gritty sensation), or blurred vision [48]. Any suspected overexposure incidents require immediate medical assessment and follow institutional injury reporting procedures [48].
UV germicidal lamps represent valuable tools for enhancing laboratory safety when implemented with comprehensive understanding of their limitations, hazards, and maintenance requirements. Effective UV safety programs integrate engineering controls as the primary protection layer, supplemented by robust administrative procedures and appropriate personal protective equipment. The implementation of regular maintenance schedules including monthly cleaning and annual lamp replacement ensures optimal disinfection performance while minimizing potential hazards.
As UV technologies evolve, emerging options like 222 nm Far-UVC may offer enhanced safety profiles for continuous disinfection applications. However, regardless of technological advancements, the fundamental principle remains unchanged: UV radiation presents serious health risks that demand respect, knowledge, and disciplined adherence to safety protocols. By integrating the application notes and protocols outlined in this document, research facilities can harness the disinfection power of UV radiation while maintaining their fundamental commitment to researcher safety.
Within the context of proper biosafety cabinet (BSC) working procedures, preventing cross-contamination is paramount for protecting personnel, the environment, and the integrity of research materials, particularly in drug development [8]. Cross-contamination can compromise experimental results and pose significant biological risks. Proper waste handling and material removal are critical components of this defensive strategy, serving as the final control point before potential contaminants leave the contained environment of the BSC. This protocol details the standardized methods for these terminal processes to ensure maximum safety and protocol compliance.
Pre-Removal Preparation and Internal Organization
A foundational step in preventing cross-contamination occurs before any item is removed from the BSC. Proper preparation and organization of the workspace are crucial.
2.1 Work Area Organization: Maintain a strict zoning procedure within the BSC. Organize all materials so that clean items are never crossed over by contaminated ones [8]. Designate specific areas within the cabinet for clean supplies, active work, and waste collection. This spatial separation minimizes the risk of accidental contamination of clean items and the workspace.
2.2 Pre-Removal Decontamination: Before concluding work, all items that will remain in the BSC or are to be removed must be surface-decontaminated. This includes sample containers, equipment, and any sealed waste bags [8]. The cabinet's interior surfaces—sides, back, front, and the underside of the view screen—must also be wiped down with an appropriate disinfectant.
Table 1: Pre-Removal Decontamination and Organization Protocol
| Step | Procedure | Purpose | Key Considerations |
|---|---|---|---|
| 1. Zoning | Designate "clean" and "contaminated" zones within the BSC. | Prevents dirty items from passing over clean ones [8]. | Keep contaminated waste and materials downflow from active work and clean supplies. |
| 2. Surface Disinfection | Wipe down all interior surfaces (sides, back, front) with an appropriate disinfectant. | Eliminates residual pathogens from the work surface [8]. | If bleach is used, a second wipe with 70% ethanol or sterile water is needed to prevent corrosion of stainless steel [8]. |
| 3. Item Decontamination | Decontaminate the exterior of all materials (equipment, sealed bags) before removal. | Ensures the outer surface of any item exiting the BSC is non-hazardous. | Allow sufficient contact time for the disinfectant to be effective. |
Waste Segregation, Containment, and Removal
The correct handling of waste within the BSC is a critical control point for containing biohazards.
3.1 Segregation and Containment: Contaminated materials, including pipette tips, gloves, and other disposable items, must be placed directly into a biohazard bag or an autoclavable container with a lid within the BSC [8]. Sharp items must be disposed of in designated, puncture-resistant sharps containers. All containers must be kept closed within the cabinet until they are ready for sealing.
3.2 Sealing and Surface Decontamination: Before removal from the BSC, biohazard bags must be securely sealed, and the exterior surfaces of all containers must be wiped down with an appropriate disinfectant [8]. This crucial step ensures that the outer surface of the waste container is not a source of contamination during transport.
3.3 Post-Work Purge: Following the completion of work and the sealing of waste, allow the BSC to run for 2-3 minutes with no activity [8]. This purges the work area of any airborne contaminants that may have been stirred up during the cleanup process, resetting the cabinet to a clean state.
Diagram 1: Logical workflow for waste handling and removal from a Biosafety Cabinet.
Quantitative Data and Experimental Protocols
Table 2: Critical Timing and Workflow Metrics for Material Removal
| Parameter | Quantitative Measure | Experimental Justification |
|---|---|---|
| Post-Placement Purge | Wait 5 minutes before starting work [8]. | Allows cabinet airflow to purge airborne contamination from the work area after placing materials. |
| Post-Work Purge | Let BSC run for 2-3 minutes after work concludes [8]. | Allows cabinet airflow to purge airborne contaminants from the work area before the cabinet is opened for final waste removal. |
| Workflow Interruption | Perform no other activities if a centrifuge is operating in the BSC [8]. | Centrifuge fans create disruptive air currents sufficient for contaminated air to escape. |
Experimental Protocol: Validation of Surface Decontamination Efficacy
- Objective: To confirm that the selected disinfectant and wiping procedure effectively decontaminates the outer surface of a sealed waste container.
- Methodology:
- Preparation: Inside the BSC, prepare a simulated waste bag containing a non-pathogenic surrogate organism (e.g., Bacillus atrophaeus spores for chemical disinfectants). Seal the bag.
- Contamination: Lightly coat the exterior of the sealed bag with a safe, fluorescent tracer powder, simulating surface contamination.
- Decontamination: Wipe the bag's exterior following the standard laboratory procedure using the prescribed disinfectant (e.g., 70% ethanol).
- Sampling & Analysis:
- Use contact plates or swabs on the bag's surface pre- and post-decontamination to test for microbial growth.
- Examine the bag under UV light to check for removal of the fluorescent tracer, indicating physical cleaning efficacy.
- Expected Outcome: A significant log reduction in microbial recovery from the post-decontamination samples and complete removal of the fluorescent tracer, validating the procedure.
The Scientist's Toolkit: Essential Reagent Solutions
Table 3: Key Research Reagents for Decontamination and Safety
| Reagent/Material | Function/Application | Technical Notes |
|---|---|---|
| 70% Ethanol | Routine surface decontamination of BSC interiors and material exteriors [8] [55]. | Effective germicide with no corrosive effects on 304/316 stainless steel; requires no rinse [8] [55]. |
| Sodium Hypochlorite (Bleach) | High-level disinfection for spill management of specific biohazards [8]. | Corrosive to steel; surfaces must be rinsed with 70% ethanol or sterile water after use to prevent damage [8]. |
| Biohazard Bags (Autoclavable) | Primary containment for contaminated solid waste within the BSC. | Must be robust and sealable (e.g., autoclave bags with integrated ties). |
| Nitrile Gloves | Primary barrier for protecting the operator's hands and arms from contamination [8]. | Worn as part of PPE; double-gloving may be necessary for high-risk procedures [8] [55]. |
| Long-Sleeved Gown with Knit Cuffs | Protects the operator's body and minimizes shedding of skin flora into the work area [8]. | Critical PPE that minimizes personal contamination and protects the work area. |
Adherence to the detailed protocols for waste handling and material removal outlined in this document is non-negotiable for maintaining the integrity of the biosafety cabinet as a primary containment device. By rigorously applying these techniques—from proper internal segregation and sealing to the final surface decontamination and purging step—researchers and drug development professionals can effectively mitigate the risk of cross-contamination, thereby safeguarding personnel, the environment, and the validity of sensitive scientific investigations.
Within the framework of proper biosafety cabinet (BSC) working procedure research, maintaining the integrity of primary containment is paramount. While routine surface decontamination is a standard practice, the spill tray, also referred to as the drain pan or catch basin beneath the work surface, represents a critical yet often overlooked component. Located underneath the perforated work surface, this tray is designed to capture spills, drips, and debris that pass through the work surface grilles [10]. Failure to implement a rigorous deep cleaning protocol for the spill tray can lead to accumulated contaminants, including dust, broken glass, and microbial growth, which ultimately compromises the sterile work environment and can lead to contamination events [10] [8]. This application note provides a detailed, evidence-based protocol for accessing and decontaminating the spill tray, a fundamental procedure for ensuring continuous protection of personnel, products, and the environment.
When to Perform Deep Cleaning
The frequency of deep cleaning is contingent upon BSC usage intensity. The following table summarizes recommended frequencies and triggering events.
Table 1: Schedule for Spill Tray Deep Cleaning
| Scenario | Recommended Frequency/Action |
|---|---|
| Routine Preventive Maintenance | Every 6-12 months, depending on frequency and intensity of use [10]. |
| Following a Major Spill | Immediately after the spill has been contained and initial cleanup is performed [8]. |
| Visible Contamination | As soon as contamination is suspected or observed [10]. |
| Prior to Decontamination for Service | Before any scheduled maintenance, filter changes, or relocation [37]. |
Safety Precautions and Preparation
Personal Protective Equipment (PPE)
- Lab coat and appropriate gloves (pulled over the cuff of the lab coat) are mandatory [10] [8].
- Eye protection or a face shield is warranted based on the biological agents used and the disinfectants selected for the procedure [10].
Reagent and Material Preparation
Gather all necessary materials before commencing the procedure to minimize movement in and out of the BSC.
Table 2: Essential Reagents and Materials for Spill Tray Decontamination
| Item | Function |
|---|---|
| Agent-appropriate disinfectant (e.g., diluted bleach, peroxide-based) | To inactivate biological agents present in the BSC [10]. |
| 70% Ethanol or sterile water | To remove residual disinfectant that may cause corrosion (e.g., after using bleach) or leave residues [10] [8]. |
| Heavy-duty wipes or disposable towels | For applying disinfectant and wiping surfaces. Heavyweight materials are less likely to be drawn into internal airflow risers [8]. |
| Biohazard bag | For safe disposal of contaminated wipes and other solid waste [8]. |
| Extendable wet mop or reach-assisting tool | To safely clean all interior surfaces without having to place your head inside the BSC [10]. |
Step-by-Step Experimental Protocol
Preliminary Decontamination and Access
- Turn on the BSC: Allow the blower to run for several minutes to purge stagnant air from the work area [10].
- Decontaminate the Interior: Thoroughly disinfect all readily accessible interior surfaces, including the walls, work surface, and the interior of the glass sash, using an agent-appropriate disinfectant. Spray the disinfectant onto a wipe or towel rather than directly into the cabinet to avoid aerosolization and damage to internal components [10].
- Remove Items and Work Surface: Clear the BSC of all equipment. Carefully lift or remove the main work surface to gain access to the spill tray beneath it [10]. Consult your BSC's user manual for specific instructions on safe work surface removal.
Spill Tray Decontamination Procedure
- Initial Assessment and Disinfection: Inspect the spill tray for spills, dust, and debris. Soak a heavy-duty wipe or towel with disinfectant and thoroughly wet the entire surface of the spill tray, ensuring full contact. Allow the disinfectant to remain wet for the full contact time specified by the manufacturer to ensure efficacy [10].
- Mechanical Cleaning: Use the wipes to mechanically remove all solid debris and residues from the tray. Place all used wipes and debris directly into a biohazard bag within the BSC.
- Removing Corrosive Residues: If a corrosive disinfectant like bleach was used, a second wiping with 70% ethanol or sterile water is required to remove residual chlorine, which can corrode the stainless steel over time [8].
- Preventing Airflow Disruption: Exercise extreme caution when cleaning near the back of the tray and the exhaust grilles. Ensure that wipes are not pulled into the internal riser, as this can severely disrupt airflow and necessitate a full gaseous decontamination and recertification to remove the obstruction [8].
Reassembly and Post-Cleaning Validation
- Reinstall Work Surface: Once the spill tray is completely dry, carefully reposition and secure the main work surface.
- Final Surface Decontamination: Perform a final wipe-down of the work surface and interior walls with 70% ethanol to eliminate any potential contaminants introduced during reassembly.
- Waste Management: Seal the biohazard bag inside the BSC and surface-decontaminate its exterior before removal for proper disposal [8].
- Documentation: Record the date, scope of cleaning, and any observations in the laboratory's BSC maintenance log.
The following workflow diagrams the complete procedure from preparation to validation:
Relationship to Broader Biosafety Cabinet Maintenance
Spill tray decontamination is one integral component of a comprehensive BSC management program, which includes routine cleaning, annual certification, and gaseous decontamination. The following diagram illustrates this logical hierarchy of BSC maintenance procedures:
Deep cleaning that involves accessing the spill tray is considered a non-routine event. If this procedure is prompted by a specific spill or contamination incident, a risk assessment must be conducted. This assessment will determine if a subsequent gaseous decontamination (e.g., using vaporized hydrogen peroxide or paraformaldehyde) is required to decontaminate the entire cabinet, including internal plenums and filters, which cannot be accessed via manual cleaning [37]. This procedure must only be performed by approved vendors due to the significant hazards involved [37]. Furthermore, any time the BSC is moved for spill tray access or other maintenance, it must be recertified before being returned to service to ensure all protective functions are restored [8] [37].
Ensuring Compliance and Selecting the Right Containment Equipment
Biosafety Cabinets (BSCs) are primary containment devices essential for protecting personnel, products, and the environment from exposure to biohazardous agents. Class II BSCs, the most common type in clinical and research laboratories, provide this triple layer of protection through a combination of HEPA-filtered downflow and inflow air patterns. Adherence to established certification standards is not merely a regulatory formality but a critical component of laboratory safety culture, ensuring these complex engineering controls function as intended. The cornerstone of this system in the United States is the NSF/ANSI 49 standard, which provides the definitive framework for the design, construction, performance, and field certification of Class II Biosafety Cabinetry [38] [15].
Certification according to NSF/ANSI 49 assures laboratories of a BSC's reliable operation, durability, structural stability, and cleanability while setting limits on noise, illumination, and vibration [38]. This standard works in concert with guidelines from authoritative public health bodies. The CDC/NIH "Biosafety in Microbiological and Biomedical Laboratories" (BMBL) serves as an advisory document recommending best practices for the safe conduct of work from a biosafety perspective, emphasizing protocol-driven risk assessment [56]. Together, these standards form a comprehensive system for managing the risks associated with handling infectious agents at Biosafety Levels (BSL) 1 through 4, creating a secure environment for researchers, scientists, and drug development professionals [57] [15].
Governing Standards and Their Applications
NSF/ANSI 49: The Gold Standard for Class II BSCs
The NSF/ANSI 49 standard specifically applies to Class II (laminar flow) biosafety cabinets, which are designed to minimize inherent hazards when working with agents assigned to biosafety levels 1, 2, 3, or 4 [38] [15]. The standard undergoes periodic revision to incorporate technological advances and safety research. The 2024 edition introduced several significant updates that all users and certifiers must note, including updated language for the pressure decay test, revised field certification preconditions, and the removal of the drop testing requirement from previous versions [38]. A critical safety update in the current standard reduces the power failure disconnection time from 1 hour to 5 minutes, ensuring cabinets return to a safe state more quickly after a power interruption [38].
The standard differentiates between several types of Class II BSCs, each designed for specific applications and offering different levels of containment, particularly regarding the handling of volatile chemicals. The classification and key specifications are detailed in Table 1 below.
Table 1: Class II Biosafety Cabinet Types and Specifications per NSF/ANSI 49
| BSC Type | Minimum Inflow Velocity (ft/min) | Exhaust System | Recirculation | Common Applications |
|---|---|---|---|---|
| Type A1 | 75 [15] | Recirculated to room or through external exhaust [15] | High | Basic microbiological work; not for volatile chemicals [38] |
| Type A2 | 100 [15] | Recirculated to room or through external exhaust [15] | High | General purpose microbiology; low-level volatile agents |
| Type B1 | 100 [15] | Partial direct exhaust (contaminated air) [15] | Partial | Work with low levels of volatile toxic chemicals |
| Type B2 | 100 [15] | Total direct exhaust (no recirculation) [15] | None | Work with significant volumes of volatile toxic chemicals |
| Type C1 | 100 [15] | Can switch between A1 and B1 modes [15] | Variable | Flexible facilities handling both microbiological and chemical hazards |
CDC/NIH BMBL Guidelines and Risk Assessment
While NSF/ANSI 49 focuses on the equipment itself, the Biosafety in Microbiological and Biomedical Laboratories (BMBL), now in its 6th Edition, provides the overarching biosafety framework [56]. The BMBL is an advisory document that emphasizes its core principle is protocol-driven risk assessment [56]. It is not intended to be a rigid regulatory document but a tool for assessing risks and proposing mitigation steps in biomedical and clinical laboratories, acknowledging that a single document cannot identify all possible risk combinations and mitigations [56].
For work with specific agents such as SARS-CoV-2, the CDC recommends that laboratories perform a site-specific and activity-specific comprehensive risk assessment in collaboration with biosafety professionals, laboratory management, and other scientific and safety experts [57]. At a minimum, Biosafety Level 2 (BSL-2) facilities, practices, and procedures are recommended for diagnostic research, anatomic pathology, environmental testing, and virus propagation utilizing SARS-CoV-2 [57]. The BMBL guidelines stress that all clinical specimens should be treated as potentially infectious materials and that Standard Precautions must be followed, including the use of appropriate personal protective equipment (PPE) [57].
BSC Certification Protocols and Methodologies
Certification is the process of testing and verifying that a biosafety cabinet meets all the performance requirements of the NSF/ANSI 49 standard. This process is required upon installation, annually thereafter, after any repair that might affect containment, and whenever the cabinet is relocated [58] [36] [59]. The certification process involves a series of precise tests performed by qualified technicians using calibrated instruments.
Diagram: The Biosafety Cabinet Certification Workflow
Pre-Assessment and Visual Inspection
Before formal testing begins, a thorough pre-assessment is crucial. The certifier will conduct a visual inspection of the cabinet's physical condition, looking for any signs of damage, corrosion, or deterioration that could compromise containment [58]. This stage also involves reviewing the cabinet's maintenance history, certification records, and ensuring it is correctly positioned in the laboratory, away from doors, windows, and high-traffic areas that could disrupt airflow [36].
Performance Testing: Detailed Methodologies
The core of the certification process involves a series of performance tests designed to verify every aspect of the BSC's containment and protection capabilities. The key tests and their methodologies are summarized in Table 2 below.
Table 2: Essential BSC Certification Tests and Methodologies
| Test | Purpose | Standard Protocol | Acceptance Criteria |
|---|---|---|---|
| Inflow Velocity | Verifies personnel protection by ensuring adequate air curtain [58] | Measure air velocity at the front opening [58] | Type A1: ≥75 ft/min; A2, B1, B2, C1: ≥100 ft/min [15] |
| Downflow Velocity | Ensures unidirectional airflow for product protection [58] | Measure velocity of air descending through work area [58] | Uniform and consistent flow per manufacturer's specifications |
| HEPA Filter Integrity | Confirms no leaks in HEPA filters, ensuring environmental protection [58] | Introduce challenge aerosol (e.g., PAO, DOP) upstream; scan filter face and gaskets with photometer [58] | No leakage exceeding 0.01% of upstream challenge aerosol concentration |
| Airflow Smoke Pattern | Visualizes airflow to detect dead spots or turbulence [58] | Use a small source of visible fog to trace airflow patterns [58] | Smooth, coherent flow toward front and rear grilles without escape |
| Cabinet Leak (Pressure Decay) | Tests structural integrity of cabinet plenums [38] | Pressurize cabinet to 2.5" w.g. and monitor pressure drop | Updated language in NSF/ANSI 49-2024 specifies acceptable decay rate [38] |
Other critical tests include electrical safety checks, alarm and interlock verification (e.g., sash alarm), vibration, illumination, and noise level tests, the latter having received updated language in the 2024 standard [38] [58]. All testing equipment, such as anemometers and photometers, must be properly calibrated to ensure data accuracy and regulatory compliance [58].
Practical Implementation and Compliance
Certification Management and Documentation
Upon successful completion of testing, the certifier provides two key documents: a certification label affixed to the cabinet and a detailed test report [58]. The label displays the certification date, expiration date, and the certifier's contact information. The comprehensive report includes all test results, instrument model numbers and calibration dates, any noted deficiencies, and corrective actions taken. This documentation is essential for regulatory audits and internal quality assurance programs [58].
Laboratories must maintain a rigorous schedule for annual recertification [36] [59]. Furthermore, recertification is mandatory after any event that could disrupt the cabinet's containment, including relocation, replacement of HEPA filters, or any repair to internal components affecting airflow or balance [58] [36].
The Scientist's Toolkit: Reagents and Materials for BSC Testing and Maintenance
Proper certification and maintenance require specific reagents and materials. The following table details key items used by certifiers and laboratory staff.
Table 3: Essential Research Reagent Solutions for BSC Testing and Maintenance
| Item | Function | Application Notes |
|---|---|---|
| Disinfectants (e.g., Wescodyne) | Surface decontamination before and after work [36] | Follow manufacturer's dilution, contact time, and safe handling instructions [57] |
| EPA-Registered Disinfectants | Decontamination against specific pathogens like SARS-CoV-2 [57] | Check EPA's List N for qualified disinfectants [57] |
| HEPA Filter Challenge Aerosol | Integrity testing of HEPA filters [58] | Commonly polyalphaolefin (PAO) or diocylphthalate (DOP) |
| Visible Fog Fluid | Visualizing airflow patterns during smoke pattern test [58] | Non-toxic, mineral oil-based fluids are typically used |
| 70% Ethanol / Hydrogen Peroxide | Surface decontamination; alternatives for specific needs [2] | Peracetic acid and UV light are also mentioned, though UV efficacy is limited [2] [36] |
| Calibrated Anemometer | Measuring inflow and downflow air velocities [58] | Must be regularly calibrated to ensure measurement accuracy [58] |
| Photometer | Detecting aerosol leakage during HEPA filter testing [58] | Used in conjunction with challenge aerosol generator |
Integrating BSCs into the Laboratory Biosafety Program
A certified BSC is only one component of a comprehensive biosafety program. Laboratory personnel must be trained in proper BSC techniques to avoid compromising the containment. Key user practices include:
- Planning and Preparation: Allow the BSC to operate for at least 5-10 minutes with the blower on to purge airborne contaminants before beginning work [58] [36].
- Work Zone Management: Perform all work at least 6 inches back from the front intake grille [36]. Arrange materials to separate clean and contaminated items, working from "clean to dirty" [36].
- Minimizing Disruptions: Avoid rapid movements, do not block the front or rear grilles, and ensure others do not walk quickly behind the user during work, as this can disrupt the protective air curtain [36].
- Prohibited Items: Open flames are not permitted inside BSCs as they disrupt airflow and can damage HEPA filters [36]. Equipment that causes turbulence (e.g., centrifuges) should be placed toward the rear of the cabinet, and all other work should stop while it operates [36].
Finally, it is critical to understand that BSCs are not fume hoods. Most Class II BSCs are not designed for work with significant volumes of volatile chemicals or radioactive materials. Laboratories must evaluate their needs and, if required, install a Class II Type B2 cabinet (total exhaust) or other appropriate ventilation for such hazards [36].
Adherence to NSF/ANSI 49 and CDC/NIH BMBL guidelines is a non-negotiable standard for modern laboratories handling biohazardous materials. A rigorous, protocol-driven approach to BSC certification and use forms the foundation of primary containment, directly safeguarding the health of researchers and the integrity of their work. As standards evolve, with the 2024 edition of NSF/ANSI 49 introducing critical updates, the laboratory community must remain vigilant in maintaining compliance. Ultimately, a certified biosafety cabinet, operated by a well-trained professional within a culture of safety, is an indispensable asset in the relentless pursuit of scientific discovery and drug development.
Within the context of proper biosafety cabinet working procedure research, the selection of appropriate primary containment equipment is a fundamental aspect of laboratory safety and experimental integrity. Biological Safety Cabinets (BSCs), chemical fume hoods, and laminar flow hoods, while similar in appearance, serve distinct purposes and offer different protection profiles [60]. Misidentification or improper use of this equipment can lead to serious consequences, including personnel exposure to hazardous agents, contamination of experiments, and environmental release [61] [62]. This application note provides a detailed comparative analysis of these three types of equipment, focusing on their protection capabilities, operational mechanics, and appropriate applications, thereby forming a critical component of a robust laboratory biosafety protocol.
Equipment Classification and Protection Objectives
The core difference between BSCs, fume hoods, and laminar flow hoods lies in their protection objectives. Understanding what or who is being protected is the first step in selecting the correct equipment.
- Biological Safety Cabinets (BSCs) are engineered to provide triple protection: they safeguard the personnel (the user), the product (the experimental material), and the environment (the laboratory and outside world) from biological particulates and aerosols [61] [60]. This multi-directional protection is achieved through HEPA filtration of both incoming and exhaust air, and a defined airflow pattern that creates a barrier against contamination.
- Chemical Fume Hoods are designed with a single, critical objective: to protect the personnel from inhaling hazardous chemical fumes, vapors, and particulates [61] [63]. They operate by capturing contaminants at the source and exhausting them outside the building, offering no protection to the product inside from contamination.
- Laminar Flow Hoods (or Clean Benches) have a protection goal that is the inverse of a fume hood. They are designed solely to protect the product or process from contamination by particulate matter by providing a constant, unidirectional flow of HEPA-filtered air over the work surface [64] [62]. They provide no protection for the user and should never be used with hazardous materials.
The following diagram illustrates the primary protection scope of each device, highlighting the fundamental differences in their safety objectives.
Comparative Operational Parameters
The distinct protection goals of each cabinet are achieved through fundamentally different engineering and operational mechanisms, particularly regarding airflow patterns and filtration systems. A summary of key comparative data is provided in the table below.
Table 1: Comparative Analysis of BSCs, Fume Hoods, and Laminar Flow Hoods
| Parameter | Biological Safety Cabinet (BSC) Class II | Chemical Fume Hood | Laminar Flow Hood |
|---|---|---|---|
| Primary Protection | Personnel, Product, Environment [61] [60] | Personnel only [61] [65] | Product only [64] [62] |
| Primary Hazard Type | Biological particulates (bacteria, viruses, cell cultures) [61] | Chemical fumes, vapors, volatile compounds [61] [63] | Non-hazardous particulate contamination [62] |
| Airflow Pattern | Laminar downflow of HEPA-filtered air over work surface; inward air curtain at front opening [61] | Inward flow of unfiltered room air across work surface, directed to exhaust [61] | Unidirectional (horizontal or vertical) laminar flow of HEPA-filtered air over work surface [64] |
| Filtration | HEPA filters on both supply and exhaust air (Class II) [61] [65] | Typically no filtration; direct exhaust to outside [61] | HEPA filtration of supply air only; no containment of exhaust [64] |
| Air Recirculation | Yes (e.g., 70% recirculated, 30% exhausted in Class II A2) [65] | No; 100% exhaust to exterior [61] | 100% recirculation back into the laboratory room [64] |
| Typical Applications | Microbiological cultures, tissue culture, work with infectious agents [61] [2] | Handling volatile solvents, acid digestions, toxic powder weighing [61] [63] | Preparation of sterile media, electronic assembly, non-hazardous drug compounding [64] [62] |
Detailed Analysis of Biosafety Cabinets
BSCs are the most complex of the three devices, with different classes offering varying levels of protection. Class II BSCs, the most common type, are further subdivided. The selection logic for the appropriate type of BSC based on the application's specific needs can be visualized in the following workflow.
- Class I BSCs: Provide personnel and environmental protection, but not product protection. They are suitable for enclosing equipment or procedures that generate aerosols when product sterility is not required [65] [60].
- Class II BSCs: Provide protection for personnel, product, and the environment. They are the workhorses for microbiological and cell culture work [65] [60]. The main types include:
- Type A2: Recirculates ~70% of air and exhausts ~30% through a HEPA filter. It can be vented back into the room or externally via a canopy connection. It is the most common type found in laboratories [65] [64].
- Type B1 & B2: These are hard-ducted to the building exhaust. Type B1 cabinets recirculate a portion of air, while Type B2 cabinets are 100% exhausted. They are used when working with low levels of volatile toxic chemicals or radionuclides in conjunction with biological agents [65].
- Class III BSCs: These are gas-tight, totally enclosed cabinets providing the highest level of containment for BSL-4 agents. Manipulations are performed via attached rubber gloves, and all air is HEPA-filtered upon entry and exit [65] [62].
Experimental Protocols for Safe Operation
Protocol: Standard Operating Procedure for a Class II BSC
This protocol is essential for maintaining the integrity of the biosafety cabinet's containment and ensuring aseptic conditions.
A. Pre-Use Procedures and Preparation
- Certification Check: Verify the BSC has a current certification sticker (within the last 12 months) [8] [22].
- Personal Protective Equipment (PPE): Don a buttoned lab coat, gloves, and any other PPE as determined by risk assessment [8] [22].
- Decontamination: Wipe down all interior surfaces of the BSC with an appropriate disinfectant (e.g., 70% ethanol). If using bleach, a second wipe with sterile water or ethanol is needed to prevent corrosion [8].
- Material Preparation: Assemble all necessary materials and disinfect the external surfaces before introducing them into the BSC. Place items in a logical order from "clean" to "dirty" across the work surface [8].
- Purge Time: Turn on the BSC and allow it to run for at least 5 minutes with no activity to purge airborne contaminants from the work area [8] [22].
B. Work Execution and Practices
- Sash Position: Ensure the sash is at the proper operating height, typically 8-10 inches, as specified by the manufacturer [22].
- Work Zone: Perform all work at least 4 inches inside the front grille [8]. Keep materials away from the front intake and rear exhaust grilles to avoid disrupting airflow [8].
- Movement and Technique: Minimize rapid arm movements into and out of the cabinet and across the work zone to prevent disruption of the protective air curtain [8]. Use slow, deliberate motions.
- Aseptic Technique: Employ strict aseptic technique at all times. Work from clean areas to contaminated areas across the work surface.
- Avoid Flames: Do not use Bunsen burners inside a BSC. The flame creates turbulence, disrupts airflow, and the heat can damage HEPA filters. Use sterile disposable loops or micro-incinerators instead [8].
C. Post-Use Cleanup and Decontamination
- Contain Waste: Seal all biohazard bags and decontaminate their surfaces before removing them from the BSC [8].
- Surface Decontamination: After removing all materials, wipe down all interior surfaces of the BSC with an appropriate disinfectant [8] [22].
- Final Purge: Allow the BSC to run for an additional 2-3 minutes with no activity to purge any generated aerosols [8].
- Shutdown: Turn off the blower and lights if the cabinet is not required to run continuously [8].
Protocol: Verification of Fume Hood Containment
This protocol outlines the methodology for qualitatively verifying the containment of a chemical fume hood, a critical safety check.
- Principle: To visually assess the capture and containment efficiency of the fume hood by generating a simulated fume (smoke) and observing its movement under different sash conditions and with simulated user interference.
- Reagents and Equipment:
- Smoke tube or smoke generator.
- Tissue meter or a lightweight string/thread.
- Methodology:
- Pre-Check: Ensure the fume hood performance indicator (manometer, digital monitor) shows the hood is operating within the safe range [63].
- Face Velocity Check (Qualitative): Attach a tissue or thread to the end of a ruler and slowly bring it towards the hood face. Observe the point at which it is definitively pulled towards the hood. This should occur several inches in front of the sash.
- Containment Test:
- With the sash at the operational height, gently release a small amount of smoke from the smoke generator at various locations across the hood face and around the edges of the sash.
- Observe the path of the smoke. All smoke should flow smoothly into the hood without spilling into the room.
- Repeat the test while simulating a person walking past the hood at a normal pace to check for disruption from external air currents.
- Interpretation of Results: Any spillage, backflow, or turbulence that pushes smoke out of the hood and into the laboratory indicates a containment failure. The hood should be taken out of service and reported to environmental health and safety for professional testing and repair [63].
The Scientist's Toolkit: Essential Research Reagent Solutions
The following table details key reagents and materials essential for the safe and effective operation of biological safety cabinets and the maintenance of aseptic conditions.
Table 2: Essential Reagents and Materials for BSC Work
| Item | Function/Application | Key Considerations |
|---|---|---|
| 70% Ethanol | Primary surface disinfectant for routine decontamination of the BSC interior and material surfaces [8]. | Effective against a broad spectrum of microbes; evaporates quickly without residue; less corrosive than other disinfectants. |
| Sodium Hypochlorite (Bleach) | Chemical disinfectant for surface decontamination, particularly effective against viral agents [8]. | Requires correct dilution (e.g., 1:10); corrosive to stainless steel and must be rinsed with sterile water or 70% ethanol after use [8]. |
| HEPA In-line Filter | Placed in the vacuum line during aspiration to protect the central vacuum system and the environment from biohazardous aerosols [22]. | Must be checked and replaced regularly; proper decontamination before disposal is required. |
| Germicidal Soap | For hand and arm hygiene before and after working in the BSC to minimize the introduction and spread of contaminants [8]. | Critical for maintaining aseptic technique and personal hygiene. |
| Appropriate Lab Attire | Long-sleeved, back-fastening lab coat with knit cuffs and gloves to minimize shedding of skin flora and protect the user [8] [62]. | Prevents contamination of the experiment and protects the user's skin and street clothes. |
| Flameless Incinerator / Disposable Loops | Provides a sterile method for inoculating cultures without the disruptive turbulence caused by an open Bunsen burner flame [8]. | Preserves the unidirectional airflow integrity within the BSC. |
The deliberate selection and correct use of BSCs, fume hoods, and laminar flow hoods are non-negotiable components of professional laboratory practice. The choice is unequivocal: chemical fume hoods for personnel protection against chemical hazards; laminar flow hoods for product protection in non-hazardous work; and biosafety cabinets for comprehensive protection when handling biological agents. Integrating this knowledge with rigorously followed standard operating procedures, as outlined in the provided protocols, forms the foundation of a safe and productive research environment, ultimately ensuring the safety of personnel, the integrity of research, and the protection of the environment.
Biosafety Cabinets (BSCs) are fundamental engineering controls in research and drug development, providing essential protection for personnel, products, and the environment when working with biohazardous materials [60]. The integrity of this protection depends not only on proper daily use but also on rigorous decontamination procedures during key operational events. Decontamination prior to servicing, relocation, or declaring equipment as surplus is a critical risk mitigation step, ensuring that hazardous biological agents are completely inactivated before the cabinet's containment is physically breached or compromised [66] [67]. This protocol document, framed within a broader thesis on proper biosafety cabinet working procedures, outlines the standardized methodologies for achieving this essential decontamination, safeguarding laboratory staff, certification technicians, and the wider community from potential exposure.
When is Decontamination Required?
Gas or vapor decontamination is a mandatory procedure in several specific scenarios where routine surface cleaning is insufficient. This process targets contamination hidden in internal plenums, HEPA filters, and blower assemblies that cannot be accessed for manual cleaning [66].
Table 1: Scenarios Requiring Full Decontamination
| Scenario | Primary Rationale | Supporting Standards/Guidance |
|---|---|---|
| Before replacing HEPA filters | Prevents exposure to concentrated pathogens trapped within the filter media during handling and disposal [8] [45]. | NSF/ANSI 49, Manufacturer's Guidelines [8] |
| Prior to major internal maintenance or repairs | Protects service technicians from exposure during work on fans, motors, or internal electronics [66]. | Institutional Biosafety Policies [67] |
| After a significant biological spill or contamination event | Addresses widespread or aerosolized contamination that may have entered the cabinet's internal airflow system [66]. | Laboratory Biosafety Manuals [8] |
| Before relocating or moving a BSC | Prevents the release of agents during physical transport and protects facilities personnel [45] [67]. | CDC/NIH BMBL, Institutional EH&S Policies [8] [45] |
| Before decommissioning or sending to surplus | Ensures the cabinet is safe for handling by non-laboratory personnel and for eventual resale or disposal [66] [45]. | Institutional Surplus Property Regulations [67] |
| When switching between different biological agents | Prevents cross-contamination of research materials, crucial for maintaining experimental integrity [66]. | Good Laboratory Practice (GLP) |
Decontamination Methods: From Surface Cleaning to Gas Decontamination
A clear distinction must be made between routine cleaning and full decontamination. Routine surface decontamination involves wiping down interior surfaces with an appropriate disinfectant before and after each use [10]. In contrast, the scenarios in Table 1 require a more comprehensive approach using gaseous or vaporized sterilants to ensure contamination is eradicated from all internal components [66].
Selection of Chemical Sterilants
The choice of sterilant is a critical decision that depends on the biological agents used, material compatibility, and safety profile. The following table compares the most common sterilants used for full BSC decontamination.
Table 2: Comparison of Common Gas/Vapor Sterilants for BSC Decontamination
| Sterilant | Mechanism of Action | Advantages | Disadvantages & Safety Considerations |
|---|---|---|---|
| Formaldehyde Gas (CH₂O) | Alkylating agent that reacts with proteins and nucleic acids [66]. | Highly effective and widely used; proven penetration capability [68]. | Classified as a human carcinogen; requires complex neutralization and extended aeration; hazardous residue management [66] [45]. |
| Vaporous Hydrogen Peroxide (VHP) | Strong oxidant that damages cellular components through free radical formation [68]. | Breaks down into water and oxygen, leaving minimal residue; safer for personnel and environment [68]. | Requires precise humidity control; may not be compatible with all materials (e.g., some plastics and metals) [66]. |
| Chlorine Dioxide (ClO₂) | Oxidizing agent that disrupts metabolic pathways. | Fast-acting with strong sporicidal activity [66]. | Requires precise humidity control; can be corrosive to some materials [66]. |
| Peracetic Acid (PAA) Dry Fogging | Strong oxidation, similar to hydrogen peroxide [68]. | Effective sporicide at cold temperatures; produces innocuous byproducts [68]. | Requires specialized fogging equipment; potential for corrosion [68]. |
Experimental Protocol for Validated Decontamination
The following methodology is adapted from peer-reviewed validation studies to ensure complete decontamination of all internal areas of a BSC, including HEPA filter pleats and plenums [68].
Objective: To validate the efficacy of a gas/vapor decontamination cycle for a Class II Type A2 BSC. Principle: Biological Indicators (BIs) containing a high population of a known resistant microorganism (e.g., Geobacillus stearothermophilus spores) are placed at critical locations within the BSC. A successful cycle inactivates all BIs [68].
Materials and Reagents:
- Biological Indicators (BIs): Commercially available spore strips or vials of Geobacillus stearothermophilus [68].
- Chemical Sterilant: e.g., VHP or PAA, as described in Table 2.
- Culture Media: Trypticase soy broth with phenol red indicator.
- Incubator: Capable of maintaining 56°C ± 2°C.
- Appropriated PPE: Including respirators, gloves, and chemical-resistant suits.
- Gas/Vapor Generator: Calibrated equipment for the chosen sterilant.
Procedure:
- BI Placement: Place BIs at a minimum of 15 critical locations within the BSC. Key placements include:
- In the pleats of the supply and exhaust HEPA filters (both clean and dirty sides).
- Within the common plenum (back, front, and sides).
- On the supply diffuser in the work area.
- On the back wall of the work area.
- Below the work tray (left and right sides) [68].
- Cabinet Preparation: Seal the front opening of the BSC with plastic sheeting if it is not located in a sealable room. For BSCs in a fumigatable room, ensure all gaps (e.g., around doors) are sealed with duct tape [68].
- Operational Status: Crucially, the BSC must be operational and running during the decontamination cycle. Research shows that operating the cabinet's blower is essential for circulating the fumigant through the internal plenums and across the HEPA filters, ensuring complete decontamination. Decontamination fails when the cabinet is off [68].
- Fumigation Cycle: Introduce the sterilant according to a previously validated cycle. Parameters (e.g., dehumidification phase, injection rate, concentration, contact time) must be strictly followed [68].
- Aeration: After the cycle completes, allow for a full aeration period as defined by the protocol for the specific sterilant to ensure safe re-entry.
- BI Retrieval and Incubation:
- Aseptically retrieve all BIs.
- Transfer each BI to a tube of trypticase soy broth.
- Incubate all tubes at 56°C for 7 days.
- Observe daily for color change (from pink to yellow) and turbidity, which indicate bacterial growth and decontamination failure [68].
Validation Criterion: Decontamination is considered successful only if all incubated BIs show no growth after the 7-day incubation period [68].
The logical relationships and workflow for this decontamination protocol are summarized in the following diagram:
The Scientist's Toolkit: Key Reagents and Materials for Decontamination
Table 3: Essential Materials for BSC Decontamination and Validation
| Item | Function / Purpose |
|---|---|
| Geobacillus stearothermophilus Biological Indicators (BIs) | Gold-standard for validating sterility. Provides a defined population of highly resistant bacterial spores to challenge and verify the decontamination cycle [68]. |
| Chemical Sterilants (VHP, PAA, Formaldehyde, ClO₂) | The active agent for inactivating biological contaminants. Selection is based on efficacy, safety, and material compatibility (see Table 2) [66] [68]. |
| Trypticase Soy Broth with Phenol Red | Culture medium used to incubate BIs post-cycle. A color change (pink to yellow) and turbidity indicate BI survival and decontamination failure [68]. |
| Calibrated Vapor/Gas Generator | Equipment designed to safely vaporize and distribute the sterilant at a controlled rate and concentration, ensuring consistent and repeatable results [68]. |
| Personal Protective Equipment (PPE) | Includes respirators, chemical-resistant suits, gloves, and safety goggles. Essential for protecting personnel during the handling of sterilants and the decontamination process [69]. |
| Airflow Monitoring Equipment (Anemometer) | Used during re-certification to measure inflow and downflow velocities, ensuring the BSC's containment is restored after decontamination and reassembly [13]. |
| HEPA Filter Integrity Test Equipment (Aerosol Generator & Photometer) | Used to scan for leaks in the HEPA filters and their seals after decontamination and filter replacement, a critical step in recertification [13]. |
Post-Decontamination Procedures and Recertification
Once decontamination is complete and validated, the BSC must be returned to a certified operational state before it can be used for biohazardous work.
- Reassembly and Inspection: If the BSC was disassembled for service or filter change, reassemble it according to the manufacturer's specifications. Visually inspect all surfaces for chemical residues or any signs of damage [66].
- Recertification: This is a mandatory step performed by qualified personnel. Recertification involves a series of tests to NSF/ANSI 49 or equivalent standards, including [45] [13]:
- Airflow Velocity Measurements: Verifying correct inflow and downflow.
- HEPA Filter Integrity Testing: Ensuring no leaks in the supply and exhaust filters.
- Airflow Smoke Pattern Visualization: Confirming proper laminar flow and containment.
- Particle Counts: For Class II cabinets, verifying the Grade A/ISO 5 air quality in the work zone [13].
- Documentation: Maintain complete records of the decontamination event (including BI results) and the subsequent recertification report. This documentation is critical for regulatory compliance, auditing, and tracking the cabinet's maintenance history [66] [45].
Adherence to strict decontamination protocols prior to servicing, relocating, or surplussing a biosafety cabinet is a non-negotiable component of a comprehensive laboratory safety program. By following the validated methodologies and safety precautions outlined in these application notes, research institutions and drug development facilities can effectively mitigate the risks associated with biohazardous materials, ensuring the protection of their most valuable assets: their personnel, their research, and the public.
Within the framework of proper biosafety cabinet (BSC) working procedures, meticulous documentation and record-keeping are not merely administrative tasks; they are critical components of the quality assurance and safety culture in research and drug development. Consistent and accurate logs provide verifiable evidence that personnel are properly trained and that primary containment equipment is maintained to the standards required for safeguarding personnel, products, and the environment. This protocol outlines detailed methodologies for establishing and maintaining a robust documentation system for BSC certification and personnel training, ensuring compliance with regulatory requirements and upholding the integrity of research involving biohazardous materials.
The Scientist's Toolkit: Essential Materials for BSC Documentation
The following table details key resources and materials essential for establishing and maintaining an effective BSC documentation system.
Table 1: Essential Materials for BSC Documentation and Record-Keeping
| Item | Function |
|---|---|
| NSF/ANSI Standard 49 | The foundational document establishing performance criteria and minimum requirements for the design, manufacture, and testing of Class II BSCs. It is the benchmark for all certification activities [70] [71]. |
| Biosafety in Microbiological and Biomedical Laboratories (BMBL) | A key guideline referenced by the NSF that identifies the use of accredited field certifiers and outlines biosafety levels, informing training and operational protocols [71] [1]. |
| Certification Test Reports | Detailed reports generated by accredited field certifiers after testing. Institutions are advised to retain these as proof of compliance [70] [71]. |
| Digital Training Platform (e.g., Workday Learning) | Institutional systems used to assign, deliver, and automatically record completion of required safety training courses, ensuring traceability [70] [72]. |
| Laboratory-Specific Training Log | A locally maintained record (e.g., a signed paper form or digital spreadsheet) that documents hands-on training and competency assessments conducted by the Principal Investigator or lab supervisor [70]. |
| Standard Operating Procedure (SOP) | A lab-specific document detailing the proper use, cleaning, and decontamination procedures for the BSC, serving as a primary training resource and reference [70] [59]. |
Record-Keeping Protocols for Biosafety Cabinet Certification
Certification Requirements and Scheduling
Biological safety cabinets must be professionally certified to ensure they contain aerosols and function as a primary barrier. The following events trigger a mandatory certification [70] [59]:
- After initial installation
- Annually for BSCs used in BSL-1 and BSL-2 laboratories
- Every six months for BSCs in BSL-3 laboratories [70]
- After the cabinet is moved or repaired
- Before disposal or decommissioning
Certification must be performed in accordance with NSF/ANSI Standard 49 by an accredited professional [70] [71]. No work is permitted in a BSC with an expired certification [70].
Quantitative Data for Certification Tracking
Maintaining a summary log of all BSCs in a laboratory or facility is essential for management. The following table provides a structured format for tracking key certification data.
Table 2: Biosafety Cabinet Certification Log
| BSC ID | Location (Room) | BSC Class & Type | Last Cert. Date | Cert. Due Date | Certifying Agent | Report Location |
|---|---|---|---|---|---|---|
| BSC-01 | Lab 310 | Class II, Type A2 | 2024-10-15 | 2025-10-15 | Integra Testing | Digital Archive, Folder "BSC_Certs" |
| BSC-02 | Lab 315 | Class II, Type B2 | 2024-11-01 | 2025-05-01 | Allometrics | Lab Safety Binder, Sec. 3 |
| (...add additional rows as needed...) |
Experimental Protocol: Managing the Certification Process
- Initiate Service Request: Contact the approved certification provider (e.g., Integra Testing) when a certification event is upcoming or required [70].
- Prepare the BSC: Prior to the certifier's arrival, laboratory personnel must clear the cabinet of all items and disinfect all interior surfaces with an appropriate disinfectant, such as a 1:10 bleach solution followed by a 70% ethanol rinse to prevent corrosion [70].
- Retain Documentation: Upon completion, obtain the official certification report from the field certifier. This report documents the results of all performance tests, including inflow velocity, HEPA filter integrity, and downflow velocity.
- Update Records: File the report in a designated location (e.g., a laboratory safety binder or digital asset management system) and update the master BSC Certification Log (Table 2) with the new certification date and the next due date.
Record-Keeping Protocols for Personnel Training
Training Requirements and Frequencies
The Principal Investigator (PI) holds ultimate responsibility for ensuring all personnel are trained and proficient in BSC use. This training often combines institutional online courses with hands-on, lab-specific instruction [70]. Training must be documented and refreshed on a regular schedule.
Table 3: Biosafety Cabinet Training Requirements and Frequencies
| Training Type | Core Content | Typical Frequency | Responsible Party |
|---|---|---|---|
| Institutional Online Course | BSC types, design features, principles of protection (personnel, product, environment) [72]. | Every 3 years [72] | Institution (EHS/OH&S) via learning管理系统 (e.g., Workday) [70]. |
| Lab-Specific Practical Training | Aseptic technique, workflow (clean-to-dirty), proper materials placement, correct use of disinfectants, emergency procedures [70]. | Upon initial assignment and when procedures change [70]. | Principal Investigator / Lab Supervisor [70]. |
| Biosafety Fundamentals (BSL2/2+) | Risk assessment, facility requirements, and practices for the corresponding biosafety level [72]. | Every 3 years [72] | Institution (EHS/OH&S). |
| Bloodborne Pathogens | Requirements and best practices for working with human-derived materials [72]. | Annually [72] | Institution (EHS/OH&S). |
Quantitative Data for Training Tracking
A laboratory-specific training log should be maintained to provide a clear audit trail. The following table offers a template for tracking the competency of all personnel.
Table 4: Laboratory Personnel BSC Training Log
| Name | Initial Online Training Date | BSC Model-Specific Practical Training Date | Trainer Initials | Next Refresher Due |
|---|---|---|---|---|
| Jane Doe | 2023-05-10 | 2023-05-15 | BWC | 2026-05-10 |
| John Smith | 2024-01-22 | 2024-01-30 | JEC | 2027-01-22 |
| (...add additional rows as needed...) |
Experimental Protocol: Implementing a Training and Documentation Program
- Develop a Lab SOP: Create a detailed Standard Operating Procedure for BSC use that covers decontamination, materials placement, and emergency spill response.
- Schedule Institutional Training: Ensure new personnel complete the required online institutional courses (e.g., "Biological Safety Cabinet" and "Biosafety Fundamentals") before beginning work in the BSC [72].
- Conduct Practical Demonstration: The PI or designee must provide hands-on training within the lab using the specific BSC model. This session should cover:
- Assess and Document Competency: The trainer observes the trainee performing a mock procedure and confirms competency. Upon successful completion, the trainer signs and dates the Laboratory Personnel BSC Training Log (Table 4).
- Maintain Centralized Files: Keep all training records—both digital certificates from institutional training and the signed lab-specific log—in a designated laboratory safety binder that is readily accessible for audits.
Workflow for BSC Certification and Training Management
The following diagram illustrates the logical relationship and workflow for maintaining compliance in BSC certification and personnel training, highlighting their interconnected nature.
Conclusion
Mastering biosafety cabinet procedures is not merely a regulatory formality but a critical component of research integrity and laboratory safety. By understanding the foundational principles, adhering to meticulous step-by-step protocols, proactively troubleshooting common issues, and ensuring rigorous validation, researchers can create a reliably safe environment for both personnel and sensitive biological materials. The consistent application of these practices directly contributes to the reproducibility and credibility of biomedical research, protects valuable drug development projects from contamination, and upholds the highest standards of occupational health. As biological techniques and regulatory frameworks evolve, a commitment to ongoing training and adaptation of these best practices will remain essential for advancing scientific discovery while maintaining safety.
References
- 1. Laboratory Safety Manual - Chapter 16 [https://policies.unc.edu/TDClient/2833/Portal/KB/ArticleDet?ID=132028]
- 2. The Role of the Biosafety Cabinet in Preventing Infection ... [https://pmc.ncbi.nlm.nih.gov/articles/PMC10823295/]
- 3. Biological Safety Cabinet Safety Considerations [https://researchsafety.gwu.edu/biological-safety-cabinet-safety-considerations]
- 4. Guidelines for Laboratory Biosafety: Handling and ... [https://www.cdc.gov/bird-flu/php/severe-potential/guidelines-for-laboratory-biosafety.html]
- 5. Top 5 Biological Safety Cabinets in 2025 [https://www.spyndl.com/en/content/blog/guide/compare-biological-safety-cabinet-2025]
- 6. How Efficient Is Your Biosafety Cabinet? [https://www.labmanager.com/how-efficient-is-your-biosafety-cabinet-24221]
- 7. Use of HEPA Filters in Biosafety Cabinets [https://www.nuaire.com/en/resources/hepa-filters-in-biosafety-cabinets]
- 8. Biological Safety Cabinets - EHSO Manual 2025-2026 [https://labman.ouhsc.edu/hbSections.aspx?ID=612]
- 9. Everything You Need to Know About AS 2252.2:2025 [https://www.aesenvironmental.com.au/latest-news/as-2252-2-2025-class-ii-biological-safety-cabinet-standard/]
- 10. Learn how a biosafety cabinet protects you [https://www.ehs.washington.edu/about/latest-news/biosafety-month-2025-learn-how-biosafety-cabinet-protects-you]
- 11. Best practices for using and maintaining 'Biological Safety ... [https://cleanroomtechnology.com/best-practices-for-using-and-maintaining-biological-safety]
- 12. How a Class II, Type A2 Biosafety Cabinet Works [https://www.nuaire.com/en/resources/class-ii-type-a2-biosafety-cabinet-how-it-works-article]
- 13. Biosafety Cabinet Ventilation Testing, Servicing & Validation [https://totalcleanair.com/biosafety-cabinet-ventilation-testing-servicing-validation/]
- 14. Best Practices for Biosafety Cabinet Operations [https://www.labmanager.com/best-practices-for-biosafety-cabinet-operations-34059]
- 15. Class II Biosafety Cabinets, as Specified in NSF/ANSI 49- ... [https://blog.ansi.org/ansi/class-ii-biosafety-cabinets-nsf-ansi-49/]
- 16. How Often Should Biological Safety Cabinets Be Certified? [https://techsafety.com/blog/biological-safety-certification]
- 17. Biosafety Cabinet Validation: Ensuring Compliance - QUALIA [https://qualia-bio.com/blog/biosafety-cabinet-validation-ensuring-compliance/]
- 18. How often does a Biosafety Cabinet need to be certified [https://www.nuaire.com/en/resources/how-often-does-a-biosafety-cabinet-need-to-be-certified-article]
- 19. Biological Safety Cabinet Movement and Recertification [https://www.labmanager.com/biological-safety-cabinet-movement-and-recertification-16982]
- 20. Biological Safety Cabinet Certification and Repair [https://www.policy.iastate.edu/policy/biological/cabinet]
- 21. Biosafety Cabinet Comparison [https://ehs.oregonstate.edu/LVSG-BSC-compare]
- 22. Working Safely in a Biosafety Cabinet - Princeton EHS [https://ehs.princeton.edu/laboratory-research/biological-safety/biological-safety-cabinets/working-safely-biosafety-cabinet]
- 23. Biosafety Cabinet Operation: Essential Training Guide - QUALIA [https://qualia-bio.com/blog/biosafety-cabinet-operation-essential-training-guide/]
- 24. Biological Safety Cabinets: Usage Guidelines [https://blink.ucsd.edu/safety/research-lab/biosafety/containment/bsc/usage.html]
- 25. Operator-derived particles and falling bacteria in biosafety ... [https://pmc.ncbi.nlm.nih.gov/articles/PMC10831277/]
- 26. Back to Basics: Choosing the Appropriate Surface Disinfectant [https://pmc.ncbi.nlm.nih.gov/articles/PMC8224088/]
- 27. Factors Affecting the Efficacy of Disinfection and Sterilization [https://www.cdc.gov/infection-control/hcp/disinfection-sterilization/efficacy-factors.html]
- 28. Modern technologies for improving cleaning and disinfection ... [https://aricjournal.biomedcentral.com/articles/10.1186/s13756-016-0111-x]
- 29. Efficacy and design requirements of UV light cabinets for ... [https://pmc.ncbi.nlm.nih.gov/articles/PMC10643671/]
- 30. An integrated workflow for quantitative analysis of the ... [https://www.nature.com/articles/s41467-023-43919-3]
- 31. biosafety-cabinet-proper-procedures-techniques-video [https://www.nuaire.com/en/resources/biosafety-cabinet-proper-procedures-techniques-video]
- 32. Best Practice Tips for Biological Safety Cabinets [https://www.labmanager.com/best-practice-tips-for-biological-safety-cabinets-817]
- 33. How to use a biosafety cabinet - Integra Biosciences [https://www.integra-biosciences.com/united-states/en/blog/article/how-use-biosafety-cabinet]
- 34. Biosafety Cabinet Work Zone Setup for Biomed/Micro [https://www.nuaire.com/en/resources/setting-up-class-ii-biosafety-cabinet-work-zone-for-biomedical-microbiological-work]
- 35. Essential Biosafety Cabinet Decontamination Practices & ... [https://rdlaboratoryequipment.com/blogs/all/essential-practices-to-prevent-contamination?srsltid=AfmBOopwnA1k0_5wqJUufUBdVmz6hUfrIHiwyJFejPRMEDq5bWpYO3Tk]
- 36. Biological Safety Cabinets - Environmental Health and Safety [https://www.umaryland.edu/ehs/research-safety/biosafety/biological-safety-cabinets/]
- 37. Biological Safety Cabinets [https://ehs.unc.edu/topics/biological-safety-cabinets/]
- 38. NSF/ANSI 49-2024: Biosafety Cabinets Design and ... [https://blog.ansi.org/ansi/nsf-ansi-49-2024-biosafety-cabinets-bscs/]
- 39. Biological Safety Cabinets: Open Flames and Flammable ... [https://blink.ucsd.edu/safety/research-lab/biosafety/containment/bsc/open-flame.html]
- 40. Open Flames (Bunsen Burners) in Biosafety Cabinets - IBC [https://ibc.utah.edu/library/open-flames-bunsen-burners-in-biosafety-cabinets.php]
- 41. Biological Safety Cabinets [https://drs.illinois.edu/Page/SafetyLibrary/BiologicalSafetyCabinets]
- 42. Biological Safety Cabinet Airflow for Labs: Ducts and More [https://www.triumvirate.com/blog/biological-safety-cabinet-airflow]
- 43. 6.1.5 Using biological safety cabinets in the laboratory [https://tbksp.who.int/en/node/1129]
- 44. Biosafety Cabinets | Office of Research Safety [https://researchsafety.gwu.edu/biosafety-cabinets]
- 45. Biological Safety Cabinets | UW Environmental Health & Safety [https://www.ehs.washington.edu/biological/biological-safety-cabinets]
- 46. Fume Hood Proper Work Practices - Princeton EHS [https://ehs.princeton.edu/laboratory-research/laboratory-safety/laboratory-equipment-and-engineering/fume-hoods/fume-hood-proper-work-practices]
- 47. Occupational Safety: UV Light Guidelines [https://www.safety.rochester.edu/ih/uvlight.html]
- 48. Ultraviolet (UV) Safety [https://ehs.gatech.edu/ultraviolet-uv-safety]
- 49. Assessing the Health Implications of UV/LED Nail Lamp ... [https://pmc.ncbi.nlm.nih.gov/articles/PMC11931093/]
- 50. Influence of UV nail lamps radiation on human ... [https://www.nature.com/articles/s41598-023-49814-7]
- 51. Far-UVC and Eye Safety: Findings from a 36-Month Study [https://uvmedico.com/news/far-uvc-and-eye-safety]
- 52. UV Light Installation: Where to Put It and Why It Matters [https://www.eliteairtx.com/blog/uv-light-installation-guide-2025]
- 53. Maintenance Tips for Prolonging the Life of Your UV Lamps [https://www.alpha-cure.com/news-article/maintenance-tips-for-prolonging-the-life-of-your-uv-lamps]
- 54. Herasafe 2025 Biological Safety Cabinet [https://www.thermofisher.com/us/en/home/life-science/lab-equipment/biological-safety-cabinets/models/herasafe-2025.html]
- 55. Preventing Cross Contamination in Your Biological Safety ... [https://www.tion.co.uk/education/preventing-cross-contamination-in-your-biological-safety-cabinet/]
- 56. Biosafety in Microbiological and Biomedical Laboratories ... [https://www.cdc.gov/labs/bmbl/index.html]
- 57. Laboratory Biosafety Guidelines for working with SARS- ... [https://www.cdc.gov/covid/php/lab/index.html]
- 58. Step-by-Step Guide to NSF Biosafety Cabinet Certification [https://rdlaboratoryequipment.com/blogs/all/guide-to-nsf-biosafety-cabinet-certification?srsltid=AfmBOopI68X1TjHrVkMqvH3AWUbekd5QbrMV_UbLRisXCX70UhzrlPfH]
- 59. Biological Safety Cabinets - Environment, Health & Safety [https://ehs.umich.edu/research-clinical/engineering-controls/biological-safety-cabinets/]
- 60. Biosafety Cabinets: Protection in Biological Labs [https://aspr.hhs.gov/S3/Pages/Biosafety-Cabinets.aspx]
- 61. Biological safety cabinet vs fume hood: Quick comparison [https://labs-usa.com/2025/11/04/biological-safety-cabinet-vs-fume-hood-2/amp/]
- 62. Biosafety Cabinet vs. Laminar Flow Clean Bench [Pros & ... [https://daiscientific.com/biosafety-cabinet-vs-laminar-flow-clean-bench-pros-cons/?srsltid=AfmBOopruC33tsqfJLwS2eD2VJFxrQmszxgSXmvBGuT6s8wsLPzbCthM]
- 63. Chemical Fume Hoods - Environmental Health and Safety [https://www.purdue.edu/ehps/rem/laboratory/equipment-safety/lab-safety-equipment/cfh.html]
- 64. Lab Planning Guide: BSCs, Fume Hood, Laminar Flow [https://www.airscience.com/lab-planning-guide-ductless-fume-hoods-laminar-flow-hoods-and-biological-safety-cabinets]
- 65. Fume Hood vs. Biosafety Cabinet: What to Use & When [https://www.nuaire.com/en/resources/fume-hood-vs-biosafety-cabinet]
- 66. Biosafety Cabinet Gas Decontamination Considerations [https://www.nuaire.com/en/resources/biosafety-cabinet-gas-decontamination-considerations]
- 67. Equipment - FAA USA Safety and Health Programs [https://uwm.edu/safety-health/biosafety/equipment/]
- 68. Decontamination Validation of a Class II Type A2 Biosafety ... [https://pmc.ncbi.nlm.nih.gov/articles/PMC9134616/]
- 69. Biosafety Cabinet Cleaning: Step-by-Step Guide - QUALIA [https://qualia-bio.com/blog/biosafety-cabinet-cleaning-step-by-step-guide/]
- 70. Biological Safety Cabinets | Environment, Health and Safety [https://ehs.cornell.edu/research-safety/biosafety-biosecurity/biological-safety-manuals-and-other-documents/biological/biological-safety-cabinets]
- 71. Biosafety Cabinet Field Certifier Accreditation [https://www.nsf.org/lab-testing/biosafety-cabinetry/biosafety-cabinet-field-certifier-accreditation]
- 72. Biosafety Training Courses - Environment, Health & Safety [https://ehs.ucla.edu/training-support/courses/biosafety]